Transcription
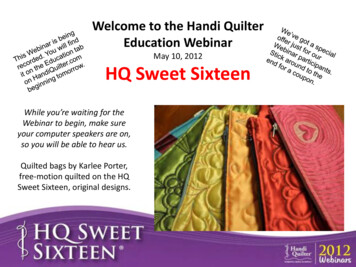
Welcome to the Handi QuilterEducation WebinarMay 10, 2012HQ Sweet SixteenWhile you’re waiting for theWebinar to begin, make sureyour computer speakers are on,so you will be able to hear us.Quilted bags by Karlee Porter,free-motion quilted on the HQSweet Sixteen, original designs.
Your presenter today isVicki HothHandi QuilterEducation CoordinatorAssisting her isKarlee PorterHandi QuilterTeam MemberWhile we welcome your questions, we have a lot ofmaterial to cover today and may not be able to answerall of them. If we miss your question, please post it toAsk an HQ Expert on the Forum on HandiQuilter.comwhere it will get the attention it deserves.
Who wants to quilt with a Sit-down Longarm?1. A Quilter who already hasthe skill set for free-motion“push-through” quilting anddoesn’t have the time orinclination to tackle stand-upcarriage-style quilting.2. A Quilter who doesn’t havethe physical stamina to standup to quilt all day.3. A Quilter who doesn’t haveroom for a 12-foot frame (theHQ Sweet Sixteen has a 30” x36” footprint).
What quilt size limitations are there with theHQ Sweet Sixteen?1. There are no limitations to quiltsize.2. The important thing to rememberis: NEVER LET YOUR QUILT HANG OFFTHE EDGES OF THE TABLE.3. For large quilts, you can accomplishthat by using table extensions(available from Handi Quilter) or byplacing the table up again furnitureyou already own.
What accessories are available for theHQ Sweet Sixteen?1. Every quilter would benefit fromowning the HORIZONTAL SPOOL PIN.This handy thread holder is perfect fordelicate threads, threads that feedbest horizontally (as opposed to beingfed vertically up and away from acone) or for using up those smallspools of thread you have left over.2. The OPEN-TOE HOPPING FOOT is agood choice for thread-painting,quilting around appliqué or printedlines or for anyone who wants morevisibility of the needle area.
Does the HQ Sweet Sixteen have stitchregulation available?1. Yes it does. TruStitch stitch regulationwill be available June 1, 2012.2. If your Sweet Sixteen was shipped afterApril 10, 2012, it is TruStitch-ready and youcan “plug and play”.3. If your Sweet Sixteen was shipped beforethat time, it will require a factory-installedsoftware upgrade. Both the upgrade and theshipping are free to U.S. owners. (Overseasowners must speak to their local distributorsfor details. There may be a charge.)
How does TruStitch work?1. TruStitch is a full-visibility stitchregulation system.2. Components include the Controller,the Receiver, the Magnet and theCoaster, plus the power supply,charging cord and other items neededfor installation.
How does TruStitch work?1. The wireless Controller isplaced under the quiltsandwich and is held in anatural position with yourhand while free-motionquilting.2. The Controller tracks itsown movement across thetabletop and sends messagesto the Receiver, whichtranslates the motion intoeven-length stitches.
How does TruStitch work?1. The Magnet holds theController in place on thequilt sandwich, allowing for“hands-free” operation.
How does TruStitch work?1. The Coaster allowsyou to use theController whenquilting borders andnear the edge of thequilt sandwich.
Is TruStitch compatible with my older-style HQSixteen Sit-down machine?1. Unfortunately, notat this time. HandiQuilter hopes to beable to offer a versionthat will work with theolder-style machines,but there isn’t atimeline available.
When will TruStitch be available?1. TruStitch will beginshipping to HQ Retaillocations beginning June1, 2012.2. MSRP is 995.00 USDplus tax and shipping.3. HQ Retailers areaccepting pre-orders rightnow.
How do I know how fast I’m stitching?1. The HQ Sweet Sixteenhas speed-control, whichenables you to focus onstitching and not on whatyour foot is doing.2. The machine stitches1500 stitches-per-minute(SPM) at top speed 100%3. Speeds are set aspercentages. For example,50% 750 SPM
What are Presets?1. The three blue buttonson the main screen areuser-defined presetspeeds. YOU choose yourthree favorite “go-to”speeds.2. Some people like tostitch at 20% aroundappliqué for greatercontrol.3. The same quilter maychoose 75% for largeoverall meanders.
What’s the difference between the NeedleUP/DOWN button and the Needle Icon in theCenter of the Screen?1. The Needle UP/DOWN setting enablesthe quilter to set the default for where theneedle lands each time you stop stitching.2. The Needle Icon is a toggle button. Itmakes the needle take a half stitch. If theneedle is up, it will go down when youpush the button.3. Use the icon button to bring the bobbinthread up for starting and stopping.
How do I Start and Stop a Stitching Line?There’s no reverse on this machine.1. Because there are no feed dogs on theHQ Sweet Sixteen, there is no way toprovide a reverse action except to produceit by moving the fabric back and forth.2. We recommend that you stitch tinystitches in place to lock your stitches whenstarting and stopping a line of stitching.3. You can also start a line by stitching tinystitches and allowing them to get longer asyou move away from the starting point.
Won’t that Leave a Knot?1. Yes, it does. For casual quilts, this won’tmatter. But if you’re doing work to enterinto judged competition, consider adifferent way to start and stop.2. Leave long tails of thread at thebeginning and end of each line ofstitching. After you’ve finished quilting,thread them into a hand needle and burythe stitches in the quilt after taking sometiny, invisible stitches to hold the stitchingin place.
The Table: Adjusting the Table Height“Having the table set to the correctheight for your body helps to preventfatigue and body aches.”Sit in front of the table and bend yourarms at a 90 degree angle. Your handsshould be able to rest flat on the tableor just slightly drop to the tabletop.Determine how much you need toraise or lower the table and adjust thelegs accordingly.
Adjusting the Table HeightWith a partner lifting one end of the table (to take the weight off the table feet),kneel beside the table legs and squeeze the adjustment knobs together to loosen thetable feet.
Adjusting the Table HeightRaise or lower to desiredheight and release knobs.Partner gently lowers tableto floor. Repeat for otherend.
TNT: A Quick Look at Threads,Needles and TensionUnlike your domesticsewing machine, theHQ Sweet Sixteen usesa round shank needle.The round shank makesit easy to adjust theneedle in case ofstitching problems.Go to HandiQuilter.com/Webinars to seethe TNT Webinar for more information.
TNTThe round shankmakes it easy toadjust the needlein case of stitchingproblems.However, it alsomakes it easy toput the needle inwrong.Go to HandiQuilter.com/Webinars to seethe TNT Webinar for more information.
TNTThe Groove is theindentation inthe front side ofthe needlePhoto shows HQ18 Avanté machine. AllTNT information is the same for all HQmachines.
TNTIt is important tochoose the rightsize needle foryour threadweight, so thethread will ridecomfortably inthe groove as itgoes through thefabric.Thicker thread larger needle size(bigger number)
TNTThe SCARF is acut-out portion ofthe back side ofthe needle,positioned in themachine so thatthe hook passesby it and catchesthe thread loop.
Positioning the NeedleThe placement ofthe needle in themachine isimportant. In HandiQuilter quiltingmachines, thegroove goes to thefront of themachine, with thescarf to the back.GROOVE TOTHE FRONTSCARFTO THEBACK
The Basics of Stitch FormationAs the needleenters the fabric,the thread iscarried along in thegroove.
The Basics of Stitch FormationWhen the needlecomes back up,friction holds thethread below thequilt sandwich,causing a loop toform.The rotary hookthen rotatesaround, grabs theloop, bringing itaround the bobbincase, making thelock stitch.
Positioning the Needle.It is very important that theneedle be inserted all the way upinto the needle bar.Handi Quilter machines provide a“sight hole” in the needle bar.Look into the hole to confirm thatthe butt of the needle is insertedall the way.
Positioning the Needle.Because the roundshanked needle will fitin the needle bar in anyorientation (unlike a flatshanked needle whichfits in only one way), it isimportant to positionthe needle correctlywith the eye of theneedle in the “6 o’clock”position.Using a pin in the eye of the needlehelps with positioning.
Positioning the Needle.Sometimes, if youexperience skippedstitches, slightlyrotating the needleto the “6:30”position will solvethe problem,because it allowsthe hook to catchthe loop sooner.
Positioning the Needle.If you experienceshredding, slightlyrotating the needletoward the “5:30”position might solve theproblem, because itwould delay the timewhen the hook grabs theloop.
Needle SizesIt is important to purchaseneedles that are the rightneedle system. HandiQuilter uses the 134(135 X 7) system.Using the wrong needlesystem is a recipe for bigproblems.Handi Quilter sells needlesfor their longarm quiltingmachines in sizes 12, 14,16, 18 and 20 (125).
A Threading TipThe thread path on theHQ Sweet Sixteen ispretty traditional, butsome quilters miss thefinal thread guide.There is a collar on theneedle bar, just abovethe needle. Make sureyou thread the threadthrough the hole in thecollar, before threadingthe needle from front toback.
Threading Tip: Horizontal Spool PinFor threads on spools,especially delicatethreads, werecommend using thehorizontal spool pin.This allows thethreads to bypass twothread guides, whichmeans there’s lesstension on the threadto start with.
Thread Tip: Start with the BobbinIt’s important that bobbins arewound properly.A “soft” bobbin, one that’s woundtoo loosely, will be spongy.When a soft bobbin unwinds, theindividual thread is pulled downinto the bobbin and it snarls andjams, causing feeding problemsand skipped or broken stitches.
Adjusting Bobbin Case Tension is theFoundation of the Perfectly-BalancedStitchWhen adjusting tensions the HQ SweetSixteen, it’s important to remember thispoint:START WITH THEBOBBIN FIRST!Go to HandiQuilter.com/Webinars to seethe TNT Webinar for more information.
The “SECRET” to Perfect TensionOnly after thebobbin casetension is set, doyou adjust thetop tension.Lighter-weight threads will need a lightertension both in the bobbin and on top.
Checking Bobbin TensionPlace the bobbin in the case and bringthe thread out through the slit.Check to see that the bobbin turnsclockwise when pulling on the thread(and viewing it from this side).Starting with a FULL bobbin gives youthe correct weight when checkingbobbin case tension.
Checking Bobbin TensionUse the Drop TestLift up the thread. Whentension is set correctly, thebobbin case will lift from yourhand, then will gently fall backto your hand, like a spidercrawling down its web.PERFECT TENSION:Bobbin case falls slowly back down tohand without jiggling or bouncing.
Checking Bobbin TensionIf the bobbin case does NOTfall down to your hand, thetension is too tight.TENSION TOO TIGHTBobbin case does not come down
Checking Bobbin TensionIf the bobbin case won’t liftfrom your hand, the tension istoo loose.TENSION TOO LOOSEBobbin case won’t lift from hand
Adjusting Bobbin TensionThere are two screws on the side ofthe bobbin case. The adjustmentscrew is the larger of the two andhas a “circle” around it.Turn the screw right to tighten; leftto loosen. The adjustments areminute. Think of them as “ticks of aclock”.RIGHTY TIGHTYLEFTY LOOSEY
Adjusting Bobbin TensionThere are two screws on the side ofthe bobbin case. The adjustmentscrew is the larger of the two andhas a “circle” around it.Turn the screw right to tighten; leftto loosen. The adjustments areminute. Think of them as “ticks of aclock”.RIGHTY TIGHTYLEFTY LOOSEY
Checking StitchesIt’s important to have asample quilt sandwichavailable for testingbefore stitching on yourquilt.After adjusting thebobbin case to perfecttension, stitch a little tocheck your stitchbalance.
Checking StitchesYou are looking forperfectly balancedstitches that meet inthe middle of the quiltsandwich.Each stitch should gointo the quilt andshould appear as aseparate stitch, on boththe top and bottom.
Checking Stitches
Checking StitchesThese topstitches arelaying on topof the quilt.This meansthe toptension istoo tight.You need toloosen yourtop tension.
Checking StitchesWe havepainted thedot on thetension knobwhite, so youcan see it inthis photo.Turn theknob to theleft to loosenthe tension.
Checking StitchesAdjusting thetension knobis differentfrom thebobbin caseadjustments.Often youwill need tomake halfand full turnsof the knobto adjust.
Checking StitchesThese topstitches aretoo loose.
Checking StitchesHere’s a viewof those loosetop stitchesfrom the backside.You will needto tighten thetop tension byturning thetension knobto the right.
Checking StitchesA thread nestlike this couldbe the sign ofnot having thethread flossedinto thetension dial.
Now you’ve got it! Perfect Tension,Perfect Stitches.BUT, what if youhave perfecttension andbalanced stitchesand your threadstill breaks?
Here’s the SECRET!If you have perfect tension and balancedstitches and your thread still breaks, it isbecauseYOUR TENSION IS SET TOO TIGHTIN BOTH THE BOBBIN AND THETOP FOR THE THREAD YOU’REUSING.The answer:Start again with the bobbin and loosen thetension. Then readjust the top tension.
Sandwiching the QuiltSafety Pinsor Straight Pins w/PinMoors
Sandwiching the QuiltSpray Baste orThread Baste
Managing the Bulk: Rolling
Managing the Bulk: Fan-Folding
Managing the Bulk: Puddling
Free-Motion Quilting: Hand PlacementMachingers
Free-Motion Quilting: Hand PlacementNo Gloves
Free-Motion Quilting: Hand PlacementPinch an Inch
Free-Motion Quilting: MovementMove hands andquilt in compassdirections.NORTHSOUTHEASTWEST(Up, Down, Left,Right)
Free-Motion Quilting: MovementDON’T rotate quilt.MOVE the quiltparallel to theneedle, not aroundthe needle.
Ruler Work: Two-Point Pressure1. Press againstthe hoppingfoot2. Press downagainst the quilt3. NOTE: Ruler isplaced againstthe left side ofthe hoppingfoot in thisphoto
Ruler Work: Placing the Ruler1. Rulers andtemplates canalso be placedagainst the backof the hoppingfoot.2. Maintain steadypressure againstthe foot andonto the quilt.
Ruler Work: Placing the Ruler1. This photoshows the ruleragainst theRIGHT side ofthe hoppingfoot2. Maintain steadypressure againstthe foot andonto the quilt.
Ruler Work: Placing the Ruler1. You are not limited tostraight rulers. Tryusing templates, suchas this circle template.2. It is especiallyimportant to use the“compass point”quilting movementswith templates. Do notrotate the quilt.3. Use the ruler to helpmove the quilt.
Ruler Work: Placing the RulerThe HQVersaTool is agood choice foryour firstruler/templatebecause itincludes bothstraight linesand curves.
Getting Designs on QuiltsMarking
Getting Designs on QuiltsFill Stitches
Getting Designs on QuiltsPhotoprintedon fabric
Getting Designs on QuiltsContouring
Getting Designs on QuiltsFoliage
Getting Designs on QuiltsDetail Work
Getting Designs on QuiltsSky/Landscape
Getting Designs on QuiltsGolden Threads Paper
Getting Designs on QuiltsBack Side
Getting Designson QuiltsArt PanelsQuilt by Helen Godden, discharge techniqueHandi Quilter Corporate Collection
Getting Designson QuiltsDetailQuilt by Helen GoddenDischarge techniqueHandi Quilter Corporate Collection
Getting Designs on QuiltsDetailQuilt by HelenGoddenDischargetechniqueHandi QuilterCorporateCollection
Getting Designson QuiltsDetailSample by David TaylorFree-motion QuiltingHandi Quilter Corporate Collection
Getting Designson QuiltsThread PaintingSample by Ellen Anne EddyFree-motion Quilting with HeavyThreadsHandi Quilter Corporate Collection
Getting Designs on QuiltsSamplebyEllenAnneEddyThread Painting Detail
Getting Designs on QuiltsSamplebyEllenAnneEddyThread Painting Detail
Getting Designs on QuiltsSamplebyEllenAnneEddyThread Painting Detail
Getting Designs on QuiltsSamplebyEllenAnneEddyThread Painting
Getting Designs on QuiltsSamplebyEllenAnneEddyThread Painting Detail
Getting Designs on QuiltsSamplebyEllenAnneEddyThread Painting Detail
Getting Designs on QuiltsSamplebyDavidTaylorEcho Quilting
Getting Designs on QuiltsSamplebyDavidTaylorEcho Quilting Detail
Quilting Fill DesignsPebbles
QuiltingFillDesignsDoodling
Quilting Fill Designs“McPortering”(thanks to Karen McTavish forher inspiration)
Quilting FillDesignsCurls‘nSwirls
Quilting Fill DesignsSwirly-cues
Quilting Fill DesignsLines
Quilting Fill DesignsEchoes&Pebbles
Quilting Fill DesignsThemanymake awhole
Quilting Wholecloth: PracticeStartwithfreemotionsimple,largeshapes
Quilting Wholecloth: PracticeUsemicroquiltingto fillbetweentheshapes.
Quilting Wholecloth: PracticeSwirl,dip, echoandbreak uptheshapes.
Quilting Wholecloth: .
Thanks for joining us today.Can you remember all of this?You don’t have to. A copy of this webinarwill be on the HandiQuilter.com websiteunder the Education tab. Just click onWebinars.The next Education Webinar will be offeredJune 14 at 11:00 a.m. Mountain DaylightTime. The topic will be Easy ComputerizedQuilting with the HQ Pro-Stitcher.Watch for the next Handi QuilterNewsletter for registration information.
A Special OFFER just for YOU!25% off any Quilter’s AcademyDVDs on HandiQuilter.comUSE this code:HQSweetOffer Expires midnight, MDT, May11, 2012Please Note: The only DVDs that are specificallyHQ Sweet Sixteen-related are David Taylor’s.However, some of the other titles haveinformation that can be useful for sit-downquilters, such as the ones about rulers,continuous line designs or micro-quilting.
Welcome to the Handi Quilter Education Webinar May 10, 2012 HQ Sweet Sixteen Whileyou'rewaitingforthe Webinar to begin, make sure your computer speakers are on, so you will be able to hear us. Quilted bags by Karlee Porter, free-motion quilted on the HQ Sweet Sixteen, original designs.

