Transcription
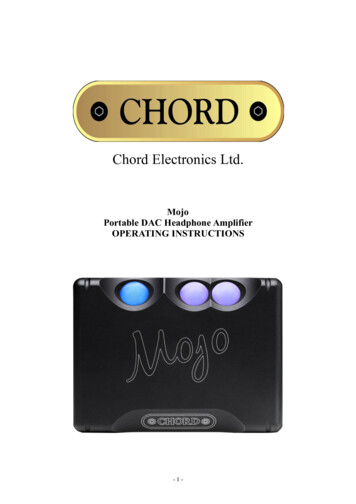
Chord LimitedMojoDac Headphone AmplifierOPERATING INSTRUCTIONS- !1 -
Cleaning and care instructions:Mojo requires no special care other than common sense. Spray window cleaner (clear type) may beused (if first sprayed onto a soft cloth) to remove surface blemishes such as finger marks from themetal casing. Never spray directly onto the converter and never use abrasive cleaning, use only a lintfree soft cloth.There are no user serviceable parts in Mojo. It should be serviced only by Chord Electronics Limited ortheir expressly approved service agents.Warranty:Mojo comes with a comprehensive 12 month warranty (conditions apply) please register online.Should you need to make a claim under warranty please contact your local retailer or distributor.Mojo diagram:- !2 -
Mojo Operating InstructionsCharging:Mojo can be charged from any 1 Amp USB port using the cable supplied or any other USB A to microUSB B type cable. Just plug the cable into the connector with the battery symbol.Please note that the USB charger or computer port must be capable of supplying at least 1Acurrent.Charging is indicated by a white light under the charging port. When Mojo is fully charged(approximately 4 hours) the light will switch off.We recommend charging with Mojo switched off.Charging with Mojo switched on and playing is possible, but the time taken to fully charge will beconsiderably longer and depending on volume level and headphone load the battery. It is possible that,when using headphones of high load, the battery may take extremely long to fully charge.It is normal for Mojo to become warm when charging especially if switched on and playing at the sametime.Switching On/ OffPress and hold down the power button for 2 seconds to switch Mojo on or off.Please note you must wait 5 seconds between switching on or off before the power button willrespond again.Volume IndicationThe and – volume balls are illuminated to indicate the volume setting. The standard range is frombrown to white for maximum volume.At both minimum volume and maximum volume the range has been extended and the balls illuminatespecially to indicate this.At minimum volume the ball will remain brown whilst the – ball will continue to change colourthrough the range from white back down to brown again. This allows for finer volume adjustmentwhen using in ear monitors.At maximum volume the – ball will remain on white whilst the ball will change through the coloursfrom red to white at maximum volume. This gives a finer adjustment at very high volume.Sample Rate IndicationThe power ball will illuminate when a digital signal is connected and show the sample rate detected.The table below shows the colours and the corresponding sample rate.Brigthness Setting- !3 -
Mojo has two brightness settings for the illumination. Once Mojo has switched on and finished theinitialisation briefly press both volume buttons at the same time to change between bright and dimmodes.Line Level ModeTo set the output level to 3V ( line level ) for connection to a preamplifier press both volume buttonstogether when switching on the unit. Both volume balls will illuminate light blue. This mode is notremembered so when you switch off it will reset back to the previous volume stored for safety reasons.MemoryMojo has a memory function that will store the volume level and brightness settings even after the unitis switched off.Audio OutputsThere are two 3.5mm stereo jack socket outputs for headphones. Both can be used at the same time andwill drive all headphones and in ear monitors (with the exception of electrostatic) from 8 ohmsimpedance to 600 ohms. The outputs are also short circuit protected.Digital InputsMojo has 3 digital inputs.1 x TOSLink optical capable of playing 44.1KHz to 192KHz PCM and DSD64 in DoP format.1 x 3.5mm COAX SPDIF capable of playing 44.1KHz to 384Khz PCM (768KHz special operation)and DSD64, DSD128 in DoP format.1 x micro USB capable of 44KHz to 768KHz PCM and DSD64, DSD128 and DSD256 in DoP format.Driverless on Mac, Android and Linux OS. However Windows Vista, 7, 8, and 10 will require a driverwhich can be found on our Mojo webpage.Digital Input SelectionInput selection is automatic.By default Mojo will always select USB input if this is plugged in.To use Optical or the 3.5mm Coax input please remove the digital USB input cable first ( you can stilluse the charging input ).If you have both coax and optical inputs connected at the same time, then the 3.5mm coax input willtake priority over the optical. To use optical please unplug the coax input or switch off the digitalsource.Using USB Digital AudioConnection to the host computerConnect Mojo to the host computer, phone, or tablet by inserting a USB lead into any available USBsocket. To support high sample rates (96Khz and above) the USB socket on the computer must be USB2.0 or above. Once connected insert the other end of the cable into the USB audio socket on Mojo.- !4 -
If using a Microsoft computer and the driver hasn’t been installed on your computer, an automaticdriver installation wizard may appear.Note: If you want to avoid the automatic driver installation, please connect Mojo to the computer aftermanually installing the driver.Microsoft Windows Driver installationThe drivers for Mojo are available on our website. Please go to the Mojo product page atwww.chordelectronics.co.uk. Drivers are contained in zip files and must be extracted beforeinstallation.Installing the driver on a Windows PCCreate a temporary folder on the hard disk of your computer (this can be on your desktop).Double-click on the zip file contained on the CD to open it. Select and drag all files in the temporaryfolder, this will automatically unzip all the files.Automatic installationConnect Mojo to the PC. Following the negotiation process, the driver installation wizard isautomatically launched.Click on the button to proceed. Choose automatic installation (as recommended) and proceed to nextstep. Indicate the folder where you have previously unzipped the driver and proceed to installation.Click on Continue. The installation will proceed to the end.You may get warning messages indicating that the driver is not digitally signed - just click yes tocontinue installation.Click on Finish to complete the driver installation.Manual installationSometimes it is necessary or advisable to install the driver manually. Without connecting Mojo to thePC double-click the setup file contained in the extracted zip file. The driver will automatically beinstalled on your PC.You will find Chord Async USB 44.1kHz–192kHz device listed under Audio, Video and Gamecontrollers. Right-click to access the available actions. Select “Uninstall”.Configuring sound settings on a Windows PCConfiguring a PC with Windows Vista, Windows 7, 8 or 10A Windows PC can use Mojo in three different ways:Direct Sound (DS), Kernel Streaming (KS) and WASAPI. DS is suitable for players which can’toperate in Kernel Streaming mode nor with WASAPI or for Internet streaming; KS can be chosen (forbetter performance) with players which can operate in Kernel Streaming mode (such as FooBar,Winamp, Monkey Media, JRiver). WASAPI (Windows Audio Standard API) is a standard interface foraudio players which allows to get the same performance of KS with applications which can’t operate inKS mode, at the cost of higher CPU load.Configuring for Direct Sound with Windows Vista or Windows 7- !5 -
Open control Panel and select Hardware and Sounds. Under Audio, click on Manage Audio Devices.Set Chord Async USB 44.1kHz–768kHz as default device. Then, click on OK.Configuring for Kernel Streaming with Windows Vista or Windows 7As for Windows XP, Kernel Streaming has no standard setting in Windows Vista and Windows 7. KSmust be selected in the specific player you choose to use. For example, when using FooBar, with Mojoconnected to the PC, go to the File/Preferences/Playback /Output tab and select “Kernel StreamingChord Async USB 44.1kHz–768kHz” as output device. Foobar will require the KS add-on installedfirst. Other players will require different settings.Configuring for WASAPI with Windows Vista or Windows 7Similar to Kernel Streaming, WASAPI cannot be directly accessed. WASAPI must be selected in thespecific player you choose to use. For example, when using FooBar, with Mojo connected to the PC,go to the File/Preferences/Playback /Output tab and select “WASAPI: Chord Async USB 44.1kHz768kHz” as output device. Foobar will require the WASAPI add-on installed first.Other players will require different settings.Configuring Mac OS XOpen the System Environment Settings from the Start menu. Open the Sound options from the SystemEnvironment settings.Select the Output tab and confirm that Chord Mojo is selected as the default output device.Sample Rate SetupOpen the Audio MIDI Settings options (Application – Utility - Set Audio MIDI).Select the Audio Output tab in the Set Audio MIDI.Select the desired sample frequency from the options given.Android Device OperationTo use Mojo with an Android device you will need an ‘on the go’ cable ( OTG ). This is a special cablethat tells the Android device to run in host mode and enable USB audio. Some devices with newerAndroid operating system ( 5 and above ) will then play all audio into Mojo. If this does not work thenyou need to download either USB Audio Player Pro or Onkyo HF player to enable USB audio support.Both are available from the Google Play store.Apple iPad/iPhone OperationIn order to use USB audio you will require an Apple device running iOS6 or later and it needs thelightning connector rather than the old 30 pin connector.You require the Apple camera connection kit which will enable a standard USB connection from thelightning port. Use this cable with the short USB to micro USB cable to connect Mojo. All audio willthen play through Mojo.Onkyo HF player can be used to support high resolution audio including DSD.De-emphasis coding- !6 -
Mojo will automatically detect when a pre-emphasized recording is being played, and will set thecorrect de-emphasis filters in the converter section.DSD decodingDSD playback is supported using the DoP Standard 1.0 with 0xFA / 0x05 markers. Please see theplayback software manual for more details on configuring DSD support.- !7 -
Product SpecificationHARMONIC DISTORTION -103dBSIGNAL TO NOISE RATIO 120dBCHANNEL SEPARATION 125dB @ 1KHzDYNAMIC RANGE122dBDIGITAL INPUTS1 x 75Ω SPDIF 3.5mm 44.1KHz - 384KHz1 x Plastic fibre optic ( TOSlink ) 44KHz - 192KHz,1 x USB 44KHz – 768KHzHEADPHONE OUTPUTS2 x 3.5mm Jack SocketsOUTPUT IMPEDANCE75mohm (short circuit protected)- !8 -
There are no user serviceable parts in Mojo. It should be serviced only by Chord Electronics Limited or their expressly approved service agents. Warranty: Mojo comes with a comprehensive 12 month warranty (conditions apply) please register online. Should you need to make a claim under warranty please contact your local retailer or distributor.