Transcription
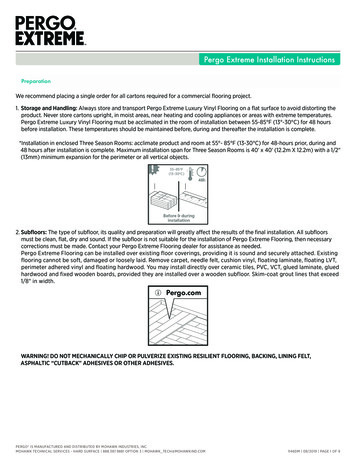
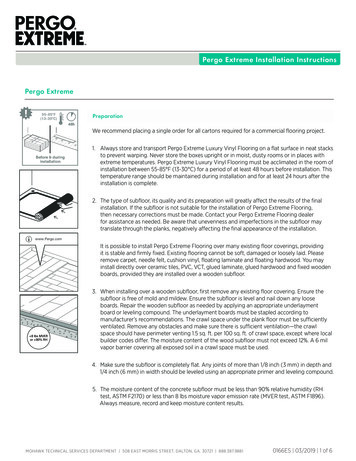
Pergo Extreme Installation InstructionsPergo Extreme55–85ºF(13–30ºC)PreparationWe recommend placing a single order for all cartons required for a commercial flooring project.1. Always store and transport Pergo Extreme Luxury Vinyl Flooring on a flat surface in neat stacksto prevent warping. Never store the boxes upright or in moist, dusty rooms or in places withextreme temperatures. Pergo Extreme Luxury Vinyl Flooring must be acclimated in the room ofinstallation between 55-85 F (13-30 C) for a period of at least 48 hours before installation. Thistemperature range should be maintained during installation and for at least 24 hours after theinstallation is complete.2. The type of subfloor, its quality and its preparation will greatly affect the results of the finalinstallation. If the subfloor is not suitable for the installation of Pergo Extreme Flooring,then necessary corrections must be made. Contact your Pergo Extreme Flooring dealerfor assistance as needed. Be aware that unevenness and imperfections in the subfloor maytranslate through the planks, negatively affecting the final appearance of the installation.www.Pergo.comIt is possible to install Pergo Extreme Flooring over many existing floor coverings, providingit is stable and firmly fixed. Existing flooring cannot be soft, damaged or loosely laid. Pleaseremove carpet, needle felt, cushion vinyl, floating laminate and floating hardwood. You mayinstall directly over ceramic tiles, PVC, VCT, glued laminate, glued hardwood and fixed woodenboards, provided they are installed over a wooden subfloor. 8 lbs MVERor 90% RH3. When installing over a wooden subfloor, first remove any existing floor covering. Ensure thesubfloor is free of mold and mildew. Ensure the subfloor is level and nail down any looseboards. Repair the wooden subfloor as needed by applying an appropriate underlaymentboard or leveling compound. The underlayment boards must be stapled according tomanufacturer’s recommendations. The crawl space under the plank floor must be sufficientlyventilated. Remove any obstacles and make sure there is sufficient ventilation—the crawlspace should have perimeter venting 1.5 sq. ft. per 100 sq. ft. of crawl space, except where localbuilder codes differ. The moisture content of the wood subfloor must not exceed 12%. A 6 milvapor barrier covering all exposed soil in a crawl space must be used.4. Make sure the subfloor is completely flat. Any joints of more than 1/8 inch (3 mm) in depth and1/4 inch (6 mm) in width should be leveled using an appropriate primer and leveling compound.5. The moisture content of the concrete subfloor must be less than 90% relative humidity (RHtest, ASTM F2170) or less than 8 lbs moisture vapor emission rate (MVER test, ASTM F1896).Always measure, record and keep moisture content results.MOHAWK TECHNICAL SERVICES DEPARTMENT 508 EAST MORRIS STREET, DALTON, GA. 30721 888.387.98810166ES 03/2019 1 of 6
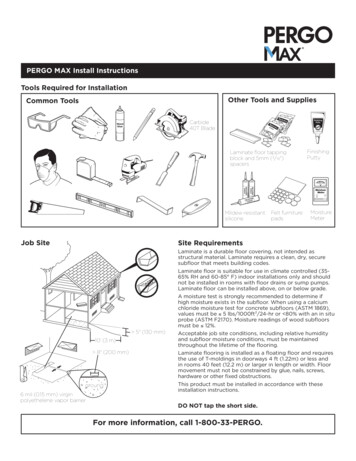
Pergo Extreme Installation InstructionsPergo Extremewww.Pergo.com 3/16” in 10’(5mm in 3m) 3/16” in 10’(5mm in 3m)Preparation (cont.)6. Any unevenness greater than 3/16" in a 10' radius (5mm in 3m) must be leveled. Use anappropriate leveling compound and use primer or sealer if recommended by supplier. In somecases, the use of an underlayment may eliminate the need for additional leveling of subfloor.www.Pergo.com7. Floor heating systems (hydronic or electric) that are built into the cement subfloor may beused with Pergo Extreme Flooring if a constant room and floor temperature of 65 to 85 F(18 to 30 C) can be maintained during acclimation and installation and for 48 hours afterinstallation is complete. For health and safety reasons, a maximum floor surface temperatureof 82 F (27 C) must be maintained. Separate rooms with and without radiant floor heatingor rooms with different temperature controllers using a transition profile. We recommendMohawk RevoFit moldings, following manufacturer’s installation guidelines and utilizing a 1/4inch (6 mm) expansion gap 5/8 inch (16mm) for areas that will be exposed to temperaturesgreater than 85 F (30 C) to allow expansion and contraction of the subfloor.8. Make sure that the subfloor is dry, flat, stable, clean and free from debris, grease andchemical substances. If needed, scrape off and clean up old adhesives. Prior to installation,carefully remove all debris, sweep and vacuum. Repair surface imperfections and cracks. Werecommend removing existing base trim and installing new moldings after installation of PergoExtreme flooring is complete.9. The following standard tools are needed: utility knife, tape measure, safety glasses, chalk line,speed square, tapping block, circular saw, gloves and a pencil. In addition to the standard tools,we recommend having a pull bar and a carpenter’s square available.The use of any accessories other than Pergo Extreme accessories may cause damageto your Pergo Extreme flooring. In such cases, the warranty provided by Pergo will bevoid. Therefore, we advise using only Pergo Extreme accessories, which have been speciallydesigned and tested for use with your Pergo Extreme flooring. The RevoFit molding can beused as a T-molding or reducer, and track may be stapled to wooden subfloors or glued, usinga moisture-cured polyurethane based adhesive and following manufacturer’s instructions. Donot glue any transition strips or moldings directly to the floor.10. Visually inspect all planks before and throughout installation in optimal lighting. Unacceptableplanks should be discarded or, when possible, used as cut pieces to start or finish rows afterremoving the defective portion of the plank.MOHAWK TECHNICAL SERVICES DEPARTMENT 508 EAST MORRIS STREET, DALTON, GA. 30721 888.387.98810166ES 03/2019 2 of 6
Pergo Extreme Installation InstructionsPergo ExtremeInstallation1. During installation, blend the planks by working out of multiple cartons to avoid laying toomany identical lighter or darker panels adjacent to one another. For optimal results, it is bestto fit the panels in the direction of the longest wall and parallel to the light source in theroom. Avoid installing plank flooring using the “brick” method of staggering. It is best to use arandom stagger of at least 8 inches (20 cm).A 3 in(7.6 cm)A 3 in(7.6 cm)www.Pergo.com2. Measure the room before you start installing underlayment or flooring planks. Make sure thatthe last row of panels is at least 3 inches (7.6 cm) wide when finishing the installation. Werecommend snapping a chalk line to ensure a perfectly straight installation.3. Pergo Extreme flooring has been designed for floating installations in indoor areas includingthree season environments with or without underlayment inclusive of sunrooms and solariumswith ambient temperatures ranging between 0 and 140 F (-17 and 40 C). Please contact yourflooring dealer or Mohawk Technical Services if you have any questions.4. If you choose to use underlayment, install it simultaneously with the floor installation. Werecommend Mohawk ActiveSound underlayment, which helps ensure joint integrity, reducessound, helps prevent indentation, and insulates and helps level the subfloor. Pergo Extremeproducts with pad attached cannot be installed over separate underlayment.5. Begin in the left corner of the room. Start the first row with a whole plank. Cut off the long sidetongue (end and edge) for the first panel. Position the cut edges adjacent to the wall.6. Fit the plank with cut side against the walls. Make sure that you leave an expansion space of 1/4inch (6 mm) [5/8 inch (16mm) for areas that will be exposed to temperatures greater than 85 F(30 C)] between the plank and the wall, using spacers as needed.7.Cut using a circular saw or reciprocating jigsaw.MOHAWK TECHNICAL SERVICES DEPARTMENT 508 EAST MORRIS STREET, DALTON, GA. 30721 888.387.98810166ES 03/2019 3 of 6
Pergo Extreme Installation InstructionsPergo ExtremeInstallation (cont.)8. Turn the long side of the first panel of the second row into the already secured panel in the firstrow at an angle of 20 to 30 . Move the panel to be fitted slightly up and down; at the sametime, exert some forward pressure. The panels will click together.9. Then slide the third plank together horizontally. Slightly lift the plank to beinstalled by holding your hand underneath. Push the short side joint downgently with your thumb, moving from the inner corner towards the outsideuntil you hear a “click”. Ensure the short side ends are closed by knockinggently on the short side click connection with the palm of your hand ortapping block.Next, connect the panels of the first two rows on the short sides.10. Check the expansion space to ensure it is at least 1/4 inch (6 mm) [5/8 inch (16mm) for areasthat will be exposed to temperatures greater than 85 F (30 C)] and make sure the first twoinstalled rows are perfectly straight. A chalk line can help ensure the installed planks arealigned. Adjust the straightness of your floor as necessary.11. Continue installation row by row toward the opposite side of the room. Always check each jointto ensure a good locking connection before continuing to the next plank. Press down gentlywith your thumb on top of every short end joint to ensure a good locking connection.An expansion space of 1/4 inch (6 mm) [5/8 inch (16mm) for areas that will be exposedto temperatures greater than 85 F (30 C)] around the perimeter of the room shouldbe maintained; this same expansion space should be maintained when using transitionmoldings. Otherwise, there is no need for additional expansion space within or betweenrooms.FinishingYou may walk on your new Pergo Extreme floor immediately after installation.1. Inspect the final surface of the installed floor. Install base molding to the wall. Never attach thebase to the floor itself. In places where profiles or base cannot be installed, fill the expansionspace with silicone.MOHAWK TECHNICAL SERVICES DEPARTMENT 508 EAST MORRIS STREET, DALTON, GA. 30721 888.387.98810166ES 03/2019 4 of 6
Pergo Extreme Installation InstructionsPergo ExtremeFinishing (cont.)2. When the new flooring meets a threshold or a doorway, we recommend undercutting the doorjamb. To secure the right cut, turn a plank upside down and place it on the floor up to the doorframe. Then place a handsaw flat against the plank and simply cut through the frame. Removethe cut-out piece and vacuum away debris. You can now secure the plank on the long side atthe side of the door jamb. Use an installation tool pull bar to securely join the long andshort joints.3. If it is difficult to tilt the planks (e.g. under radiators), use a pull bar installation tool to pull theplanks together.4. In rows where there is a pipe, make sure the pipe falls exactly in line with the short side of twoplanks. Select a drill bit with the same diameter as the pipe plus 1/2 inch (13 mm). Click theplanks together on the short side and drill a hole centered on the joint between the two planks.Then install the planks.5. For a double pipe, drill a hole equivalent to the diameter of the pipe plus 1/2 inch (13 mm) ateach of the marked points. If located on the long side of the plank, make a 45 cut from eachhole to the edge of the plank.Then, using an appropriate glue along the cut edges of the piece you cut out,glue the piece in place. Be sure no glue comes between the cut-out piece and thesubfloor.Maintenancewww.Pergo.comFor full care and maintenance instructions for residential and commercialapplications, please visit www.mohawkflooring.com.1. Use a vacuum cleaner suitable for hard surface flooring (with no moving partsand without rotary beater bars) to clean your Pergo Extreme floor. Your PergoExtreme floor can also be cleaned with a damp or wet mop.Never use a steam cleaner on your Pergo Extreme floor.2. Remove spills from the floor immediately.MOHAWK TECHNICAL SERVICES DEPARTMENT 508 EAST MORRIS STREET, DALTON, GA. 30721 888.387.98810166ES 03/2019 5 of 6
Pergo Extreme Installation InstructionsPergo ExtremeMaintenance (cont.)0 & 140ºF (-17 & 40ºC)3. Protect the floor from furniture and chair legs by using felt pads and coasterprotectors. Ensure chairs with castors have suitable soft rubber wheels. Replacehard or plastic castors with soft wheels designed for a vinyl floor and/or use asuitable desk mat.Never drag heavy items of furniture over the floor, always lift instead. Make sure furniturelegs have a large surface area in contact with the floor and are affixed with non-staining floorprotectors. The taller and wider the furniture feet are, the greater the disbursement of weight,which helps avoid damage to the floor.4. Ensure that the indoor room temperature is alwaysmaintained between 0 and 140 F (-17 and 40 C).Place non-rubber backed mats at all outside entrances to prevent dirt, grit and soil from beingtracked onto your floor. This will help keep the floor clean and extend the life of your floor.Do not allow cigarettes, matches or other very hot items to contact the floor as this maycause permanent damage. Also, prolonged contact with items made from rubber can cause apermanent stain on the floor.For technical assistance please contact your flooring dealer or Mohawk Technical Services at888.387.9881, option 3.MOHAWK TECHNICAL SERVICES DEPARTMENT 508 EAST MORRIS STREET, DALTON, GA. 30721 888.387.98810166ES 03/2019 6 of 6
1. Always store and transport Pergo Extreme Luxury Vinyl Flooring on a flat surface in neat stacks to prevent warping. Never store the boxes upright or in moist, dusty rooms or in places with extreme temperatures. Pergo Extreme Luxury Vinyl Flooring must be acclimated in the room of installation between 55-85 F (13-30 C) for a period of at .