Transcription
DVRRemote Software&DVRPlayer SoftwareVer. 1.2User’s Manual
ContentDVRRemote Software1.2.3.Overview.4System Requirements .5Getting Start of Installation .53.1Changing Internet Settings.53.2Installing Remote Software .73.2.1Log in / Log off .93.2.2Software Upgrades.104.Basic Operation .104.1To View Live Video. 114.1.1Selecting Display Mode.124.1.2Assigning Camera to Windows .124.1.3Operating Cameras with Dome Control.134.2Instant Recording .144.2.1Recording Video Instantly .144.2.2To Playback Instant Recording Video.154.3To Take a Snapshot.154.4To Playback Video.154.4.1Playing Back Remote Video .164.4.2To Playback Local *.drv Files .174.4.3Playback Controls .184.4Verifying Digital Signature .194.5Search from Event List.215.Configuring the Remote Unit .225.1System Setup.245.1.1Version .245.1.2Language .255.1.3Date / Time.265.1.4Unit Name .285.1.5Password .295.1.6Network Setup.305.1.7RS485 Setup.335.1.8Audio Output .355.1.9Key Beep.365.2Camera Setup.375.3Record Setup .3900-2DG216DZEA22
5.3.1Schedule Setup.395.3.2Preset Configuration.415.3.3Per Camera Config .435.3.4ezRecord Setup .455.3.5Data Lifetime .465.3.6Pre-Alarm Recording.475.3.7Circular Recording .485.3.8Audio Recording.495.4Event Setup .495.4.1Internal Buzzer .505.4.2Event Icon .515.4.3Email Notice .525.4.4Event Duration .535.4.5Per Channel Configuration .536. Trouble Shooting Guide .56Appendix A: Setting up a DVR behind a Router.57DVRPlayer Software1.2.3.4.Overview.60Install the Software to Your PC .60Main Window.62To Local Playback the Video.634.1Single Step Forward and Backward .655.Verify the Digital Signature .655.1To export recorded video with digital signature .665.2To Verify the Exported Recorded Video .6700-2DG216DZEA23
DVRRemote Software1.OverviewDVRRemote is a remote browser-based software application designed tooperate with Full-featured MPEG-4 DVR series products. Using the software,users are allowed to view live and recorded video, and also to configureFull-featured MPEG-4 DVR series units remotely via a LAN, WAN or Interneton your personal computer.The Full-featured MPEG-4 DVR series unit automatically downloads theDVRRemote plug-ins to the connected PC when you connect toFull-featured MPEG-4 DVR series unit by entering the IP address of the unitin the address field on the browser.The tasks can be performed with DVRRemote are listed below: 00-2DG216DZEA2Remote viewing of live / recorded video.Remote setup of Full-featured MPEG-4 DVR series unit.Remote control of dome cameras.Alarm notification from the Full-featured MPEG-4 DVR series unit.Up to five connections to one Full-featured MPEG-4 DVR series usingDVRRemote, including one Administrator and four User operators.4
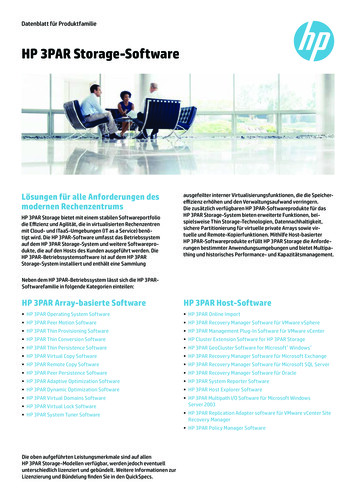
2.3.System RequirementsItemsMinimum RequirementsPersonal ComputerPentium-3 600 MHz processor (Pentium Celeron orPentium-4 1.5GHz processor preferred).RAM 256 MB minimum Hard Drive 20 MB availablefor software installationOperating SystemWindows XP, 2003Windows 2000Web BrowserMicrosoft Internet Explorer version 6.0 or aboveMonitorThe minimum monitor screen resolutionrequirement is 1024 x 768 with 16-bit color.Video CardXVGA with 16 MB video RAMNetwork Card10Base-T (10 Mbps) or 100Base-TX (100 Mbps)operation; must match the network configurationGetting Start of InstallationRefer to the following description to install the DVRRemote remote controlsoftware.3.1Changing Internet SettingsThe PC you want to operate with DVRRemote should be set to acceptActiveX plug-ins. Please follow the steps to set the Internet security settingsappropriately. Before operating the remote software, please check the IP address of yourFull-featured MPEG-4 DVR series unit. To check the IP address, pressMENU key on the unit and enter password to access OSD Main menu;select System Setup , Network Setup , then LAN Setup to check theIP. Start the IE; you may start it either by clicking on the desktop icon, or byusing the Start menu to access it.NOTE: Windows IE provides the ActiveX component that isrequired when using the DVRRemote software. Select Tools from the main menu of the browser, then InternetOptions , and then click the Security tab.00-2DG216DZEA25
Select Trusted sites and click Sites to specify its security setting. Disable Require server verification (https:) for all sites in this zone. Typethe IP address of the unit in field and click Add to add this web site tothe zone. Click OK to confirm the setting and close Trusted sites dialog.00-2DG216DZEA26
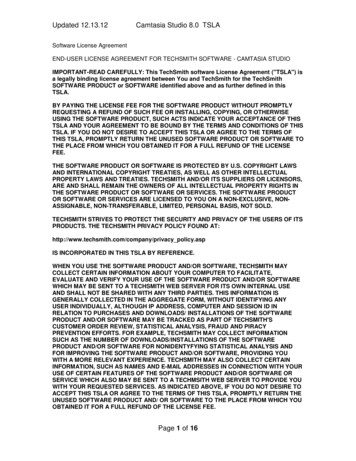
In the Security Level area, click Custom Level . The Security Settingsscreen is displayed. Under All ActiveX controls and plug-ins , set all items to Enable or Prompt . Click OK to accept the settings and close the Security screen. Click OK to close Internet Options dialog.Now, you can continue with the rest of the DVRRemote installation.3.2Installing Remote SoftwareStart the browser to initiate the installation of DVRRemote on your personalcomputer. You can save the IP address of the remote unit as a Favorites itemin your web browser to have easy access next time. Start the IE; you may start it either by clicking on the desktop icon, or byusing the Start menu to access it. Enter the IP address of your Full-featured MPEG-4 DVR series unit in theaddress field where is at the top of the browser. The ActiveX controls and plug-ins dialog will show twice for confirmation,click YES to accept ActiveX plug-ins. The DVRRemote plug-ins will bedownloaded and installed on your PC automatically when the connectionis successfully made.00-2DG216DZEA27
NOTE: Do not enter any leading 0 characters in the address, forexample, “192.068.080.006” should be entered as “192.68.80.6”. Ifthe default trigger port 80 is changed into another one, take port81 for example, you should enter the IP address as“192.68.80.6:81”. A version check starts to verify whether DVRRemote was installed already,and also check if the version is the same as that stored on that particularFull-featured MPEG-4 DVR series unit. This process may take up to 30seconds. When the software is completely downloaded, the Login Screen is nowdisplayed.00-2DG216DZEA28
3.2.1Log in / Log offYou can log in using the Admin or User account. Admin accounts canperform unit configuration freely, while User account has more limitation onremote access to the unit.One “Admin” and up to four “Users” can access a Full-featured MPEG-4DVR series unit at the same time. Furthermore, if the “Admin” account iscurrently accessing the unit OSD menu via front panel of the unit, then youcannot save information as an “Admin” on DVRRemote. The Full-featuredMPEG-4 DVR series unit Admin account has priority.The following steps demonstrate procedures to view video from remote unit: Start DVRRemote by entering the IP Address of the remote Full-featuredMPEG-4 DVR series unit in the Address field of the browser. Or you mayclick on the Favorite entry for the unit (if the IP address of the unit hasbeen set). Enter your Username and password. You can save password in the list ifneeded. The default usernames and passwords are listed as below.Login TypeDefault User nameadminuserDefault Password12344321 Click OK to log in to the remote Full-featured MPEG-4 DVR series unit.The process may take a few seconds. If the connection is made successfully, the main window displays livevideo of the attached cameras.00-2DG216DZEA29
If you close the IE browser, you log off the system at the same time.3.2.2Software UpgradesWhen a new version of DVRRemote software is available on yourFull-featured MPEG-4 DVR series unit, it will be automatically installed whenyou access the unit. Follow the steps to upgrade the software. The message “Browser will be closed” is now displayed. Click Yes toaccept to version upgrade. Start your IE again and enter the IP address of the remote Full-featuredMPEG-4 DVR series unit in the Address field of the browser; or, if youhave set a Favorite for the unit address, click the Favorites entry for yourunit. When the software is completely downloaded, the Login Screen will bedisplayed.4.Basic OperationWhen you successfully connect to a unit, the DVRRemote main windowdisplays as follows. The connected cameras of the remote unit will be listedon the left and an array of camera output windows displayed on the right ofthe main window.00-2DG216DZEA210
To view the main window in full-screen view, press F11 on your keyboard.The features on DVRRemote main window will be described in the followingsections.4.1To View Live VideoYou can view live video from the cameras attached to the remote unit byclicking Live button on the main window toolbar.You can select desired display mode and assign wanted camera view to thewindow(s) after the view on the Full-featured MPEG-4 DVR series unit isdisplayed on the main window. To select wanted display mode and assigncamera, refer to the following sections.00-2DG216DZEA211
4.1.1Selecting Display ModeYou can indicate the number of windows displayed on themain window. Click one of the display buttons on theleft-bottom corner of the main window. You can select from4, 9 and 16 camera displays. To view certain window in fullscreen, you may either double-click on the wanted window,or click on the corresponding CAMERA button.4.1.2Assigning Camera to WindowsTo assign a camera to a specific window in a multi-windowdisplay mode, follow the steps: Select the desired display mode first by pressing thecorresponding MODE button. Click on the corresponding CAMERA button and drag thecursor onto the wanted display cameo. The assignmentyou make will not be saved when you exit DVRRemote.NOTE: The CAMERA button displays with a dome icon when thecorresponding camera is equipped with dome control.00-2DG216DZEA212
4.1.3Operating Cameras with Dome ControlDVRRemote allows you to control and configure a domecamera remotely.Click on any CAMERA button to view the camera in fullscreen display. Then click on a CAMERA button which isdisplayed with a dome icon. The Dome Control Panel(shown as right) will be displayed in the left side of the mainwindow. The items on the dome control panel are describedas follows.Set Preset PointsThis itemis used to set up preset positions. DVRRemote allows its userto set up to 255 preset positions with DynaColor, American Dynamics, andPelco (Pelco P & Pelco D) domes.Use Direction buttons to move dome camera to an appropriate position, andthen click the button and choose wanted number from the pull-down list. Thepreset position is named as the selected number.Go Preset PointThis itemis used to call the camera preset point which was set up withthe set preset function. Click and choose a number to call the preset forviewing.A.F. (Auto Focus)Click to focus the camera automatically for a clear view.ID (Dome ID Setup)Click for changing the dome ID and protocol. User privileges in not allowed tochange the dome ID and protocol; Admin privileges is needed to access thisfunction.00-2DG216DZEA213
FocusUse to adjust the camera lens to focus on objects for a clear view. Click theadjusting buttons to modify the focus setting.IrisThis item is used to open and close the iris to let more or less light into thecamera. Click the adjusting buttons to modify the iris setting.ZoomYou are allowed to zoom-in or zoom-out using the adjusting buttons. Zoom-into view less area and zoom-out to view more area.Direction ButtonsThese buttons are used to pan and/or tilt the dome camera. Click the arrowbutton in the direction you want to view.4.2Instant RecordingThe Instant Recording function allows you to record videoquickly on your PC.4.2.1Recording Video InstantlyFollow the steps to start recording instantly: Click on the Instant Recording button. Select the destination you want to save the video. Click on the button again to stop recording.NOTE: The instant recording video will be saved as *.drv file.NOTE: The Audio function is set to OFF as the default setting.00-2DG216DZEA214
4.2.2To Playback Instant Recording VideoFollow the steps to playback a video recording instantly: Click Play on main window toolbar and click Local Playback tab. Click Open to choose a file recorded. Click OK to start playing the recorded video.4.3To Take a SnapshotThe software allows you to take a snapshot through the hot key on the topside of the main window. Each click takes a snapshot and it will be saved intoa *.BMP file on the desktop of you PC. The snapshot file will be named as“Snapshot-*”.4.4To Playback VideoDVRRemote allows you to view recorded video either from the remoteFull-featured MPEG-4 DVR series unit, or remote playback from the harddisk drive of your PCTo access the Playback screens, click Play button on the main windowtoolbar. There are three tabbed screens are contained in the Playbackscreens: Remote Playback , Local Playback and Verify tabs. The Remote Playback allows you to play back from a remote unit. The LocalPlayback enables you to play back a recorded video file with DVRRemotethat was downloaded and stored on the hard disk drive of your PC. The Verify allows verify the digital signature to authenticate a video file exportedfrom the unitThe remote unit continues recording while you are playing back recordedvideo on your PC, either remote playback or local playback.00-2DG216DZEA215
4.4.1Playing Back Remote VideoTo view remote video, click Play on the top of the main window toolbar, andthen Remote Playback tab. The Remote Playback screen will then bedisplayed.The From and To on the top of the screen display the date and time fromwhich recorded video is available for playback.To play back remote video segments, follow these steps: Select the date and time of the segment to play back from the Start field.You can change the date and time either by typing desired numbersdirectly or using the arrow buttons.To type directly:Click on day, month and year of date field respectively, and type the desirednumbers directly. Follow above steps to adjust the hour, minute and secondof time field.To use the arrow buttons:Click on the arrow button next to the date field to display the calendar; thenclick the left and right arrow at the top of the calendar to change the date.Use up and down arrow in the right side of the time field to change to thewanted time.To click Near From :00-2DG216DZEA216
Click Near From button to set the date and time as the From time.To click Near To :Click Near To to set the date and time to five minutes ahead the To time. Select the camera(s) you want to play back. Click Clear to clear all ofthe camera entry selections, and click All to select all of the cameraentries. Click OK to start the operation, or click Close to abort.4.4.2To Playback Local *.drv FilesThe Local Playback tab allows you to play back *.drv video files that storedon your PC's hard drive.Click the Local Playback tab in the Playback screen for displayingdownloaded video. The Local Playback screen is shown as below.Follow below steps to play back a downloaded *.drv file with DVRRemote. Click Open and the file selection screen is displayed. Select the *.drv video file to play back and click OK . Click OK in the Local Playback Screen to start the operation, or click Cancel to abort the playback. View the video playback using the Playback controls. After playback, click Live to return to live video.00-2DG216DZEA217
4.4.3Playback ControlsWhen playing back local or remote video, DVRRemote is in Playback Mode.The playback controls toolbar is on the main window, as shown in thefollowing figure.The Playback controls and indicators are described below.Fast RewindClick to play the recorded video in reverse direction. Click repeatedly to selectthe rewind speed: 1 , 2 , 4 , 8 , 16 , or 32 .Play / PauseClick once to play the recorded video, click again to pause the playback.Fast PlaybackClick to play the recorded video forward. Click repeatedly to select theplayback speed: 1 , 2 , 4 , 8 , 16 , or 32 .StopStop playing the recorded video.00-2DG216DZEA218
4.4Verifying Digital SignatureThe digital signature aims to authenticate a video file exported from the unit.Follow the description to verify the digital signature. Click Play on the main window tool bar. Click Verify tab to display the Verify window. Click Browse to select the *.gpg, *.avi, *.sig files respectively, whichbelong to the exported video you want to authenticate.00-2DG216DZEA219
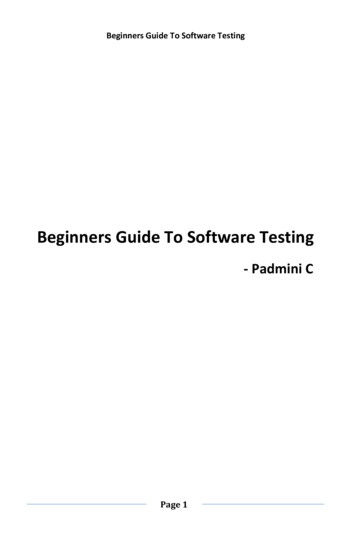
Click Verify to start verifying digital signature. The result of verify shows in the Status Log field. It returns a GOOD orBAD signature result. A GOOD signature indicates the exported clip hasnot been altered. GOOD Signature00-2DG216DZEA220
4.5Search from Event ListClick SEARCH, the Event List appears. The List contains information aboutthe alarm events that your unit recorded and saved. Up to 1024 events can belisted in the Alarm List.The Alarm List (shown as below figure) displays each event by its number, thedate and time of the event, the status of the event (including MOTION,ALARM IN, and VIDEO LOSS), and the camera channel on which the eventoccurred.To view an alarm recording, follow these steps: Click SEARCH button positioned in the Main Window Toolbar. The AlarmList appears. Scroll through the events in the Alarm List and highlight the event ofinterest. Double-click on the desired event to view the alarm recording.00-2DG216DZEA221
5.Configuring the Remote UnitClick MENU button on the toolbar to configure a Full-featured MPEG-4DVR series unit remotely. The Configuration menu displays as below.Configuration MenuThe Configuration menu contains a list of items that are used to configureFull-featured MPEG-4 DVR series units remotely. The following subsectionsdescribe the configuration items and buttons used in the OSD menu.NOTE: The settings in Configuration menu only apply to the unit.The Administrator can perform unit configuration freely. If you log inDVRRemote using User account, the most settings will be read only andcannot be configured.00-2DG216DZEA222
NOTE: If an Administrator account is currently accessing the unit OSDsetup menu, you are not allowed to save the configuration as anAdmin on DVRRemote. The Full-featured MPEG-4 DVR unitadministrator account has priority.The items in Configuration menu are described in the table below.ItemSystem SetupMonitor SetupCamera SetupRecord SetupEvent SetupDescriptionConfigures the system related items on the remote unit, suchas password, date/time and network settings, etc.Configures monitor-related items, such as brightness andsaturation, etc.Configures camera titles and other camera-related items onthe remote unit.Configures record-related items on the remote unit, such asevent and audio recording parameters.Configures the way in which the remote unit handles events.Buttons in Configuration ScreensThe configuration screen contains several buttons that enable you to saveand close the settings. These buttons are shown as below.The functions of these buttons are described below. OK You can save just the settings in the section of the Configurationscreen in which you are working, click OK to save the settings andclose the Configuration screen. Cancel Click to close the screen without saving any changes. Apply Click Apply to save all of the settings in the Configuration screenand apply them to the remote unit.00-2DG216DZEA223
5.1System SetupThe System setup screen allows user to set language,date/time, password, and network and RS-485 settingson the remote unit.Click MENU button on the main window toolbar, andexpand the System setup menu by clicking the plusicon. The expanded System Setup menu displays asthe figure on the right.Items in the System Setup menu are described asfollowing sections.5.1.1VersionShow the Model Name, Hardware version and Software version of theconnected unit, shown as below figure. The mentioned information is for readonly.00-2DG216DZEA224
5.1.2LanguageThe Language menu allows users to select the system language for OSDmenu and screen messages of the remote unit. Language selection takeseffect immediately when the selection is done.NOTE: The selection is used to change the system language of theremote DVR unit, but not for changing the language of theDVRRemote software.00-2DG216DZEA225
5.1.3Date / TimeClick Date/Time to display the Date/Time menu, shown as follows. Themenu allows user to configure the date/time related settings.NOTE: The following three items “Date/Time Display”, “Date/TimeDisplay Mode” and “Date/Time Order settings” are applied to theremote DVR unit only.Date/Time DisplayUser can set the date and time information to display in one or two rows. Thedefault is 1 Row .Date Display ModeUsers are allowed to set the date-displayed mode for the remote unit. Thedate is comprised of Year (Y), Month (M), and Day (D). To change thedate-displayed mode, click on the black arrow of this item and select thewanted option form the pull-down menu. The default display mode is Y/M/D in both NTSC and PAL formats.00-2DG216DZEA226
Time Display ModeUsed to set the time format of the remote DVR unit in 12 hour or 24 hour. Thedefault setting is 24 HR .Date/Time OrderUsed to set the order of Date/Time display to Date First or Time First .Daylight Saving TimeThe following items are used for those people who live in certain regions toobserve Daylight Saving Time. Select ON to enable the following DSTsettings, or OFF to disable the function. DST Start/ DST EndThe items are used to set the daylight saving duration. Enter thewanted DST start time and end time into both fields using thekeyboard directly, or use the pull-down menu to select the desireddate and time. DST BiasThe item is used to set the amount of time to move forward from thestandard time for Daylight Saving Time. The Available options are 30 , 60 , 90 and 120 minutes.When you have completed the settings, remember to take one of thefollowing actions. Click OK to save the modified settings. Click Apply to save all modified settings set in the configuration menu. Click Cancel to abort and leave all settings unchanged.00-2DG216DZEA227
5.1.4Unit NameThe item is used to change the unit name of the connected remote DVR unit.To change the unit name, type the new name in the field directly using thekeyboard.00-2DG216DZEA228
5.1.5PasswordThe Password menu allows administrator to change the password settingswhich are used for accessing the unit. Click Password in System Setupmenu to display the screen.Enable PasswordThe item is used to determine whether the password is required or not foraccessing the OSD menu. Select YES to demand entering password whenaccessing the OSD menu; if not, select NO .Load Factory PasswordThis item allows the administrator to reload the factory password in case thathe or she doesn’t remember or locate the password. There are three optionsto select from: Admin (reload the Admin password only), User (reloadthe User password only), and All (reload the Admin and User passwords).The factory password is 1234 for administrator and 4321 for user.00-2DG216DZEA229
5.1.6Network SetupNetwork Setup menu contains the following threesettings: “Email Address”, “SMTP Setup” and “DDNSSetup”. Move you mouse and click on the plus icon todirectly expand the Network Setup menu.The expanded Network Setup menu displays as thefigure on the right.Email AddressEmail Address menu, shown as below, is used to editthe e-mail address where alarm event information willbe sent to. Enter the e-mail address directly usingyour keyboard.00-2DG216DZEA230
SMTP SetupClick SMTP Setup to display the SMTP Setup menu, shown as below. Themenu allows users to configure the SMTP related settings of the remote DVRunit.The items in this menu are described in the following sections.00-2DG216DZEA2 Email Via SMTPThe item enables users to determine whether or not the remote DVRunit sends e-mail via SMTP. Select YES to send e-mail via SMTP;if not, select NO . SMTP ServerUsed to setup the SMTP server. SMTP PortUsed to change SMTP port to another port, if necessary. SMTPusually is implemented to operate over Internet port 25. Click the UPand DOWN arrows to adjust the value.31
SMTP AccountUsed to setup the SMTP username. Enter the wanted usernamethrough the keyboard directly. SMTP PasswordUsed to setup the SMTP password. Enter the password directly withyour keyboard.DDNS SetupClick DDNS Setup to display the DDNS Setup menu. It allows user toconfigure the DDNS related settings. Enable DDNSUsed to enable or disable the Dynamic Domain Name Service.Select YES to enable the service, or NO to disable. Host NameAllow users to setup a domain name, which is used to call theremote Full-featured MPEG-4 DVR series unit by words through theinternet.00-2DG216DZEA232
DDNS PortAllow user to setup the port for DDNS. Click the UP and DOWNarrows to adjust the value. Submit/UpdateWhen done, select YES to updat
DVRRemote Software 1. Overview DVRRemote is a remote browser-based software application designed to operate with Full-featured MPEG-4 DVR series products. Using the software, users are allowed to view live and recorded video, and also to configure Full-featured MPEG-4 DVR series units remotely via a LAN, WAN or Internet on your personal computer.