Transcription
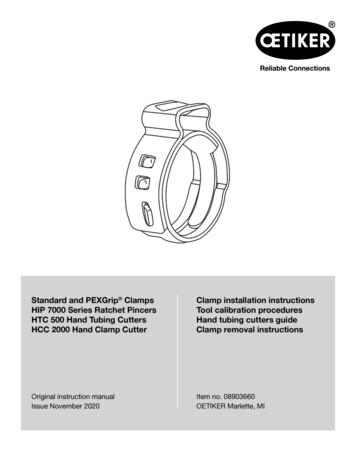
Standard and PEXGrip ClampsHIP 7000 Series Ratchet PincersHTC 500 Hand Tubing CuttersHCC 2000 Hand Clamp CutterClamp installation instructionsTool calibration proceduresHand tubing cutters guideClamp removal instructionsOriginal instruction manualIssue November 2020Item no. 08903660OETIKER Marlette, MI
Oetiker StepLess Ear Clamps 167 for PEX1Information about this manual1.1Symbols and means of depiction Always read and observe these safety notices. Observe all notices that are flagged with a safety alert symbol and text.Safety notices are used in this manual to warn of the risk of personal injury or property damage.The following symbols are used in this instruction manual:SymbolWARNINGNOTICE1. .2. .3. .1.2MeaningFailure to observe this notice may lead to property damage.Information for proper use.Multi-step instructions Carry out the steps in the order shown.ScopeThis instruction manual is intended for Oetiker StepLess Ear Clamps 167, manufactured to meet ASTM F2098 in boththe Standard PEX Clamp and PEXGrip Clamp variety for use in conjunction with: PEX or PE-RT Tube per ASTM F877 PEX Insert fittings per ASTM F1807 or F2159 PEX connecting solutions for markets compliant with Standard ASTM F877/F2098The specified clamps are suitable for fast and secure connections for PEX tubing in the plumbing field. The clampdesign is tamper evident.Version 11.2020 089036601-2
Oetiker StepLess Ear Clamps 167 for PEX2Basic instructions2.1Recommended installation Correct usage also covers observance of this instruction manual. Any use not in accordance with the prescribed usage shall be regarded as incorrect usage, and may lead toThe products may only be used for the intended purpose and under safe and fault-free conditions.product failure. For proper installation of Oetiker PEX series clamps, use calibrated genuine Oetiker installation tools. For ratchet pincer maintenance, care and calibration, reference the complete Calibration Procedures suppliedwith tool or reference sections 3.1, 3.2 and 3.3 of this instruction manual.1.3-Handle Ratchet Pincer (Fig. 1)Oetiker HIP 7000 l 280Item no. 14100280 Includes GO/NO-GO gauge Can be calibrated Lightweight for easy handling Heavy-duty professional grade tool Single handed installation2.Item no. 14100280Fig. 2:Item no. 14100069Fig. 3:Item no. 141003372-Handle Ratchet Pincer (Fig. 2)Oetiker HIP 7000 l 069Item no. 14100069 Includes GO/NO-GO gauge Can be calibrated Lightweight for easy handling Heavy-duty professional grade tool3.Fig. 1:DIY Economy 2-Handle Ratchet Pincer (Fig. 3)Oetiker HIP 7000 l 337Item no. 14100337 Includes NO-GO gauge pin Cannot be calibrated, tool is not adjustable Lightweight for easy handling Tool must be disposed of when out of calibration Light-duty toolVersion 11.2020 089036602-3
Oetiker StepLess Ear Clamps 167 for PEX2.2Clamp installation instructions1.Per ASTM F2098, insert fitting into tubing untilshoulder or tube stop contacts end of tubing.Position clamp within 1/8" to 1/4" (3.2 to 6.4 mm)of tube end. (Fig. 4)! Note: “Tube end” must be cut square.(Reference section 4 of this instructionmanual for Oetiker recommended HandTubing Cutters.)2.Fig. 4:Insert fitting/position clampFig. 5:Close clamp ear with toolFig. 6:Full ear closure requiredClose clamp ear with tool, tool will not releaseuntil clamp is fully closed. (Fig. 5)3.IMPORTANT: For proper installation of Oetiker PEXseries clamps, full ear closure is required. Visuallyinspect clamp for correct closed ear form. (Fig. 6)Version 11.2020 089036602-4
Oetiker StepLess Ear Clamps 167 for PEX2.2.1 Assembly noticeNOTICE For the correct assembly of Oetiker StepLess 167 PEX clamps, the clamps must be completely closed. Genuine Oetiker Hand Installation Pincers with ratchet mechanism will release only when clamp has fully closed. Tool information for HIP 7000 Ratchet Pincer Series, for Oetiker PEX Clamps, can be found in section 2.1.2.2.2 Warning notice: clamp installationsWARNING In high chloride water conditions, use only plastic fittings. Do not install in contact with concrete. Use only ASTM F1807 or F2159 insert fittings with OETIKER clamps. Failure to observe the above warnings may result in property damage.2.2.3 International standards Clamps conform to ASTM1 F2098 for use with ASTM F1807 and F2159 insert fittings andASTM F876 PEX 2 tubing. For additional information, please refer to ASTM International Standards Worldwide. Complies with NSF3 product listing cNSFus-PW. For additional information, please refer to theNSF organization.1ASTM American Society for Testing and Materials2PEX Polyethylene cross-linked3NSF National Sanitation FoundationVersion 11.2020 089036602-5
Oetiker StepLess Ear Clamps 167 for PEX3Ratchet pincer calibration prodcedures3.1Checking the tool calibration for: Item nos. 14100280 and 141000691.Close handles of manual pincer to stop point (Fig. 7).Calibration instructions on this page are specific for Ratchet Pincer Item nos. 14100280 and 141000692.7Fig. 7:Stop pointFig. 8:Insert gaugeFig. 9:Insert gauge (side view)Insert GO/NO-GO Gauge into jaw gap(Fig. 8 and Fig. 9).3.GO/NO-GO Gauge must stop at NO-GO shoulder.4.If the gauge passes through the NO-GO point,89the tool much be recalibrated (see section 3.3).5.Check tool calibration daily.Version 11.2020 089036603-6
Oetiker StepLess Ear Clamps 167 for PEX3.2Checking the tool calibration for: Item no. 141003371.A NO-GO Gauge “Pin” (.062 dia.) is provided toCalibration instructions on this page are specific for Ratchet Pincer Item no. 14100337determine if the tool is in calibration and is capable of .providing crimps that conform to industry standards.2.10Grasp the handles and close the tool until theratchet is released. Hold the handles in the closedposition and attempt to insert the NO-GO GaugeFig. 10:“Pin” into the jaw tips.3.NO-GO Gauge Pin “must not“ pass jaw tips.Discard tool if NO-GO gauge pin passes.If the “Pin” passes into the opening beyond the jawtips (Fig. 10), the tool is no longer useable! It will notmake crimps that conform to the specification andmust be discarded.4.Check tool calibration daily.3.2.1 Calibration and spare parts noticeNOTICE DIY Economy 2-Handle Ratchet Pincer (Item no. 14100337): tool is not adjustable, dispose of tool once it isout of calibration. No spare parts are available for the DIY Economy 2-Handle Ratchet Pincer (Item no. 14100337).Version 11.2020 089036603-7
Oetiker StepLess Ear Clamps 167 for PEX3.3Re-calibrating tools for: Item nos. 14100280 and 141000691.Using a straight blade screw driver, loosenRe-calibration instructions on this page are specific for Ratchet Pincer Item nos. 14100280 and 14100069adjustment nut (Fig. 11).2.Close handles to stop point and place GO/NO-GOGauge into jaw gap.3.Fig. 11:Adjustment nut11Using a straight blade screwdriver, rotate eccentricstud (Fig. 12) counter-clockwise until jaws contactthe GO/NO-GO Gauge before the NO-GO area ofthe Gauge.12Fig. 12:4.Eccentric studUsing a straight blade screwdriver, tighten theadjustment nut (Fig. 13).5.Check tool calibration daily.Fig. 13:3.4 Adjustment nut13Tool maintenanceDo not use the Ratchet Tools for any purpose other than to assemble clamps. Use other than intended maydamage the tool and void warranty. Lubricate the tool head, spring and ratchet mechanism once per every 30 days with a light lubricating oil (if tooloperation becomes sluggish at any time lubricate prior to further use). Clean tool periodically to remove rust and dirt. Rust or dirt build-up will interfere with tool operation and voidwarranty coverage. Lubricate all parts after cleaning to provide a light protective coating of oil.3.5Tool warrantyWhen properly maintained and used as intended the Ratchet Tools are warranted against materials and manufacturingdefects for a period of one year from date of purchase. This warranty does not cover defects or damage arising fromimproper storage or handling, ordinary wear and tear, misuse, abuse, accident or use with unauthorized product orparts. Liability is limited to repair or replacement of product or component part which is determined defective as covered bythis warranty.Version 11.2020 089036603-8
Oetiker StepLess Ear Clamps 167 for PEX4Hand tubing cutters for PEX: Item nos. 14100408 and 141004184.1HTC 500 l 408 features and instruction guideRecommended for cutting PEX tubing.Hand Tubing Cutter (Fig. 14)Oetiker HTC 500 l 408Item no. 14100408 Quickly cuts PEX tubing up to 3/4", PEX type A, B, & C V-shaped notch keeps pipe or tube steady Light and durable glass filled nylon construction Super sharp blade for quick and easy cuts1. Place cutting chamber around tube4.22. Squeeze handlesFig. 14:Item no. 141004083. Remove tubingHTC 500 l 418 features and instruction guideRadial Hand Tubing Cutter (Fig. 15)Oetiker HTC 500 l 418Item no. 14100418 For PEX tube, plastic conduit and gas pipe Cuts 1/2", 3/4" & 1" PEX tube, PEX type A, B & C Compact tool cuts tube square, keeps it round Straight, circular cuts form tighter connections1. Push tubing into cutting chamber2. Rotate cutter in direction of arrowVersion 11.2020 08903660Fig. 15:Item no. 141004183. Squeeze handles and remove tubing4-9
Oetiker StepLess Ear Clamps 167 for PEX5Hand clamp cutter for Oetiker ear clampsSpecially designed for removing Oetiker Ear Clamps, quick and easy ear clamp cutting.Compound Action Hand Clamp Cutter (Fig. 16)Oetiker HCC 2000 l 502Item no. 141005025.1Clamp removal instruction guide1.Place hand clamp cutter jaw tips on each sideof clamp ear or single leg (Fig. 17).2.Squeeze handles (Fig. 18).3.Cut through and remove clamp (Fig. 19)Fig. 16:Item no. 14100502Fig. 17:Correct jaw tip placementFig. 18:Squeeze handlesFig. 19:Cut and remove clampNOTICE Caution must be observed with Hand Clamp Cutters, they can generate extreme forces. It is recommended that protective eye wear be worn when cutting clamps.Version 11.2020 089036605-10
4.2 HTC 500 l 418 features and instruction guide For PEX tube, plastic conduit and gas pipe Cuts 1/2", 3/4" & 1" PEX tube, PEX type A, B & C Compact tool cuts tube square, keeps it round Straight, circular cuts form tighter connections Fig. 15: Item no. 14100418 1. Push tubing into cutting chamber 2. Rotate cutter in direction .

