Transcription
Chapter 1 IntroductionChapter 2 Important Safety InstructionsChapter 3 Installing the SoftwareChapter 4 Connecting the ScannerChapter 5 Placing DocumentsChapter 6 Scanning with CaptureOnTouchChapter 7 Setting the Scanner DriverChapter 8 Special ScanningChapter 9 Regular MaintenanceChapter 10 Replacing Consumable PartsChapter 11 Uninstalling the SoftwareChapter 12 TroubleshootingChapter 13 Appendix16T3-0030-02E
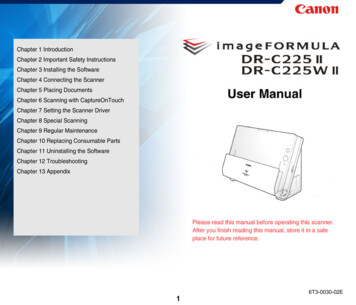
Chapter 1 IntroductionAbout This ManualThank you for purchasing the Canon imageFORMULA DR-C225 II/C225W II Document Scanner.Manuals for the ScannerIn order to fully understand the features of this scanner and use themmore effectively, please read this manual and the manuals shown belowthoroughly before using the product. After reading, store the manual in asafe place for future reference. Documentation for this scanner consists of the following manuals.Setup GuideThis provides complete and comprehensive information about thescanner. About This Manual. 2User Manual (this manual)This manual contains complete explanations for operations on thescanner. This manual is stored on the supplied Setup Disc as anelectric manual.Features of the Scanner. 3Names and Functions of Parts . 5Regulations . 7Trademarks . 9The User Manual will be registered to the following location in the startmenu after you install the software on the Setup Disc.2
Register Windows 8.1 at the following locations.Indicates operational requirements and restrictions. Be sure to readthese items carefully to operate the machine correctly, and avoiddamage to the machine.Indicates a clarification of an operation, or contains additionalexplanations for a procedure. Reading these notes is highlyrecommended.Features of the ScannerAfter the software is installed from the setup disc, the User Manual isshown below./Applications/DR-C225 User Manual.appThe main features of the DR-C225 II/C225W II document scanner aredescribed below.Symbols Used in This Manual Compact DesignThe scanner has a compact size of 300 (W) x 339 (H) x 235 (D)(11.81" (W) x 13.3" (H) x 9.25" (D)) mm when the document feed isopen. A newly designed feed mechanism saves space by eliminatingthe need for space to eject paper at the front of the scanner.The following symbols are used in this manual to explain procedures,restrictions, handling precautions, and instructions that should beobserved for safety. Fast Document FeedingDocuments can be scanned at a speed of up to 25 pages per minute(when scanning one-sided or two-sided documents of A4 size at 200dpi).Indicates a warning concerning operations that may lead to death or injuryto persons if not performed correctly. To use the machine safely, alwayspay attention to these warnings. Two Eject Paths for Scanning a Variety of DocumentsUse the U-turn path to scan paper of standard thickness, or use thestraight path to scan cards and other thick documents. Indicates a caution concerning operations that may lead to injury toHigh Image QualityThe 600 dpi optical resolution sensor incorporated in the scannerenables documents to be scanned with high image quality.persons, or damage to property if not performed correctly. To use themachine safely, always pay attention to these cautions. USB 2.0 Interface Color/Grayscale SupportThe scanner supports Hi-Speed USB 2.0.Documents can be scanned in 24-bit color or 256-level grayscale.3
Supports a Variety of Scanning Modes Card Scan Paper Size DetectionThese modes may not work, depending on the type of document. You can scan business or ID cards. Auto Color Detection Scanning ShortcutUsing CaptureOnTouch, you can register commonly usedcombinations of scan modes and output methods as [ScanningShortcut] for quick access. Any [Scanning Shortcut] can be assigneda start button.DeskewThe scanner straightens scanned images when it detects that thedocument was placed askew. CaptureOnTouchThe bundled CaptureOnTouch software lets you register specificscanning procedures suited to particular document types andapplications for easy access just by selecting the scanning job.Folio ScanYou can scan folded documents. The scanner will scan both sidesand combine the scanned images into a single image. Character/Line Emphasis FunctionIf characters and lines in scanned images are not clearly visible, youcan use this function to adjust their thickness during scanning.Auto Resolution DetectionWhen enabled in the CaptureOnTouch or scanner driver settings, thisfunction detects the content of documents and determines thescanning resolution automatically. Prescan FunctionThe scanner is equipped with a Prescan function that allows you toadjust the contrast and brightness of a prescanned image and thensend the adjusted image to the application software, without needingto scan the document again.Full Auto ModeA Full Auto Mode is provided in CaptureOnTouch and the scannerdriver to allow scanning under automatically determined conditions.Scanning conditions such as the color mode and page size are setautomatically based on the document being scanned. Skip Blank Page FunctionThe scanner is equipped with a Skip Blank Page function thatenables you to scan a document without storing images of blankpages, regardless of whether each page of the document is twosided or one-sided. Both sides are scanned, but saving the image isskipped for scan images judged to be from a blank page.The scanner detects whether the scanned document is in color,grayscale, or black and white (binary), and saves the imageaccordingly. Color Drop-outThe scanner is equipped with a Color Drop-out function that enablesyou to specify a color for the scanner to omit from the scanned imageduring black and white or grayscale scanning.The scanner automatically detects the size of a scanned documentand eliminates any unnecessary space around the edges of theimage when storing the image, even when storing a document ofirregular size. Text Enhancement ModesThe scanner is equipped with the Advanced Text Enhancement Mode(only for Windows), for enhancing the text of documents with dark oruneven backgrounds, and the Advanced Text Enhancement II mode,for enhancing the text when both the text and background are light.The scanner supports the following scanning modes, depending onthe document type: Single-sided or double-sided scanning (with Skip Blank Pagefunction) Continuous or single sheet feedUltrasonic Double Feed Detection Ultrasonic waves are used to detect pages that are fed at the sametime as well as the space between pages. Scanning stops if a doublefeed is detected.Auto StartThe scanner is equipped with an auto start function, which enablesscanning to be automatically started when a document placed in thefeeder is detected.4
Names and Functions of PartsSleep ModeThe scanner is designed to save energy by entering the sleep modewhen it is not scanning documents. This section describes the name and function of each part. Makesure to read this section and familiarize yourself with the parts of thescanner before using the scanner.Wi-Fi connectivity (DR-C225W II only)You can operate the scanner and load document from a PC or otherdevice with a wireless connection. Front ViewThe Wi-Fi function supports scanning operations and documentloading via wireless connection to a PC or other device.In the software, this scanner is indicated as " DR-C225" .(1) Front UnitOpen this when removing paper jammed inside the scanner, cleaningthe inside of the scanner, or replacing rollers.(2) Document Eject PocketScanned documents are output here.(3) Feed Extension PlatesPull this out when loading long documents.(4) Eject SupportOpen this when loading long documents.(5) Feed SupportPull out this to support loaded documents.(6) Document Feed TrayOpen this when loading documents for scanning.(7) Power ButtonThis turns the scanner ON and OFF.5
Back View(8) Start ButtonThis starts scanning the document loaded in the document feed tray(9) Feed Selection IndicatorThis indicates the way documents are currently being fed inaccordance with the position of the feed selection lever.Lever positionIndicator colorUpper (non separation feeding)WhiteLower (standard feeding)Black(10) Feed Selection LeverThis changes the way documents are fed.(11) ConnectorsConnectors for connecting an AC adapter and USB cable areavailable.(1) OPEN ButtonPress this button to open the front unit.(12) Eject Selection LeverUse this lever to change the way documents are ejected.(2) Wi-Fi function setting location (DR-C225W II only)Set and confirm wireless connection using the Wi-Fi function. Connectors(3) Kensington SlotConnect an anti-theft key chain or the like.(4) Cable GroovesSecure the USB cable and power cord that are connected to thescanner along the rear of the scanner. Use these when you want torun the cables on the side opposite the connectors.(1) Power ConnectorConnect the supplied AC adapter to this connector.(2) USB ConnectorConnect the supplied USB cable to this connector.6
Regulationsand can radiate radio frequency energy and, if not installed and used inaccordance with the instructions, may cause harmful interference to radiocommunications. However, there is no guarantee that interference will notoccur in a particular installation. If this equipment does cause harmfulinterference to radio or television reception, which can be determined byturning the equipment OFF and ON, the user is encouraged to try tocorrect the interference by one or more of the following measures:FCC/IC REGULATIONS (For North America)Document Scanner, Model 6130050/6130060This device complies with Part 15 of FCC Rules and Industry Canadalicence-exempt RSS standard(s). Operation is subject to the following twoconditions: (1) this device may not cause interference, and (2) this devicemust accept any interference, including interference that may causeundesired operation of this device.Le présent appareil est conforme aux la partie 15 des règles de la FCC etCNR d'Industrie Canada applicables aux appareils radio exempts delicence. L'exploitation est autorisée aux deux conditions suivantes : (1)l'appareil ne doit pas produire de brouillage, et (2) l'utilisateur de l'appareildoit accepter tout brouillage radioélectrique subi, même si le brouillage estsusceptible d'en compromettre le fonctionnement. Reorient or relocate the receiving antenna. Increase the separation between the equipment and receiver. Connect the equipment into an outlet on a circuit different from that towhich the receiver is connected. Consult the dealer or an experienced radio/TV technician for help.Use of shielded cable is required to comply with Class B limits in SubpartB of Part 15 of FCC Rules.Do not make any changes or modifications to the equipment unlessotherwise specified in the manual. If such changes or modifications shouldbe made, you could be required to stop operation of the equipment.This equipment complies with FCC/IC radiation exposure limits set forthfor an uncontrolled environment and meets the FCC radio frequency (RF)Exposure Guidelines in Supplement C to OET65 and RSS-102 of the ICradio frequency (RF) Exposure rules. This equipment has very low levelsof RF energy that it deemed to comply without maximum permissiveexposure evaluation (MPE). But it is desirable that it should be installedand operated keeping the radiator at least 20cm or more away fromperson's body (excluding extremities: hands, wrists, feet and ankles).Canon U.S.A. Inc.One Canon Park, Melville, NY 11747, U.S.A.Tel. No. 1-800-OK-CANON (1-800-652-2666)This transmitter must not be co-located or operated in conjunction withany other antenna or transmitter.Cet équipement est conforme aux limites d'exposition aux rayonnementsénoncées pour un environnement non contrôlé et respecte les règles lesradioélectriques (RF) de la FCC lignes directrices d'exposition dans leSupplément C à OET65 et d'exposition aux fréquences radioélectriques(RF) CNR-102 de l'IC. Cet équipement émet une énergie RF très faiblequi est considérée conforme sans évaluation de l'exposition maximaleautorisée. Cependant, cet équipement doit être installé et utilisé engardant une distance de 20 cm ou plus entre le dispositif rayonnant et lecorps (à l'exception des extrémités : mains, poignets, pieds et chevilles).RADIO INTERFERENCE REGULATIONS (For 120 V models)This digital apparatus does not exceed the Class B limits for radio noiseemissions from digital apparatus as set out in the interference-causingequipment standard entitled " Digital Apparatus" , ICES-003 of the IndustryCanada.RÈGLEMENT SUR LE BROUILLAGE RADIOÉLECTRIQUE(For 120 V models)Cet appareil numérique respecte les limites de bruits radioélectriquesapplicables aux appareils numériques de Classe B prescrites dans lanorme sur le matériel brouilleur: " Appareils Numériques" , NMB-003édictée par l'Industrie Canada.FCC CAUTIONChanges or modifications not expressly approved by the party responsiblefor compliance could void the user's authority to operate the equipment.Note: This equipment has been tested and found to comply with the limitsfor a Class B digital device, pursuant to Part 15 of the FCC Rules. Theselimits are designed to provide reasonable protection against harmfulinterference in a residential installation. This equipment generates, uses,7
DR-C225W II: Model 6130060International ENERGY STAR Office Equipment ProgramDR-C225 II: Model 6130050As an ENERGY STAR Partner, CANON ELECTRONICS INC. has determined that this machine meets the ENERGY STARProgram guidelines for energy efficiency.The International ENERGY STAR Office Equipment Program is aninternational program that promotes energy saving through the use ofcomputers and other office equipment. The program backs thedevelopment and dissemination of products with functions that effectivelyreduce energy consumption. It is an open system in which businessproprietors can participate voluntarily. The targeted products are officeequipment, such as computers, monitors, printers, fax, machine, copiers,and scanners. The standards and logos are uniform among participatingnations. This model doesn’t provide " setting options" for powermanagement.Módulo WLAN instalado adentro de productoMARCA: CanonMODELO: SX-SDMGNIFETEL: RCPCASX14-2029SX-SDMGN RCPCASX14-2029La operación de este equipo está sujeta a las siguientes dos condiciones:(1) es posible que este equipo o dispositivo no cause interferenciaperjudicial y (2) este equipo o dispositivo debe aceptar cualquierinterferencia, incluyendo la que pueda causar su operación no deseada.European Union (and EEA) only.Reproduction WarningThis symbol indicates that this product is not to be disposed ofwith your household waste, according to the WEEE Directive(2002/96/EC) and your national law. This product should behanded over to a designated collection point, e.g., on anauthorized one-for-one basis when you buy a new similarproduct or to an authorized collection site for recycling waste electricaland electronic equipment (EEE). Improper handling of this type of wastecould have a possible negative impact on the environment and humanhealth due to potentially hazardous substances that are generallyassociated with EEE. At the same time, your cooperation in the correctdisposal of this product will contribute to the effective usage of naturalresources. For more information about where you can drop off your wasteequipment for recycling, please contact your local city office, wasteauthority, approved WEEE scheme or your household waste disposalservice. For more information regarding return and recycling of WEEEproducts, please visit www.canon-europe.com/environment.This device is designed to be used in a legal manner, in accordance withall applicable laws, including, but not limited to, counterfeit and copyrightlaws, as well as laws pertaining to national security.Any person(s) found to have reproduced any of the following materials(regardless of whether such reproduction was intentional or not) for thepurpose of misrepresenting such material as the original may beprosecuted in accordance with the applicable laws and regulations. Paper money or bank notes (domestic and foreign) Postage stamps, revenue stamps, or other similar stamps Stock certificates, bond certificates, promissory notes, cheques, orother valuable certificates Passports, licenses, or other certificates or documents issued bygovernment officials or agenciesThis is not an exhaustive list.Canon is not responsible for how this scanner is used by an individual.Please note that certain intellectual property is protected by copyright law,and copyrighted items may not be reproduced without the expresspermission of the copyright holder except for personal or household useunder limited circumstances.(EEA: Norway, Iceland and Liechtenstein)Fur EMVGDieses Produkt ist zum Gebrauch im Wohnbereich, Geschafts-undGewerbebereich sowie in Kleinbetrieben vorgesehen.DisclaimersModel NamesThe information in this document is subject to change without notice.The following names may be provided for the safety regulations in eachsales region of the Document Scanner.8
TrademarksCANON ELECTRONICS INC. MAKES NO WARRANTY OF ANY KINDWITH REGARD TO THIS MATERIAL, EITHER EXPRESS OR IMPLIED,EXPECT AS PROVIDED HEREIN, INCLUDING WITHOUT LIMITATION,THEREOF, WARRANTIES AS TO MARKETABILITY,MERCHANTABILITY, FITNESS FOR A PARTICULAR PURPOSE OFUSE OR NON-INFRINGEMENT. CANON ELECTRONICS INC. SHALLNOT BE LIABLE FOR ANY DIRECT, INCIDENTAL, ORCONSEQUENTIAL DAMAGES OF ANY NATURE, OR LOSSES OREXPENSES RESULTING FROM THE USE OF THIS MATERIAL.CANON ELECTRONICS INC. IS NOT LIABLE FOR THE STORAGE ANDHANDLING OF DOCUMENTS SCANNED WITH THIS PRODUCT, ORTHE STORAGE AND HANDLING OF RESULTING SCANNED IMAGEDATA.IF YOU INTEND TO DISCARD THE ORIGINALS OF SCANNEDDOCUMENTS, YOU THE CUSTOMER ARE RESPONSIBLE FORINSPECTING THE SCANNED IMAGES AND VERIFYING THAT DATA ISINTACT.THE MAXIMUM LIABILITY OF CANON ELECTRONICS INC. UNDERTHIS WARRANTY IS LIMITED TO THE PURCHASE PRICE OF THEPRODUCT COVERED BY THE WARRANTY. Canon and the Canon logo are registered trademarks, of Canon Inc.in the United States and may also be trademarks or registeredtrademarks in other countries. imageFORMULA is a trademark of CANON ELECTRONICS INC. Microsoft, Windows, PowerPoint, and SharePoint are registeredtrademarks or trademarks of Microsoft Corporation in the UnitedStates and other countries. Microsoft product screen shot(s) reprinted with permission fromMicrosoft Corporation. OS X and macOS are the trademarks of Apple Inc., registered in theU.S. and other countries. ENERGY STAR is a registered trademark of the United StatesEnvironmental Protection Agency. ISIS is a registered trademark of Emc Corporation in the UnitedStates. Other product and company names herein may be the trademarks oftheir respective owners. However, the TM and symbols are not usedin this document.CopyrightCopyright 2018 by CANON ELECTRONICS INC. All rights reserved.No part of this publication may be reproduced or transmitted in any form orby any means, electronic or mechanical, including photocopying andrecording, or by any information storage or retrieval system without theprior written permission of CANON ELECTRONICS INC.9
Chapter 2 Important SafetyInstructionsInstallation LocationThe performance of this scanner is affected by the environment inwhich it is installed. Make sure that the location where the scanner isinstalled meets the following environmental requirements.To ensure the safe operation of this scanner, be sure to read the safetywarnings and precautions described below. Provide adequate space around the scanner for operation,maintenance, and ventilation. When scanning documents using the straight path, provide adequatespace in front of the scanner for scanned document output. Avoid installing the machine in direct sunlight. If this is unavoidable,use curtains to shade the scanner. Avoid locations where a considerable amount of dust accumulates. Avoid warm or humid locations, such as in the vicinity of a waterfaucet, water heater, or humidifier. Avoid locations where ammoniagas is emitted. Avoid locations near volatile or flammable materials,such as alcohol or paint thinner. Avoid locations that are subject to vibration. Avoid exposing the scanner to rapid changes in temperature. If theroom in which the scanner is installed is cold but rapidly heated,water droplets (condensation) may form inside the scanner. This mayresult in a noticeable degradation in scanning quality. The followingconditions are recommended for optimal scanning quality:Installation Location. 10AC Adapter . 11Moving the Scanner. 11Handling . 12Disposal. 13When sending the scanner for repairs . 13Room temperature: 10 C to 32.5 C (50 F to 90.5 F)Humidity: 25% to 80% RH10
Moving the ScannerAvoid installing the scanner near equipment that generates amagnetic field (e.g. speakers, televisions, or radios.)AC Adapter Connect only to a power outlet of the rated voltage and power supplyfrequency (120 V, 60 Hz or 220-240 V, 50/60 Hz depending on yourregion). Do not connect other electrical equipment to the same power outlet towhich the scanner is connected. Also, when using an extension cord,make sure that the extension cord is rated for the currentrequirements of the scanner. Never try to take the AC adapter apart or modify it in any way, as thisis dangerous. The power cord may become damaged if it is often stepped on or ifheavy objects are placed on it. Do not use the power cord while it is coiled. Do not pull directly on the power cord. When disconnecting the powercord, grasp the plug and remove it from the outlet. Keep the area around the power cord clear of objects so that thepower cord can be disconnected easily in an emergency. Do not use an AC adapter other than the one provided with thescanner. Do not use the AC adapter provided with the scanner withother products. If you have any questions regarding the power supply, contact yourlocal authorized Canon dealer or service representative for furtherinformation.11 When moving the scanner, always hold it with both hands to avoiddropping it. Make sure to disconnect the interface cable and AC adapter beforemoving the scanner. If the scanner is transported with these itemsconnected, the plugs and connectors may be damaged.
Handlingpower outlet. Then, contact your local authorized Canon dealer orservice representative to have the unit serviced.Note the following precautions whenever using the scanner. Failureto do so may result in a fire or electric shock. Never place alcohol, benzene, paint thinner, or other flammablesubstances near the scanner. Do not cut, damage, or modify the power cord. Do not place heavyobjects on the power cord, and do not pull or excessively bend thepower cord. Never connect the power cord when your hands are wet. Do not connect the scanner to a multi plug power strip. Do not knot or coil the power cord as this may result in a fire orelectric shock. When connecting the power cord, make sure that thepower plug is securely and completely inserted into the power outlet. The supplied power cord set is intended for use with this scanneronly. Do not use it with other electronic equipment. In addition, do notuse power cord sets other than the one supplied with the scanner.Doing so may result in fire or electric shock. Before moving the scanner, be sure to push the power button to turn itOFF, and disconnect the power plug from the power outlet Do not install the scanner on a surface that is unstable, tilted, orsubject to excessive vibrations. Doing so may cause the scanner tofall, resulting in personal injury or damage to the scanner. Never place small metal objects such as staples, paper clips, orjewelry on the scanner. These items may fall into the scanner, andcause a fire or electric shock. Should such objects ever fall inside thescanner, immediately push the power button to turn it OFF, anddisconnect the power plug from the power outlet. Then, contact yourlocal authorized Canon dealer or service representative to have theunit serviced. Do not install the scanner in a humid or dusty location. Doing somight cause a fire or electric shock. Do not place objects on top of the scanner. Such objects may tip orfall over, resulting in personal injury. Connect only to a power outlet of the rated voltage and power supplyfrequency (120 V, 60 Hz or 220-240 V, 50/60 Hz depending on yourregion). When unplugging the power cord, grasp it firmly by its plug. Do notpull directly on the power cord, as this may damage or expose thecord’s internal wiring, resulting in a fire or electric shock. Do not take the scanner apart or modify it. Never try to take the AC adapter apart or modify it in any way, as thisis dangerous. Do not use flammable spray near the scanner. When cleaning the scanner, push the power button to turn it OFF anddisconnect the power cord from the power supply. Clean the scanner using a slightly dampened cloth which has beenwell wrung out. Never use alcohol, benzene, paint thinner, or anyother flammable substances.Leave sufficient space around the power plug so that it can beunplugged easily. If objects are placed around the power plug, youwill be unable to unplug it in an emergency. If the scanner makes strange noises, or gives off smoke, heat, orstrange odors, or the scanner does not function or otherabnormalities occur when you use the machine, immediately pushthe power button to turn it off, and disconnect the power plug from thepower outlet. Then, contact your local authorized Canon dealer orservice representative to have the unit serviced.Do not allow water or flammable substances (alcohol, paint thinner,benzene, etc.) to spill into the scanner, as this may result in a fire orelectric shock. Push the power button to turn the scanner OFF for safety when notusing the scanner for a long period of time, such as overnight. Also,push the power switch to turn it OFF, and disconnect the power cordfrom the power outlet for safety when the machine will not be used foran extended period of time, such as during consecutive holidays. Do not drop the scanner, or subject it to impact or strong shock.Should the scanner ever become damaged, immediately push thepower button to turn it OFF, and disconnect the power plug from the12
Do not wear loose clothing or jewelry that may get caught in thescanner while you are using it. This may result in personal injury. Beextra careful of neckties and long hair. If anything becomes caught inthe scanner, immediately disconnect the power cord to stop thescanner.DisposalBe careful when loading paper into the scanner and when removingjammed paper. It is possible to cut your hand on the edge of a sheetof paper.When sending the scanner for repairsWhen disposing of this scanner, be sure to follow all local ordinances andlaws or consult with the retailer who sold you the scanner.When a request is made for repairs, the scanner needs to be sent to thespecified address. When sending the scanner, use the packing box inwhich it came. Firmly secure the scanner with packaging material whenyou place it in the packing box.13
Chapter 3 Installing the SoftwareSystem requirementsTo use the scanner, your computer must satisfy the following systemrequirements.This section describes the software installation procedure using the setupdisk (DVD) that comes with this product. System requirements . 14Computer Setup Disc Contents. 15CPU: Intel Core 2 Duo 1.66GHz or fasterIntel Core i7 2.3GHz or faster Software Installation. 16 Memory: 1 GB or more8 GB or moreHard disk: 3 GB or more available space required for installationof all softwareUSB interface: Hi-Speed USB2.0Monitor: Resolution of 1024 768 (XGA) or betterrecommended.Optical drive: Drive capable of reading CDs/DVDs.Operating system Microsoft Windows 7 Service Pack 1 or later (32-bit and 64-biteditions)Microsoft Windows 8.1 (32-bit and 64-bit editions)Microsoft Windows 10 (32-bit and 64-bit editions)Microsoft Windows Server 2008 R2 Service Pack 1 or laterMicrosoft Windows Server 2012 R2Microsoft Windows Server 2016OS X 10.11*macOS 10.12macOS 10.13This is the environment as of May 2018.For the latest software support information, go to the Products pageon the Canon website.* Our wireless connection application software bundled with the DRC225W II, " NetworkMonitor" and " Wireless Connection Setup Tool"are compatible with Mac OS 10.10 and 10.12.2 or later, and do NOTsupport any other OS. If you are using 10.12.2 or later, please usethe software versions mentioned below or any higher version.NetworkMonitor: 1.4.0.342Wireless Connection Setup Tool: 1.4.0.3014
Setup Disc ContentsOther requirements An ISIS-compatible application (Windows only) or a TWAINcompatible application that is compatible with the aboveoperating systems.NET Framework 4.0 or later (Windows only)Install the following software necessary for using the s
Manuals for the Scanner Documentation for this scanner consists of the following manuals. Setup Guide This provides complete and comprehensive information about the scanner. User Manual (this manual) This manual contains complete explanations for operations on the scanner. This manual is stored on the supplied Setup Disc as an electric manual.