Transcription
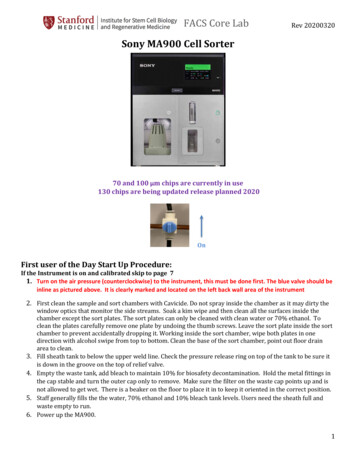
FACS Core LabRev 20200320Sony MA900 Cell Sorter70 and 100 µm chips are currently in use130 chips are being updated release planned 2020OnFirst user of the Day Start Up Procedure:If the Instrument is on and calibrated skip to page 71. Turn on the air pressure (counterclockwise) to the instrument, this must be done first. The blue valve should beinline as pictured above. It is clearly marked and located on the left back wall area of the instrument2. First clean the sample and sort chambers with Cavicide. Do not spray inside the chamber as it may dirty the3.4.5.6.window optics that monitor the side streams. Soak a kim wipe and then clean all the surfaces inside thechamber except the sort plates. The sort plates can only be cleaned with clean water or 70% ethanol. Toclean the plates carefully remove one plate by undoing the thumb screws. Leave the sort plate inside the sortchamber to prevent accidentally dropping it. Working inside the sort chamber, wipe both plates in onedirection with alcohol swipe from top to bottom. Clean the base of the sort chamber, point out floor drainarea to clean.Fill sheath tank to below the upper weld line. Check the pressure release ring on top of the tank to be sure itis down in the groove on the top of relief valve.Empty the waste tank, add bleach to maintain 10% for biosafety decontamination. Hold the metal fittings inthe cap stable and turn the outer cap only to remove. Make sure the filter on the waste cap points up and isnot allowed to get wet. There is a beaker on the floor to place it in to keep it oriented in the correct position.Staff generally fills the the water, 70% ethanol and 10% bleach tank levels. Users need the sheath full andwaste empty to run.Power up the MA900.1
Rev 202003207. The Aerosol Management System is unique for this system. It is only activated to clear aerosols for 30sec-1minute before opening the collection chamber. The unit is NOT ON during the sort. ONLY activated brieflybefore opening the sort chamber. Demonstrate on/off functions of the Buffalo unit and use of the foot pedalcontrols.8. *Once the system has been setup, in order to empty the waste or fill sheath you must put the MA900 in“standby” mode. Directions for putting the machine in standby are located on page 6*. If you fail to do thisit will result in having to recalibrate the system and a significant loss of time.9. Log in to Windows. Account: guest1, password: guest.10. Once the MA900 is in Standby, start the Cell Sorter Software.11. Log in with your username and password.Automated Alignment and Sort Setup (30 minutes) Read all prompts and respondATTENTION: QC takes 30-40 minutes, to help assist in passing clean the plates, and aspirator. During thefluidics start up select clean sample line, and sheath filter de-bubble prior the QC is recommended.o Side streams may not form if the plates are not clean and dryo If sample line is dirty it may not deliver adequate beads to pass QCo Air in sheath filter will cause instability of the stream and cause failure of sort parameterso Full sheath tank promotes stability1. After log in, you are prompted to scan and load the new chip – Chips are good for 24h and the previous day’schip can be reused if 24h has passed. If continuing use on the current chip, simply open the instrument frontand reload the current chip once it is ejected. Load/exchange the chip following the onscreen instructions.Write date and time on the package if using a new chip.i. To load a chip – feed the chip until the soft stop, then gently engage the last ¾ inch demonstrate.ii. Select the desired lasers, the 488 nm laser is mandatory select other desired lasers.iii. Select the Standard filter configuration for the instrument (this is the system not your application setting).iv. Follow prompts on screen to check sample line for back flush.2. During the fluidics start up select the Sheath Filter De-bubble option and Sample line cleaning (this will do a10% Bleach and Sterile DiH20 clean for 8-10 minutes) available on the bottom of the screen during start upbefore running the QC beads.3. Before you run the beads check to be sure the plates are clean and dry. Occasionally they will get wetduring the fluidics startup and if they are not cleaned and dry it may cause a failure in your QC and asignificant loss of time.4. Run Autocalibration. NO CAP on tube.i. Mix the Sony beads vial gently and dispense about 1 ml intoa tube (can be polystyrene or polypropylene), place 1 ml ofSony beads in the correct 5ml tube holder on machine.When prompted, load the calibration beads. Make sure thetube goes to the bottom of the tube holder.ii. Selected the Targeted Steam option.iii. Step one of the calibration aligns the chip and finds thetarget fluorescent sensitivity and sets the laser delay. Thistakes approximately 10 minutes. Steps 2-4 fine tune thestream profile, side streams, drop charge and sort delay.This takes approximately 30 minutes.iv. If autocalibration fails, check the log file for failure explanation, check that the plates are clean and dry, do asheath filter de-bubble.2
Rev 20200320v. If this does not resolve the issue, check the optical filters, sheath tank seal, check front cytometer pane forliquid levels. Text or call staff forassistance.Experiment Setup1. Filter all samples including controls 40umesh.2. Select the experiment you would like touse, or the Blank Template.3. On the upper right, change the experimentname.4. Fill in other information for yourexperiment.5. Check or uncheck the fluorescentparameters that are needed and name theparameters if you wish.6. Turn on/off lasers for your experiment. Be sure that the488nm laser is on.7. Click Create New Experiment in the lower right of themonitor.When running a compensation matrix1. There are 2 methods for compensation available thewizard and manual.2. Choose to start compensation wizard if you are sortingwith multiple fluorochromes and have prepared singlecolor controls.3. Click OK to continue4. Flow rate is controlled by sample pressure setting.5. Follow the wizard’s instructions and run the negativecontrol and adjust the FSC and BSC in Detector & Threshold settings to get the populations on scale. Brieflyload a fully stained sample at this point (do not record it) and verify that none of the positive populations areoff scale. If they are, lower the PMT value to get them back on scale.6. Then reload the negative control and record. Adjust the gate such that it is around the correct scatterpopulation.7. Acquire the single-stained controls, adjust the gate around thepositive populations, then click Calculate Matrix. The shape of therecord button changes from circular to square when data is beingrecorded.8. Click Finish to end the Wizard.ooIf no compensation is necessary, select Detector & Threshold Settings.Adjust FSC gain and BSC gain such that your cells are on scale.3
Rev 20200320ooooAcquire enough events for the sample to be sorted so that you can set gates. Pause the acquisition.Create plots on the worksheet. Double click inside gates to create gated plots or change the gates byclicking on the gate name at the top of a plot. Be sure to include a singlet gate based on FSC-A vs FSC-H orFSC-H vs FSC-WAdjust gate settings for populations of interest.Set the value to record to 5,000 or 10,000 events. If the population is rare, record more events.9. Start making graphs and approximate gates for your experiments. Created elements, plots and approximategates before collecting data will allow them to be available in all the tubes. If you forget you can copy theworksheet elements to the following tubes.Tube sorting setup1. Select the desired sort mode. Purity or Semi-Purity is recommended.2. Set the sort gates. Indicate the number of cells to be sorted or leave the value at 0 to sort continuously.3. To check trajectory of your side streams, load a targeting tube with tape or parafilm on top so you can see thedrop deposited in your sample collection holder. Place sample collection holder in sort collection chamber.4. In the cytometer ribbon select the black toolbox labelled settings. Select Advanced Settings tab near thebottom, in the stream window bottom left, select Load Collection, then hit Start to deposit fluid and checkstream trajectory, adjust if necessary, by clicking the arrows on the right. Once targets are defined loadcollection tubes with media for sort.5. Place the collection tube holder into the collection area and set collection tubes.6. Click “Next Tube” to create a new tube.7. Click “Load Collection”.8. Make sure flow rate is stable, click “Start” to load sample tube and start acquiring.9. Hit “Sort & Record Start” to sort and save data for the sample.10. Run the sample pressure at a maximum of 6 during sorting.11. From the Cytometer tab, you can adjust temperature control for the sample and collection, chamber lightsand agitation.12. Monitor the collection tubes change them when they are full. Turn on Aerosol management unit for 60seconds before opening the chamber. The unit must be off for sorting.4
Rev 2020032013. To change tubes: Pause the sample, Unload Collection, switch tubes, load collection and the sort will continue.14. To stop the sort, press the black Stop button. On/off aerosol management. The Aerosol Management Systemon this unit it is ONLY on when you are removing a sample after sorting, or to clean the unit after a clog.Turn on the unit using the power button bottom left front. Hit the foot pedal on the floor to activate suction.Leave the unit evacuating for 30-60 seconds. THE UNIT IS OFF WHEN YOU ARE SETTING UP ANDSORTING. It is only active when the door is to be opened after BSL-2 sorting or in event of a clog. Turn offunit immediately.Sorting into a Plate1. Install splash guard, plate stand and plate holder (stored in refrigerator).2. Change the Sort Method to 96 or 384-well plate.3. Start the sample, then Pause when enough cells are seen to set sorting gates. Pause the sample and set thegates.4. Click on Sort Settings to open the 96 well sort setup and plate adjustments5. Load a plate with the cover on.6. Select the Plate Adjustment tab.7. Choose either to deflect empty drops of sheath fluid, or to run the sample (preferred).8. Select ‘4 corners and center well’9. If running the sample, select the gate to use (typically the singlets).10. Click ‘Start’ and the MA900 will sort 50 drops into the corner wells and a center well.11. When it finishes, Pause the sample and Unload the plate(automatic if the sample is not running). You can remove theplate to check the drop positions over the wells. Note theadjustments needed, and re-load the plate. Click on each cornerone at a time, and adjust the drop position. The defaultadjustment of 1 mm can be changed down to 0.1 mm if desired.Once the adjustments are finished, click ‘Start’ again.12. Remove the plate to be sure that the adjustments are correct,re-do if necessary.13. Select the wells to be sorted:o In the Plate Sort Settings tab, highlight the wells to be sorted. Select the gate and Stop Count, then clickAdd.o Check the Index Sort box if desired.14. Remove the plate lid.15. Click ‘Index Sort & Record Start’.16. When sort is finished, you will have the option to continue sorting an additional plate. Click continue if youwish to sort additional plates with the same sample. You will have the opportunity to change sort criteria.Selecting “no” will require that you unload/reload the sample. On/off aerosol management17. Remove the plate holder (store in refrigerator) and splash guard.18. To analyze index sort data, click on the Worksheet Tools and ‘Analyze Index Data’*If the waste needs to be emptied or sheath filled after the auto calibration hasalready been done, it will need to be put in standby mode. If you do not put the machine instandby mode and attempt to empty the waste, the stream will shut off and you will have to run the autocalibration again.To put the machine in standby mode:1. From the cytometer ribbon, select “settings” (a)2. On the settings panel, select “advanced settings”5
Rev 202003203. On the “pressure options” tab, select “standby” (b)4. Once you have replaced the tank after emptying and adding bleach, or filled the sheath tank select “ready” (c)Data Export1. FCS file export: right click on the Experiment (scroll up past all the sample tubes to the top of theexperiment), and select Export as FCS Files, or in the Experiment tab, select Export FCS Files from theribbon.2. The button lets you browse to the appropriate folder.1. click export àclick close3. A PDF of the experiment layout, including sort setup and a screenshot of the gates can be saved by clickingcustom print (in the Worksheet Tools Ribbon).4. Experiment export: From the File menu, select Database. Click on the experiment to export, then on thearrows to move it to the export window on the right.5. The button lets you browse to the appropriate folder C:\Facsdata.6. This saves the entire experiment and allows you to save the data, the plots and the gates. It is recommendedthat you do this export in order to have a full backup of the experiment. It can then be deleted and importedback into the database if necessary.7. On the desktop use the data upload icon to upload your experiment to box, the same procedure for all ourcytometers is used.8. Check the scheduler to see if you are the last userClean upIf NOT, the last user of the day:1. From the Cytometer tab, select Bleach Clean.Prepare 15 ml tube with 10 ml of 10% bleach. Placeon tube holder and proceed with cleaning. This willtake 6 minutes, and approximately 7 ml of bleachwill be run through the sample tubing and chip.2. From the Cytometer tab, select Shutdown Rinse.Prepare a 15 ml tube with 12 ml of Di water. Placethe tube on the holder and proceed with the rinse.This will take another 6 minutes.3. Log out of the software.4. When the box comes up asking if you are sure youwant to log out, check the box that says “Keep sortcalibration.” If you do not check the box, the nextperson will have to run the auto calibration againbefore sorting.5. If there is more than a 2 hour gap between log-ins, the machine will shut the stream off and the autocalibration will have to be run again at the next log.Shut Down1. If the last user, from the Cytometer tab (a), select Hardware and Software Shutdown (b). The cleaningwizard will start. Prepare a 15 ml tube with 12 ml of 10% bleach. Place on tube holder and proceed withcleaning. This will take 6 minutes, and approximately 7 ml of bleach will be run through the sample tubingand chip.6
Rev 202003202. After the bleach cleaning is finished, you will be prompted to prepare a 15 ml tube with 12 ml of Di water.Place the tube on the holder and proceed with the rinse. This will take another 6 minutes.3. Select Shutdown to power down the instrumentand you will also be logged out of the software.4. Turn off the air pressure with switch on wall(Rotate valve to horizontal position not in linewith the fitting).OffQuick Start Instructions if the machine is already set up.When the previous user has already setup the chip and left the instrument on for you. When the last userlogged out they must have clicked on “Keep autocalibration for next user”. The machine is alreadycalibrated for you.1. Login to the software with your username and password. Create your experiment or select a template you havesaved. Select desired lasers and parameters and label fluorophores.2. If the Waste and Sheath fluid levels are low (check the instrument panel), it is recommended that you refill themnow. To do so, you should first put the instrument in “Standby” mode. This turns off the stream and depressurizesthe instrument. (Cytometer tab Settings “Advanced setting” “Pressure Options” “Standby” button). Do notclose this dialog box.3. IN STANDBY MODE: Empty the waste container and refill the sheath fluid. Be sure to depressurize the sheathfluid tank by disconnecting the air pressure hose. It has a snap-fit connection. For the waste container, hold thefitting stationary and twist the plastic white cap. Do not tilt the waste container fitting. Keep the filter pointed so itdoes not get wet. Put it inside the beaker to the side. This prevents liquid from entering and clogging the air filter.4. IN STANDBY MODE: Clean the sample and sort chambers with Cavicide. The sort plates can only be cleaned withsterile water or 70% ethanol. To clean the plates carefully remove one plate by undoing the thumb screws. Leavethe sort plate inside the sort chamber to prevent accidentally dropping it. Working inside the sort chamber, wipeboth plates in one direction with sterile water or alcohol swipe top to bottom. Clean the sides and floor of the sortchamber where the waste goes. The side windows need to be cleaned for side stream evaluation demonstratecleaning these windows.5. IN READY MODE: Put the machine back into “Ready” mode. In the same “Pressure Options” dialog box, click on“Ready” button. The machine will now start re-pressurizing.6. Run the bleach cleaning (Cytometer tab “Bleach Clean” button on the ribbon). Follow the prompts. Clean with15mL conical.7. Run the DI Water clean (Cytometer tab “DI Rinse” button on the ribbon). Follow the prompts. Clean with 15mLtube. You’re now good-to-go.8. (OPTIONAL) While cleaning is running, you can start making graphs and approximate gates for yourexperiments. Created elements, plots and approximate gates before collecting data will allow them to be availablein all the tubes. If you forget this step you can copy the worksheet elements to the next tube.9.The Aerosol Management System for this unit is ONLY on when you are removing a sample after sorting or toclean the unit after a clog. Turn on the unit using the power button bottom left of unit. Hit the foot pedal on thefloor to activate suction. Leave the unit evacuating for 30-60 seconds. THE UNIT IS OFF WHEN YOU ARESETTING UP AND SORTING. It is only active when the door is to be opened after BSL-2 sorting or in event of aclog, then turn it off immediately7
Rev 20200320Please pick only ONE dye per columnumn.8
Rev 202003209
Rev 2020032010
Rev 2020032011
Sony MA900 Cell Sorter 70 and 100 µm chips are currently in use 130 chips are being updated release planned 2020 On . Sony beads in the correct 5ml tube holder on machine. When prompted, load the calibration beads. Make sure the tube goes to the bottom of the tube holder.