Transcription
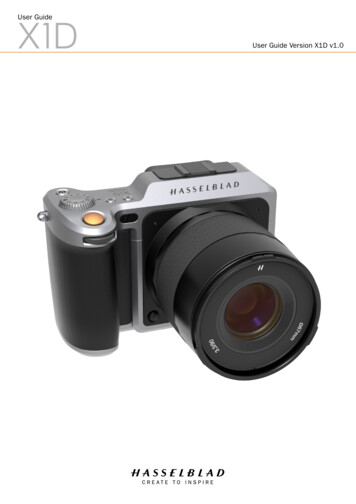
User GuideUser Guide Version X1D v1.0
USER GUIDE Content12Introduction 61.11.21.31.41.579101111Interactive PDF 11Search Tools 11Format and Printing the X1D User Guide 11Safety 2.12.22.32.42.52.63Medium Format Photography Check the Delivery X1D Technical Specifications System Requirements About this User Guide Safety and Warnings Cautions Disposal FCC ISED Certification Information Functions 3.13.2The X1D Interaction Displays Touch Display Navigation Zoom in and out on the Touch Display 3.33.43.53.63.73.83.9X1DNavigating the Menus 121313141515151617181920Description of the Touch Display Menu Items 20Overview of Menus and Settings on Touch Display 21Touch Display Main Menu 22Main Menu 22Add shortlinks to Main Menu Favourites 22How to Add shortlinks to Main Menu 23How to Remove shortlinks on the Main Menu 23Control Screen 24Locked Programs on the Control Screen 24Settings on the Control Screen 25Parts, Components, Buttons and Controls Grip Buttons and Controls Camera Body Buttons and Controls Mode DIal Exposure Program Modes 2831323334Manual Exposure Mode 35Manual Quick Exposure Mode 36Automatic Exposure Mode 37www.hasselblad.com2
USER GUIDE 3.103.113.123.133.143.15Custom Modes 38Automatic Exposure - P Mode 39AE-L Button 40Fixed Exposure Compensation Setting 41Exposure Compensation / Quick Adjust 42Light Meter Exposure Mode Video Recording Connector Ports Memory Cards 43444546Insert a Memory Card 47Remove SD Memory Cards 48Format SD Cards 49Format Memory Cards via Touch Display 49XCD Lenses 50Hasselblad XCD 45 Lens, 45 mm 50Hasselblad XCD 90 Lens, 90 mm 50Remove and Attach a Lens 51Remove the Lens 51Attach the Lens 52Remove the Lens Cap 53Attach the Lens Cap 53Remove the Lens Shade 54Attach the Lens Shade 54Filters 553.163.173.18Display Information Touch Display and Controls Electronic Viewfinder Display EVF Typical Viewfinder Display 3.19Focus 5657585860Focus Assist 60Manual Focus 61Manual Override in Autofocus Mode 61Auto / Manual Focus Setting 61Autofocus 623.20Single Shot Focus 63Continuous Focus 63Stop Down Button Stop Down / Depth of Field Preview 3.213.22Change Settings on the Grip 6465To Adjust Shutter and Aperture on Grip 66ISO and White Balance 67Browsing, Preview and Histogram Browse Captures X1D646868www.hasselblad.com3
USER GUIDE 3.233.243.253.26Select Card to Browse 68Standard Preview 699 View Mode 69Histogram Types 70Histogram Mode 70Capture Details Mode 70Luminance Histogram Mode 70Separate Histogram RBG Mode 70Histogram Mode - Exposure 71Phocus Overview Phocus Features in Phocus 73Phocus Mobile 73Connect to a Computer Camera Configuration in Phocus Phocus and Hasselblad Capture Files 3.273.283.293.3044.34.4X1DBattery 74757677Battery Charger 78Charge the Battery 78Rechargeable Battery Specification 79Battery Life and Battery Warning 80Temperature Warning Store the Camera Carrying Strap 808081Attach the Carrying Strap 81Remove the Carrying Strap 82Settings 4.14.27273Camera Settings Menu Camera Exposure Settings 838484Exposure Adjust 85True Exposure 86Flash Settings 88Flash and Strobe Settings 89Exposure Lock 90AE-L (AE-Lock) / Quick Adjust 91Image Orientation 92Camera Focus Settings Camera Live View Settings 9394Live View 95Zooming in Live View 95Focus in Live View 95Live View with HDMI External Screen 96www.hasselblad.com4
USER GUIDE 4.54.6Camera Configuration Settings Video Settings Menu Video Settings nu WI-FI Display Storage 6.49999100101Format Card 101Image and Video Destination SettingsDate and Time Power and Timeouts Language Service Check for Update About About Certification 103104105106107108109110XCD Lens Range 111XCD 45 Lens 111XCD 90 Lens 111XCD HC Lens Adapter 111Optional HC Lens Accessories 112HTS 1.5 112CF Adapter 112H 13, 26 and 52 Extension tubes 112Optional Accessories 113Pro shade V/H 60 – 95 113Pro shade adapters 113UV-sky filters 114Pola filters 114Support strap with Quick plate H 114Camera strap H 114Troubleshooting ssories 5.16GeneralGeneralGeneralGeneral9798Error Messages Change Language on Sensor Unit from Unknown Language Clean the Lens Glass 115117118119Remove Dust 119Remove Smear 119Clean the Sensor Unit Filter 120www.hasselblad.com5
1INTRODUCTION
Introduction1.1USER GUIDEMEDIUM FORMAT PHOTOGRAPHYMedium Format Photography is about Quality. CameraSystem Design and Production have to be carefully crafted.The Usability needs to be simple and still detailed to assureQuality. The Captures have to be accurate in terms ofExposure, Focus, Color Quality and Reliability.Hasselblad knows this and strives to deliver it to you.The Hasselblad X1D is a completely new Medium FormatCamera with the Professional Quality inherited from the H6Dthat has been redeveloped from the ground up.In this way all the previous workexperience based and branchdemanding features are automatically included. So, just whenyou think things can't get much better, they do. And the X1D isthat model - all the good things from our past and ready for thefuture!have access to a more comprehensive world to apply mediumformat quality to.Hasselblad's best kept secret is knowing that every link in thechain that leads to the page in the magazine has to reach acertain standard; it is that simple.That's why Hasselblad spends so much time and energy intochecking those almost endless behind-the-scenes details andstandards because We understand this simple concept.There is no magical formula to Hasselblad s success other thanan understanding of what is required to produce the best resultsavailable in the world today and an acceptance that there are noshortcuts in this process.We do our best to produce the best, there is no other way toachieve the Hasselblad star quality.The X1D provides a reliable connection to the fleetingenvironment of digital imaging technology so when the windchanges direction, the X1D remains as the safeguardingcompanion to provide support.True to Hasselblad philosophy, interchangeability and versatilityspan our product range regarding lenses and accessories withminimal restrictions. This applies not only to X1D but all H1,H2, H3, H4, H5 and H6 models as well. The all new XCD lenssystem additionally breaks rank regarding series limitations withthe ability to use other lenses from the H system. In short, youX1Dwww.hasselblad.com7
USER GUIDEIntroductionX1D FeaturesMedium format advantagesShallow depth of field.Large sensor for unbeatable image resolution.Super smooth color and tone rendition.Enlargements in breathtaking quality.HNCS - Hasselblad Natural Color SolutionHNCS saves time and enables high Color Quality in skin tonesand specific product tones that are going to be renderedautomatically and accurate.True FocusTrue Focus is a feature for many professional photographerswho work fast and by instinct. They don’t have the time todouble check focus for every single split second shot andneither do they have the time to get it wrong. True Focus deliversthe sharpness in an intuitive manner, at speed.IFC - Immediate Focus ConfirmIFC are for True Focus users who have a second to spare and adesire to know the focus is exactly on target regarding specificareas. Intuitively and directly displays inspection of captures at100% pinpointing the original focus selection.JPEG & RAW filesThe JPEG files are not only 1/4 resolution they are also HNCprofiled so you can print straight from a folder for amazingquality. RAWs are retained of course for your final masterpieces.Digital Lens CorrectionThe Digital Lens Correction is applied at the file editing stage,takes a discerning look at any colour aberration, distortionand light fall off however minor (which is inherent in any lens,anywhere) and resolves the situation automatically.X1D Camera and Lenses featuresStainless steel/aluminium camera body.Access to 12 H system lenses.Access to most V system lenses by CF Adapter accessory.Access to all H accessories.XCD System lenses and accessoriesXCD 45 Lens.XCD 90 Lens.H System Lenses and AccessoriesAdapter to use H system Lenses.Lenses: 24, 28, 35, 50, 80,100,150, 210, 300120 Macro50-110 & 35-90 zooms1.7x converter & Macro converterCF adapter (to be able to use V system lenses) HTS 1.5 tilt/shift adapterGIL (Global Image Locator)Battery Adapter for technical camera useX1Dwww.hasselblad.com8
USER GUIDEIntroduction1.2CHECK THE DELIVERYBATTERYPROTECTIONCOVERHOT SHOECOVERBATTERYELECTRONICVIEWFINDEREVFFRONT PROTECTIVECOVERCAMERA BODYLENS RELEASE BUTTONLENSIn the packageCheck the DeliveryUSB stick with X1D User Guide and Phocus Software.1 Unpack all items.2 Make sure that all the itemslisted on the attached packageinformation are supplied.3 Inspect all the items for damage.4 If any items are missing ordamaged, write down the productnumber of that item. If not,proceed to step 6.5 Contact your Hasselblad dealeror distributor and tell them theproduct number of the itemmissing or damaged.6 Keep the purchase details and thewarranty in a safe place.Camera BodyCamera Front Protective CoverLens (if included in purchase)Lens HoodLens Protection lid x2BatteryBattery Protection CoverBattery Charger1 SD Card includedUSB 3 CableCarrying StrapX1Dwww.hasselblad.com9
USER GUIDEIntroduction1.3X1D TECHNICAL SPECIFICATIONSCamera typeMedium Format Mirror less Digital camera with Auto-focus, Auto-exposure, interchangeable Lenses.ConstructionMachined aluminium. Tripod socket 1/4”Sensor typeCMOS, 50 megapixels (8272 6200 pixels, 5.3 5.3 µm)Sensor dimensions43.8 32.9mmImage sizeStills: RAW 3FR capture 65MB on average. TIFF 8 bit: 154MB; Video: HD (1920 x 1080p)File formatStills: Hasselblad 3FRVideo: H.264 Compressed (25 fps)Shooting modeSingle shot stills, VideoColour definition16 bit; Dynamic range approx. 14 stopsISO speed rangeISO 100, 200, 400, 800, 1600, 3200, 6400, 12800, 25600Storage optionsTwo SD cards or tethered to Mac or PCColour managementHasselblad Natural Colour Solution, HNCSStorage capacity16GB card holds 240 images on averageCapture rateTBDDisplay and User Interface3 inch TFT type, 24 bit colour, 920K pixels; Touch functionality: Yes, full support. Live View: On camera, host and iOS device with highframe rate. Full touch user interface, including swipe, scroll and pinch/spread to zoom. Camera grip with buttons and control wheels.Many camera functions and settings can be controlled from a tethered computer or iPhone/iPad over Wi-Fi.Viewfinder (Electronic, EVF)2.4 MPixel Electronic Viewfinder (EVF)Histogram feedbackYes, on rear display and in viewfinderIR filterMounted in front of sensorSoftwarePhocus for Mac and Windows. Compatible with Adobe Camera and Adobe Photoshop Lightroom.Platform supportMacintosh: OSX version 10.9; PC: XP/Vista/Windows 7 (32 and 64 bit)/ 8 / 10Host connection typeUSB 3.0 (5 Gbit/s) Type-C connectorAdditional connectionsMini HDMI, Audio In/OutOperating temperature-10 - 45 C / 14 - 113 FWi-Fi802.11 a, b, g, n (depending on region), acDimensionsComplete camera w/ XCD 45mm lens: 148 x 97 x 125mm [W x H x D]Weight1170 g (Complete camera w/ XCD 45mm lens, Li-Ion battery and card)LensesHasselblad XCD lenses with built-in electronically controlled shutter and aperture. Automatic or manual focusing with instant manualfocus override. All HC/HCD lenses can be used with an adapter (optional). Lens shades can be mounted in reverse for transport.ShutterElectronically controlled lens shutter with speeds up to 1/2000. Flash sync at all speeds.Shutter speed range60 minutes to 1/2000 sec with XCD lenses. 1/800 or 1/1000 with HC/HCD lenses.Flash sync speedFlash can be used at all shutter speeds.Flash controlTTL centre-weighted system. Compatible with NikonTM System flashes. ISO range 100 to 6400. Flash output can be adjusted (-3 to 3EV) for fill-in purposes independent of ambient light. Sync at all shutter speeds.FocusingAutomatic and manual focusing with electronic focus aid in manual mode. Instant manual focus override. Automatic focusing usingcontrast detection.Exposure meteringSpot, Center Weighted and Center SpotMetering range Spot: EV2 to 21, Center Weighted: EV1 to 21, Center Spot: EV1 to 21Auto BracketingBracketing using predetermined number of captures (2, 3, 5, 7 or 9) and EV step difference intervals.Power supplyRechargeable Li-ion battery (7.2 VDC/3200 mAh)Interval TimerNumber of captures from 2 to ‘no limit’ and interval from 1 second to 1 hour.ISO RangeISO 100 - 25600CustomizationSome of the X1D’s functions can be customized by the user to suit specific styles or situations through the built-in menu system.X1Dwww.hasselblad.com10
Introduction1.4USER GUIDESYSTEM REQUIREMENTSStorage and editing of images requires a certain minimumstandard regarding computer capabilities. Large images requirea reasonably high-performance computer with sufficient memory,advanced graphics capabilities and a recent operating system.It is recommended that the computer has a USB 3 connector,which will allow you to load images more quickly from thecamera. A USB SD card reader can also be used for imagetransfer from the SD cards.1.5ABOUT THIS USER GUIDEThe X1D User Guide is designed for onscreen PDF reading totake advantage of the interactivity functions and search tools.INTERACTIVE PDFYou can navigate the User Guide by selecting a chapter in theTable of Contents. This interactive feature is available on nearlyall PDF readers, computer plattforms and webbrowsers.SEARCH TOOLSOn most PDF readers you can use the Seacrh Tool to find aspecific subject, function or setting.FORMAT AND PRINTING THE X1D USER GUIDEPlease note that the format is A4 to conform with the mostcommon standard. Therefore if printing out to US Letter formator similar please ensure you select “Fit to Printable Area” in thepage scaling dialogue.X1Dwww.hasselblad.com11
2SAFETY
Safety2.1SAFETY AND WARNINGSWarning!Do not place cables between camera and computer so thatthere is a risk for people to trip and fall. This can causepersonal injury and/or damage to the equipment.Warning!If you use spare battery packs, make sure to use protectivecaps on the contacts. The contacts can short-circuit and catchfire if not protected. This can cause personal injury and/ordamage to the equipment.Warning!Do not expose batteries (battery pack and batteries installed) toexcessive heat such as sunshine, fire or similar. If exposed, thebatteries can catch fire. This can cause personal injury, damageto the equipment and the surrounding environment.Warning!Be careful when working with strobe and flash units. This willprevent personal injury and/or damage to the equipment.Warning!Operation of this equipment in a residential area could causeradio interference.2.2CAUTIONSCaution!Be careful when you use the camera. The camera is a precisioninstrument. This will help prevent damage to the camera.Caution!Danger of explosion if battery is incorrectly replaced. Replaceonly with the same or equivalent type.Caution!Do not use batteries other than specified. This can causedamage to the batteries.Caution!Use protective covers as much as possible. The protectivecovers will help prevent damage to the equipment.Caution!Use a protective case or camera bag when you transport theequipment. This will help prevent damage to the equipment.X1DUSER GUIDECaution!Protect the equipment from oil fumes, steam, humid conditionsand dust. This will help prevent damage to the equipment.Caution!Seal all equipment in a plastic bag or similar if you enter dampand humid condition from dry and cold condition. Wait until theequipment has acclimatized to the new temperature before youremove the equipment from bag. This will help prevent damageto the equipment.Caution!Avoid frequent and high temperature changes. This can causedamage to the equipment.Caution!Keep camera and equipment away from moisture. If your camerabecomes wet, disconnect from electric power and let cameradry before further use. This will help prevent damage to theequipment.Caution!Store the equipment in a dry environment. This will help preventdamage to the equipment.Caution!Be careful when you attach/detach the components to/fromthe camera. This will help prevent damage to the data busconnections.Caution!Use the grip or strap when you lift and handle to camera. Thiswill help prevent damage to the camera.Caution!Do not insert fingers into the camera body. This can causedamage to the equipment.Caution!Do not touch the lens glass surfaces with your fingers. This cancause damage to the equipment.Caution!Do not touch the CMOS Sensor with your fingers. This cancause damage to the equipment.www.hasselblad.com13
USER GUIDESafetyCaution!Keep all equipment out of reach of small children. This willprevent damage to the equipment.Caution!When cleaning the camera, remove the batteries. This willprevent damage to the camera.Caution!If you leave the camera unused for a long period, remove thebatteries. This will prevent damage to the equipment.Caution!Do not try to remove the glass IR filter from the front of theCMOS (due to dust or similar). This can cause damage to theequipment. Always contact your local Hasselblad AuthorizedService Center.Caution!If you use canned compressed air to clean the glass of IR filter,read the instructions very carefully before use. This will helpprevent damage to the filter.2.3DISPOSALThis product must be put in municipal waste.Check local regulations for disposal.X1Dwww.hasselblad.com14
USER GUIDESafety2.4FCCFederal Communication Commission Interference Statement:This equipment has been tested and found to comply with thelimits for a Class B digital device, pursuant to Part 15 of theFCC Rules. These limits are designed to provide reasonableprotection against harmful interference in a residentialinstallation.This equipment generates, uses and can radiate radiofrequency energy and, if not installed and used in accordancewith the instructions, may cause harmful interference toradio communications. However, there is no guarantee thatinterference will not occur in a particular installation. If thisequipment does cause harmful interference to radio ortelevision reception, which can be determined by turning theequipment off and on, the user is encouraged to try to correctthe interference by one of the following measures: Reorient or relocate the receiving antenna. Increase the separation between the equipment andreceiver. Connect the equipment into an outlet on a circuitdifferent from that to which the receiver is connected. Consult the dealer or an experienced radio/TV technicianfor help.FCC CautionAny changes or modifications not expressly approved by theparty responsible for compliance could void the user’s authorityto operate this equipment.This device complies with Part 15 of the FCC Rules. Operation issubject to the following two conditions:1 This device may not cause harmful interference, and2 this device must accept any interference received, includinginterference that may cause undesired operation.FCC Radiation Exposure Statement:This equipment complies with FCC radiation exposure limits setforth for an uncontrolled environment. The highest SAR value asreported to the authorities for the X1D-50c when tested for useby the Body is 0.10 W/kg and Extremity is 0.33W/kg against alimit of 1.6W/kg.2.5ISEDRSS-Gen Information for the Certification of Radio ApparatusThis device complies with ISED licence-exempt RSS standard(s).Operation is subject to the following two conditions:1 this device may not cause interference, and2 this device must accept any interference, includinginterference that may cause undesired operation of thedevice.Cet appareil est conforme au(x) standard(s) RSSexempt(s) de licence de ISED. Son fonctionnement estsujet aux deux conditions suivantes:1 cet appareil ne doit pas occasionner d’interférence2 cet appareil doit supporter toutes les interférences, ycompris celles qui pourraient provoquer un mauvaisfonctionnement de cet appareil.RSS-102 RF Exposure Compliance of RadiocommunicationApparatusThe X1D-50c has been designed to comply with safetyrequirements for exposure to radio waves. SAR testing hasbeen performed in accordance with RSS-102, with the X1D50c transmitting at its highest certified power level in all usedfrequency bands. The highest Body SAR value for the X1D50c when tested was 0.10 W/kg against a limit of 1.6 W/kg.Extremity SAR was measured to 0.33 W/kg.Please follow the instructions included in the user guide forproduct installation and use.Le X1D-50c a été conçu pour se conformer aux exigences desécurité en matière d’exposition aux ondes radio.Des tests SAR ont été effectués conformément à la RSS102 avec le X1D-50c transmettant à son plus haut niveaude puissance certifié dans toutes les bandes de fréquencesutilisées.La valeur SAR la plus élevée pour la X1D-50c lors des testsétait de 0,10 W/Kg contre une limite de 1.6 W/kg. On a mesurél’extrémité SAR à 0,33 W/kg.Merci de suivre les instructions fournies dans le mode d’emploipour l’installation et l’utilisation du produit.2.6CERTIFICATION INFORMATIONDepending on region certification information in addition to whatis engraved on the camera bottom can be found on an e-label.From the Main Menu this label is reached by pressing GeneralSettings About Certification.X1Dwww.hasselblad.com15
3FUNCTIONS
USER GUIDEFunctions3.1THE X1D INTERACTION DISPLAYSFront Scroll WheelEVF - ELECTRONICVIEWFINDER DISPLAYMode DialTOUCH DISPLAYRear Scroll WheelElectronic Viewfinder Display, EVFElectronic Viewfinder Display, EVFThe EVF on the Camera displays ISO, Focus action, Exposurecompensation, Aperture, Shutter and Captures remaining. Pressthe MF / AF and the ISO / WB buttons to change settings. Usethe Front Scroll Wheel or the Rear Scroll Wheel to select desiredsettings. Press the same button again to Exit and Save.X1DTouch DisplayTouch DisplayThe X1D display is touch sensitive and you can use it in thesame way you navigate on a smartphone. Swipe, select, pinchand spread to zoom for example. You can also navigate by usingthe 5 soft buttons to the right of the Touch Display and ScrollWheels on the Camera.www.hasselblad.com17
USER GUIDEFunctions3.2TOUCH DISPLAY NAVIGATIONThe Touch Display on the X1D Camera is similar to a Phone orTablet with touch sensitivity. The following gestures can be usedto navigate and control the camera:Action FunctionSwipe RightMove back / Move image right.Swipe LeftMove image left. Only in Browsemode.Swipe DownDisplay Control Screen.Swipe UpHide Control Screen.Tap / PressSelect action / button / setting.Double TapZoom in to 100%. Double Tap againto Zoom out to full View.Swipe RightSwipe LeftSwipe DownSwipe UpFunction ActionSelectTap / Press with one finger.Display Control ScreenSwipe down from the top of thescreen.Hide Control ScreenSwipe up.Move backSwipe right.Zoom inZoom outSpread (move two fingers apart).Pinch (move two fingers together).Display Control Screen from Main Menu1 Swipe down over Main Menu to display the Control Screen.Swipe down by starting on the upper part of the Sensor UnitDisplay near the top edge.Swipe Down2 The Control Screen displays the Camera Settings.3 The Control Screen is interactive, select any of the settingsto make a quick adjustment within the Control ScreenInterface.Main Menu4 Swipe Up to hide the Control Screen and display the MainMenu.Swipe UpControl ScreenX1DControl ScreenMain Menuwww.hasselblad.com18
USER GUIDEFunctionsZOOM IN AND OUT ON THE TOUCH DISPLAYThe Touch Display on the X1D Camera is similar to a Phone orTablet with touch sensitivity. The following gestures can be usedto navigate and control the Camera:Zoomed ViewFunction ActionZoom inSpread (move two fingers apart).Zoom outPinch (move two fingers together).SelectMove backTap / Press with one finger.Swipe right.Display Control ScreenSwipe down from the top of thescreen.Hide Control ScreenSwipe up.Standard PreviewAction FunctionDouble TapZoom in to 100%. Double Tap againto Zoom out to full View.Swipe RightMove back / Move image right.Swipe LeftMove image left. Only in Browsemode.Swipe DownDisplay Control Screen.Swipe UpHide Control Screen.Tap / PressSelect action / button / setting.9 View Mode9 View Mode displays an overview of up to 9 captures. Scrolldown to display all Captures in the Folder.X1D9 View Modewww.hasselblad.com19
USER GUIDEFunctions3.320NAVIGATING THE MENUSDESCRIPTION OF THE TOUCH DISPLAY MENU ITEMS1The X1D Display Screen is Touch Sensitive and you can clickwith one finger to select and swipe in different directionsto move up, down, forward and backward through the userinterface.234Button Screen function1 Browse ButtonGo to image browse2 Soft Button Up3 Image Rating ButtonSelect4 Soft Button Down5 Menu / (EXIT) ButtonBack to Main Menu1 Browse ButtonStarts display and shows the last image. The user canreview images, browse and zoom. Preview images and zoomin to view close-ups of previews for focus checking. Zoomout to view several at once and finally to view and selectfolders and media.2 Soft ButtonFunction depends on screen information. Also acts as DeleteImage button in Browse Mode.3 Image Rating ButtonRate image 1-5 stars or green/yellow/red. Also works assoft button. Also toggles between 1-view and 9-view inBrowse Mode.4 Soft ButtonFunction depends on screen information.5 MENU / (EXIT) ButtonThis button opens the Main Menu. It is also used for othertasks (for example EXIT button) as you issue commandsnavigating the menu system.5Control ScreenBy using the buttons on the control panel and the scroll wheelson the grip you can navigate through the various levels in themenu. Here is an overview of the setting options available.Main MenuX1Dwww.hasselblad.com
FunctionsUSER GUIDEOVERVIEW OF MENUS AND SETTINGS ON TOUCH DISPLAYThe Touch Display can be controlled directly on the touchsensitive screen by pressing the menus and icons. You canscroll up, down and from left to right as described in previouschapters. You can also navigate the on screen menus by usingthe following buttons and scroll wheels:1 Control buttons next to the Touch Display for exampleMenu / Exit button2 Front Scroll Wheel3 Shutter Release4 Mode Dial5 Rear Scroll WheelThe Main Menu on the Touch Display:On the right side of the Display there are three Main FunctionSettings, Camera Settings, Video Settings and General Settings.Above them the Favourite Settings Short Cuts are displayed. Youcan add or delete these Short Cuts to access your most usedfunctions directly from the Main Menu for better work flow.1The Menu Button (1) navigates back to Main Menu.2345X1Dwww.hasselblad.com21
USER GUIDEFunctions3.4TOUCH DISPLAY MAIN MENUMain MenuMAIN MENU1In the Main Menu there are 3 different Main Settings.Camera Settings (1), Video Settings (2) and GeneralSettings (3). The placement of these 3 Settings arefixed and cannot be changed.2The icons on the left part of the Main Menu areFavourite Shortlinks to Functions. These are:Wi-FiLive View mode (LV)DisplayStorageExposure ( /-)Focus (AF)ADD SHORTLINKS TO MAIN MENU FAVOURITES341234Camera SettingsVideo SettingsGeneral Settings (plus) symbolTo create and speed up your own workflow you canadd in the settings you use more frequently in theFavourite settings. To add your own functions, selectthe icon (4) on the Main Menu. Select a new functionfrom the list. This function will now be displayed on theMain Menu until you remove it and replace it by otherFavourite settings.The available functions to add are:Quality RAW/JPGSelf TimerCustom ButtonsConfigurationImage InfoVideo Quality 1080pAudioProfilesSoundDate & TimePower & TimeoutsLanguageServiceAboutSee detailed description on how to add and removefunctions to your Favourite list on the following page.X1Dwww.hasselblad.com22
USER GUIDEFunctionsHOW TO ADD SHORTLINKS TO MAIN MENU1 Select the icon (A) on the Main Menu.2 The Add Favourite Pop up screen displays theavailable options to add in a scroll list.3 Select for example Quality RAW/JPG (B).4 The RAW/JPG Quality icon is displayed on theMain Menu and the action is saved in the CameraMemory.Main MenuAHOW TO REMOVE SHORTLINKS ON THE MAIN MENU1 Press and Hold on the icon you would like toremove from the Main Menu Favourites. RAW/JPGQuality (C) in this example.2 A new icon is displayed near the selected function(D).3 Select / Press the X in the orange circle to deletethe icon and remove the function from the MainMenu Favourites.4 The RAW/JPG Quality icon is no longer displayedin the Main Menu Favourites list. You can add thesame function back again later at any time.Add Favourite Pop up screenBMain Menu with Quality Favourite addedCAdd Favourite Pop up screenDX1Dwww.hasselblad.com23
USER GUIDEFunctionsCONTROL SCREENYou can access the most common settings via theControl Screen. You can easily change these settingsby tapping on any function and adjust directly.Control ScreenDisplay Control ScreenSwipe down from the top of the display on the TouchDisplay or press the soft button to the right of thedisplay you can always display the Control Screen.Close the Control ScreenSwipe up from the top of the display on the TouchDisplay or press the soft button again the display youcan always display the Control Screen.LOCKED PROGRAMS ON THE CONTROL SCREENP ModeWhen you select P Mode the Aperture (5.6) andShutter (125) are automatic and displayed in greycolour that indicates that you cannot change thesesettings.A ModeFor Aperture priority (A) you can change the Aperturevalue and the Shutter value will be automatic anddisplayed in grey.Control ScreenP ModeControl ScreenA ModeS ModeFor Shutter priority (S) you can change the Shuttervalue and the Aperture value will be automatic anddisplayed in grey.Control ScreenS ModeX1Dwww.hasselblad.com24
USER GUIDEFunctionsSETTINGS ON THE CONTROL SCREENWhite BalanceWhite Balance- Cloudy- Shade- Daylight- Tungsten- Flour
X1D www.hasselblad.com Introduction USER GUIDE 8 X1D Features Medium format advantages Shallow depth of field. Large sensor for unbeatable image resolution. Super smooth color and tone rendition.


