Transcription
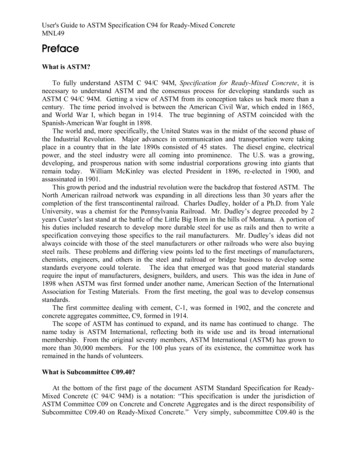
ASTM A106 A106M Standard Specificationfor Seamless Carbon Steel Pipe forHigh-Temperature Service
1. Scope*1.1 This specification2 covers seamless carbon steel pipe forhigh-temperature service (Note 1) in NPS 1 8 to NPS 48 [DN 6to DN 1200] (Note 2) inclusive, with nominal (average) wallthickness as given in ASME B 36.10M. It shall be permissibleto furnish pipe having other dimensions provided such pipecomplies with all other requirements of this specification. Pipeordered under this specification shall be suitable for bending,flanging, and similar forming operations, and for welding.When the steel is to be welded, it is presupposed that a weldingprocedure suitable to the grade of steel and intended use orservice will be utilized.NOTE 1—It is suggested, consideration be given to possible graphitization.NOTE 2—The dimensionless designator NPS (nominal pipe size) [DN(diameter nominal)] has been substituted in this standard for suchtraditional terms as “nominal diameter,” “size,” and “nominal size.”1.2 Supplementary requirements of an optional nature areprovided for seamless pipe intended for use in applicationswhere a superior grade of pipe is required. These supplementary requirements call for additional tests to be made and whendesired shall be so stated in the order.1.3 The values stated in either SI units or inch-pound unitsare to be regarded separately as standard. The values stated ineach system may not be exact equivalents; therefore, eachsystem shall be used independently of the other. Combiningvalues from the two systems may result in non-conformancewith the standard.1.4 The following precautionary caveat pertains only to thetest method portion, Sections 11, 12, and 13 of this specification: This standard does not purport to address all of the safetyconcerns, if any, associated with its use. It is the responsibilityof the user of this standard to establish appropriate safety and
health practices and determine the applicability of regulatorylimitations prior to use.2. Referenced Documents2.1 ASTM Standards:3A530/A530M Specification for General Requirements forSpecialized Carbon and Alloy Steel PipeE213 Practice for Ultrasonic Testing of Metal Pipe andTubingE309 Practice for Eddy-Current Examination of Steel Tubular Products Using Magnetic SaturationE381 Method of Macroetch Testing Steel Bars, Billets,Blooms, and ForgingsE570 Practice for Flux Leakage Examination of Ferromagnetic Steel Tubular Products2.2 ASME Standard:ASME B 36.10M Welded and Seamless Wrought Steel Pipe42.3 Military Standards:MIL-STD-129 Marking for Shipment and Storage5MIL-STD-163 Steel Mill Products, Preparation for Shipment and Storage52.4 Federal Standard:Fed. Std. No. 123 Marking for Shipments (Civil Agencies)5Fed. Std. No. 183 Continuous Identification Marking of Ironand Steel Products52.5 Other Standards:SSPC-SP 6 Surface Preparation Specification No. 663. Ordering Information3.1 The inclusion of the following, as required will describethe desired material adequately, when ordered under thisspecification:3.1.1 Quantity (feet, metres, or number of lengths),3.1.2 Name of material (seamless carbon steel pipe),3.1.3 Grade (Table 1),3.1.4 Manufacture (hot-finished or cold-drawn),
3.1.5 Size (NPS [DN] and weight class or schedule number,or both; outside diameter and nominal wall thickness; or insidediameter and nominal wall thickness),3.1.6 Special outside diameter tolerance pipe (16.2.2),3.1.7 Inside diameter tolerance pipe, over 10 in. [250 mm]ID (16.2.3),3.1.8 Length (specific or random, Section 17),3.1.9 Optional requirements (Section 9 and S1 to S8),3.1.10 Test report required (Section on Certification ofSpecification A530/A530M),3.1.11 Specification designation (A106 or A106M, including year-date),3.1.12 End use of material,3.1.13 Hydrostatic test in accordance with SpecificationA530/A530M or 13.3 of this specification, or NDE in accordance with Section 14 of this specification.3.1.14 Special requirements.4. Process4.1 The steel shall be killed steel, with the primary meltingprocess being open-hearth, basic-oxygen, or electric-furnace,possibly combined with separate degassing or refining. Ifsecondary melting, using electroslag remelting or vacuum-arcremelting is subsequently employed, the heat shall be definedas all of the ingots remelted from a single primary heat.4.2 Steel cast in ingots or strand cast is permissible. Whensteels of different grades are sequentially strand cast, identification of the resultant transition material is required. Theproducer shall remove the transition material by any established procedure that positively separates the grades.4.3 For pipe NPS 11 2 [DN 40] and under, it shall bepermissible to furnish hot finished or cold drawn.4.4 Unless otherwise specified, pipe NPS 2 [DN 50] andover shall be furnished hot finished. When agreed uponbetween the manufacturer and the purchaser, it is permissibleto furnish cold-drawn pipe.
TABLE 1 Chemical RequirementsComposition, %Carbon, maxManganesePhosphorus, maxSulfur, maxSilicon, minChrome, maxCCopper, maxCMolybdenum, maxCNickel, maxCVanadium, maxCGrade AGrade BGrade C0.25A0.27–0.930 0350 0350.100.400.400.150.400.080.30B0 29–1.060.0350.0350.100.400.400.150.400.08AFor each reduction of 0.01 % below the specified carbon maximum, an increaseof 0.06 % manganese above the specified maximum will be permitted up to amaximum of 1.35 %.BUnless otherwise specified by the purchaser, for each reduction of 0.01 % belowthe specified carbon maximum, an increase of 0.06 % manganese above thespecified maximum will be permitted up to a maximum of 1.65 %.CThese five elements combined shall not exceed 1 %.5. Heat Treatment5.1 Hot-finished pipe need not be heat treated. When hotfinished pipe is heat treated, it shall be heat treated at atemperature of 1200 F [650 C] or higher.5.2 Cold-drawn pipe shall be heat treated after the final colddraw pass at a temperature of 1200 F [650 C] or higher.6. General Requirements6.1 Material furnished to this specification shall conform tothe applicable requirements of the current edition of Specification A530/A530M unless otherwise provided herein.7. Chemical Composition7.1 The steel shall conform to the requirements as tochemical composition prescribed in Table 1.
8. Heat Analysis8.1 An analysis of each heat of steel shall be made by thesteel manufacturer to determine the percentages of the elements specified in Section 7. If the secondary melting processes of 5.1 are employed, the heat analysis shall be obtainedfrom one remelted ingot or the product of one remelted ingotof each primary melt. The chemical composition thusdetermined, or that determined from a product analysis madeby the manufacturer, if the latter has not manufactured thesteel, shall be reported to the purchaser or the purchaser’srepresentative, and shall conform to the requirements specifiedin Section 7.9. Product Analysis9.1 At the request of the purchaser, analyses of two pipesfrom each lot (see 20.1) shall be made by the manufacturerfrom the finished pipe. The results of these analyses shall bereported to the purchaser or the purchaser’s representative andshall conform to the requirements specified in Section 7.9.2 If the analysis of one of the tests specified in 9.1 doesnot conform to the requirements specified in Section 7,analyses shall be made on additional pipes of double theoriginal number from the same lot, each of which shallconform to requirements specified.10. Tensile Requirements10.1 The material shall conform to the requirements as totensile properties given in Table 2.11. Bending Requirements11.1 For pipe NPS 2 [DN 50] and under, a sufficient lengthof pipe shall stand being bent cold through 90 around acylindrical mandrel, the diameter of which is twelve times theoutside diameter (as shown in ASME B 36.10M) of the pipe,without developing cracks. When ordered for close coiling, thepipe shall stand being bent cold through 180 around acylindrical mandrel, the diameter of which is eight times theoutside diameter (as shown in ASME B 36.10M) of the pipe,without failure.
TABLE 2 Tensile RequirementsGrade ATensile strength, min, psi [MPa]Yield strength, min, psi [MPa]Elonga ion in 2 in. [50 mm], min, %:Basic minimum elongation transverse strip tests, and for all smallsizes tested in full sectionWhen standard round 2-in. [50-mm] gage length test specimen isusedFor longitudinal strip testsFor transverse strip tests, a deduction for each 1 32-in. [0.8-mm]decrease in wall thickness below 5 16 in. [7.9 mm] from the basicminimum elongation of the following percentage shall be madeAGrade B48 000 [330]30 000 [205]LongituTransversedinalGrade C60 000 [415]35 000 [240]LongituTransversedinal70 000 [485]40 000 22012AA1.25A1.001.00The minimum elongation in 2 in. [50 mm] shall be determined by the following equation:e 5 625000A 0.2/ U0.9for inch-pound units, ande 5 1940A 0.2/U0.9for SI units,where:e minimum elongation in 2 in. [50 mm], %, rounded to the nearest 0.5 %,A cross-sectional area of the tension test specimen, in.2 [mm2], based upon specified outside diameter or nominal specimen width and specified wall thickness, rounded tothe nearest 0.01 in.2 [1 mm2]. (If the area thus calculated is equal to or greater than 0.75 in.2 [500 mm2], then the value 0.75 in.2 [500 mm2] shall be used ), andU specified tensile strength, psi [MPa].11.2 For pipe whose diameter exceeds 25 in. [635 mm] andwhose diameter to wall thickness ratio, where the diameter towall thickness ratio is the specified outside diameter divided bythe nominal wall thickness, is 7.0 or less, the bend test shall beconducted. The bend test specimens shall be bent at roomtemperature through 180 with the inside diameter of the bendbeing 1 in. [25 mm] without cracking on the outside portion ofthe bent portion.Example: For 28 in. [711 mm] diameter 5.000 in. [127 mm]thick pipe the diameter to wall thickness ratio 28/5 5.6[711/127 5.6].12. Flattening Tests12.1 Although testing is not required, pipe shall be capableof meeting the flattening test requirements of SupplementaryRequirement S3, if tested.13. Hydrostatic Test13.1 Except as allowed by 13.2, 13.3, and 13.4, each lengthof pipe shall be subjected to the hydrostatic test withoutleakage through the pipe wall.13.2 As an alternative to the hydrostatic test at the option ofthe manufacturer or where specified in the purchase order, itshall be permissible for the full body of each pipe to be testedwith a nondestructive electric test described in Section 14.13.3 Where specified in the purchase order, it shall bepermissible for pipe to be furnished without the hydrostatic testand without the nondestructive electric test in Section 14; inthis case, each length so furnished shall include the mandatorymarking of the letters “NH.” It shall be permissible for pipemeeting the requirements of 13.1 or 13.2 to be furnished wherepipe without either the hydrostatic or nondestructive electrictest has been specified in the purchase order; in this case, suchpipe need not be marked with the letters “NH.” Pipe that hasfailed either the hydrostatic test of 13.1 or the nondestructiveelectric test of 13.2 shall not be furnished as “NH” pipe.13.4 Where the hydrostatic test and the nondestructiveelectric test are omitted and the lengths marked with the letters“NH,” the certification, where required, shall clearly state “NotHydrostatically Tested,” and the letters “NH” shall be appended to the product specification number and material gradeshown on the certification.14. Nondestructive Electric Test14.1 As an alternative to the hydrostatic test at the option ofthe manufacturer or where specified in the purchase order as analternative or addition to the hydrostatic test, the full body ofeach pipe shall be tested with a nondestructive electric test inaccordance with Practice E213, E309, or E570. In such cases,the marking of each length of pipe so furnished shall includethe letters “NDE.” It is the intent of this nondestructive electrictest to reject pipe with imperfections that produce test signalsequal to or greater than that produced by the applicablecalibration standard.14.2 Where the nondestructive electric test is performed, thelengths shall be marked with the letters “NDE.” Thecertification, where required, shall state “Nondestructive Electric Tested” and shall indicate which of the tests was applied.Also, the letters “NDE” shall be appended to the productspecification number and material grade shown on the certification.14.3 The following information is for the benefit of the userof this specification:14.3.1 The reference standards defined in 14.4 through 14.6are convenient standards for calibration of nondestructivetesting equipment. The dimensions of such standards are not tobe construed as the minimum sizes of imperfections detectableby such equipment.
14.3.2 The ultrasonic testing referred to in this specificationis capable of detecting the presence and location of significantlongitudinally or circumferentially oriented imperfections:however, different techniques need to be employed for thedetection of such differently oriented imperfections. Ultrasonictesting is not necessarily capable of detecting short, deepimperfections.14.3.3 The eddy current examination referenced in thisspecification has the capability of detecting significantimperfections, especially of the short abrupt type.14.3.4 The flux leakage examination referred to in thisspecification is capable of detecting the presence and locationof significant longitudinally or transversely oriented imperfections: however, different techniques need to be employed forthe detection of such differently oriented imperfections.14.3.5 The hydrostatic test referred to in Section 13 has thecapability of finding defects of a size permitting the test fluidto leak through the tube wall and may be either visually seenor detected by a
2.1 ASTM Standards:3 A530/A530M Specification for General Requirements for Specialized Carbon and Alloy Steel Pipe E213 Practice for Ultrasonic Testing of Metal Pipe and Tubing E309 Practice for Eddy-Current Examination of Steel Tubu-lar Products Using Magnetic Saturation E381 Method of Macroetch Testing Steel Bars, Billets, Blooms, and ForgingsFile Size: 225KBPage Count: 21
