Transcription
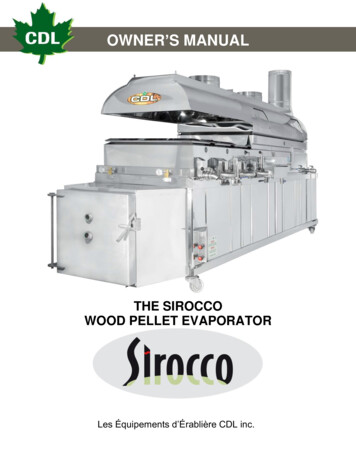
OWNER’S MANUALTHE SIROCCOWOOD PELLET EVAPORATORLes Équipements d’Érablière CDL inc.
[Type a quote from the document or the summary of an interesting point. You can position the text box anywherein the document. Use the Text Box Tools tab to change the formatting of the pull quote text box.]Thank you for choosing a CDL wood pellet evaporator. Our 40 years ofexperience working with sugarmakers ensures you that you acquired a performantand quality piece of equipment. Before using this piece of equipment, it isrecommended to thouroughly read this document.FINDING INFORMATIONMake a record for future useBrand:Purchased Date:Model Number:Serial Number:Serial number locationThe serial number is located on the back of the evaporator archSerial # locationLes Équipements d’Érablière CDL inc.2
[Type a quote from the document or the summary of an interesting point. You can position the text box anywherein the document. Use the Text Box Tools tab to change the formatting of the pull quote text box.]TABLE OF CONTENTFinding informationTable of contentSafetyInstallationOperating the ormanceWarranty233491113141516SAFETYA wood pellet evaporator can be a dangerous piece of equipment. Always wearheat resistant gloves and clothing when you fire an evaporator. Often, visitors canbe in the sugarhouse. Make sure they stay at a safe distance from the evaporator,especially children.Do not let the equipment exposed to outside weather conditions. A pelletevaporator works with solid material (wood) and produces intense heat in front ofthe arch and around the smoke stack. Follow the installation instructions to avoidany safety related issues concerning the heat produced.Every day when you shut down the evaporator empty the evaporator feedingscrew to make sure that the fire doesn’t go back to the bin. If the evaporatoris not to be used for an extended period of time, cut the power to theevaporator and empty the screw and bin from any remaining pellets.Les Équipements d’Érablière CDL inc.3
[Type a quote from the document or the summary of an interesting point. You can position the text box anywherein the document. Use the Text Box Tools tab to change the formatting of the pull quote text box.]INSTALLATION1) Remove the wheels under the evaporator2) Level your arch with the adjustable legs.3) Install the roof jack, base stack, stack pipe, collar and stack cover (pleasemake sure that the stack cover is installed against the dominant wind). Ideally,have a rope coming down from the stack cover to a place where it is easy tooperate.4) Place the pans on the arch, install the base stack behind the flue pan and besure that flue pan is levelled. If there is space left between the pans, tightenthe pan tightner located at the front of the arch.5) Install the float boxes and transfer connections.6) Install the small pellet bin behind the evaporator by coupling the steel tube ofthe bin to the tube coming out the back of the evaporator. Tighten firmly theset screw.7) Connect the pellet feeding system. There are 3 possibilities:a) Feed with 40 lbs bags. No other system required.b) Feed with 1000 lbs bag. Install conveying system to the small bin.c) Feed with an outside silo. Install conveying system to the small bin8) Connect power to the evaporator. The main electrical box is located on theback of the evaporator (it is recommended to use a certified electrician).9) It is highly recommended to have a make up air entry near the burner toimprove combustion (especially if the building is well insulated).10) To reduce noise in the building, it is an option to move the blower outside themain room. It is also recommended, to reduce dust in the main room to alsohave the small pellet bin in a separate room directly behind the evaporator. Callyour CDL representative for more information.11) A start up with a CDL technician is included with the purchase of a new woodpellet evaporator, please contact your sales representative to take anappointment with CDL’s service department. A technician will come on site tomake the necessary adjustments and to start the evaporator for the first time.Before his visit, all the electrical components must be hooked up, you musthave enough pellets to run a couple hours and you need to have a big enoughwater supply to feed the evaporator. The start up can be done using soft water.For the location of your evaporator, make sure you have a concrete or ceramicfloor strong enough to support the weight of the evaporator and its content as wellas at least 24” between any wall and the smoke stack. If you need to put it closerto the wall, a heat barrier (ceramic blanket for example) should be installed. Also,make sure that your steam and smoke stacks have a free way to the roof of thebuilding (avoid rafters). Also, your ceiling should be high enough for you to raisethe hoods safely with a cable and pulley system. The installation of this evaporatormust be done by qualified personnel.Les Équipements d’Érablière CDL inc.4
[Type a quote from the document or the summary of an interesting point. You can position the text box anywherein the document. Use the Text Box Tools tab to change the formatting of the pull quote text box.]If your building is not insulated, you will have a better combustion and abetter steam evacuation. If it is insulated, you will need to have an air intakeinside your building (air trap, open window etc). The air intake should at leastbe 24” x 24”.IMPORTANT: Make sure to contact your insurance company in order toverify their safety standards.Prefabricated chimneyIf you decided to buy a pre-fabricated chimney to install with your evaporator,please refer to the manufacturer’s instructions. A chimney can get up to 1000 Fdegrees. Before installing this type of equipment, make sure it’s made for this kindof conditions and validate with your insurance company that it’s in compliance withtheir safety standards.OPERATING THE EVAPORATORStarting for the 1st time or at the beginning of a new seasonLes Équipements d’Érablière CDL inc.5
[Type a quote from the document or the summary of an interesting point. You can position the text box anywherein the document. Use the Text Box Tools tab to change the formatting of the pull quote text box.]-Verify that all the electrical controls are in good working condition.Clean with compressed air the inside of the electrical panel to remove anyaccumulated dust.Verify that the air control levers move freely.With a vacuum cleaner, remove any left over ashes from the previousseason from the bottom of the fire chamber.Clean and grease the chain link and gears of the pellet bin feeding system(for the double burner models only).Verify that the coupling between the motor and the screw is well in place.Before filling the small bin with pellets, turn the feeding screw and makesure it turns the way it should.Pellet informationWe recommend to use good quality pellets. To use lesser quality pellets will giveyou lesser boiling performances and a lot more ashes to clean everyday. Thepresence of non combustible material in the pellets could cause premature wear inthe moving parts, jamming of the screw and general failure of the system.Pellet caracteristicsThis evaporator is designed to run with wood pellets with the following properties: Soft wood (burns better than hard wood)No bark inside the pellet (bark will leave ashes after burn)Humidity content less than 6% (weight)Ash purcentage less than 1% (weight)Diameter: 6 to 7 mm (0.236” to 0.276”)Length: no longer than 35 mm (1.378”)Energy capacity: between 5 and 5.68 kWh/Kg (7738 to 8800 BTU/lb)Density: 650 Kg/m3 (40.5 lbs/pi3)Starting instructionsBefore starting the evaporatorLes Équipements d’Érablière CDL inc.6
[Type a quote from the document or the summary of an interesting point. You can position the text box anywherein the document. Use the Text Box Tools tab to change the formatting of the pull quote text box.] Open the valve under the silo (if there is one).Open the gate under the pellet bin at 1/3 feeding the screw.Feed the evaporator with electricity.Open the stack covers.Make the pellet feeding system is ready.Make sure the power is on in the main panel.If you don’t feed the pellets manually, you need to set the feeding switchon the main electrical panel to “auto” or “manual”.o choose “auto” to have the whole feeding system work automaticaly.The silo motor (M2) feeds the pellet bin until the level of pelletsreaches the high level sensor. The sensor will stop the silo motor. Atimer (TD1) will start for a preset number of minutes. When the timerreaches its preset value, the silo motor will start again to fill the bin.Make sure the timer value is not too long to run out of pellets in thebin. Try to start the motor when the bin is 2/3 empty.o Choose “manual” if you want to fill the bin manually. When manual ischosen, the silo motor will turn continuously. Flip the swith to “auto”when you reach the desired pellet level in the bin.When ready1. Open smoke stack Damper 100% (handle going down) – this will increasedraft while chimney is cold and will allow you faster starts.2. Scrape and clean ashes from the burner and make sure none of the airopenings are plugged.3. Open the pellet bin shut-off gate at ‘’3’’ (arm is located close to the pelletbin).4. Make sure all valves are open and water levels are good, adjust floats ifnecessary.5. Turn on auger at maximum speed to get pellets in the burner (1/3 of theburner maximum), then stop the auger.6. Close air in the door and air in the burner completely (pull handles).Note: Even when the handle is fully closed, there will always be some airgoing in the door for safety reasons.7. Pour diesel or wood alcohol on the pellets and light it with a torch.8. Turn on the blower.9. Adjust the burner air at ¾ of is maximum , let the pellets burn in the burnerfor 6 minutes.10. Increase gradually the screw RPM until you reach full power (See Max RPMchart per evaporator size in the operator manual) and gradually decreaseair in the burner by rotating counter-clockwise the burner air adjustmenthandle. Leave enough air to get the pellets dancing in the burner but if theburning pellets jump out of the burner, the air is too high. Even if a fewpellets fly out of the burner, it's not a problem, they will burn.Les Équipements d’Érablière CDL inc.7
[Type a quote from the document or the summary of an interesting point. You can position the text box anywherein the document. Use the Text Box Tools tab to change the formatting of the pull quote text box.]11. Adjust the smoke stack damper to get between 0.03 to 0.05 on theMagnehelic gauge (this must be done after the chimney reached operatingtemperature because the draft will increase with heat).12. Put your hand on the door often, you always should be able to hold yourhand on the door. Too much heat will warp the door. If door gets too hot,add air in the door but don't add too much. Too much air in the door willonly decrease the draft and over heat the chimney throwing energyoutside!!! Try it, you’ll understand!IMPORTANT : EVERY TIME YOU ADJUST THE AIR (DOOR ORBURNER), IT WILL AFFECT THE DRAFT. YOU WILL NEED TO ADJUSTTHE BASE STACK DAMPER EVERYTIME!13. Have some vegetable oil or defoamer close by when operating evaporator,should pans start to foam up, put a drop into the pan and the foam will godown. This will prevent boiling over.14. Maintain these levels by the adjustment on your front and rear floats.(THEY WILL HAVE TO BE ADJUSTED AS EVAPORATOR STARTS TOEVAPORATE WATER FROM THE MAPLE SAP).15. At this point the thermometer that is being used has to be placed in boilingwater for 5 minutes. (WRITE THIS TEMPERATURE DOWN) and thenplace the thermometer at the point where syrup is to be drawn from theevaporator.16. Finish syrup is always drawn off 7 degrees above the boiling point of water.17. (EXAMPLE: IF BOILING WATER IS AT 212 DEGREES, THEN YOUWOULD OPEN VALVE AT 219 DEGREES).18. When you become more experienced on the evaporation of yourevaporator, you can bring the level of sap down to 3/4” above the flues inthe flue pan.19. (ALWAYS MAINTAIN 1 ½” to 2” IN THE SYRUP PAN).Note: when you shutdown the evaporator, the blower will run for another 10minutes before shutting down. This is to cool down the unit faster andprotect the equipment.Should you have any problems, our service personnel will be pleased to assistyou. Our toll free number is: 800-762-5587Pan change procedure1. Stop the Auger.Les Équipements d’Érablière CDL inc.8
[Type a quote from the document or the summary of an interesting point. You can position the text box anywherein the document. Use the Text Box Tools tab to change the formatting of the pull quote text box.]2. Wait 10 minutes with the blower ON (this will cool down the burner andextend its life).3. Shutdown the blower.4. Change pans.5. Start the blower.6. Start the auger increasing the speed gradually (3 rpm at the time) to normalspeed (you will not need to use fuel or torch to restart)7. You shouldn’t need to re-adjust any air but, it’s always better to check fromtime to time.End of the day shutt-off procedure1. Close the pellet bin gate, keeping the auger running (we recommend toempty the auger every night, especially in damp conditions, the pellets couldexpand and lock the auger). Make sure you have enough concentrate dodo this.2. When you see that no more pellets are getting in the burner, turn the augeroff.3. Wait 10 minutes with the blower ON (this will cool down the burner andextend its life). Leave the blower running longer if you can, why not whileyou clean everything?4. Stop the blower.5. Close the stack cover.Emergency stop1. Stop the feed screw.2. After 5 minutes, shut-off the blower.or1. Lift the sap level sensor if you have a detecto. The feed screw will stop andsoon after the blower will stop too.At the end of the season1.2.3.4.Empty the silo feed screw.Empty the evaporator feed screw completely.Close the gate at the bottom of the silo (photo H and I).Clean the burner of all residues, clean the base of the smoke stack usingthe access door (photo E).5. Clean the bottom of the evaporator of any unburned pellets.6. Cut the power off every equipment.ELECTRICAL INFORMATIONDrive for feed screw motor DRV1Silo timer TD1Detecto contactor (optional)Les Équipements d’Érablière CDL inc.9
[Type a quote from the document or the summary of an interesting point. You can position the text box anywherein the document. Use the Text Box Tools tab to change the formatting of the pull quote text box.]Breaker CB1Silo motor contactsFuse FU1Timer: Mode AC1: Main contactor for water level (Detecto)M2: Relay for silo motorCB1: Main breakerDRV1:Drive for feed screw motorTD1: Silo timerTG2: Toggle switch for manual or auto mode to feed pelletsTG1: Toggle switch for drive (feed screw ON/OFF)TG3: Toggle switch for air blowerM1: Feed screw motorVR1: Feed screw motor speed control (RPM)Les Équipements d’Érablière CDL inc.10
[Type a quote from the document or the summary of an interesting point. You can position the text box anywherein the document. Use the Text Box Tools tab to change the formatting of the pull quote text box.]Les Équipements d’Érablière CDL inc.11
[Type a quote from the document or the summary of an interesting point. You can position the text box anywherein the document. Use the Text Box Tools tab to change the formatting of the pull quote text box.]Legend:: cables inside the control panel: cables outside the control panel: equipment supplied by another supplierA: terminal block inside the main control panelColor code:Les Équipements d’Érablière CDL inc.600V, 30, 60Hz600V, 30, 60Hz600V, 30, 60Hz240V, 10, 60Hz120V, 10, 60HzNeutral24VDC0VDCSecurityL1 RedL2 BlackL3 BlueL1 RedRedWhiteOrangeBlueYellow12
[Type a quote from the document or the summary of an interesting point. You can position the text box anywherein the document. Use the Text Box Tools tab to change the formatting of the pull quote text box.]Control box: photo ARPM readoutof the pelletfeed screw tothe burnerManualAutomaticMode selector for thesilo (if you have one):chose betweenmanual andautomaticOn the latest models,this switch has beenmoved to the bottomof the panelBurner: photo BFill 1/3 of theburner to start upLes Équipements d’Érablière CDL inc.13
[Type a quote from the document or the summary of an interesting point. You can position the text box anywherein the document. Use the Text Box Tools tab to change the formatting of the pull quote text box.]Light the pellets: photo CSpray the top of thepellets with fire starterlike diesel and lite with apropane torchControl panel: photo DBase stack temperatureMagnehelic gaugePellet feed screwspeed adjustmentBlower on/offPellet feed screwon/off switchLes Équipements d’Érablière CDL inc.14
[Type a quote from the document or the summary of an interesting point. You can position the text box anywherein the document. Use the Text Box Tools tab to change the formatting of the pull quote text box.]Access door: photo ERemove thispanel to accessthe inside of theevaporator fromthe backAir adjustments (double burner model): photo FSingle burner unit only has 1 gauge and 2 handlesLes Équipements d’Érablière CDL inc.15
[Type a quote from the document or the summary of an interesting point. You can position the text box anywherein the document. Use the Text Box Tools tab to change the formatting of the pull quote text box.]Base stack damper: photo FThe damper will have to be adjusted between 35 to 45 degrés from the vertical. Magnehelic gauge must read 0.1.Pellet bin gate: photo GClosedOpenMove this arm tomodify the opening ofthe bin to the screwLes Équipements d’Érablière CDL inc.16
[Type a quote from the document or the summary of an interesting point. You can position the text box anywherein the document. Use the Text Box Tools tab to change the formatting of the pull quote text box.]Silo set up: photo HBottom of silo: photo ISilo gate valve, only open 1/3 in normal operationLes Équipements d’Érablière CDL inc.17
[Type a quote from the document or the summary of an interesting point. You can position the text box anywherein the document. Use the Text Box Tools tab to change the formatting of the pull quote text box.]Silo screw motor: photo JSilo screwSilo screw motorPellet levelsensorPellet binFeed screwmotor and gearreducerLes Équipements d’Érablière CDL inc.Pellet feed screw18
[Type a quote from the document or the summary of an interesting point. You can position the text box anywherein the document. Use the Text Box Tools tab to change the formatting of the pull quote text box.]Pellet level sensor in bin: photo KPellet levelsensorSingle and double burner: photos LLes Équipements d’Érablière CDL inc.19
[Type a quote from the document or the summary of an interesting point. You can position the text box anywherein the document. Use the Text Box Tools tab to change the formatting of the pull quote text box.]Technical informationModel2½x82 ½ x 103 x 103 x 123 ½ x 123 ½ x 144 x 124 x 144 x 154 x 165 x 125 x 145 x 155 x 166 x 146 x 156 x 166 x 18Surface ft22025303642494856606460707580849096108Evapor.Gal 201515151518202222# bags40 * 5’ and 6’ wide evaporators have 2 burners, that’s why the RPM is lower** Multiply by 1.2 to get the evaporation rate in US gallons per hourLes Équipements d’Érablière CDL inc.20
[Type a quote from the document or the summary of an interesting point. You can position the text box anywherein the document. Use the Text Box Tools tab to change the formatting of the pull quote text box.]Les Équipements d’Érablière CDL inc.21
[Type a quote from the document or the summary of an interesting point. You can position the text box anywherein the document. Use the Text Box Tools tab to change the formatting of the pull quote text box.]Les Équipements d’Érablière CDL inc.22
[Type a quote from the document or the summary of an interesting point. You can position the text box anywherein the document. Use the Text Box Tools tab to change the formatting of the pull quote text box.]Les Équipements d’Érablière CDL inc.23
[Type a quote from the document or the summary of an interesting point. You can position the text box anywherein the document. Use the Text Box Tools tab to change the formatting of the pull quote text box.]Les Équipements d’Érablière CDL inc.24
[Type a quote from the document or the summary of an interesting point. You can position the text box anywherein the document. Use the Text Box Tools tab to change the formatting of the pull quote text box.]Modèles2½x82 ½ x 103 x 103 x 123 ½ x 123 ½ x 144 x 124 x 144 x 154 x 165 x 125 x 145 x 155 x 166 x 146 x 156 x 166 x 18Dimension in 55¼164¼167¼191¼Les Équipements d’Érablière CDL let 18181820202020JKFanwith 1HPmotor220V8”x12”airductBinsize:5 ft3¾ HPmotor220 VFanwith 2HPmotor220VBinsize:9 ft3¾ HPmotors(2x)220 V9¾”x12”airduct25
[Type a quote from the document or the summary of an interesting point. You can position the text box anywherein the document. Use the Text Box Tools tab to change the formatting of the pull quote text box.]MAINTENANCEPan cleaning1) Fill pans with permeate or clean water. Fill it to the top.2) Add a CDL recommended cleaner, heat up and leave sitting all night.3) Drain and rinse thoroughly with water.4) Fill the pan to the top again with clean soft water and bring it to a boil for 15minutes, to insure that there is no more cleaner residues left.5) Use only a CDL recommended cleaner.6) Never use abrasive products or steel brush, steel wool or any productcontaining chlorine or muriatic acid.7) If there is burned syrup on the side of a pan, use commercial cold ovencleaner. It will dissolve the syrup without using abrasive products. To bringback the shine, use a foaming industrial glass cleaning product.IMPORTANT: if there is any cleaning product left in the pan, it will seriouslydamage the pan. It could even make holes in it.When to clean you pansPan cleaning depends on evaporator size and the amount of scale depositproduced by your evaporator. Front pans have to be checked every hour toprevent overheating. If too much scale deposit in your pan, you could burn it. Somake sure that you check your flue pan at the end of every day, especially in thecorners at the end of each flue. Too much scale deposits can cause a pan tooverheat.Les Équipements d’Érablière CDL inc.26
[Type a quote from the document or the summary of an interesting point. You can position the text box anywherein the document. Use the Text Box Tools tab to change the formatting of the pull quote text box.]Maintenance of the optionnal base stack preheater1) It’s very important to drain the preheater at the end of each day. If sap staysfor a long time in a warm environment, bacterias will grow and they will betransferred to the pans when you start the evaporator.2) It’s also important that after every time concentrated sap is boiled, permeatewater is boiled for 10 to 15 minutes. This will sterilize the interior of hepreheater for the next time you will boil.3) Empty the preheater.4) Don’t go over 180 F degrees in the preheater because if the sap gets to 212 Fdegrees, steam will come out of the water entrance relief pipe and coulddamage the preheater. If you have difficulty maintaining the temperature under180 F degrees, call you local representative for support.Les Équipements d’Érablière CDL inc.27
[Type a quote from the document or the summary of an interesting point. You can position the text box anywherein the document. Use the Text Box Tools tab to change the formatting of the pull quote text box.]TROUBLESHOOTING GUIDEFloat doesn’t hold a constant level of sap The rubber piece of the float arm needs to be replaced or readjusted.Float box arm needs to be realigned.Make sure there isn’t sap inside the float (hole in the float).The sap tank is too high and puts too much pressure on the float arm;you need to install a secondary pressure control float box or to relacatethe sap tank.Smoke comes out of the pellet bin Not enough draft, readjust the base stack damper.The feed screw turn, but the pellets don’t come out the screw The gate at the bottom of the silo is closedThe silo timer is set too longThe pellet bin gate is closed or open too wide (blocked)You ran out of pelletsThe coupling between the motor and the screw is apartThe screw is jammed, take it apart and clean itSap boils too hard in front or at the back of the evaporator Adjust the key in the back of the evaporator to add more draft.Les Équipements d’Érablière CDL inc.28
[Type a quote from the document or the summary of an interesting point. You can position the text box anywherein the document. Use the Text Box Tools tab to change the formatting of the pull quote text box.]EVAPORATOR WARRANTYYour evaporator is covered by a two year limited warranty. For two yearsfrom your original date of purchase, Les Équipements d’Érablière CDL (CDL),will replace or replace any parts of this evaporator that prove to be defectivein materials or workmanship when such evaporator is installed, used andmaintained in accordance with the provided instructions.ExclusionsThis warranty does not cover the following:1. Products with original serial number that have been removed,altered or cannot be readily determined.2. Product that has been transferred from its original owner to anotherparty or removed outside the USA or Canada.3. Production loss due to any kind of failure of the evaporator.4. Revenu losses due to syrup quality.5. Service calls which do not involve malfunction or defect in materialsor workmanship, or used other than in accordance with theprovided instructions.6. Service calls to correct the installation of your evaporator or toinstruct you how to use your evaporator.7. Expenses for making the evaporator accessible for servicing, suchas the removal of wall, shelves etc.8. Any service beyond the first two years.9. Damages caused by: services performed by unauthorized servicecompanies; use of parts other than genuine CDL parts or partsobtained from persons other than authorized service companies; orexternal causes such as abuse, misuse, inadequate power supply,accidents, fires, or acts of God.10. It doesn’t cover the consumable products (as wood pellets) oraccessories.11. If the product was damaged by abusive use, negligence, accidentcaused by the customer, modification made by the customer, waterdamage, variation in the electric power or power surge.12. Damage cause by the use of products that are not meant for usewith our equipment or a bad use of a product as acids, cleaningproducts.13. Use of contaminated, recycled or sub standard wood pellets.14. Use of any other burning agent other than wood pellets.Les Équipements d’Érablière CDL inc.29
[Type a quote from the document or the summary of an interesting point. You can position the text box anywherein the document. Use the Text Box Tools tab to change the formatting of the pull quote text box.]Disclaimer of implied warranties; limitation of remediesCustomer’s sole and exclusive remedy under this limited warranty shall berepair or replacement as provided herein. Claims based on impliedwarranties, including warranties of merchantability or fitness for a particularpurpose, are limited to two years or the shortest period allowed by law, butnot less than two years. CDL shall not be liable for consequential orincidental damages such as property damages and incidental expenses orloss or revenues caused by any event covered by this warranty. Some statesand provinces do not allow the exclusion or limitation of incidental orconsequential damages, or limitations on the duration ofimplied warranties,so these limitations or exclusions may not apply to you. This written warrantygives you specific legal rights. You may also have other rights that vary fromstates to states.If you need serviceKeep your receipt, delivery slip or some oter appropriate payment record toestablish the warranty period should service be required. If service isperformed, it is in your best interest to obtain and keep all receipts. Serviceunder this warranty must be obtained by contacting CDL at the addresses orphone numbers below. Obligations for service and parts under this warrantywill be performed by CDL in Canada. Products features or specifications asdescribed or illustrated are subject to change without notice.Les Équipements d’Érablière CDL257 Route 279St-Lazare, Québec, CanadaG0R 3J0(418) 883-5158Les Équipements d’Érablière CDL inc.CDL USA3 Lemnah DriveSt. Albans, VT, 05478(802) 527-000030
draft while chimney is cold and will allow you faster starts. 2. Scrape and clean ashes from the burner and make sure none of the air openings are plugged. 3. Open the pellet bin shut-off gate at ''3'' (arm is located close to the pellet bin). 4. Make sure all valves are open and water levels are good, adjust floats if necessary. 5.