Transcription
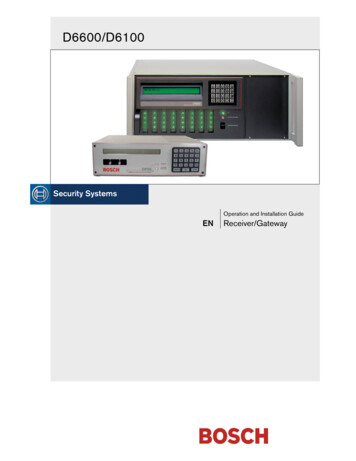
D6600/D6100Operation and Installation GuideENReceiver/Gateway
D6600/D6100 Operation and Installation Guide TrademarksTrademarksMicrosoft , Windows , Windows NT are eitherregistered trademarks or trademarks of MicrosoftCorporation in the United States and/or othercountries.2Bosch Security Systems 4/05 4998122704F
D6600/D6100 Operation and Installation Guide .29.09.19.1.19.1.29.2Introduction. 5Emergency Procedures . 6Card Functions and Locations. 6D6600. 6Front Panel . 6Line Cards and Modules . 7Rear View. 8Internal View . 8D6100. 9Front Panel . 9Line Cards and Modules . 9Back Plate . 9D6600 Specific Cards. 9D6640/D6641 Line Cards and D6645 LineTerminator Card. 9D6640/D6641 LED Descriptions . 9Card Installation .10Telephone Line Monitoring Voltage .11D6610 CPU Card and D6615 CPUTerminator Card.12D6610 CPU Card Connection.12D6615 CPU Terminator Card .12Card Removal and Replacement .12Power Supply Modules (D6600 Only) .12Printer Specifications .12Installation.13All Installations .13UL Installations.13Burglar Alarm Applications .13Fire Alarm Applications .13Installation Check List .13Rack Mount Instructions .14Powering Down the Receiver .14Standby Power .14Connecting External Batteries .14Minimum Standby Battery Chart .15Minimum Standby UPS Power.15Input and Output Ports .15UPS Monitoring through CPU ProgrammableInput Ports .16Input Default Connection Configuration.16Input Reverse Connection Configuration .16Automation Link Monitoring (COM3) throughCPU Programmable Output Ports.16Bosch Security Systems 4/05 414.4.114.4.214.514.614.7D6600/D6100 Operation . 17Process Flow . 17Event Database. 17Receiver Handshake and Kiss-Off . 19Message Verification . 19Handshake Tone Compatibility . 19Message is Received . 19How Call Groups Work . 19Buzzer Operation . 20Reporting Devices: Primary andSecondary. 20Normal Operation Mode . 20Operating in Manual Mode. 21Keypad Menu Operation . 21Log In . 21Using the Keypad. 21Event Buffer Display. 22Current System Trouble Display . 22Software Version Display. 22Keypad Functions . 22Skip Current Automation Event . 23Line Test . 23Clear Pending Events . 24Busy Seconds (Line Busy) Reports. 24Two-Way Audio. 25Enhancements and Changes. 25Two-Way Audio Modes of Operation. 26Network Communications (D6600 Only) . 27No Data Received Reports . 28Description. 28No Data Received. 28Data Error . 28Wrong Data . 28Using the Central Station AutomationSystem with the D6600 . 29Central Station Tips . 30Back-up Receiver . 30Computer Interface. 30D6200 Programming Software . 30Telephone Lines. 30Emergency Ringers. 30Rotary Lines . 30Proper Ground . 30Radio Frequency Interference . 30Test Communicator . 303
D6600/D6100 Operation and Installation Guide Contents15.016.017.0Troubleshooting Guide.31Specifications .34Service Information.35FiguresFigure 1:Figure 2:Figure 3:Figure 4:Figure 5:Figure 6:Figure 7:Figure 8:Figure 9:Figure 10:Figure 11:Figure 12:Figure 13:Figure 14:Figure 15:Figure 16:Figure 17:Figure 18:Figure 19:Figure 20:Figure 21:4D6600 CommunicationsReceiver/Gateway (Front View). 6D6600 CommunicationsReceiver/Gateway (Rear VSiew). 8Receiver Card Placement. 8D6100 Communications Receiver/Gateway (Front View). 9D6100 Communications Receiver/Gateway (Rear View). 9D6640/D6641 Line Card . 9D6645 Line Terminator Card. 9D6640/D6641 LED Descriptions .10Removing the top cover of the D6600 .10Inserting the D6645 Line TerminatorCard .11Securing the D6645 Line TerminatorCard .11D6615 CPU Terminator Card .12Location of D6100 Battery Terminals andD6600 Battery Connector .13D6600 Back Panel Showing Input/OutputPorts .15D6100 Back Panel Showing Input/OutputPorts .15Input Wiring for Reverse Configuration 16D6600 NetCom System ConnectionDiagram - C900TTL-E and Any ControlPanel .27D6600 NetCom System ConnectionDiagram - D9133TTL-E and BoschControl Panels .28NO DATA RECEIVED Message.28D6600 System – Direct Connect .29D6600 System – Standard/NetworkAutomation .29TablesTable 1:Table 2:Table 3:Table 4:Table 5:Table 6:Table 7:Table 8:Table 9:Table 10:Table 11:Table 12:D6600/D6100 Supported CommunicationFormats . 5Power LED Indications . 6System Trouble LED. 7D6600 Line Cards and Modules . 7Battery Voltage Display . 14Calculating Standby Current for theD6600. 15Standby Current for the D6100 . 15Minimum Standby Battery Chart . 15Terminator Card Configuration. 16Testing Communication Links . 22Hardware Troubleshooting Guide. 31D6600/D6100 Specifications . 34Bosch Security Systems 4/05 4998122704F
D6600/D6100 Operation and Installation Guide 1.0 Introduction.1.0 IntroductionThe D6600/D6100 CommunicationsReceiver/Gateways offers several unique features: Modular construction with plug-in circuit boardsfor quick, easy service Open structure PC platform for futuredevelopment Programmable formatting for receiving data frommost major brands of digital communicators Easy and inexpensive updating using modularcards (D6600 only) Convenient software downloads Superior digital signal processing to reduce noiseand signal loss User interface module with LED indicators Front panel keypad Alphanumeric liquid crystal display (LCD)The D6600 metal enclosure contains several modularcards: D6610 Central Processing Unit (CPU) Card D6615 CPU Terminator Card D6640 or D6641 Telephone Line Card thatsupports four telephone line interfaces D6645 Telephone Line Terminator CardUp to seven additional telephone line cards along withseven additional line terminator cards can be installedin the D6600 to expand the receiver’s capacity to 32receiving lines.Table 1:D6600/D6100 SupportedCommunication FormatsAcron Super FastAdemco SlowAdemco ExpressAdemco High SpeedAdemco Contact IDCFSK Bell/V.21*FBI SuperfastFranklin/SescoaITI*Radionics BFSKRadionics HexRadionics Modem IIRadionics Modem IIe/IIIa2RB2000 (D6641 only)*ROBOFON*Scantronics Scancom*Seriee FSK/DTMF*Sescoa Super SpeedSIA 8/20/300SIA ADT*SIA V.21*Silent Knight FastSilent Knight FSKStandard Pulse FormatsSur-Gard DTMFTelim*Veritech FSKVONK (D6641 only)** Not investigated by UL.Use a printer to permanently record date, time, groupnumber or transmission format and line number,account number, receiver number, and event by area,zone, and point. The printer tape and theD6600/D6100 LCD display show other receiver statusmessages such as software revision levels of the CPUCard.Program the D6600/D6100 using the front panelkeypad or the COM4 port with the D6200Programming Software package.NetCom refers to the D6600 with the optional D6680Network Adapter. It supports data networkcommunications including an account databasecapacity of up to 3200 accounts with the optionalD6201 Security Key. Refer to Section 11.0 NetworkCommunications on page 27 for more detailedinformation.The D6600/D6100 works with the following BoschControl Panels (referred to throughout this manual as“Bosch Control Panels”): D9412G D7412 D7412G D7212 D7212G D9112 D9412Bosch Security Systems 4/05 4998122704F5
D6600/D6100 Operation and Installation Guide 2.02.0 Emergency ProceduresSection 17.0 Service Information on page 35 of this guidecontains a Service Information form. Keep this formcurrent and accessible to central station personnel at alltimes in case of emergency.If your D6600/D6100 Receiver becomes inoperable orexperiences trouble receiving signals:1. Notify your supervisor.2. Refer to Section 15.0 Troubleshooting Guide onpage 31.3. Contact Bosch Security Systems 24-HourTechnical Support at (888) 886-6189 for assistanceif you have a receiver spares package and need toreplace a circuit card or module.The AC/DC Power Supply Module andDC/DC Power Supply Module are notfield serviceable. Contact Bosch SecuritySystems for service.Disconnect power to the receiver beforeremoving the CPU or CPU terminatorcard.Before Calling 24-Hour Technical Support1. Have this guide nearby and opened to Section 15.0Troubleshooting Guide on page 31.2. Have your spares package, the D6200Programming Software, and the D6600/D6100Program Entry Guide (P/N: 4998122702) nearby.3. Know the location of the telephone line jacks forthe receiver.4. Know the telephone numbers to the receiver’stelephone line cards.5. Know the exact nature of the problem you areexperiencing such as reports received, LEDs lit,Operator Alert Buzzer sounded.6. Have the Service Information form nearby (page 35).Emergency Procedures3.0 Card Functions andLocations3.1D66003.1.1Front PanelFigure 1:D6600 CommunicationsReceiver/Gateway (Front View)211 – LCD - Shows up to 80 characters of information(two lines of up to 40 characters each)2 – Keypad - The D6600 has a 20-button keypad.Table 2 and Table 3 show define the D6600/D6100POWER and SYSTEM TROUBLE LEDs.Table 2: Power LED IndicationsPresentOnPower LED Bosch Security Systems 4/05 4998122704F
D6600/D6100 Operation and Installation Guide 3.0 Card Functions and Locations.Table 3: System Trouble LEDSystem Trouble LED StatusSolid RedClearNo System TroubleAny System Trouble**Refer to Appendix B: D6600/D6100 Internal Messages in theD6600/D6100 Computer Interface Manual(P/N: 4998122703). The following items cause systemtrouble. Depending on the supervision setting, the itemsindicated by ** might cause system trouble.Battery Missing**UPS AC FailBattery Bad**UPS Battery LowAC FailSystem Temperature High3.1.2External Printing Error**Line Fault**COM# Error**Line Card Trouble**COM3 Trouble**Line Cards and ModulesTable 4: D6600 Line Cards and ModulesNameTelephoneline cardModelD6640Telephoneline cardD6641CPU ptionUp to eight line cards can be installedin one D6600 Receiver, for up to 32telephone line connections.Functions like the D6640. Includesimproved Public Switched TelephoneNetwork (PSTN) processing,additional memory for futureenhancements, and single firmwareupgrade package.The D6600 uses one CPU card. TheCPU card takes the incominginformation from the line card androutes the information to anautomation port, the LCD on the frontof the receiver, and an external printer.The power supply modules regulatethe power used by the D6600. Theseare not field serviceable.Located behind the line card, the telephone line terminator card isolatesand protects the line card against outside voltage surges that might comeover the telephone line. Each line cardmust have a line terminator card.Located behind the CPU card, theCPU terminator card provides theD6600 with two serial ports (COM3and COM4), a parallel port (parallelprinter), and a general I/O port (I/O).The serial ports can be used forcomputer automation, PC connectionfor programming, or NetComconnection with a D6680.Bosch Security Systems 4/05 4998122704F7
D6600/D6100 Operation and Installation Guide 3.03.1.3Card Functions and LocationsRear ViewThe D6600 has input and output pin connector sockets for up to eight line cards, network option (if installed), andone CPU card. It also has slots for connecting these cards to their corresponding terminator cards.Figure 2:D6600 Communications Receiver/Gateway (Rear VSiew)1234Bosch Security SystemsFairport, NYUSA1234BATTERYInput:100 - 120/220 - 240V 50 - 60 Hz2.5 Amps1 – Blank plate and location of installed D6672Serial COM1 Expansion Kit2 – D6615 CPU Terminator Card3.1.43 – Card slot covers4 – D6645 Line Terminator CardInternal ViewFigure 3:Receiver Card Placement192354871 – D6645 or D6645INTL Telephone LineTerminator Card2 – Back plate3 – D6615 CPU Terminator Card4 – D6630 AC/DC Power Supply (not serviceable)865–6–7–8–9–D6610 CPU CardD6631 DC/DC Power Supply (not serviceable)Card guidesD6640/D6641 Telephone Line CardDirection of receiver frontBosch Security Systems 4/05 4998122704F
D6600/D6100 Operation and Installation Guide 4.0 D6600 Specific Cards.3.2D61003.2.1Front PanelFigure 4:Figure 6:D6640/D6641 Line Card1D6100 Communications Receiver/Gateway (Front View)21 – Liquid crystal display (LCD) - Displays up to 80characters of information (two lines of up to 40characters each)2 – 23-button keypadTable 2 and Table 3 on page 6 define the D6600/D6100POWER and SYSTEM TROUBLE LEDs.3.2.2The D6100 Receiver/Gateway does not use the sameline cards and modules as the D6600. These functionsare built in.3.2.33Line Cards and ModulesBack PlateFigure 5:D6100 Communications Receiver/Gateway (Rear View)1 – 48-pin connection to D6645 Line TerminationCard2 – 40-pin connection to D6600 Back Plate3 – LEDs (refer to Figure 8)Figure 7:D6645 Line Terminator Card111223761 – Telephone lineconnections2 – Input/output ports3 – COM4 RS-232 port4 – COM3 auxiliaryRS-232 port54325 – Parallel portconnection6 – Ethernet port(not available)7 – Power connectionterminal block4.0 D6600 Specific Cards4.1D6640/D6641 Line Cards and D6645Line Terminator CardBosch Security Systems 4/05 4998122704F1 – 48-pin connection to D6640/D6641 Line Card2 – Alignment Guide - Stabilizes the connectionand acts as a guide for connecting theterminator card to the line card.3 – Telco Line Jacks - Standard telephone linesconnect to the RJ11C jacks.4.1.1D6640/D6641 LED DescriptionsThe LED is active until the system acknowledges theentire transmission and the telephone line is ready toreceive signals9
D6600/D6100 Operation and Installation Guide 4.0Figure 8:D6640/D6641 LED Descriptions41322314D6600 Specific Cards4.1.2Remove power to the receiver whenremoving, replacing, or installingtelephone line cards or telephone lineterminator cards (refer to Section 7.7Removing Power to the Receiver onpage 14).Discharge static electricity from your bodyby touching the receiver’s internal frame(unpainted section) before handling anycircuit card.OL/LF1 – Flashes green when an incoming call rings.2 – Glows green when the receiver is online withan incoming call.3 – Glows red when the line card detects a linefault condition.4 – LED is off and ready to receive signals or isdisabled in the software.Card InstallationInstalling Telephone Line Terminator Cards1. Remove the rear slot cover (Item 3, Figure 2 onpage 8).One telephone line terminator card is installed inthe receiver when shipped from the factory.2. Insert a terminator card in the slot next to theinstalled telephone line terminator cards.Figure 9:Removing the top cover of the D6600213.4.5.10To replace a failed terminator card, remove the sixscrews (Item 1, Figure 9). Hold the top metal coverof the D6600 and lift it off (Item 2, Figure 9).Remove the defective card.Insert the new card in the same slot by aligning thetop and bottom of the terminator card with thecard guides in the enclosure.Bosch Security Systems 4/05 4998122704F
D6600/D6100 Operation and Installation Guide 4.0 D6600 Specific Cards.Figure 10: Inserting the D6645 Line TerminatorCard7.48.32Do not install spare line cards and do notconnect line cards to the spare terminatorcards.9.11 – Alignment slot2 – Alignment guide tab6.Mount the terminator card (Item 1, Figure 11 onpage 11) in an empty slot (Item 3, Figure 11) of thereceiver cabinet (Item 4, Figure 11) by securing thebracket screws at the top and bottom (Item 2,Figure 11) of the terminator card to the mountingrails at the top and bottom edges of the cabinet.Ensure the screws are tight.Repeat this process for all additional terminatorcards.3 – D6645 LineTerminator card4 – D6600 Back plateSlide the card into the enclosure so the alignmentguide (Item 2, Figure 10) tab on the back of theterminator card (Item 3) inserts into the alignmentslot (Item 1) in the back of the D6600’s back plate(Item 4) circuit board.Figure 11: Securing the D6645 Line TerminatorCard42Connect appropriate telephone line cords to thetelephone line jack on the terminator cards.Installing Telephone Line Cards1. Install the telephone line terminator card(s) (referto Installing Telephone Line Terminator Cards on page10).2. Open the display door on the receiver.One telephone line card is installed in the receiverwhen shipped from the factory.3. Slide a line card into the slot next to the installedline card.4. Remove the appropriate snap-in covers from thefront of the panel.5. Close the front panel.6. Program the line card if necessary.When the line card is initialized (as indicated by aprinter report), the settings in the line cardprogramming section automatically load into thecard.7. Connect telephone lines to the line card4.1.3Telephone Line Monitoring VoltageThe receiver continuously monitors the telephone linevoltage. Normal operating voltage ranges from1.8 VDC to 2.5 VDC. Any voltage above 2.5 VDCcauses the line to appear good (restoral) and anindication appears if any voltage is below 1.8 VDC.321–2–3–4–1D6645 Line Terminator CardBracket screws (top and bottom)Empty slotD6600Bosch Security Systems 4/05 4998122704F11
D6600/D6100 Operation and Installation Guide 5.04.2D6610 CPU Card and D6615 CPUTerminator Card4.2.1D6610 CPU Card ConnectionThe CPU card connects to the user interface on thefront of the D6600 using a 50-pin ribbon cable socket.4.2.2D6615 CPU Terminator CardFigure 12: D6615 CPU Terminator Card12341 – Alignment Guide - Stabilizes the connectionand acts as a guide for connecting theterminator card to the CPU card.2 – COM3 Automation Computer Port - An auxiliaryRS-232 port for connecting to a computerterminal or an automation computer forSIA/6500 Mode Automation Format reportinguse a null-modem cable to connect to acomputer.3 – COM4 RS-232 Port - Connection to acomputer running the D6200 programmingsoftware.*4 – Parallel Printer Port*Use a null-modem cable to connect directly tothe computer. You can also connect this port toa D6680 for communicating over a network.Power Supply Modules (D6600 Only)4.2.3Card Removal and ReplacementRemove power to the D6600 beforeremoving, replacing, or installing the CPUcard (D6610) or CPU terminator card(D6615).Removing the CPU Card1. Remove power to the receiver (refer to Section 7.7Removing Power to the Receiver on page 14).2. Carefully grasp the plastic grip on the CPU card.Slide it 2 in. to 3 in. (50 mm to 75 mm) out of theenclosure.3. Unplug the 50-pin ribbon cable connecting theuser interface card to the CPU card. Be careful notto bend the board when disconnecting this cable.Grasp the plastic plug connected to the CPU boardat the end of the cable and gently pull it away fromthe circuit board.4. Pull the CPU card straight out of the card guide.Replacing the CPU Card1. Remove power to the receiver (refer to Section 7.7Removing Power to the Receiver on page 14).2. Remove the defective CPU card from theenclosure.3. Align the top and bottom of the CPU card with thecard guides. Slide the card into the enclosure,leaving 2 to 3 in. (50 mm to 75 mm) out to connectthe ribbon cable.4. Connect the ribbon cable to the CPU card. Orientthe cable so the red stripe is up and slide the cardthe remaining distance into the enclosure.5. Restore power to the receiver.5.0 Power Supply Modules(D6600 Only)The AC/DC (D6630) and DC/DC(D6631) Power Supply Modules are notfield serviceable.Contact the National Repair Center at(800) 289-0096, extension 4220 forrepair or replacement.6.0 Printer SpecificationsParallel printer connection: Use the DB25 port on theback of the D6600/D6100 rear panel to connect to astandard parallel text printer.Models: Safecom SC9002 (Star 300) requires 82.6 mm.(3.25 in) wide paper.12Bosch Security Systems 4/05 4998122704F
D6600/D6100 Operation and Installation Guide 7.0 Installation.7.0 Installation7.1All InstallationsInstall the D6600/D6100 CommunicationsReceiver/Gateway according to the National ElectricalCode (NEC), NFPA 70, the National Fire Alarm Code,NFPA 72, and the local Authority Having Jurisdiction(AHJ).7.2UL InstallationsUL Standard 827 requires that any centralstation listed for NFPA 72, Central StationProtective Signaling, UL Central StationBurglary or Police Station ConnectService must have a redundant receiveron the premises to use if the primaryreceiver malfunctions.UL Standard 827 also states that you must be able toswitch from one receiver to a standby receiver within30 sec, and repair the faulty receiver and return it toservice within 30 min.NFPA 72 requires that if more than eight telephonelines are used, the receiving equipment must becompletely duplicated so switchover can beaccomplished in 30 sec (per NFPA 72-1996 45.3.2.2.1.1).7.3Install the D6600/D6100 Receiver according to ULStandard 827 for Central Station Burglar AlarmSystems. Use in a central station that has backup ACpower (per UL 827) to supervise certificated accounts.Terminals for connection of external batteries are onthe rear of the receiver (Figure 13).7.4The D6600/D6100 Receiver can be used for CentralStation Protective Signaling when it is installed andused in compliance with NFPA 72 and ANSI/NFPA70. Installation limits for digital alarm communicatorreceivers (DACR) are under the local AHJ.7.51.2.3.4.5.Burglar Alarm ApplicationsFigure 13: Location of D6100 Battery Terminalsand D6600 Battery Connector6.27.D6600Bosch Security SystemsFairport, NYUSA1BATTERYBATTERY8.234Input:100 - 120/220 - 240V 50 - 60 Hz2.5 AmpsReceivers are not shown to scale.Bosch Security Systems 4/05 4998122704FInstallation Check ListCheck each receiver card to see that it is correctlypositioned in the card guides at the top and bottomof the enclosure. Also confirm connections did notloosen during shipment (D6600 only).Ensure the earth ground is connected andgrounded through the AC inlet.If you are installing additional line cards, install theterminator cards now (D6600 only).After installing additional line terminator cards,install the line cards (refer to Section 4.1.2 CardInstallation on page 10).You might also want to install the line terminatorcard(s) from your spares package(s). If there is amalfunction, you can quickly switch over to thereplacement card (refer to Section 4.1.2 CardInstallation on page 10).You can install spare line terminatorcards. Do not install spare line cards.D61001Fire Alarm Applications9.Connect four or six conductor telephone cord(s) tothe RJ11C jack(s) of the desired telephone line(s).Plug the other end of the modular telephonecord(s) into the telephone jack on the appropriateline terminator card(s).Connect the appropriate country-specific ACtransformer wiring leads to the AC terminals onthe rear of the D6100.Plug the AC cord (D6600 only) into a correctlywired 120 VAC, 60 Hz or 220 VAC, 50 Hz outlet(standard AC outlet).Plug the AC transformer into the correctly wiredwall receptacle that matches the voltage of thetransformer.Ensure a switch does not control theoutlet.13
D6600/D6100 Operation and Installation Guide 8.010. Turn the D6600 power switch on. The D6100starts up as soon as you plug in the ACTransformer.11. Set the calendar and clock to the correct date andtime and program the necessary options.12. Ensure that communication formats are correct byhaving communicators send test reports to eachline connected to the receiver.7.6Rack Mount InstructionsRack mounting hardware is included with the D6600,and is available as an option with the D6100. Whenmounted in a rack, plug the D6600 AC cord or theD6100 AC transformer into an outlet inside the rackonly if the outlet is wired according to Article 760 ofthe NEC. Rack mounting is required (per NFPA 72,1-5.2.5.2) to meet the mechanical protectionrequirement when using the type of AC cord providedwith the D6600/D6100. It is also required that a ULListed rack for fire protective service be provided whenused in UL Listed central stations.Do not connect the D6600/D6100 to anoutlet controlled by a switch.Install a shelf or bracket at the back of therack to support the D6600. The frontmounting ears cannot support the fullweight of the D6600.7.71.2.3.Removing Power to the ReceiverRemove battery power.Turn off the AC power on the D6600 or unplugthe D6100 AC transformer.Unplug the AC cord from the outlet.Do not try to restart the D6600/D6100with a fully discharged battery. Reconnectafter you apply power. To prevent deepbattery discharge, use a D135A LowBattery Cutoff Module. Refer to theD135A Installation Guide (P/N: 7406499-000) for more information.Standby Power8.0 Standby PowerDuring a loss of AC power, the receiver automaticallyswitches to standby power. External batteries or anuninterruptible power supply (UPS) provides standbypower. As long as there is adequate standby power, thereceiver’s operation is not interrupted, even if thepower loss occurs during signal processing. Whenpower supervision is enabled and a loss of AC poweroccurs, the primary reporting devices (such as printersand computers) show AC FAIL and the D6600/D6100power indicator starts blinking. When AC powerrestores, the power indicator stops blinking andreporting devices show AC RESTORE.8.1Connecting External BatteriesDo not connect an external batterycharger to the D6600/D6100.Use the terminal on the rear panel to connect anexternal DC power source. During AC power outages,the external DC source supplies power to the receiver.Use a 12 VDC lead-acid battery for external backuppower.Only use approved stationary standby batteries for ULapplications. Battery wiring must run from the receiverthrough the UL Listed rack, exit the rack through aconduit connection, and terminate at a UL Listedbattery enclosure suitable for the size and number ofbatteries used for UL applications.Table 5: Battery Voltage DisplayBattery VoltageDisplay duringAC power outageAbove 11.5 V11.5 V to 10.2 VBelow 10.2 VBattery OKBattery LowBattery BadDisplay if nobattery whenAC power isrestoredBatteryM
Battery Missing** UPS AC Fail Battery Bad** UPS Battery Low AC Fail System Temperature High External Printing Error** Line Fault** COM# Error** Line Card Trouble** COM3 Trouble** 3.1.2 Line Cards and Modules Table 4: D6600 Line Cards and Modules Name Model Description Telephone line card D6640 Up to eight line cards can be installed