Transcription
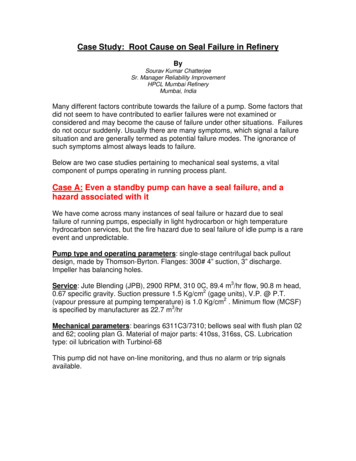
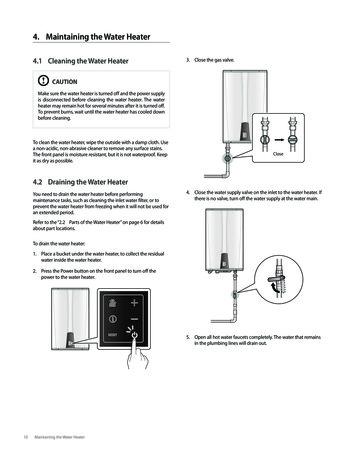
4. Maintaining the Water Heater4.1 Cleaning the Water Heater3. Close the gas valve.CAUTIONMake sure the water heater is turned off and the power supplyis disconnected before cleaning the water heater. The waterheater may remain hot for several minutes after it is turned off.To prevent burns, wait until the water heater has cooled downbefore cleaning.To clean the water heater, wipe the outside with a damp cloth. Usea non-acidic, non-abrasive cleaner to remove any surface stains.The front panel is moisture resistant, but it is not waterproof. Keepit as dry as possible.Close4.2 Draining the Water HeaterYou need to drain the water heater before performingmaintenance tasks, such as cleaning the inlet water filter, or toprevent the water heater from freezing when it will not be used foran extended period.4. Close the water supply valve on the inlet to the water heater. Ifthere is no valve, turn off the water supply at the water main.Refer to the “2.2 Parts of the Water Heater” on page 6 for detailsabout part locations.To drain the water heater:1. Place a bucket under the water heater, to collect the residualwater inside the water heater.2. Press the Power button on the front panel to turn off thepower to the water heater.5. Open all hot water faucets completely. The water that remainsin the plumbing lines will drain out.10Maintaining the Water Heater
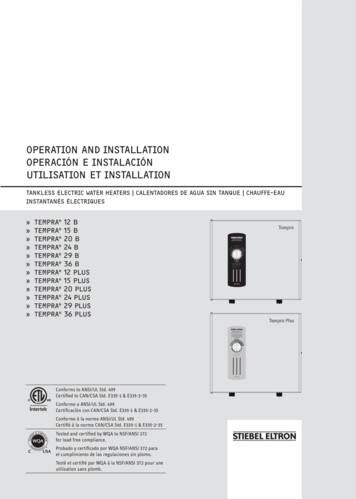
6. Remove the recirculation inlet filter from the bottom of thewater heater (“A” model only).4.3 Flushing the Heat ExchangerCAUTIONFlushing the Heat Exchanger is a somewhat complicatedprocedure. Read the following instructions carefully beforeattempting this procedure. If you are uncertain about any ofthe steps in the procedure, contact an authorized technician orlicensed professional. Keep in mind that improper maintenancecan void your warranty.Refer to the “2.2 Parts of the Water Heater” on page 6 for detailsabout part locations.Before flushing the Heat Exchanger, gather the following items:Cold WaterInlet FilterRecirculationInlet Filter(“A” model only) Pump Drain Plug(“A” model only)A bucket that is 5 gallons or largerCleaning solution diluted with water3 hosesA water circulation pumpTo flush the Heat Exchanger:7. Open the pump drain plug (“A” model only).8. Remove the cold water inlet filter.9. Allow the residual water to drain from the water heater.10. When the water is completely drained, reinsert therecirculation inlet filter and the cold water inlet filter, and thenclose the pump drain plug.BAC11. To refill the water heater follow the steps of “Draining theWater Heater” in reverse.DNavien Easy valve KitABCDHot Water LineCold Water LineCirculation PumpFlushing KitMaintaining the Water Heater11
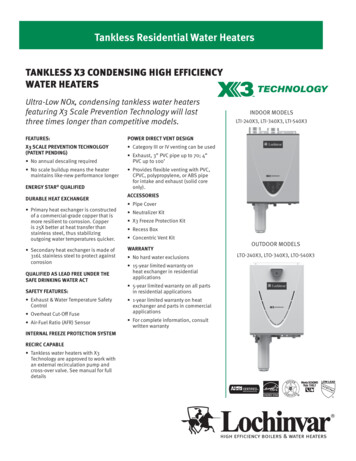
1. Press the Power button on the front panel to turn off the waterheater.2. Disconnect the power supply to the water heater.3. Close the “C” and “D” valves on the hot and cold water lines.4. Connect one tube to the “A” valve and place the free end in thebucket.5. Connect one of the tubes to the circulation pump outlet andthe cold water line at the “B” valve.4.4 Cleaning the Inlet Water Filter andRecirculation Inlet FilterTo clean the filters:1. Drain the water heater. Refer to “4.2 Draining the WaterHeater” on page 10.2. While the filters are removed, rinse it with clean running water(cold) and, if necessary, scrub it clean with a brush.Cold WaterInlet Filter6. Connect one tube to the circulation pump inlet and place thefree end in the bucket.7. Pour the cleaning solution into the bucket.8. Open both “A” and “B” valves.9. Turn on the circulation pump and allow the solution tocirculate through the water heater for at least 45 minutes.10. Rinse the cleaning solution from the water heater:a. R emove the free end of the drain tube from the bucket andplace it in the condensate drain or laundry tub (wherever thewater heater drains).b. Close the “B” valve and open the “D” valve. Do not open the“C” valve yet.c. Allow water to flow through the water heater for 5 minutes.d. Close the “A” valve and open the “C” valve.RecirculationInlet Filter(“A” model only)3. Reinsert and tighten the filters.11. Disconnect all tubes.12. Remove the cold water inlet filter from the water heater andclean out any residue.13. Reinsert the filter and ensure the filter cap is securelytightened.14. Reconnect the power supply to the Water Heater.15. Press the Power button on the front panel to turn on the waterheater.Recirculation Inlet Filter(“A” model only)Cold WaterInlet Filter4. Refill the water heater. Refer to “4.2 Draining the WaterHeater” on page 10.12Maintaining the Water Heater
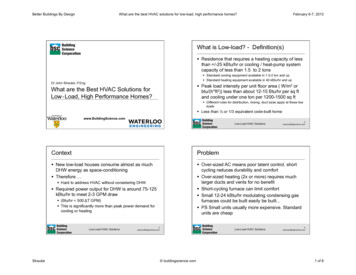
4.5 Cleaning the Air Intake Filter5. Pull the filter out of the water heater.If the air intake filter becomes clogged by dust or lint, the waterheater will cease to operate and “Error Code 10” will appear onthe front panel display. To properly maintain the water heater, youshould clean the air intake filter every 3-4 months.To clean the air intake filter:1. Press the Power button on the front panel to turn off the waterheater.6. Remove the filter from the plastic assembly and clean it with atoothbrush and clean running water.2. Disconnect the power supply to the water heater.7. Allow the filter to dry completely.3. Remove the front cover of the water heater.8. Reinsert the filter into the plastic assembly.4. Remove the screw that secures the air intake filter (the filter islocated at the top left of the water heater).9. Place the filter assembly back into the water heater and secureit with the screw.10. Replace the front cover.11. Reconnect the power supply to the water heater.12. Press the Power button on the front panel to turn on the waterheater.Maintaining the Water Heater13
4.6 Protecting the Water Heater fromFreezingCAUTIONIf hot water will not flow and you suspect that the water heater isfrozen, follow these steps:1. Press the Power button on the front panel to turn off the waterheater.2. Close the gas valve.Damage due to freezing is not covered by the Navien limitedwarranty. Freezing damage is most likely to occur due to back draftingcaused by negative pressure in the building. This is not amanufacturing defect, and therefore, Navien will not warrantany damages due to freezing. The installer is responsible forensuring that there is sufficient make-up air to avoid sucha situation and the owner is responsible for ensuring thatprotection against freezing is maintained.To avoid freezing issues, we strongly recommend the useof a direct vent exhaust and intake system. Your installershould ensure that the exhaust vent pipe and the air intakepipe are both connected directly from the collars on the topof the water heater to the outdoors. This type of vent systemminimizes air movement within the water heater.This water heater has an optional recirculation mode thatis used for freeze protection. This mode should prevent thewater heater from freezing, even if the intake air duct is notvented directly.The water heater is designed for indoor or outdoorinstallation. However, it should not be installed outdoors inareas that are prone to freezing temperatures.To ensure that the water heater does not freeze, follow theseguidelines: 14Do not unplug the power supply cord, except for routinemaintenance. The water heater has a freeze protection functionthat requires electricity. The freeze protection function willoperate regardless of whether or not the power is turned on oroff, as long as the electric supply is still connected.Do not close the gas valve, except for routine maintenance, asthis will limit additional freeze protection (“A” model only).If the power or gas supplies must be disconnected for anextended period, drain the water heater. Freezing damage mayoccur if there is a loss of power or an interruption in the gassupply to the water heater.If the water heater will not be used for an extended period,drain the water heater.Maintaining the Water HeaterClose3. Open the hot water faucet that is closest to the water heater.4. Use a hair dryer or a portable electric heater to heat up boththe primary and secondary Heat Exchangers.5. Check every few minutes to see if water is running at the openfaucet.6. When the water starts flowing again, check the water heaterand piping for leaks. If you detect any leaks or the water heateris not operating properly, contact an authorized technician orlicensed professional
10 Maintaining the Water Heater 4.1 Cleaning the Water Heater CAUTION Make sure the water heater is turned off and the power supply is disconnected before cleaning the water heater. The water heater may remain hot for several minutes after it is turned off. To prevent burns, wait until the water heater has cooled down before cleaning.