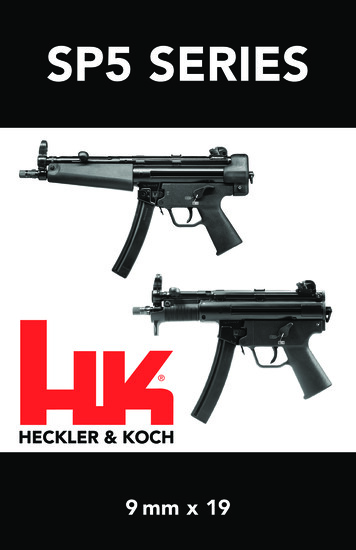
Transcription
SP5 SERIES9 mm x 19
SAFETY RULESPlease read this operator's manual before handling your firearm. The following safetyrules are placed in this manual by HK as an important reminder that firearm safety is yourresponsibility. Firearms can be dangerous and can potentially cause serious injury, damage toproperty or death, if handled im prop er ly.1. Never point a firearm at anyone or in any direction other than a SAFE direction, i.e. down range.2. Treat all firearms as if they are always loaded.3. Keep your finger off the trigger and out side of the trigger guard until your sights are aligned onthe target and you are ready to fire.4. Keep your finger off the trigger and outside of the trigger guard while loading or un load ing thefirearm.5. Keep your finger off the trigger and outside of the trigger guard while pulling the firearm out ofa holster/carry rig/case or while returning it to a holster/carry rig/case.6. Be sure of your target and the backstop beyond.7. Never give a firearm to or take a firearm from anyone unless the action is open and themagazine and/or chamber are free of any ammunition or brass.8. Be sure that the ammunition you are using is factory loaded, is of the correct caliber for thefirearm in which it is to be used, and that it is not damaged in any way.9. Before firing, remove the magazine from the firearm, lock the action open, make sure thechamber is clear of any am mu ni tion or brass, and check the barrel of the unloaded firearm forany possible ob struc tions.10. Before firing any firearm that is unfamiliar to you, make sure that you understand exactly how itfunctions. A lack of familiarity with the firearm can result in serious accidents. Attend a certifiedtraining course on any firearm which you intend to use or with which you are not sufficientlyfamiliar.11. Always wear hearing and eye protection when using your firearm.12. Keep all body parts, especially the hands and fingers, away from the muzzle to avoid injury orburns.13. Be sure that no part of either hand touches or interferes with the bolt. The bolt is movedbackward by the recoil force of the pistol during firing and may cause serious injury.14. Firearms should be locked and stored separately from ammunition and beyond the reach ofchil dren and/or any untrained individuals.15. Avoid the use of any alcoholic beverages or drugs before or during your use of a firearm.16. Discharging firearms in poorly ventilated areas, cleaning firearms, or handling ammunition mayresult in exposure to lead; a substance known to be associated with birth defects, reproductiveharm and other serious injury. Have adequate ventilation at all times. Wash hands thoroughlyafter exposure.STOP! Know how to clear this pistol before attempting to operate.1. Point the muzzle of the pistol in a safe direction and place the safety lever in the safeposition. Ensure the muzzle is pointed in a safe direction and that the operator’s fingers areoff the trigger and outside the trigger guard. Place the safety lever in the SAFE position (whitecartrtrdge symbol with white “X” through it). Safety lever is located on both sides of thereceiver.2. Remove the magazine. Depress the magazine release on the right side of the receiver (releaselever for SP5) and remove the magazine from the magazine well.3. Open and lock the bolt to the rear. Grasping the charging handle on the left side of thereciever (located adjacent of the front sight) and move the bolt to the rear while keeping themuzzle pointed in a safe direction. Place the charging handle in the upward, locking recessnotch. The bolt should be locked in the rear position. Watch for a cartridge or empty case to beejected out through the ejection port.4. Inspect the chamber. Inspect the chamber for the presence of a cartridge or empty case by:1. Visually inspecting the chamber through the open ejection port.2. Physically inserting a finger through the magazine well and sweeping the chamber and feedramp area.3. Removing any cartridges or empty cases from the chamber or from within the firearm.The SP5/SP5K pistol is now con sid ered “Clear.” Additional safety information appearsthroughout this manual.
WARNING! Read, understand, follow, and practice the safe firearms handlinginstructions put forth in this manual. Failure to follow the safety rules and safe firearmhandling instructions taught in this manual may cause property damage, personalinjury, and/or death.SP5 SERIESOperator’s ManualHECKLER & KOCH5675 Transport BoulevardColumbus, Georgia 31907 USATel: (706) 568-1906USA Website: www.hk-usa.com Email:cs@heckler-koch-us.com Heckler & Koch USA (Heckler & Koch Inc. and Heckler & Koch Defense Inc.) June 2020All rights reserved, specifications and models subject to change without notice.
TABLE OF CONTENTSSafety Precautions & Clearing. Inside CoverSection 1 Introduction.5Section 2 Nomenclature.6Section 3 Specifications.10Section 4 Function & Op er a tion .11Operating Principle in Brief .12Cycle of Operation .12Safety/Selector Lever Function.13Section 5 Sights, Aiming, and Sight Adjustment.14Sights.14Aiming.14Sight Adjustment.15Section 6 Ammunition.18Section 7 Instructions for Use.19Section 8Section 9Section 10Section 11Section 12Clearing Procedure.19Filling & Emp ty ing the Magazine .20Loading .20Firing.21Unloading .22Selection and Use of a Holster or Carry Sling.23Storage & Trans port .23Disassembly.23Disassembly into Assembly Groups.24Assembly .26Assembly Groups.27Function Check.28Cleaning & Main te nance .29Cleaning .29Inspection .30Lubrication .31Troubleshooting Prob lems & Re pair .33Warranty Registration Information.33SP5K Accessories.34SP5 Series Exploded View & Parts List .36Firearms Service Record .404
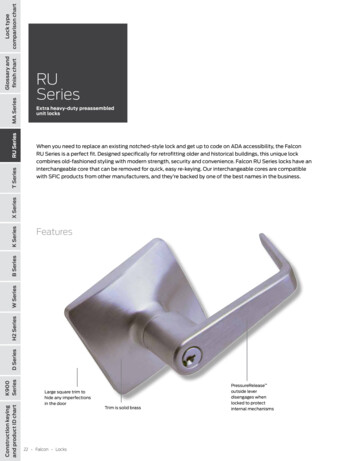
SECTION 1 INTRODUCTIONThe SP5 Series was developed by Heckler & Koch as a semi-automatic, civilian sportingpistol (hence the “SP” prefix) that matches the look and ergonomics of the famous MP5submachine gun. It is actually the second iteration of an HK commercial/civilian modelinspired by the MP5 design.The SP5 Series is designed and manufactured to meet the strict definition of a civilianpistol in the USA and cannot be altered to fire in the fully automatic mode.For more comfortable shooting, the SP5 Series is equipped with an elastic “bungee”sling. The sling is easily installed by snapping it onto the sling swivel hardware located onthe rear of the receiver. Using the sling makes firing the SP5 Series more stable and lessfatiguing.When shooting, the operator should push the SP5 Series forward against the tension ofthe sling using a two-handed grip; ensuring the forward hand gasps the handguard andthat hands and fingers are kept well away from the front of the muzzle.ALL NFA RULES APPLY. WARNING: 1. The addition of the HK stock to a HK type pistolwith a barrel shorter than 16 inches in length results in the manufacturing of a shortbarreled rifle (SBR) which falls within the classification of firearms subject to NFA controls[26 U.S. Code §5845(a)(3)]. Even if the pistol is not assembled into the butt stock,possession of the pistol and the butt stock would constitute a short barrel rifle (SBR) whichmay not be lawfully possessed unless it is registered to the possessor in the NationalFirearms Registration and Transfer Record in advance. 2. The Addition of the HK stock toa HK type pistol with a barrel of 16 inches in length or longer results in the manufacturingof a lawful sporting rifle. Prior to converting the pistol into a rifle, ensure you follow theguidance in 18 U.S. Code § 922 (r) and 27 CFR 478.39. It is YOUR responsibility to ensurethat all laws and regulations are followed.5
SECTION 2 NOMENCLATUREFig. 1 – SP5 Assembly1234567Locking pinCapRSafety lever, ambidextrousMagazine wellMagazinePaddle releaseTrigger guard8 Trigger9 Pistol grip10 Sling11 Eyelet for carrying sling12 Charging handle13 Front sight6
Fig. 2 – SP5 Assembly1234567ReceiverBoltRecoil spring guide rodCapPistol gripHandguardProtective Cap8 Locking bolt for handguard9 Lockng bolt for pistol grip/cap10 Carry sling11 10 round magazine12 15 round magazine13 30 round magazine7
Fig. 3 – SP5K (right side view)123456Locking pin for back plate (2x)Back plateSafety lever, ambidextrousMounting points on Picatinny rail scope mountThumb restFinger protector87 Magazine well8 Magazine9 Ejection port10 Magazine catch11 Snap hook12 Carrying sling
Fig. 4 – SP5K-PDW (left side view)1234567ReceiverBolt group, compl.Cap, compl.HandguardPistol grip, compl.Locking pin (3x)Safety cap8 Elastic sling9 10 round magazine10 15 round magazine11 30 round magazine1 Receiver with barrel2 Bolt group and recoilspring3 Backplate4 Pistol grip mechanism5 Magazine6 HandguardFig. 5 – SP5K Assembly Groups9
SECTION 3 SPECIFICATIONSSP5 SPECIFICATIONSCaliberOperating PrincipleLocking SystemMagazine Capacity9 mm x 19Recoil operatedRoller-delayed blowback10, 15, 30 roundsDIMENSIONS & WEIGHTLengthWidthHeightBarrel LengthSight Radius17.82.488.668.8610.2Weight (without magazine)Weight (empty magazines)5.1 lb (2500 grams)30rd-6.3 oz/180 g, 10rd-3.5 oz/110 gOTHER DATATrigger PullReturn TravelTrigger TravelBarrel 2 mm63 mm220 mm225 mm260 mm6.74-10.11 pounds-force / 30-45 N.12 inches / 3 mm.24 inches / 6 mmGroove/land profile, 6 grooves,right-hand twist, 1/2”x28”SP5K SPECIFICATIONSCaliberOperating PrincipleMode of FireMagazine CapacityCartridge case ejection9 mm x 19Roller-delayed blowbackSingle fire30, 15, 10 roundsRight sideDIMENSIONS & WEIGHTLengthWidthHeightBarrel LengthSight RadiusWeight (without magazine)Magazine Weight (empty 30, 15, 10-rd)13.9 inches (354 mm)2.40 inches (61 mm)8.66 inches (220 mm)4.53 inches (115 mm)10.2 inches (260 mm)4.64 pounds (2.11 kilograms)6 oz (170 g), 4.23 oz (120 g), 3.88 oz (110 g)OTHER DATATrigger PullTrigger TravelReturn TravelBarrel yApprox. 6.74-10.11 pounds-force (30-45Newtons).24 inches (6 mm).12 inches (3 mm)Groove/land profile, 6 grooves, right-handtwistLimited Lifetime Warranty for the original retail(commercial/civilian) purchaser, one year forlaw enforcement and military customersSelector/safety lever, firing pin springNo tools required for user field strip10
SECTION 4 FUNCTION AND OPERATIONOPERATING PRINCIPLE IN BRIEFThe cycle of operation is a reoccurring sequence of mechanical events which takes placein the operation of this self-loading firearm.There are three commonly accepted operating principles used to operate an autoloading firearm. They are utilization of the kinetic energy released as the round is fired.The powder in a modern cartridge is converted in a half dozen milliseconds from a drypowder to expanding gases 900 to 1,000 times the volume of the powder. Additionallythe pressure of this expanding gas can average 38,000 psi with a peak of over 43,000 psiin a 9 mm x 19 cartridge.This firing causes many things to happen. First, as the gases expand the bullet movesfrom the case into the barrel and the force required to move the bullet causes an exactforce to be exerted in the opposite direction. This will become recoil energy and is thepower behind two of the operating principles.Second, the gases behind the bullet are continuing to expand. They push the bullet downthe bore imparting spin to the bullet by the inscription of the bullet on the lands andgrooves of the bore. These grooves are in the shape of a spiral which makes the bulletturn as it travels down the barrel. It can achieve a rate of spin of almost 80,000 rpm in a 9mm. The expanding gases if vented and applied to pistons or rods can be made to powerthe mechanism of the auto loader.One of the features of the gas operated gun is that the barrel is stationary and that thegas is vented from the barrel forward of the mid point of the barrel. This creates a delaywhich enables the bullet to leave the muzzle and the pressure to drop to a safe level priorto the action opening.In the recoil operated system the barrel and breech, barrel and bolt, barrel and slideremain closed while the mechanism is in recoil until the bullet leaves the bore and thepressure drops to a safe level. This is done through timing, but the barrel in a recoilsystem moves. Examples are numerous as all Browning design pistols are recoil operatedincluding pistols like the HK USP series, HK45 series, P30 series, P2000 series, and VPseries.Blowback is another method of operation using recoil energy and includes two types,simple and the delayed. The simple blowback system uses the mass of the bolt to causethe delay necessary for the bullet to leave the muzzle. Many fully automatic submachineguns and .22 LR semi-automatic firearms use simple blowback.Delayed blowback however, instead of using the mass of the bolt, incorporates amechanical “disadvantage” which must be overcome to unlock the bolt and open theaction. In the case of the HK SP5 Series (and the HK MP5) disadvantage is caused by therollers engaging the barrel extension and locking piece. This type of bolt system enablesthe bolt mechanism to be lightweight.The SP5 Series and MP5 function through the utilization of the symmetrical transmissionof energy. The equal and opposite reaction to the bullet traveling down the bore providesmore than enough energy to function the gun.11
CYCLE OF OPERATIONThe cycle of operation is a reoccurring sequence of mechanical events which takes placein the operation of a self-loading firearm. The sequence for the SP5 Series pistols beginswith a loaded magazine inserted into the magazine well.1. FEEDING Removing a round from the magazine.As the bolt moves forward under the pressure of the expanding recoil spring, the feedingpawl on the bolt head rides between the lips of the magazine stripping a round out of themagazine and feeding it into the chamber.2. CHAMBERING Placing the round in the chamber of the barrel and seating it fully.The bolt pushes the round forward into the chamber until the mouth of the cartridgecomes to rest on the end of the chamber.3. LOCKING - Closing and locking of the breech mechanism prior to firing.The bolt, being pushed by the recoil spring, continues to apply pressure to the base ofthe cartridge until the extractor cams out allowing the bolt to snap forward. The front ofthe bolt head hits the back of the barrel and stops its forward movement. Once the bolthead has stopped moving, the bolt carrier and locking piece continue forward for about4mm until the locking piece forces the locking rollers out into the locking recesses of thebarrel extension.4. FIRING - Ignition of the propellant powder.The trigger is pulled and pushes up on the rear of the sear causing the front to movedown releasing the hammer. The hammer falls to the firing pin and overcomes the tensionof the firing pin spring driving the firing pin into the primer. The primer detonates,igniting the propellant powder and firing has occurred. When the sear releases thehammer the spring in the sear causes the sear to travel a predetermined motion. Thissetting of the sear allows SEMI-AUTOMATIC fire and the sear is reset to catch thehammer before the hammer hits the firing pin.5. UNLOCKING Removal of any blocking mechanism from the breech so the breechcan open.The resultant force of the cartridge firing creates an impact on the bolt head that sendsforce through the rollers into the locking piece, knocking it to the rear. Once the lockingpiece moves from between the rollers, the bolt is unlocked.6. EXTRACTING removal of the fired cartridge case, or a round from the chamber.As the bullet is leaving the cartridge case, expanding gases pressurize the inside of thecase and the flutes in the chamber. This prevents the case from sticking to the wall of thechamber and residual gas pressure floats the case out of the chamber on this film of highpressure gas.7. EJECTING - Expulsion of the round or fired case from the gun.The extractor holds the empty case to the face of the bolt head as it travels to the rear.The carrier rides over the rear of the ejector and the front comes up through the face ofthe bolt hitting the case as the bolt moves to the rear. The extractor creates a pivot andthe ejector provides thrust as the case is knocked out of the ejection port.8. COCKING - Resetting of the trigger mechanism to enable subsequent shots to befired. NOTE: cocking is NOT complete at this time!While the bolt moves to the rear the hammer is pushed back and the bolt rides over it.When the bolt moves forward for the next cycle the hammer starts forward. The shooterreleases the trigger causing the sear to snap back into position and the firearm is readyfor the next shot.12
SAFETY/SELECTOR LEVER FUNCTIONNOTE: The SP5 Series has ambidextrous selector/safety levers, that is safety leverslocated on both sides of the lower receiver. Either lever can be manipulated andmoves the lever on the other side. Unlike some firearms, the selector/safety leverscan be placed on the “SAFE” position even if the firearm is not cocked.“SAFE POSITION” – Place the selector lever with the point facing towards the closedwhite box containing a bullet symbol with an “X” over it (downward, Fig. 6).“FIRE POSITION” – Place the selector lever with the point towards the closed red boxcontaining a red bullet symbol in it (upward, Fig. 7).Fig. 6 – Selector lever on SAFEFig. 7 – Selector lever on FIRE13
SECTION 5 SIGHTS, AIMING, AND SIGHT ADJUSTMENTSIGHTSThe SP5 Series is equipped with the same sighting system installed on the HK MP5K andthe SP89 — a protected front sight blade (Fig. 9) and an adjustable rear drum (Fig. 8) withvarious width notches for precise shooting and rapid target acquisition.Fig. 8 – Rear SightFig. 9 – Front SightNOTE: HK SP5 Series pistols are test fired for accuracy by ensuring the point ofaim equals point of impact at 25 meters (27.3 yards). Individual results concerningaccuracy and/or shot placement are affected by such factors as stance, grip,engagement range, and ammunition. Use of different types of ammunition can changethe elevation and windage of the position of point of impact. The sights can beadjusted to correct changed position of point of impact.AIMINGThe correct sight alignment and “sight picture” is depicted in Fig. 10 below. Commonsight alignment errors are shown in Fig. 11.Fig. 10 – Correct sight alignment14
Fig. 11 – Common sight alignment errorsSIGHT ADJUSTMENTSight adjustment for the SP5 Series is made on the rear sight drum. The rear sight can beadjusted for precise shooting or for rapid target acquisition. Movement of the sight willbe in the same direction the shooter wants the impact of the round to move. If the hitis to the right of the intended target, then the sight and the impact must be moved left.For precise shooting, adjust the rear sight to a narrow notch (Fig. 12). For rapid targetacquisition, adjust the rear sight to a wide notch (Fig. 13).Fig. 12 – Narrow sight notchFig. 13 – Wide sight notchUse an HK sight adjustment tool ( Fig. 14, HK part # 3000009) to adjust the rear sight.The sight adjustment tool includes two components, a Phillips screwdriver and anelevation adjustment module (stored in the handle of the screwdriver).Fig. 14 – HK sight adjustment tool15
Fig. 15 – Insert elevation toolmodule into rear sightFig. 16 – Adjust rear sightElevation Adjustment – Point of Impact TOO HIGH1. Insert the elevation tool module into rear sight while inserting the wedges of the toolinto the slots of the rear sight (Fig. 15).2. Insert the Phillips-head screwdriver into the elevation adjustment tool moduledownwards and hold it (Fig. 16).A, press3. Turn rear sight drum counter-clockwise B (Fig. 16). Turning by one click changes thepoint of impact by approximately 1.375 cm (0.55 inches) at 25 meters (27.34 yards or82 feet) range.4. After correction withdraw the Phillips-head screwdriver and remove elevation toolmodule. The catch bolts will then re-engage in the slots. After performing the elevationadjustment set the desired sight notch again.Elevation Adjustment – Point of Impact TOO LOW1. Insert the elevation adjustment module tool into rear sight while inserting the wedgesof the tool into the slots of the rear sight (Fig. 15).2. Insert the Phillips-head screwdriver into the elevation adjustment tool moduledownwards and hold it (Fig. 16).A,press3. Turn rear sight drum B clockwise (Fig. 16). Turning by one click changes the point ofimpact by approximately 7 cm (2.76 inches) at 25 meters (27.34 yards or 82 feet) range.4. After correction withdraw the Phillips-head screwdriver and remove elevation toolmodule. The catch bolts will then re-engage in the slots. After performing the elevationadjustment set the desired sight notch again.16
Fig. 17 – Lossen screwFig. 18 – Turn windageAdjustment screwWindage Adjustment – Point of Impact TOO FAR RIGHT1. Loosen screw by turning counter-clockwise with Phillips-head screwdriver (Fig. 17).2. Turn windage adjustment screw clockwise (Fig. 18).3. Tighten screw by turning clockwise with Phillips-head screwdriver.Windage Adjustment – Point of Impact TOO FAR LEFT1. Loosen screw by turning counter-clockwise with Phillips-head screwdriver (Fig. 17).2. Turn windage adjustment screw counter-clockwise (Fig. 18).3. Tighten screw by turning clockwise with screwdriver.Any corrections which may be required when sighting-in the SP5 Series should beperformed by adjusting the rear sight for elevation or windage. The pistols are designedto be sighted in at a range of 25 meters. REMEMBER THIS HELPFUL FORMULA: LL C(Lower or Left Clockwise rotation)17
SECTION 6 AMMUNITIONWARNING! HK specifically disclaims any re spon si bil i ties for any damage or injurythat should occur because of, or as a result of, the use of faulty, remanufactured, orreloaded (hand load ed) ammunition, or of cartridges oth er than those for which thepistol was orig i nal ly cham bered for.HK SP5 Series pistols are designed to fire quality, factory-loaded am mu ni tion, load ed toNATO or SAAMI (Sporting Arms and Ammunition Manufacturers’ Institute) spec i fi ca tionsfor use spe cif i cal ly in handguns.The following guidelines should be considered when se lect ing the cor rect am mu ni tion foryour pis tol:1. Be sure the am mu ni tion you have chosen is com pat i ble with your pistol-proper caliber,cartridge, bul let weight, etc.2. Prior to loading the mag a zine and cham ber, carefully in spect all car tridg es for thefollowing ab nor mal i ties: Cracked, split, dirty or cor rod ed cases Improperly seat ed pro jec tiles and/or primers Damaged pro jec tiles.3. Do not attempt to fire a cartridge in which the pro jec tile has been forced back into thecase. Upon firing, this con di tion may result in increased chamber pres sure above safelim its.4. DO NOT USE: Reloads or remanufactured ammunition. Aluminium or steel cased ammunition. Non-jacketed or exposed lead ammunition. Corrosive ammunition (primer and/or propellant). For eign and/or out dat ed mil i tary sur plus Any ammunition that exceeds NATO or SAAMI (Sporting Arms and AmmunitionManufacturers’ Institute) pressure limits. Corroded ammunition. Dented Cartridges. Cartridges with loose bullets. Cartridges exposed to extreme heat above 135 F (57 C) until they have cooled. Use only authorized ammunition that is manufactured to NATO and SAAMI specs. Ammunition that is wet or dirty. Ammunition ex posed to oil, grease, wa ter or direct sun light. If possible, re movecontaminants be fore use and cool down am mu ni tion ex posed to di rect sun light orheat. (Ex po sure to sourc es of heat could raise the cham ber pres sure of the car tridgeabove safe limits.)WARNING! HK firearms are designed to function with quality, manufactured brasscased ammunition. Use of steel or aluminum-cased cartridges is not recommendedand could adversely affect safe and reliable functioning. Use of cast-lead bullets isalso not recommended.NOTE: HK handguns are safe for use with new, high-quality U.S. factory ammunitionmanufactured to SAAMI specifications. For further information go to www.saami.orgor contact the manufacture of your ammunition directly.18
SECTION 7 INSTRUCTIONS FOR USEKnow how to clear an SP5 Series pistol before attempting to operate.CLEARING PROCEDURE1. Point the muzzle of the pistol in a safe direction and place the safety lever in thesafe position. Ensure the muzzle of the firearm is pointed in a safe direction and that theoperator’s fingers are off the trigger and outside the trigger guard. Place the safety leverin the SAFE position (white cartridges symbol with white “X” through it). Safety lever islocated on both sides of the receiver.2. Remove the magazine. Depress the magazine release button on the right side of thereceiver (Fig. 19 A ) or paddle on the SP5. Remove the magazine from the magazine well(Fig. 19 B ).3. Open and lock the bolt to the rear. Grasping the charging handle on the left sideof the receiver (located adjacent of the front sight) and move the bolt to the rear whilekeeping the muzzle pointed in a safe direction (Fig. 20). Place the charging handle in theupward, locking recess notch (Fig. 21 A and B ). The bolt should be locked in the rearposition. Watch for a cartridge or empty case to be ejected out through the ejection port.4. Inspect the chamber. Inspect the chamber for the presence of a cartridge or emptycase by (Fig. 22):1. Visually inspecting the chamber through the open ejection port.2. Physically inserting a finger through the magazine well and sweeping the chamberand feed ramp area.3. Removing any cartridges or empty cases from the chamber or from within thefirearm.Fig. 19 – Remove the magazineFig. 20 – Move the bolt rearwardFig. 21 – Lock the bolt rearwardFig. 22 – Check the chamber19
Fig. 23 – Depress the SP5 magazinerelease lever or button.Fig. 24 – Remove the magazine from themagazine well.FILLING AND EMPTYING THE MAGAZINENOTE: Do not attempt to load more than the prescribed number of cartridges intothe magazine. Do not alter the shape of the magazine housing, fol low er or spring.To do so may cause stoppages or the mag a zine may not seat properly in the pistol.Filling the MagazineFig. 25 – Loading the magazineFig. 26 – Unloading the magazine1. Hold the magazine in the non-firing hand with the back side of the mag a zine restingagainst the palm .2. Using the firing hand, hold a car tridge between the index finger and thumb with theprojectile facing the palm.3. Press the rim of the cartridge down against the forward edge of the mag a zine followeror on the top car tridge al ready in the magazine (Fig. 25 A ).4. Slide the cartridge back into the mag a zine under the feed lips (Fig. 25 B ).5. Repeat steps 1-4 until the magazine is full. Do not overfill the magazine.Emptying the MagazineExert pressure with a finger on the base of the cartridge (Fig. 26) and push each cartridgeforward out of the mag a zine until the magazine is empty.LOADING1. Lock charging handle rearward. Ensure the safety lever is in the “SAFE” position.2. Pull charging handle all the way back and hold it (Fig. 27 A ).3. Lock charging handle upwards in place into recess notch in receiver (Fig. 27 B ). Thebolt group is held in rear position.20
Fig. 27 – Lock charging handle4. Insert magazine. When inserting the magazine into the SP5 Series pisols, the boltgroup should be locked in the rearward position.5. Insert full magazine into the firearm until the magazine catch enga
pistol in the USA and cannot be altered to fire in the fully automatic mode. For more comfortable shooting, the SP5 Series is equipped with an elastic "bungee" sling. The sling is easily installed by snapping it onto the sling swivel hardware located on the rear of the receiver. Using the sling makes firing the SP5 Series more stable and less
