Transcription
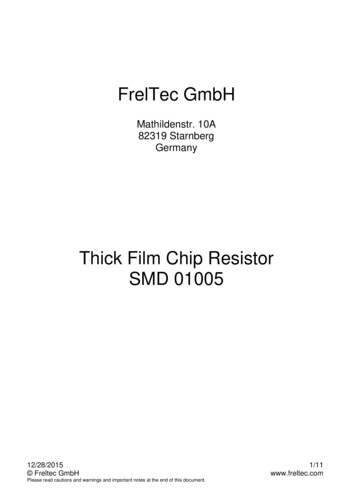
Soldering SolutionsUser Manual for Industrial &Digital Mil-Spec Solder Pots
TABLE OF CONTENTSTABLE OF CONTENTS2INTRODUCTION3PRODUCTS4-7Industrial Pots4-5Digital Mil-Spec Pots6-7SAFETY8-9Safety - Personal8Safety - Workspace8Safety - Device9SET-UP & OPERATIONSelecting a LocationCharging the Solder Pot10-151010-11Setting the Proper Temperature - Industrial Pots 12Digital Solder Pot, Set-up & CalibrationProper use of Solder Pot13-1415MAINTENANCE & CARE16-17Purging the Pot17TROUBLE SHOOTING18ACCESSORIES19WARRANTY & SERVICE DETAILS20Company InformationAmerican Beauty Tools are made just outside of Detroit Michigan, mericanbeautytools.com2
INTRODUCTIONAmerican Beauty has been a fixture in the soldering tool marketplace since 1894. Our tools are a throw-back to a time whenpeople took pride in the tools they used and companies tookpride in the tools they manufactured. Today, American Beauty tools are routinely chosen to tackle the most challenging soldering,brazing and thermal management applications with a diverse lineof soldering irons and stations, solder pots, resistance solderingsystems and accessories.Your American Beauty solder pot has been manufactured to standup to the rigors of today’s demanding production environment.Whether its a thermostactically controlled industrial pot or a digitalmil-spec solder pot, elements from it’s grey cast iron crucible, forma protective layer with the higher tin content in today’s solders,making it a great choice when going Lead-free. All AmericanBeauty solder pots are RoHS compliant. Pre-tinning your cleanwire and component parts reduces oxidation, contamination andhelps ensure perfectly wetted solder joints. Dip soldering with anAmerican Beauty solder pot is an easy and effective method ofperforming this essential operation.With this type of tool, the operator plays an essential role inachieving quality end-results, avoiding injury and ensuring a longproduct lifespan. By it’s very nature, a solder pot poses a hazardand can result in serious injury if not used properly. Please ensurethat you take the time to read this manual carefully. It containsall the information required to understand how to properlyset-up, operate & maintain this American Beauty equipment.Additionally, please feel free to visit our full-service website (www.americanbeautytools.com) for links to instructional videos, productspecifications, a technical blog, an on-line shopping cart and muchmore.The following video demonstrateshow to quickly get started usingyour solder .americanbeautytools.com3
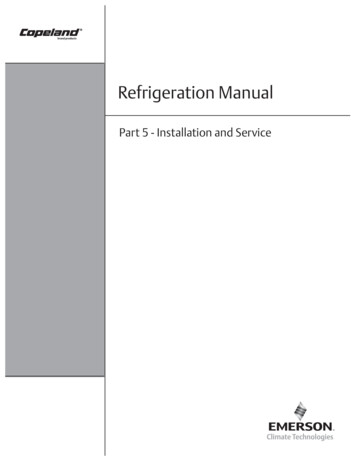
INDUSTRIAL SOLDER POTSAmerican Beauty solder pots are recognized throughout theindustry for superior performance and tremendous durability.Customers have described our pots as ‘bullet proof’ and ‘gluttonfor punishment’. If your need is a solder pot that will workday after day, month after month, this is the product for you.Dross skimmers are available for all pots, providing a saferand more efficient dross removal method than paddles, spoonsor sticks that contaminate solder and lower illed MiniPot300One Pound Solder PotPF-300Prefilled One Pound Solder Pot600Mid-Capacity Solder PotPF-600Prefilled Mid-Cap. Solder Pot4
INDUSTRIAL SOLDER POTSCharging your solder pot (adding the initial load of solder) is aprocess that takes time and patience. If you have neither, why don’tyou just let us handle that part of the product life cycle? Availablein our mini, one pound and mid capacity pot, not only is thisconvenient, its cheaper than buying the solder separately.Replacement PartModel #Dross Skimmer Assembly for One Pound Pots302Dross Skimmer Assembly for Mid-Capacity Pot602Dross Skimmer Assembly for MiniPotMP-9DHeating Elements (Pair) for Mid-Capacity Pot9300-2XHeating Elements (Pair) for One Pound Pot9301-2XHeating Element for MiniPotMP-9HThermostat for Model One Pound & Mid-Capacity Pots8055Voltage Controller for MiniPot8058Cord-set, Industrial Solder Pots9303Replacement Fuses (6 AMP)www.americanbeautytools.com8054-65
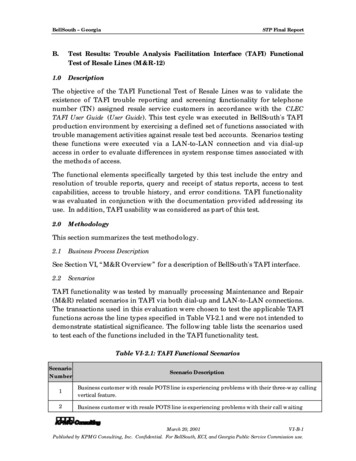
DIGITAL MIL-SPEC SOLDER POTYour digital solder pot isn’t cheap, but at least you sleep easy atnight knowing you’re operating within that very tight Mil-Spectemperature range. But are you? What happens to your piece ofmind when, just prior to use, your technician cleans off the pot’ssurface dross with a room temperature spatula. American Beauty’sDigital, Mil-Spec Compliant Solder Pots (One and Mid-cap) potshave integrated dross skimmers which eliminates this fluctuation.ModelDescriptionD-MP-9Digital Mil-Spec MiniPotD-MP-9CDigital Mil-Spec MiniPot - CeramicD-300Digital Mil-Spec 1 lbs Solder PotD-300CDigital Mil-Spec 1lbs Solder Pot - CeramicD-600Digital Mil-Spec Mid-Capacity Solder PotD-600CDigital Mil-Spec Mid-Cap. Solder Pot Ceramic6
DIGITAL MIL-SPEC SOLDER POTDigital pots exceed the requirements of military specificationsANSI(J-STD-0018).Digital LCD readout displays both preset and actual temperaturein either F or C with the ability to easliy switch between the two.Pot controls temperature to 5 F ( 2.75 C) of a preselected settingfrom ambient to 800-900 F depending upon pot size.Calibration ServiceAll American Beauty Digital Mil-Spec solder pots can be calibrated.The process is outlined in the instruction sheet inserted within thisbooklet or found on our website ally, you can find a detailed video showing the procedureon page 14 of this booklet. However, if you would prefer to have usperform the calibration service, please contact our customer serviceto discuss pricing and timing and request a return authorization.www.americanbeautytools.com7
SAFETYSolder pots contain molten solder which is extremely hot. Operatorsof this product should be made aware of and fully understand allof the warnings as they relate to the operation or use of this device.Failure to observe the following safety instruction could result inserious injury.Safety - Personal Only use the solder pot for its intended use as outlined in theintroduction of this manual. Always wear Personal Protective Equipment (PPE) whenoperating your solder pot. This includes safety glasses,protective gloves, and sleeves (if necessary) to cover yourbody. Do not operate solder pot while under the influence of alcoholor drugs.Safety - Workspace Always operate the solder pot in a well ventilated area. Somesolders and fluxes release fumes that can be harmful. Properattention should be given to these materials and the ventilationrequired to exhaust these fumes. Do not operate the solder pot in the presence of water and/orcombustible & heat sensitive materials. Never leave a solder pot unattended unless it is unpluggedand completely cooled down. Caution: When cooling, solderwill solidify on surface, but will remain molten beneath thesurface for an extended period of time. Be sure to properly label work area when in use to identify thedangers of a hot solder pot.8
SAFETYSafety - Device American Beauty solder pots are available in both a lowvoltage (110-120VAC) and high voltage (220-240VAC)version. Please consult your cord label to determine whatversion you have purchased and ensure your solder pot isproperly plugged in to the corresponding outlet. When in operation, a solder pot gets extremely hot tothe touch. After a period of time, this can also include theadjustment knob. Extreme caution should be used whentouching any part of the solder pot. Do not pick up pot at anytime during operation. Always ensure that the solder pot has been properly turnedoff at the completion of its use: The One Pound & Mid Capacity General, IndustrialUse Solder Pots use a bi-metal thermostat to controltemperature and should be turned to the lowest settingand unplugged to ensure they are “off”. The Mini Pot & Digital Pots – come equipped with a“positive off” feature that can be both heard and felt. Theunit may be unplugged as well as a secondary caution. Do not attempt to operate the solder pot with a frayed ordamaged cord or with the base plate removed. this couldexpose the operator to an electrical shock. Do not attempt to remove the protective circuitry. Never attempt to perform routine maintenance, repairs,diagnostics, or install replacements while unit is plugged in. Repairs should only be performed by a qualified technicianfamiliar with the product. Disconnect the power cord prior to performing any service ordiagnostics on your solder pot. Failure to do so could causeserious harm and electric shock.www.americanbeautytools.com9
SET-UP & OPERATIONSelecting a LocationWe have created a checklist of considerations to guide you inselecting a suitable location for your solder pot. Choosing a goodlocation to station your solder pot is the first step to operating yoursolder pot safely and efficiently. Area is well ventilated Surface is both flat and level Surface is both chemically and thermally resistant Area is away from high volume foot traffic zones Area is free from excess clutter Workspace is not in the direct path of airflow from AC orfurnace vent Workspace is preferably on an inside wall, or at-least awayfrom windows Workspace has access to a properly grounded outlet whoseoutput voltage matches that of your tool. (110-120VAC or220-240VAC) Workspace has adequate space that allows the power cordto hang freelyFollowing these basic steps should ensure a suitably safe andefficient location for the operation of your solder pot.Charging the Solder Pot“Charging” a solder pot is the common industry term that describesthe process of adding solder to the solder pot for the first time.Follow these easy steps to get your pot ready for every-day usage.1.Prepare solder While many forms of solder can be used forthe charging of your pot, we recommend bar solder, cut into1” pieces.10
SET-UP & OPERATIONWARNING: USE OF FLUX-CORE SOLDER DURING CHARGINGCAN RESULT IN EXCESSIVE SMOKING.(Cont’d from pg 10)Group these pieces into a mound inside the solder pot’scrucible. We find that this ensures maximum surface contactbetween solder pot and solder to speed up initial melting,while avoiding the chance of larger pieces ‘flipping’ duringmelting and causing potential burn hazard.2.Plug in solder pot Turn the pot’s temperature dial toapproximately 90% of maximum output.3.Add additional solder As required, carefully add additionalpieces of solder to the growing solder bath, until the solderlevel reaches the top of the crucible, but not over the crucible‘lip’.Note: A molecular bond forms between the tin in the solder andthe iron in the crucible during the initial charging. This createsa protective layer which will prevent future degradation ofyour solder pot from the tin found in most solder. Do notdisturb this layer.Watch a video on the propertechnique to charge your gwww.americanbeautytools.com11
SET-UP & OPERATIONSetting the Proper TemperatureAs a general rule the temperature of the solder bath should be setto approximately 100 F to 150 F above melt temperature of thesolder alloy being used. This prevents excess solder usage whileensuring your bath always stays liquid.Note: Temperature markings on the faceplate of your AmericanBeauty solder pot can be used as a general guide. Follow theoutlined steps for setting a more precise operating temperature.1.Use a standard testing device complete with thermal couple(s).Place a thermal couple into the center of your solder bath.2.Increase the temperature of the solder bath by turning thecontrol knob in a clockwise direction. Decrease by turningcounter-clockwise.3.Once you have determined the appropriate setting for yourparticular application, record that setting for future reference.Many operators choose to physically mark/notch the faceplateon the solder pot itself.4.When additional solder is added to the solder bath, a slightdip in the overall temperature of the pot will occur. Planaccordingly.12
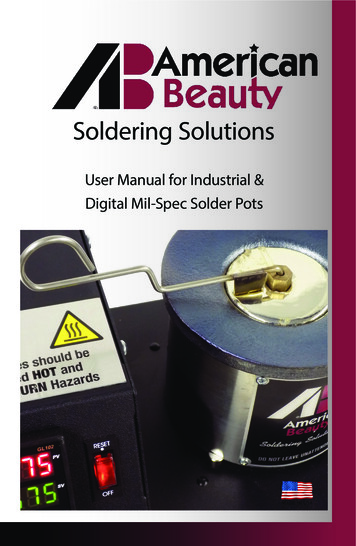
SET-UP & OPERATIONUnderstanding DisplayPV: Present Value Actual Temperature of the solder pot.SV: Set Value Target Temperature of the solder pot.AT: Auto-tune indicator Solder pot is actively learning’ whenlight is flashing.OUT: Output Indicator Solder Pot is actively heating when lightis on.SET: Functions as enter button.Initial Use & Auto-TuneEvery digital solder pot is tested, auto-tuned & calibrated at ourfacility prior to shipping. This procedure is performed without solderand at a selected temperature that ensures the solder pot and all ofits temperature control componentry are functioning properly. Aftersolder has been added for the first time (charging) and its optimaloperating temperature has been selected, we strongly recommendrunning the Auto-Tuning feature on the pot. This allows the solderpot to ‘learn’ how to best maintain the solder bath at the desiredtemperature within the tightest specifications.Any time there is a change to the solder pot (solder, location, settemperature), its a good idea to repeat this step.For specific instructions on how to Auto-Tune your Digital Solder pot,refer to the Instruction Sheet that has been inserted into this manual,or follow the link below.www.americanbeautytools.com13
SET-UP & OPERATIONIf a picture is worth a thousand words, then a video is wortha thousand pictures! If you would prefer written directions foreach of these topics, you’ll find an insert in this booklet. Finally,you can always contact our technical support if you need a littlemore hands-on assistance.Setting up your Digital PotWatch a video on the propertechnique to set-up your solder hanging Between C & FThe following video demonstrateshow to quickly switch between C& F.www.americanbeautytools.com/v/sp/ctofCalibration ProcedureWatch this video prior to (orduring) calibrating your digitalsolder pot to make life easier .www.americanbeautytools.com/v/sp/calibrate14
SET-UP & OPERATIONProper use of Solder Pot1.Prepare item to be tinned (free and clean of unwantedcontaminants).2.For items requiring flux, dip component into flux and removeensuring no excess (dripping).3.Dip and withdraw component into molten solder using asmooth and even motion.www.americanbeautytools.com15
MAINTENANCE & CAREIt is critical to maintain a level of operator consistency after thesoldering process has been properly established. While it can beeasy to become complacent, one must always remember that asolder pot maintains a bath of molten solder at temperatures ashigh as 900 F that can easily lead to serious injury.Use dross skimmer to remove residue that develops at surface ofmolten solder, prior to dipping any components or parts into thesolder bath. Integrated skimmer moves dross onto the lip of thesolder pot crucible where it dries up and can be easily removed.Solder should be replenished regularly by adding small amountsof solder that can quickly assimilate with the rest of the solderbath. This limits the temperature variation caused by adding largeamounts of solder at one time.16
MAINTENANCE & CAREPurging the PotThere may be times when it will be necessary to remove existingsolder alloy from your solder pot crucible.Caution: The solder pot will be extremely hot during this process.Use appropriate PPE that will protect you from these hightemperatures.1.Ensure work area is smooth, level, and unobstructed.2.Plug in the solder pot and heat until the entire solder bath hasturned into its liquid state.3.When solder has completely melted, remove dross skimmer (ifnecessary) and unplug solder pot.4.Carefully pour hot molten solder slowly into a temperatureresistant container.5.Allow solder in container to solidify and completely cool downbefore further handling.6.Invert the now empty solder pot onto a sheet of aluminum foilover a heat resistant surface.7.Plug the solder pot back in and turn the thermostat controlknob to its maximum heat setting. Allow the solder pot to heatfor 15-20 minutes. Any remaining dross will cinder away toa fine ash.8.Unplug the solder pot and allow it to completely cool down.9.Using a natural bristle brush remove all of the ash fromthe inside of the solder pot’s crucible. Take special care notto damage the surface of the crucible as this is your pot’sprotective layer.The idea of purging your solder pot canbe scary. Watch how we do ricanbeautytools.com17
TROUBLE SHOOTINGProblem DescriptionSolutionThe solder iscontaminated.Purge solder pot and replacesolder (pg. 13).There is a residue on topof the solder.Use Dross Skimmer to removeresidue (pg. 12).Solder pot does not turnon.1. Is the power cord connected? Connect power cord to outlet.2. Is the GCFI tripped on youroutlet? Unplug your pot, reset theGCFI, and reconnect the powercord.3. Has solder pot fuse blown? Remove fuse from cordset plug.If blown, replace. (Model8054-6)Solder pot does not turnoff or is overheating.Thermostat’s electrical contactsmay have become welded together. Replace Thermostat (300 &600) or Voltage Controller(MP-9)The solder pot is heatingbut is no longer gettinghot enough.One of the heating elementsmay have expired. Replace theelement(s).Watch our technician perform a fewof the more basic repairs.www.americanbeautytools.com/v/sp/18
ACCESSORIESSolder BarsModelDescriptionCS-PBF3Solder, Meter Bar, Lead FreeCS-PB50-3Solder, Meter Bar, Lead BearingCS-PBF4Solder, Regular Bar, Lead FreeCS-PB50-4Solder, Regular Bar, Lead BearingFluxesModelDescriptionCS-FX2Regular Flux, 2ozCS-FX3Regular Flux, 4 ozCS-FX4Ruby Fluid Liquid Flux, 2ozCS-FX5Ruby Fluid Liquid Flux, PintCS-FX6Ruby Fluid for Stainless Steel, 2ozCS-FX7Ruby Fluid for Stainless Steel, PintOther AccessoriesModelDescriptionCS-TT2Sal Ammoniac BlockSS-8Solder Sucker BulbCS-ABKITSoldering Iron Maintenance Kitwww.americanbeautytools.com19
WARRANTY & SERVICE DETAILSWarranty DetailsAmerican Beauty tools are warrantied to be free from defectsin material and workmanship as outlined below. No warranty ismade with respect to products which have been altered, subjectedto abuse or improperly used.Consumable Parts - NOT COVEREDItems include such parts as Soldering Iron Tips, Desoldering Braid,Resistance Soldering Elements and Electrodes, etc.Serviceable Parts - 90-DAY PERIODItems include such parts as are Heating Elements, Thermostats,Voltage Controllers, Cord-sets, etc. It is the customer’s responsibilityto make themselves aware of proper operating parameters, thatwhen not followed, can greatly reduce the life-span of this type ofpart.Standard American Beauty Products - 3-YR PERIODThese items include all American Beauty soldering tools that don’tfall into the two categories highlighted above.Complete warranty details can be located on our company websiteat www.americanbeautytools.com/warrantyRepair ServiceEventually even the toughest soldering tools require minor repairwork. We have expanded our internal repair department andreassigned our most experienced technicians to work on repairs.We implemented customized software to ensure accurateand timely processing of all returned products. Save yourselfunnecessary downtime and aggravation by taking advantageof American Beauty’s world-class repair and refurbishmentservice. Contact us today to make arrangements, or visitwww.americanbeautytools.com/repair20
American Beauty has been a fixture in the soldering tool market-place since 1894. Our tools are a throw-back to a time when people took pride in the tools they used and companies took pride in the tools they manufactured. Today, American Beauty tools are routinely chosen to tackle the most challenging soldering,