Transcription
PCE Americas Inc.711 Commerce WaySuite 8JupiterFL-33458USAFrom outside US: 1Tel: (561) 320-9162Fax: (561) 320-9176info@pce-americas.comPCE Instruments UK Ltd.Units 12/13Southpoint Business ParkEnsign wayHampshire / SouthamptonUnited Kingdom, SO31 4RFFrom outside UK: 44Tel: (0) 2380 98703 0Fax: (0) 2380 98703 nglishwww.pce-instruments.comManualColorimeter PCE-CSM 1, PCE-CSM 2 and PCECSM 4Version 1.3Date of creation: 21.05.2015Date of last change: 10.01.2017
ManualContents1Introduction . 32Safety notes . 33Specifications . 43.1Technical specifications . 43.2Contents of delivery . 44System description . 54.1Button description . 54.2Interface description . 54.3Battery . 64.4Changing the measuring aperture (only PCE-CSM 1) . 65Operation . 75.1Turn on the device . 75.2Taking a measurement . 75.35.3.15.3.25.3.35.3.45.3.55.3.65.3.76Additional functions . 9Record . 9Calibration . 10Connection to a PC . 10Tolerances . 11Delete recorded data. 11Averaging . 11Display mode . 12Settings . 126.1Colour offset . 126.2Language . 126.3Time setting . 126.4Contrast . 136.5Restore factory settings . 137Optional Accessories. 137.17.1.17.1.28Powder test box PCE-CSM PTB . 13Build-up . 13Operation . 14Contact . 158.1PCE Instruments UK . 158.2PCE Americas . 152
Manual1IntroductionThank you for purchasing a PCE-CSM series colorimeter from PCE Instruments.The colorimeters PCE-CSM 1, PCE-CSM 2 and PCE-CSM4 are the ideal measuring devices for qualitycontrol and offer great reliability when you need to comply with certain optical requirements. Thecolorimeters have an ergonomic design and are equipped with a user-friendly operator interface. Thedifference between the 3 devices is the size of their measuring apertures.2Safety notesPlease read this manual carefully and completely before you use the device for the first time. The devicemay only be used by qualified personnel and repaired by PCE Instruments personnel. There is nowarranty of damages or injuries caused by non-observance of the manual. This colorimeter is a precise measuring device. Please avoid strong changes in theenvironmental conditions. This includes flickering lights as well as changes of the air temperatureor air humidity.The device may only be used in the approved temperature range.Make sure the device is standing right on the measuring spot. Do not move it while the measuringprocedure is in progress. Avoid shocks.Do not expose the device to water. Only use it in areas which fulfil the permitted environmentalconditions.Keep the device clean and prevent dust or other particles from entering the measuring aperture.To clean the device, use a damp cloth. Do not use solvent-containing materials for cleaning.The case should only be opened by qualified personnel of PCE Instruments.You must not make any technical changes to the device.The instrument should never be placed with the user interface facing an object (e. g. keyboardside on a table).If you do not need the device for a longer period of time, please reset the white calibration andstore it in in the carrying case.This manual is published by PCE Instruments without any guarantee.We expressly point to our general guarantee terms which can be found in our general terms of business.If you have any questions please contact PCE Instruments.3
Manual33.1SpecificationsTechnical specificationsMeasuring apertureGeometrySensorColour spaceColour difference formulaLight sourceLight source deviceErrors between each equipmentStorageRepeatabilityPower supplyCharging timeBattery lifeLamp lifeStorage conditionsDimensionsWeightPCE-CSM 1PCE-CSM 2PCE-CSM 44 mm8 mm20 mm8/d45 /0Silicon photoelectric diodeCIEL*a*b*C*hCIEL *a*bCIEXYZΔE*abΔL*abΔE*C*HD65LED blue light 0.50ΔE*ab100 standard samples, 20,000 test samplesStandard deviation within ΔE*ab 0.08Measurement conditions: average of 30 measurements ofstandard white plateRechargeable lithium-ion battery3.7 V @ 3,200 mAh8 hoursApprox. 5,000 measurements5 years, more than 1.6 million measurementsAir temperature: 0 40 CAir humidity: 0 85 % RH, non-condensing205 x 67 x 80 mm500 g3.2Contents of delivery1 x colorimeter PCE-CSM 1, PCE-CSM 2 or PCE-CSM 41 x USB cable1 x soft bag1 x mains adaptor1 x hand strap1 x calibration plate (white)1 x pc software1 x instruction manual4
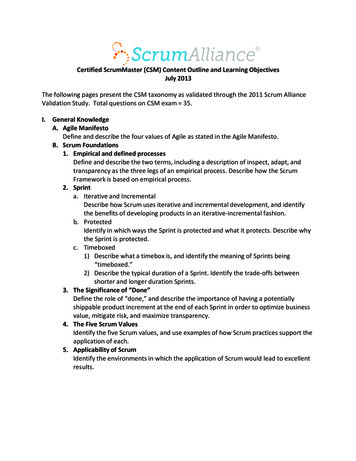
Manual4System description4.1Button description1234756Front viewrear view1. On/Off button2. Up button3. Down button4. Menu button4.25. Back button6. Enter button7. Testing buttonInterface descriptionConnectionfor mainsadaptorUSBinterfaceinterfaces Mains adaptor: Only use the mains adaptor included in the package. If it breaks down, only usesubstitutions with the following characteristics: output 5 V DC, 2 A. USB interface: By using the USB interface, you can transfer data from the colorimeter to a PC.The baud rate is 115,200 bps.5
Manual4.3BatteryThe device comes with a built-in 3.7 V 3200 mAh battery.Charging the batteryThe battery can only be charged when the device is connected to a PC or to the mains adaptor.Note: If the battery is damaged, the device can still be used via an external power source (PC / mainsadaptor).4.4Changing the measuring aperture (only PCE-CSM 1)Installing the measuring apertureTo install the measuring aperture, first put it in the allocated space (see picture below). Now turn itcounter-clockwise until you hear a clicking noise. This means that the measuring aperture is nowattached properly.Detaching the measuring apertureTo dismantle the measuring aperture, turn it clockwise, until you hear a clicking noise. This means, it isnow detached.6
Manual55.1OperationTurn on the device1. Make sure the battery is installed or the device is connected to an external power source.2. Turn on the device by switching the On/Off button to “1”. After a few seconds, you areautomatically directed to the “Standard Measurement” screen. The default setting for thismeasuring mode is L*a*b*C*H.5.2Taking a measurementIf you turn on the device, you are directed to the “Standard Measurement” screen. To take ameasurement, follow these steps:1. Press and hold the testing button (see chapter 4.1). Next, 4 light cones appear to help you aim atthe measuring point.2. Move the device as close to the measuring point as possible.3. Release the testing button. The colorimeter now takes a measurement.After the measuring process has finished, you can see the results in the following display:7
ManualAfter taking a “Standard Measurement”, you can also take one or more “Sample Measurements”. To doso, follow these steps:1. When in the result screen of a standard measurement, press the Enter buttonredirected to the “Sample Measurement” display.2. Take another measurement (just like you took the standard measurement).3. Now you can see the deviation of the sample in the following display:. You are nowNote: While the measurement is in progress (time duration: 1 second), all buttons are inactive.To go back to the “Standard Measurement” display, press the Back button8.
Manual5.3Additional functions5.3.1 RecordAll measuring results are recorded and saved to the internal memory of the colorimeter. To view therecorded data, press the Menu button , select “Record” and press Enterto confirm.Now, you get to the following display:Here, you can navigate between the individual measurements by using the arrow keys (and). If you have one or more sample measurements, you can view those by pressing Enter . Youcan navigate through the sample measurements by using the arrow keys ( and ).If you want to delete a sample measurement, select it and press and hold the Back button ,until a confirmation display appears. Now, press Enterto delete the sample or press Backto cancel.By pressing Back again, you can go back to the standard record display. If you want to add sample measurements to a standard measurement subsequently, select thestandard measurement and press the Menu button . Now, you are in the measurement display.Press Enterto get to the sample measurement display. Now you can take samplemeasurements which are added to the selected standard measurement. If you want to turn a sample measurement into a standard, select the sample measurement asdescribed above and press the Menu button . The devices switches to the standardmeasurement screen and the sample becomes a standard.9
Manual5.3.2CalibrationTo get to the calibration menu, press the Menu button , select “Calibrate“ and press Enter .Here you can select between white and black calibration. Use the arrow keys ( and ) to select andpress Enterto confirm. A confirmation display with instructions will appear.White calibrationIf you want to perform a white calibration, turn the device upside down and place the white calibrationplate on the measuring aperture. After that, press the Testing button to start the calibration.Black calibrationIf you wish to perform a black calibration, remove the calibration plate and place the device with themeasuring aperture oriented upwards. Make sure that this calibration is carried out in a dark environment.Additionally, keep the device away at least 1 meter from reflecting objects like walls, tables or otherobjects. To start the calibration process, press the Testing button.Note: A calibration is only reasonable in the following cases: when first using the device, after strongchanges in the environmental conditions, when the device has been used for a long time or when themeasurement results are inaccurate.5.3.3Connection to a PCTo connect the device to a PC, press the Menu button , select “Comm“ and press Enter . Now, youwill get to the communication display.After that, use the USB cable to connect the device to a PC and press Enter . If the connection wassuccessful, the screen shows “Communicating ”10
Manual5.3.4TolerancesTo set up or adjust tolerances, press the Menu button , select “Tolerance“ and press Enter . Now,you get to the tolerance display.Here you can activate / deactivate different tolerances. To do so, select the desired option by using thearrow keys ( and ) and press Enter . If you activate a tolerance, you get to an input display whereyou can set the desired threshold value. Use the arrow keys ( and ) to select a number. Press Enterto get to the next digit. After confirming the last digit by pressing Enter , the tolerance is set up.Note: The threshold value refers to the „ΔE*“ value in the sample measurement display. It specifies themaximum acceptable value of the deviation. If the measured value exceeds the threshold value, you cansee a “Fail” indication in the display. Otherwise, the display will show “Pass”.5.3.5Delete recorded dataTo delete the recorded data, press the Menu button , select “Delete“ and press Enter . Now, you getto the delete display.Here you have two different options. You can either delete all sample measurements (“Delete ALLSamples”) or all records (“Delete ALL Records”).Select the desired option by using the arrow keys ( and ) and press Enter . A confirmation displayappears. Press Enterto confirm or Backto cancel.Note: If you delete all records, all sample measurements will be deleted as well.5.3.6 AveragingYou can set the number of measurements which are performed during the measuring procedure. Fromthese particular measurement results, the average value is generated.To get to the averaging settings, press the Menu button , select “Average“ and press Enter .Here, you can set the number of measurements. Use the arrow keys to select a number. Press Enterto get to the next digit. After confirming the last digit by pressing Enter , the averaging is set.Note: If you set “00” or “01”, there will be no averaging.11
Manual5.3.7Display modeTo change the display mode, press the Menu button , select “Display“ and press Enter . Now, youget to the display mode settings.Here you have three different options: “CIE L*a*b*C*H*”, “CIE L*a*b*” and “CIE XYZ”. Use the arrow keys( and ) to select the desired option and press Enterto confirm.The following images show the different display modes:CIE L*a*b*C*H*(default setting)6CIE L*a*b*SettingsTo get to the settings, press the Menu buttondifferent options. Use the arrow keys ( and.6.1CIE XYZ, select “Setting“ and press Enter . Here you have) to navigate and confirm the selection by pressing EnterColour offsetHere you can activate / deactivate the colour offset. Use the arrow keys (confirm by pressing Enter .and) for selection and6.2LanguageHere you can select the menu language of the device. You can choose between English and Chinese.Select the desired language by means of the arrow keys ( and ) and confirm by pressing Enter .6.3Time settingHere you can set the time (“Set time”), date (“Set date”) and how time and date are displayed (“Timeformat” / “Date format”). Select the desired option by using the arrow keys ( and ) and press Enterto confirm.Set time / dateSelect “Set time” for time settings or “Set date” for date settings. Here you can set the individual digits ofthe time and date. Adjust the particular number by using the arrow keys ( and ) and press Enterto get to the next digit. After confirming the last digit by pressing Enter , the time / date is set.12
ManualTime formatHere you can choose between 24 h format and 12 h format. Use the arrow keys (and press Enterto confirm.and) for selectionDate formatHere you can choose between year-month-day, month-day-year and day-month-year. Use the arrow keys( and ) for selection and press Enterto confirm.6.4ContrastHere you can adjust the contrast of the display. Use the arrow keys (and press Enter to confirm .6.5andRestore factory settingsHere you can restore the factory settings of the device. To do so, press Enterdisplay. To cancel, press Back .7) to adjust the scroll barin the confirmationOptional Accessories7.1Powder test box PCE-CSM PTBWith the optional powder test box PCE-CSM PTB you can determine the colorimetric parameters ofpowders.7.1.1 Build-upThe PCE-CSM PTB is built up of a base plate (1), a measuring plate with a powder compartment (2), alens (3) and a mounting ring (4).13
Manual7.1.2Operation1. Calibration: Put the lens on the white calibrations plate and perform a white calibration. Afterthat, perform a black calibration.2. Fill in the powder: Fill the powder into the powder compartment of the measuring plate.Powder compartmentAfter that, put the powder test box back together (see 7.1.1). Make sure the screw joint is straight.3. Measure: Place the measuring hole of the colorimeter on the hole of the powder test box andperform a measurement. Make sure the colorimeter is stable.4. Clean the test box: After using the powder test box, disassemble and clean it. If needed, youcan use alcohol for cleaning. After the cleaning, let the box dry and store it properly until the nextuse.14
Manual8ContactIf you have any questions about our range of products or measuring instruments please contact PCEInstruments.8.1PCE Instruments UKBy post:PCE Instruments UK Ltd.Units 12/13 Southpoint Business ParkEnsign Way, SouthamptonHampshireUnited Kingdom, SO31 4RFBy phone:02380 987 0358.2PCE AmericasBy post:PCE Americas Inc.711 Commerce WaySuite 8Jupiter33458 FLUSABy phone:561 320 916215
PCE-CSM 1 PCE-CSM 2 PCE-CSM 4 Measuring aperture 4 mm 8 mm 20 mm Geometry 8/d 45 /0 Sensor Silicon photoelectric diode Colour space CIEL*a*b*C*h CIEL *a*b CIEXYZ Colour difference formula ΔE*ab ΔL*ab ΔE*C*H Light source D65 Light source device LED blue light Storage 100 standard samples, 20,000 test samples