Transcription
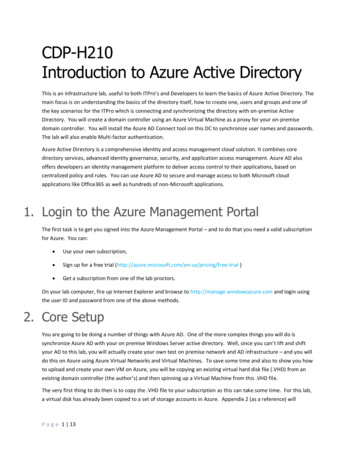
CDP-H210Introduction to Azure Active DirectoryThis is an infrastructure lab, useful to both ITPro’s and Developers to learn the basics of Azure Active Directory. Themain focus is on understanding the basics of the directory itself, how to create one, users and groups and one ofthe key scenarios for the ITPro which is connecting and synchronizing the directory with on-premise ActiveDirectory. You will create a domain controller using an Azure Virtual Machine as a proxy for your on-premisedomain controller. You will install the Azure AD Connect tool on this DC to synchronize user names and passwords.The lab will also enable Multi-factor authentication.Azure Active Directory is a comprehensive identity and access management cloud solution. It combines coredirectory services, advanced identity governance, security, and application access management. Azure AD alsooffers developers an identity management platform to deliver access control to their applications, based oncentralized policy and rules. You can use Azure AD to secure and manage access to both Microsoft cloudapplications like Office365 as well as hundreds of non-Microsoft applications.1. Login to the Azure Management PortalThe first task is to get you signed into the Azure Management Portal – and to do that you need a valid subscriptionfor Azure. You can: Use your own subscription, Sign up for a free trial al ) Get a subscription from one of the lab proctors.On your lab computer, fire up Internet Explorer and browse to http://manage.windowsazure.com and login usingthe user ID and password from one of the above methods.2. Core SetupYou are going to be doing a number of things with Azure AD. One of the more complex things you will do issynchronize Azure AD with your on premise Windows Server active directory. Well, since you can’t lift and shiftyour AD to this lab, you will actually create your own test on premise network and AD infrastructure – and you willdo this on Azure using Azure Virtual Networks and Virtual Machines. To save some time and also to show you howto upload and create your own VM on Azure, you will be copying an existing virtual hard disk file (.VHD) from anexisting domain controller (the author’s) and then spinning up a Virtual Machine from this .VHD file.The very first thing to do then is to copy the .VHD file to your subscription as this can take some time. For this lab,a virtual disk has already been copied to a set of storage accounts in Azure. Appendix 2 (as a reference) willP a g e 1 13
explain how you would do this if you want to try when you get back to the office. You just need to copy the .VHDfile to your own storage account. So first, you need a storage account.Click the “ NEW “ icon at the bottom left and select DATA SERVICES and STORAGE andQUICK CREATEIn the URL box, enter a name for your storage service use youralias vhdstore For example, if your name is Ann Green, your work email alias is agreen@contoso.com, useagreenvhdstore as the storage account name (there can be NO UPPERCASE letters or symbols).You will get a red “tick” next tothe URL name if it is OK.Choose a location – this iswhich DataCenter in the worldyou want to place your storageaccount You MUST selectNorth Europe (your copy ofthe .VHD file will be very slow ifyou do not).Select Locally Redundant replication – this means data in your storage account is NOT replicated toanother Azure data center (we don’t need it for this lab, it’s also cheaper and faster).Click on CREATE STORAGE ACCOUNT. It will take around 30 seconds for the account to get created(status: ONLINE).Now you can copy the .vhd file. You will do this using PowerShell and specifically using the PowerShellcommands for Azure. First you need to install these commands. On your lab machine, open anotherbrowser tab and go to this sesClick on the Windows Standalone link, RUNthe .msi file and follow all the prompts toget PowerShell installed.After install, Click the Window button andtype “Powershell ISE”. Right-Click thePowershell ISE application and select Runas Administrator.Click the Script button (as show opposite)to show the script window.At the command prompt, enter:Add-AzureAccountP a g e 2 13
This will launch a login Window. Login using the credentials you used earlier. PowerShell is now“connected” to your Azure subscription and you can now interact with it. For example, type the followingto get details about all your subscriptions:Get-AzureSubscriptionTo copy the .VHD file, you will use a script which will prompt you for the subscription and storage accountto use (if you have more than one), then it will randomly select from one of 5 storage accounts the .VHDfile is stored in, then finally it will initiatethe copy.In Appendix 1 in this lab guide – copythe entire script and paste it into yourscript window in PowerShell (the topsection with a tab called untitled1.ps1).Press RUN.The script will run and keep checking thestatus of the copy operation. It can takejust a few seconds or 10-15 minutes tocopy the 20GB .vhd file – it depends onother activity at the time.You will come back to this later in the lab when you need your “on-premise” domain controller.One other thing you will need when you create your Virtual Machine/Domain Controller from the .vhd file you arecopying, is a Virtual Network. This will allow you later to add your Domain Controller to this network, as well asput other VM’s in the network and have network connectivity and name resolution between them.On the Management Portal, select “ NEW” - NETWORK SERVICES - VIRTUAL NETWORK - QUICKCREATEEnter a NAME (which must be unique – suggest alias -vnet for example agreen-vnet as per the namingof your storage account (you can have symbols for most other services in your name, just not storage).P a g e 3 13
LOCATION - Select the same location as your storage account – preferably North Europe.Leave the other values alone and then click OK. Your network will get created.Once created (it will take just 20-30 seconds), click on the network and then click on the CONFIGUREtab.In the DNS Servers section, enter the name of yourdomain controller VM – yes – you have not actuallycreated this yet. Use alias -DCVN – for exampleagreen-DCVM.Since the VM will be the first VM in your network, andthe default IP address scheme for your network is a10.0.0.0 scheme, we know that the IP address given tothe first machine will be 10.0.0.4.Enter this value in the IP address and click SAVE andYES to the warning. You are doing this step now in thelab to save you a little time and not have to do a reboot of your domain controller to pick up the DNSvalue.That’s all you need to do right now. Let’s get started actually learning Azure Active Directory itself 3. First Steps with Azure AD3.1 Setting UpYour first step with Azure AD is the easy part – just creating the directory itself.On the Azure Portal, Click “ NEW”, select APP SERVICES, select ActiveDirectory and then Directory and Custom Create.Enter a name for the directory –whatever you want e.g. alias Azure ADThen a DOMAIN NAME – use alias AAD and make sure thedomain is valid/not taken – change it if it is.Select the Country/Region – pick a country in the same regionthat you choose when you created your Network/Storage Account.P a g e 4 13
3.2 Changing your Directory-Subscription MappingNow there is a relationship between Azure subscriptions and Azure Active Directory. Each subscription has to beassociated with a single directory – a directory can apply to multiple subscriptions.There is a default “hidden” directory – with the domain microsoft.onmicrosoft.com. When you created yourdirectory above, the subscription you are using is not associated with this new directory – it’s actually associatedwith the “hidden” default directory (or it might even be some other directory depending on your subscription).You can see this initial directory and you can also change it so that your subscription is mapped to your newdirectory (although you cannot change this back currently).IF you are a service administrator on the subscription you are using for this lab, you will be able to do the changebelow to your directory.Click on Settings (the last icon on the left nav).The list of subscriptions shows for each subscription what the associated directoryis. As you can see, for your subscription, the default directory is NOT the directoryyou just created.Select the subscription and Click Edit Directory at the bottom of the portal. Thenew directory you created will get populated as the only choice. If you do not seethis new directory, close the Edit Directory dialog and refresh your browser and tryagain.Click Next and OK. You will get a message about re-loading the portal. Click OK.Now the subscription will show it is associated with your new directory. This means that you can create new usersin your new directory and use the directory for your Azure subscription management. For example you can createa new user and make them a co-admin on your subscription. You will do this next.Go back to your Azure AD in the Management Portal.Click YOUR directory, and click the users tab. You will see your current Microsoft account listed.Click on ADD USER. You want a New User in Your Organization.Enter AzureCoAdmin as the username. Click NEXT.Enter the Firstname (Azure)Lastname (Coadmin)Displayname (Azure CoAdmin)For Role, select Global Administrator and then enter any alternate email address (this is not validated soit can be any well formed address e.g. foo@foo.com).DO NOT check enable MFA – you will do this in a later step.P a g e 5 13
On the Get Temporary Password screen, click the create button and then click the clipboard iconto copy the temporary password to the clipboard (you will change this password to something you canremember next).Click OKNow you have a user in your directory, the user has global admin permission on the directory itself, butthe user is not yet a co-admin on the subscription.On the Portal on the left nav, click on Settings and select the Administrators tab and click ADDEnter the name of your coadmin – which would beazurecoadmin@ alias aad.onmicrosoft.com. If youdo this correctly, your user will be validated in theAzure AD.Check the subscription you want to add the user asa co-admin to and click OK.Now open up a new In-Private browser session(this is so that you can be logged into two AzurePortal Sessions using two different accounts at thesame time) and go to the Azure Management Portalhttp://manage.windowsazure.comLogin with your full azurecoadmin@ alias aad.onmicrosoft.com account and paste the password infrom the clipboard (Ctrl-V). After login, you will be prompted to change your password, use 1stAzure asthe new password.NOTE: if you lose the password, you can reset it – go to the users tab on your directory, select theazurecoadmin user and click the reset password button at the bottom.After login, you will now see all the same services as your Microsoft account login. Click though thegetting started tour.So you have your first user, and you actually have an application (the Azure Management Portal) that uses AzureAD to authenticate against and get user information from the directory. Of course you can build your ownapplications that do this as well. Other commercial applications such as Office 365, Dynamics CRM and VisualStudio Online use Azure AD.P a g e 6 13
4. Back to AD – More stuff - BrandingSo the basic capability of Azure AD is users and groups and using Azure AD as a directory and user account store foryour applications. Azure itself uses AD as you just saw when you created your coadmin. One of the first thingsthat Organizations want to do with their directory and as an added precaution to give their users more certaintythat they are visiting an approved place – is to brand their directory/sign-in experience. For this, you need to turnon Azure AD Premium feature set.Select your Directory again from the Active Directory node on the portal (you can use either the initiallogin or the co-admin account). Click on Licenses and click the link to Try AD Premium and acceptthe trial message - this will take 10-20 seconds to setup. Click the REFRESH link.When completed, click on Assign on the bottom of the Portal. Click BOTH the two users you seeto assign licenses to them. Now these users can access premium features.Now click the CONFIGURE tab and you will see a Customize Branding button. However, beforeyou can use it, you need to download some branding assets (images, icons etc that have been alreadycreated for you).Get the set of assets for this lab from the lab download folder here: http://1drv.ms/1DcUEnICheck the “Azure Intro to ActiveDirectory” folder and select DOWNLOAD in the header. Savethe file to your desktop, right click the file on your desktop and select EXTRACT ALL Go back to the Azure Portal and click the Customize Branding button.a.For the Banner Logo – select: Contoso BannerLogo default.png from your downloaded folderb.For the Tile Logo – Select the Contoso Tilelogo defaultc.For the Sign in Page text: enter some text such as Need help? Contact Contoso Help Desk at (206) 555-1234. This site is operated by Microsoft onbehalf of Contoso Inc and is for the exclusive use of Contoso employees and partners. Visitwww.contoso.com/terms for details.d.For the Sign-In Page Illustration, Select: Contoso Illustration default.jpgOK. Then in your in-private session, you are logged in as your azurecoadmin. Click on yourusername on the top right and select Sign Out. On the “You have been Signed Out” page, click signin.You will see your branding updates as soon as Azure detect you want to use a login from the AD Domainthat you have applied your branding updates to – i.e. your azurecoadmin@ alias aad.onmicrosoft.comaccount.P a g e 7 13
5. Continue with Active Directory “Test Lab”By now, your copy of the virtual hard disk should have completed. Switch to your PowerShell session to make sureit has. If it has not, you can continue with the Multi-Factor Authentication section. Let’s first make sure youactually have a .vhd file in your storage account – remember this .vhd file is the virtual disk on which is installedWindows Server 2012 R2, it has AD installed and configured as a single forest (contoso.com) domain controller.There are a bunch of users and groups in the directory. DNS is configured.5.1 Creating your Domain Controller VM.So you have a VHD file which sits in Azure storage, but you need a VM. The basic way you do this is to create avirtual disk in Azure, pointing at your .VHD file. You then create a VM using this virtual disk. Let’s do this In Azure, click on STORAGE, click your storage account alias vhdstore, click the CONTAINERS tab and click the vhdimagescontainer (this was created for you by the script). You should have a 20GBfile in this container called teazuredisk.vhdClick on the Virtual Machines category in the left navbar of the portal. Click on the DISKS tab and click the “ CREATE” button at the bottom.Enter the details as you see opposite, pointing at the .vhdfile in your storage account (click the folder icon to browsefor the file) and making sure to check the VHD contains OSbox and the OS Family.Click OK. This action creates a logical disk that you canthen use to spin up a virtual machine from. This shouldtake around 20-30 seconds and you will see the disk in the portal when it is completed.Now in the portal click the bottom left “ NEW” button and select COMPUTE - VIRTUAL MACHINE - FROM GALLERY.On the first page of the gallery wizard, click on the MY DISKS option on the lower leftside. You will see your teazureDC disk. Select it and click NEXT.Choose a name for your VM such as alias -DCVM – e.g. agreen-DCVM. ChooseBASIC tier and A2 Size.P a g e 8 13
On the next screen, there are TWO important values.The CLOUD SERVICE DNS NAME and theREGION/AFFINITY GROUP/VIRTUALNETWORK selection. The DNS Name will default toyour VM name – make sure this resolves to avalid/unique value – change it if it does not. Make sureto select the Virtual Network you created earlier.Click Next and then FINISH. Your VM will go throughthe process of getting created and booting up. It willtake around 3-5 minutes for this to complete.While it is doing this, click on NETWORKS section inthe portal, click on your network and click on DASHBOARD. Locate the IP address that your VM gets onthe network.Then click the CONFIGURE tab and in the DNS Servers section. Make sure the IP address you enteredhere is the same as the IP address you entered at the very start of the lab. If it’s different, change it hereand after your VM has been created you will need to restart it so it picks up the correct DNS server IPaddress (which of course is itself).Once your VM is ready, you can select it in the Portal and click on Connect.When you get to the login screen for the VM, enter contoso\azureadmin as the username and1stAzure as the password (remember this is a Domain Controller, so you need to login as the uberadmin to the Domain). Enter something on the shutdown warning and click OK.Now on your Domain Controller, open Active Directory Users and Computers (Server Manager - Tools).You will see two Organisational Unit – Marketing and IT Group. Both have users in them. The passwordsfor all the users are the same – “1stAzure”. At the Contoso.com level, there are also three groups –AzureAdmins, Contoso FTE and Managers and each has some members from the 5 users in the directory.5.2 Connecting your DC to your Azure ADYou have an Azure Active Directory and now you have a DomainController You now need to install the directory synchronizationtool on your DC and setup your Azure AD to integrate with thisdomain controller.From your Virtual Machine/DC, open a browser and goto this download s.aspx?id 44225P a g e 9 13
On the Microsoft Azure Active Directory Sync Services page, click the download button and click onRUN to start the install after download.Accept the license terms and click on installAfter install, the tool will start theconfiguration wizard. The first thing itneeds is an Azure credential that hasglobal admin access to your directory.Go to the Azure Portal. You are goingto create a new user in your Azure ADthat you will use for the dirsyncoperation.Go to the users tab in Azure AD andcreate a new user called aadsyncadmin as the username and make this user a global admin also.Copy the temporary password to the clipboard.Go to either of your open Azure Portal browser sessions (the supplied admin account or yourazurecoadmin account) – sign out and then Sign-In using the new aadsyncadmin account (which willbe aadsyncadmin@ alias AAD.onmicrosoft.com. Paste (CTRL-V) the temporary password into thepassword field. On the change password screen, change the temporary password to 1stAzure.You won’t be able to access the Azureportal with this account, as it is not acoadmin on the subscription. Sign Out.Close the browser and switch to yourother Azure Portal browser session.Select your Azure AD and then click theDIRECTORY INTEGRATION tab.Click the ACTIVATED link as shownopposite to ACTIVATE your directory forsynchronization and then click SAVE.Now, switch back to your domaincontroller and the AD Sync Wizard.Enter the credentials you created for the aadsyncadmin user(aadsyncadmin@ alias AAD.onmicrosoft.com and 1stAzure).P a g e 10 13
After validating, you need to enter the forest name and an admin username\password for your domaincontroller VM. This will be contoso.com, contoso\azureadmin and1stAzure. After entering these values, click Add Forest and clickNEXT.Click past the user matching screen and on the Optional Features screen,check the Password Sync and Password Write-Back options. ClickNEXT and CONFIGURE.Once complete, click FINISH and the synchronization will happen. It will take a couple of minutes forthe users and groups to show up in your Azure AD. You will see new users in the directory and the userswill show they have been sourced from a “Local Active Directory”.If you open up any of these users, their propertieswill not be available for editing as the single masterfor these properties is your on-premise ActiveDirectory.Click on Groups. There were three groups back inyour DC – Managers, Contoso-FTE and Azure-Admins.None of these groups are showing up in Azure AD.This is because these were set as distribution groups.You need to change them to security groups.Go back to your DC, open AD users/Computers and click on the top level contoso.com object. You will seethe three groups in there. Click on each one and change the group type to security group.Now you will manually run the sync tool – which is simply a scheduled task on your DC. Click on Windowand type “Task Scheduler” and launch it.Click on the Task Scheduler Library folder, selectthe Azure AD Sync Scheduler and click the RUNbutton.Go back to your Azure AD and the groups tab.Refresh until you see the new groups appear.So you have the core skills now and the infrastructure setup to play around some more. Some things to try: Set a user from your local AD to be a co-admin on the Azure Subscription – make sure that the user canlogin (their password is synced with AD – all the user passwords are “1stAzure” on the DC. Disable the user in your local AD and make sure the user can no longer login to the Azure subscriptionTHE ENDP a g e 11 13
Appendix 1: Copy .VHD File Script" "" Running - Getting all subscription details."" " mysubs Get-AzureSubscription" List of Subscriptions."If ( mysubs.Count -gt 1) {for( i 0; i -le mysubs.Count - 1; i ) { adname mysubs[ i].DefaultAccount output " " i.ToString() ": " adname ":" mysubs[ i].SubscriptionName output }" " input read-host " Enter the Number of the subscription to select: " }else { input 0} mysubscription mysubs[ input].SubscriptionNameSelect-AzureSubscription -SubscriptionName mysubscription" "" Running - Getting all storage accounts for subscription: " mysubscription" " staccounts Get-AzureStorageAccount -WarningAction SilentlyContinue" List of Storage Accounts."if ( staccounts.count -eq 0) {"ERROR: No Storage Accounts"stop}if ( staccounts.count -gt 1) {for( i 0; i -le staccounts.Count - 1; i ){ output " " i.ToString() ": " staccounts[ i].StorageAccountName output }" " stselect read-host " Enter Number to select: "}else { stselect 0}" "" Copying VHD File to your storage account."" " mystorage staccounts[ stselect].StorageAccountNameset-azuresubscription -SubscriptionName mysubscription -CurrentStorageAccountName mystorage Out-Nullselect-AzureSubscription mysubscription Out-Null deststoragekey (Get-AzureStorageKey -StorageAccountName mystorage).Primary deststoragecontext New-AzureStorageContext –StorageAccountName mystorage StorageAccountKey deststoragekey -Protocol Http selectSA Get-Random -minimum 1 -maximum 6 vhdcopyname "teazuredisk.vhd"New-AzureStorageContainer -Name "vhdimages" -ErrorAction SilentlyContinueSilentlyContinue Out-Null destcontainer "vhdimages"-WarningAction loc "https://teazurestore" selectSA ".blob.core.windows.net/vhdimages/teazuredisk.vhd" Time [System.Diagnostics.Stopwatch]::StartNew() blob1 Start-AzureStorageBlobCopy -AbsoluteUri loc -DestContainer destcontainer DestBlob vhdcopyname -DestContext deststoragecontext -ErrorAction Stop status blob1 Get-AzureStorageBlobCopyState statusWhile( status.Status -eq "Pending"){ status blob1 Get-AzureStorageBlobCopyStateStart-Sleep 10### Print out status ### status}"Copy Time: " Time.Elapsed.Minutes ":" Time.Elapsed.SecondsP a g e 12 13
Appendix 2 – Creating/Uploading Your VM’sIf you want to create your own VMs for use in Microsoft Azure from your local machine using Hyper-V, there arejust a few critical things that you must do as follows:Create a new Virtual Disk FIRST – make it a fixed disk and use the VHD formatCreate your VM, using the Virtual Disk and make sure to select Generation 1Then do everything as normal to get your VM OS installed and all the software you need installed andconfigured. For this lab, the .ISO image for a trial edition of Windows Server 2012 R2 was downloadedand used to boot the OS and then the Domain Services role was installed and the machine promoted to aDomain Controller.There are TWO special things you have to do in your VM BEFORE you upload it to Azure. TURN ON/Allow remote desktop connection (Control Panel- System). The second is to check the Public option for the Remote Desktop firewall rules on the Windows Firewall(Window- Type Firewall)Then you need to install the latest version of the Azure PowerShell Commands on your machine you will do theupload from.Then you can shut down your VM and copy just the .vhd file up to Azure using the following PowerShell script:Add-AzureAccountSelect-Azuresubscription your subscription sourceVHD " Path to .vhd file e.g. c:\myvhdfiles\myazurevm.vhd" destinationVHD "https:// your storage account .blob.core.windows.net/ yourcontainer / your uploaded vhd e.g. myazurevm.vhd "Add-AzureVhd -LocalFilePath sourceVHD -Destination destinationVHD NumberOfUploaderThreads 5If you already have a VM but it is not a fixed disk, the Add-AzureVHD command will actually do a conversion to afixed disk for you. The VHD file though must be in VHD format, NOT VHDX.The resulting .VHD file will be in your Azure storage account – you can then create a disk from this file and thencreate a Virtual Machine using the disk, putting your VM in a Virtual Network (as per the lab steps).The VM used in this lab was also configured to be a domain controller and prepped for the Azure AD Sync toolinstall. The core steps are:1.Run Windows Update and install all the latest critical patches2.Add the Domain Services Role and also install .NET Framework 3.5 (you will need this for Azure AD Synctool).3.Configure DNS to remove the default forwarder.P a g e 13 13
Introduction to Azure Active Directory This is an infrastructure lab, useful to both ITPro's and Developers to learn the basics of Azure Active Directory. The . Azure Active Directory is a comprehensive identity and access management cloud solution. It combines core directory services, advanced identity governance, security, and application .
