Transcription
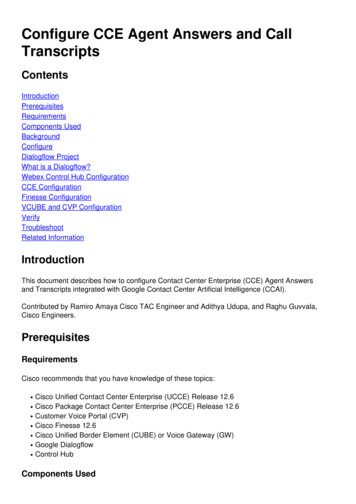
Configure CCE Agent Answers and quirementsComponents UsedBackgroundConfigureDialogflow ProjectWhat is a Dialogflow?Webex Control Hub ConfigurationCCE ConfigurationFinesse ConfigurationVCUBE and CVP ConfigurationVerifyTroubleshootRelated InformationIntroductionThis document describes how to configure Contact Center Enterprise (CCE) Agent Answersand Transcripts integrated with Google Contact Center Artificial Intelligence (CCAI).Contributed by Ramiro Amaya Cisco TAC Engineer and Adithya Udupa, and Raghu Guvvala,Cisco Engineers.PrerequisitesRequirementsCisco recommends that you have knowledge of these topics: Cisco Unified Contact Center Enterprise (UCCE) Release 12.6Cisco Package Contact Center Enterprise (PCCE) Release 12.6Customer Voice Portal (CVP)Cisco Finesse 12.6Cisco Unified Border Element (CUBE) or Voice Gateway (GW)Google DialogflowControl HubComponents Used
The information in this document is based on these software versions: UCCE Release 12.6CVP 12.6 ES6Cisco Finesse 12.6 ES 1Google DialogflowControl HubVCUBE - Cisco IOS XE Bengaluru 17.4The information in this document was created from the devices in a specific lab environment. All ofthe devices used in this document started with a cleared (default) configuration. If your network islive, ensure that you understand the potential impact of any command.BackgroundCCE 12.6 introduces the Agent Answers feature, in which an agent is provided with relevantsuggestions and recommendations in real time for the agent to consider. The suggestions andrecommendations are based on the conversation between the caller and the agent.More often, agents lack the depth of knowledge about the products and services of the businessthey serve. Agent Answers enhances the customer experience because the timely suggestionsimprove the ability of the agent to respond. Businesses can cut down on training costs and time.In addition CCE 12.6 also introduces Call Transcripts services that assist the agents by the use ofArtificial Intelligence (AI) and Natural Language Understanding (NLU). These services areavailable for the agents in the Cisco Finesse desktop gadgets. The Call Transcript gadgetdynamically converts the ongoing conversation to text and presents the text to an agent for realtime viewing and reference.Note: In this release only Google Natural Language Processing (NLP) is supported.Note: This feature is only supported in VCUBE, and CVP 12.6 ES6 is required in order tosupport of Agent Answers conference and Transfer.ConfigureDialogflow ProjectGoogle Dialogflow agent needs to be created and the Knowledge base needs to be added beforeyou start Agent Answers configuration. You require a Google service account, a Google projectand a Dialogflow virtual agent. Then, you can add the knowledge base to the Dialogflow virtualagent.What is a Dialogflow?Google Dialogflow, is a conversational User Experience (UX) platform which enables brandunique, natural language interactions for devices, applications, and services. In other words,Dialogflow is a framework which provides NLP / NLU (Natural Language Understanding) services.
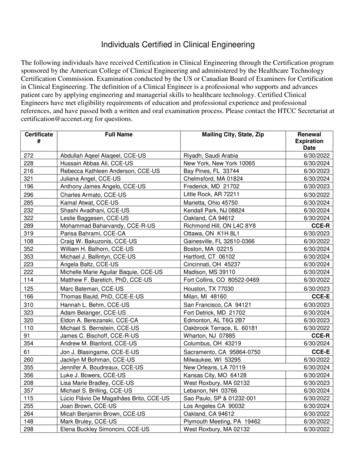
Cisco integrates with Google Dialogflow for Cisco Virtual Agent and for Agent Answers andTranscript .What does this mean for you? Well, it means you can basically create a virtual agent onDialogflow and then integrate it with Cisco Contact Center Enterprise.if you need information on how to create a virtual agent or Dialogflow project, visit: Configure CVPCVAFollow these steps to add the Knowledge base to the Virtual Assistant Voice (VAV) known also asCisco Virtual Agent (CVA).Step 1. Log in to Dialoglfow Console, select the agent and click Knowledge: Dialogflow ConsoleStep 2. On the Knowledge Bases page, click CREATE KNOWLEDGE BASE, name theKnowledge base and click Save.
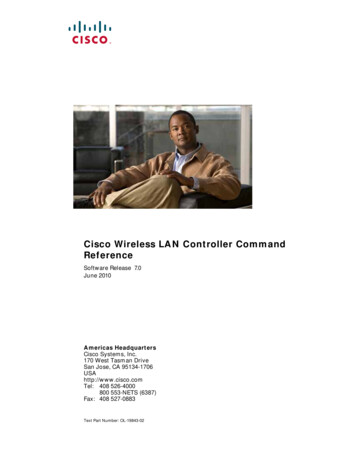
Step 3. Add a document or link to the knowledge base just created. Click Create the first one.Step 4. On the Creation page, type the document name, select the Knowledge type, the Mimetype and the Data Source.Step 5. Click CREATE.
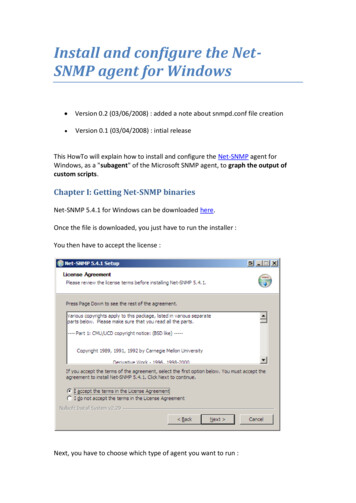
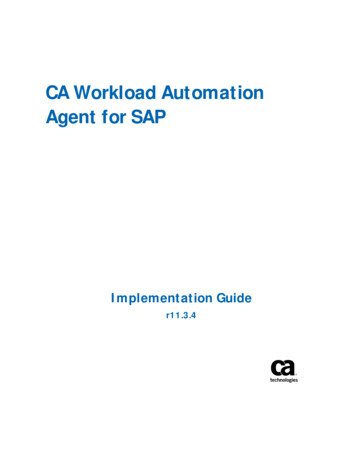
Step 6. Create a Google AI Profile.1. Once the KB or FAQs are updated for Dialogflow agent, log in to Google Agent Assist andchoose the project which is used for the KB/FAQs.2. Select the Conversation profiles and click Create new as shown in the image.3. Update these details while you create the conversation profile and click create.
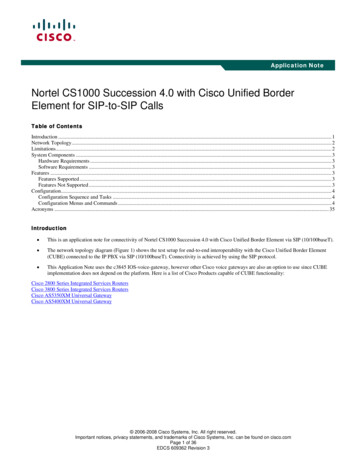
Display name – Give any name to identify the profile.Suggestion types – Based on what you have selected in the Knowledge Bases (KB) tab inDialogflow User Interface (DF UI), click on that. It should be either FAQ or Articles.Once you do this, all the KBs created in DF UI page, will appear here automatically. Select thecorrect one.Updated some of the other mandatory fields like Sentiment Analysis or update the defaultvalues based on the requirement like confidence threshold or maximum suggestions, etc.
Now the conversation profile appears on Agent Assist url.Copy the Integration ID. Click Copy to Clipboard. This is used later in the Control Hubconfiguration.Note: There is no Dialogflow configuration required for Call TranscriptsWebex Control Hub ConfigurationCreate a CCAI configuration in Cisco Webex Control Hub at Control Hub . A CCAI configurationleverages CCAI Connectors to invoke the CCAI services. For details, visit the Configure ContactCenter AI article at Webex Help CenterStep 1. Ensure that the Cloud Connect publisher and subscriber are installed. For moreinformation, visit the Install Cloud Connect section in Cisco Unified Contact Center EnterpriseInstallation and Upgrade Guide.
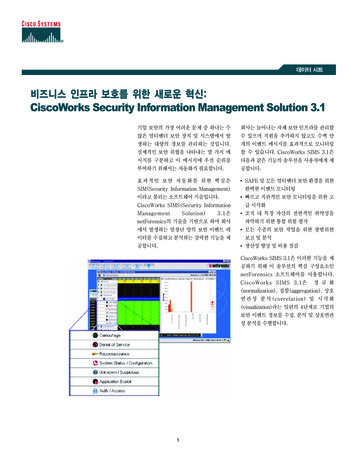
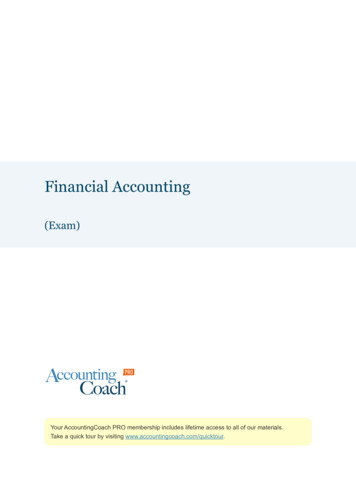
Step 2. Log in to Webex Control Hub. Navigate to Contact Center and click Cloud Connect.Step 3. On Cloud Connect window enter the name and the Fully Qualified Domain Name (FQDN)of Primary Cloud connect.Step 4. On Cloud Connect window enter the name and the FQDN of Primary Cloud connect andclick Register.Step 5. Add a Connector. On the Contact Center window select the Connectors tab.
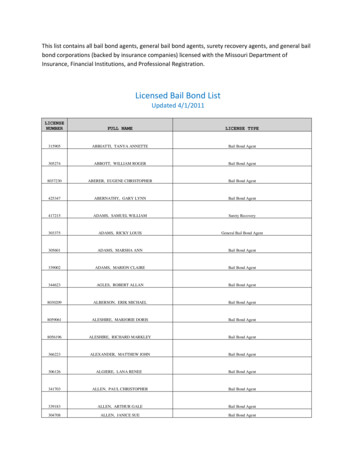
Step 6. If a connector is already added and you need to add one more, click on Add More. Sign inwith Google and follow the instructions.Step 7. Now add the features. On the Contact Center page, click Features and click New.Step 8. You are now in the Create a New Contact Center Feature page. Click Contact Center AIConfig.
Step 9. Provides the feature information, select the connector already added and the GoogleProfile created.CCE ConfigurationStep 1. On UCCE AW, open Cisco Web Administration tool and navigate to Inventory. Click New.
Step 2. Add Cloud Connect and provide the FQDN and credentials.Note: Refer to these documents for PCCE certificate exchange: Self-Signed Certificates in aPCCE Solutions and Manage PCCE Components Certificate for SPOG. For UCCE refer toSelf-Signed Certificate Exchanged on UCCE.Step 3. Configure Cloud Connect in the CVP Operations Console (OAMP). For details visit thesection Configure CVP Devices for Cloud Connect in the Administration Guide for Cisco UnifiedCustomer Voice Portal.Note: This is for UCCE only. This step is not required for PCCE.
Step 4. Import the Cloud Connect certificate to the CVP server. For details, visit the section ImportCloud Connect Certificate to Unified CVP Keystore in the Configuration Guide for Cisco UnifiedCustomer Voice Portal.Step 5. In the Unified CCE Administration console, do the this to associate the CCAI configurationall call types:1. On AW Web Administration tool, navigate to Features and select Contact Center AI.
2. On the Contact Center AI page select the CCAI configured before in Control Hub.Step 6. To apply the CCAI configuration to only a subset of the call types or to override the globalconfiguration for specific call types do this:1. In Web Administration tool, navigate to Route Settings and select Call Type.2. Click the Contact Center AI tab and select the Contact Center AI configured on the ControlHub.
Finesse ConfigurationNote: Steps 1 to 3 are for UCCE only. For PCCE start with Step 4.Step 1. Provision Cloud Connect on Cisco Finesse. For more information, visit the Cloud ConnectServer Settings topic in the Cisco Finesse Administration Guide.Step 2. Open Finesse Admin page, and navigate to settings and to Cloud Connect.Step 3. On the Cloud Connect Server Settings provide the credentials and the FQDN of thepublisher and the subscriber.
Step 4. Add the Agent Answers gadget on the Finesse Desktop Layout. On the Cisco FinesseAdministration Page, click Desktop Layout and remove the comment on the gadget informationrelated to Agent Answers.Step 5. On CCE Administration Page select Agents and on Manage Agents enable the CCAIservices. Once enabled, the Agent Answers gadget appears on the Home tab and displaysrelevant articles and suggestions during a call. For details on how to use the gadget, visit the
Contact Center AI Gadgets guide. Gadget auto-hide/un-hide and notifications capability isavailable only if the gadget is configured as a multi-tab gadget in Cisco Finesse. For more details,visit Agent Answers Gadget in the Cisco Finesse Administration Guide.
VCUBE and CVP ConfigurationStep 1. On VCUBE, enter to config mode.Config tStep 2. Create a Voice Class Sip profile to add Call-Info SIP header in INVITE message for CVPto send forking request.voice class sip-profiles 100request INVITE sip-header Call-Info add "X-Cisco-Forking: supported"Step 3. Create a media stream service profile.media profile stream-service 99connection idle-timeout 45connection calls-threshold 5proxy host proxy.dk.orgsource-ip A.B.C.Dsecure-ciphersuite aes-128-cbc-shaspecified.! default 30 mins! default 3 calls per websocket connection! optional, http proxy server IP or DNS if used! VCUBE source IP for websocket sessions! optional, VCUBE advertises all cipher suites if notStep 4. Associate media stream service profile to a media class.media class 9stream-service profile 99Step 5. Add the sip and media profile to the outgoing dial-peer towards CVP.dial-peer voice 802 voipdescription CVP SIP Comprehensive dial-peerdestination-pattern 802.
session protocol sipv2session target ipv4:X.X.X.Xvoice-class codec 1voice-class sip profiles 100media-class 9dtmf-relay rtp-nteno vadStep 6. In CVP Server sip.properties file set the SIP.UseSIPINFOForking to true.SIP.UseSIPINFOForking trueVerifyThere is currently no verification procedure available for this configuration.TroubleshootThere is currently no specific information to troubleshoot available for this configuration.Related Information Cisco Contact Center Solutions and Design Guide 12.6 Cisco Contact Center Features Guide 12.6 Technical Support & Documentation - Cisco Systems
support of Agent Answers conference and Transfer. Configure Dialogflow Project Google Dialogflow agent needs to be created and the Knowledge base needs to be added before you start Agent Answers configuration. You require a Google service account, a Google project and a Dialogflow virtual agent.