Transcription
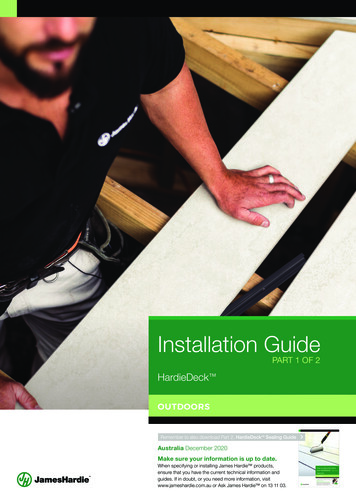
Installation GuidePART 1 OF 2HardieDeck OUTDOORSRemember to also download Part 2, HardieDeckTM Sealing GuideAustralia December 2020Make sure your information is up to date.When specifying or installing James Hardie products,ensure that you have the current technical information andguides. If in doubt, or you need more information, visitwww.jameshardie.com.au or Ask James Hardie on 13 11 03.
1. Before InstallationAll design and construction must comply with the appropriate requirementsof the current applicable building codes, James Hardie’s instructions andspecifications and any other applicable regulations and standards current at thetime of construction. Failure to do so may lead to personal injury, affect systemperformance, violate local building codes and void James Hardie’s productwarranty. This guide contains minimum requirements, local or regulationsrequirements may be greater, please ensure to check before installation.DIAGONALSTANDARD90º 90ºThe installer must ensure the product meets the aesthetic requirements beforeinstallation. James Hardie will not be responsible for rectifying aesthetic surfacevariations following installation. The responsible party for the project must ensureFIGURE 1 LAYOUT OPTIONSthat all details in this specification are appropriate for the intended application.1.1 Substructure ConsiderationsCRITERIAMINIMUM REQUIREMENTMaterialTermite resistant timber (AS 1684) or Steel with BMTbetween 0.6-1.9mm (NASH)Joist width 45mm min. , tolerance of 3-4mm over 3m.Residential Max. Spacing:Applications 500mm (standard), 300mm (diagonal)Max load: 1.8 kN (point), 2kPa (distributed)Commercial 1. Spacing at 450mm max.Applications Max. Load: 2.9 kN (point), 10 kPa (distributed)(standard2. Spacing at 300mm max.layout only) Max. Load: 3.78 kN (point), 10 kPa (distributed)All short edges of the boards must be fully supported.Any changes in direction will require additional supporte.g. corners, use of break-a-boards, etc.All framing elements including fasteners must have theappropriate level of durability for the application includingbut not limited to termite resistance, corrosion andweather exposure. Confirm suitability with manufacturer.A minimum 150mm between ground surface and theunderside of the lowest horizontal framing member.A minimum of 50mm unobstructed clearance from thelandscape to the bottom end of the fascia or deck enclosureto allow cross flow ventilation in the sub-floor. Refer to Figure 2.- BAL-29: Timber or steel frame for enclosed decks andbushfire resisting timber or steel frame for unenclosed decks.- BAL-40: Timber or steel frame for enclosed decks andonly steel frame for unenclosed decks.- BAL-FZ: Steel frame only, HardieDeckTM Snap-in TopStrip FZ must be used, all sides must be open and a1:100 deck fall is required to allow drainage.DimensionsJoistSpacing &Loading*(See Figure 1for layouts andrefer to page6 for ilationin subfloorBushfireProne AreasRequirements1.2 Other Design ConsiderationsCRITERIAMINIMUM REQUIREMENTCorrosiveHardieDeckTM is not suitable for use in Alpine areasEnvironments (Climate zone 8) or in areas within 50m of breaking surfFor swimming pools, coastal areas (within 1 km ofshoreline) and others, particular attention must be paidto sealers and sub-floor ventilation; this includes but it isnot limited to: 10mm Control joint around pool perimeter,sealing the deck within 7 days of installation and addinganti-slip additives to the sealer specified.SlipThe slip resistance is dependant on the sealer, for moreResistanceinformation, refer to the FAQ in hardiedeck.com.auBalustrades The balustrade upright supports must be fixed to the structuralframe and not to the HardieDeck system. Allow 10mm gapfor movement and in bushfire areas ensure that the gap iscovered, sealed or backed with a non-combustible material.SealingFor recommendations, suitability and applicationinstructions refer to the HardieDeck SealingGuide available at hardiedeck.com.au/downloadHardieDeckTM must be sealed within 60 days, and within 7days if around swimming pools or within 1km of coastal areas.Fasteners- For Timber Frames: Fasteners are included withConcealed Fixing System. If face fixing is required, werecommend a Stainless steel 8 gauge type 17 50mm screw.- For Steel Frames: We do not recommend the standardfasteners. As an alternative, we recommend usingHardieDriveTM 25mm screws and the HardieDriveTM41mm long for face fixing if required. For corrosiveenvironments, HardieDriveTM is not suitable, you mustuse an equivalent class 4 screw or higher.1.3 Safe Working PracticesWARNING - DO NOT BREATHE DUST AND CUTONLY IN WELL VENTILATED AREAJames Hardie products contain sand, a source of respirable crystalline silica. May causecancer if dust from product is inhaled. Causes damage to lungs and respiratorysystem through prolonged or repeated inhalation of dust from product.Intact fibre cement products are not expected to result in any adverse toxic effects. Thehazard associated with fibre cement arises from the respirable crystalline silica present indust generated by activities such as cutting, rebating, drilling, routing, sawing, crushing, orotherwise abrading fibre cement, and when cleaning up, disposing of or moving dust.When doing any of these activities in a manner that generates dust, follow JamesHardie instructions and best practices to reduce or limit the release of dust, warnothers in the area and consider rotating personnel across the cutting task to furtherlimit respirable silica exposure.If using a dust mask or respirator, use an AS/NZS1716 P1 filter and refer toAustralian/New Zealand Standard 1715:2009 Selection, Use and Maintenance ofRespiratory Protective Equipment for more extensive guidance and more options forselecting respirators for workplaces. For further information, refer to our installationinstructions and Safety Data Sheets available at www.jameshardie.com.au. FAILURETO ADHERE TO OUR WARNINGS, SAFETY DATA SHEETS, AND INSTALLATIONINSTRUCTIONS MAY LEAD TO SERIOUS PERSONAL INJURY OR DEATH.JAMES HARDIE RECOMMENDED SAFE WORKING PRACTICESCUTTING OUTDOORS1. Position cutting station so wind will blow dust away from the user or others in working area.2. Warn others in the area to avoid dust.3. Consider rotating personnel across cutting tasks to further limit respirable silica exposures.4. Use one of the following methods based on the required cutting rate:Best n Villaboard knife n Hand guillotine n FibreshearBetter n Position the cutting station in a well-ventilated area. Use a dust reducing circularsaw equipped with HardieBlade Saw Blade or comparable fibre cement blade andwell maintained M-class vacuum or higher with appropriate filter for capturing fine(respirable) dust. Wear a properly-fitted, approved dust mask or respirator (minimum P1).CUTTING INDOORSnCut only using VillaboardTM knife, hand guillotine or fibreshears (manual, electric or pneumatic).nPosition cutting station in a well-ventilated area.DRILLING/OTHER MACHININGWhen drilling or machining you should always wear a P1 dust mask and warn others in theimmediate area.IMPORTANT NOTES1. For maximum protection (lowest respirable dust production) James Hardie recommends alwaysusing best practice cutting methods where feasible.2. NEVER use a power saw indoors or in a poorly ventilated area.3. ALWAYS use a dust reducing circular saw equipped with a sawblade specifically designed tominimise dust creation when cutting fibrecement - preferably a sawblade that carries the HardieBlade logo or one with at least equivalent performance - connected to a M class or higher vacuum.4. NEVER dry sweep - Use wet suppression, or an M class vacuum or higher with appropriate filter.5. NEVER use grinders.6. ALWAYS follow tool manufacturers’ safety recommendations.7. ALWAYS wear a properly fitted, approved dusk mask, P1 or higherDUST MASKS AND RESPIRATORSAs a minimum, an AS/NZS1716 P1 respirator must be used when doing any activity that maycreate dust. For more extensive guidance and options for selecting respirators for workplacesplease refer to Australian/New Zealand Standard 1715:2009 “Selection, Use and Maintenance ofRespiratory Protective Equipment”. P1 respirators should be used in conjunction with the abovecutting practices to minimise dust exposure. For further information, refer to Safety Data Sheet(SDS) available at www.jameshardie.com.au. If concern still exists about exposure levels or youdo not comply with the above practices, you should always consult a qualified industrial hygienistor contact James Hardie for further information.1.4 Storage and HandlingTo avoid damage, James Hardie building products should be storedwith edges and corners of the product protected from chipping. JamesHardie building products must be installed in a dry state and protectedfrom weather during transport and storage. The product must be laidflat under cover on a smooth level surface clear of the ground to avoid exposure to water and moisture
2. HardieDeck 3004HardieDeck Edge 2960m300196HardieDeck Essential ComponentsTMTM2 19 HardieDeckDoublem6 3000mWinged Base Jointer*m0m300mmm5m02020Pack Size:50 UnitsProduct Code: 404780Coverage:† m4.8 boards/m2Pack Size:10 Pks of 35 (350 Units)Product Code: 306010Coverage:† 35m2/box 3.5m2/packmmmm2025* Includes300fasteners0m3000mm30030030mm0300Snap-In Top Strip FZ0mm2HardieDeck Double WingedBase Jointer3003 HardieDeckTM Snap-In196 Top0mm(either)300 Strip OptionsmmSnap-In Top Strip1960mm30030 FIGURE3 2 OVERVIEW OF THE HARDIEDECKSYSTEMm00mTM1 296HardieDeckBoard0mm3000mm300m00m296000HardieDeck Snap-InTop Stripmm2963000mmCROSS FLOWVENTILATION*0mm300HardieDeck SingleWinged Base Jointer70mm30060mmPack Size:10 Pks of 5 (50 Units)Product Code: 306012 FZ: 3060140m†mCoverage:30m2/box 3m2m/pack300m225TM0mm4 cia Edge CapSlimline Edge Capmm0300Not supplied byJames Hardie.0mm0mm300300Pack Size:10 UnitsFascia Product Code: 305844Slimline Product Code: 3058460†mm196Open00deckCoverage:0mm sides30m0m30300HardieDeck Optional Componentsm5 SealerRefer to the HardieDeckSealing Guide for moreinformation available at:hardiedeck.com.auTM0mm300m6 James HardieJoint SealantTMTM7 HardieDeckSinglemm225Winged Base Jointer*225mm2258 HardieDeckTMWingless Base Jointer*TMm919 1HardieDeck9mm00m29mm6 63000 306000Finishing Board3mm225mm2250mmmm300225Pack Size:20 Per BoxProduct Code:mm305534 300ml Cartridge522Product Code: 305672 600ml SausageCoverage:† 2.67m/100ml (5mm dia bead)Pack Size:10 Pks of 35 (350 Units)Product Code: 306011Used in the wall abutment edge* Includes fasteners0mm300Tools and PPEHardieBladeTM SawBlade. 185mm Dia.Pack Size:10 Pks of 5 (50 Units)Product Code: 306032Used in changes of board orientation* Includes fastenersSlide CompoundMitre Saw29 29m6 6 3000m000mm31960mm300Pack Size:30 UnitsProduct Code:404782Used for pattern variation or as stairmm196treads193000 00mmmm63003000mmCordlessDrill 3000mm300mmJig Saw0300PPE SafetyEquipment0mm3000mm3000mm300Pack Size:1 eachProduct Code:300660Poly-diamond blade.Slide Compound Mitre Saw connectedto a M class or higher vacuumextractor with an appropriate dust filter.For Intricate cuts. For use with Makita1960mmB-60Tungsten300 Jig Saw blade orsimilar.mm225Recommended tool for screw fixing themsheets22to5msteeland timber framing.mm225mm225Safety goggles and P2 mask areessential when cutting, drilling ormachining.† Coverage based on 500mm joist spacing.mm296m0m300225mm225HARDIEDECK SYSTEM INSTALLATION GUIDE3
3. Installation StepsSTEP1STEP2Maximum500mm.Refer toTable 1.1for roundto bottomof batten.Temporarily fix edgecap (No.4) flushedwith the edge of thedeck at maximum900mm centers.45mmbattenAdequatelysealed slab.OPTION 1: JOISTSOPTION 2: SLABSTEP3STEPApply a continuousbead of JamesHardieTM JointSealant along joists.STEP45Place the first boardand Install HardieDeckTMDouble Winged BaseJointers (No.2) and tightenthe screws ¾ of the way.Installsecondboard andtighten thescrews allthe way.STEP6STEP7STEPInstall last boardleaving a 20mmgap from the wall.810mmgapInstall subsequent HardieDeckTMDouble Winged Base Jointers(No. 2) and board, then fix thescrews over each joist.STEP9Seal the deck with a recommended sealer,please refer to the HardieDeckTM Sealing Guideavailable at hardiedeck.com.au/download.Please note that HardieDeckTM must be sealedwithin 60 days of installation and within 7 days ofinstallation if used around pools or in coastal areas.4HARDIEDECK SYSTEM INSTALLATION GUIDERemove thetemporarilyfixed edge cap.HardieDeckTM Single Winged BaseJointer (No. 7) Installed with a10mm clearance from the wall.STEP10STEPInstallHardieDeckTMSnap-In Strip(No.3) using a10mm packerand a mallet.11fasteners atmaximum500mm centersInstall selectedEdge Cap (No.4).45º mitre cutthe edge cap
4. Design and Detailing4.1 Perimeter and FasciasFace fixed decking screwrequired at 500mm centres,40mm from the board edge.HardieDeckTMSlimline EdgeCap.HardieDeckTMFascia EdgeCap.Fix at 500mmcentres witha 25mm8 gaugeStainless SteelScrew screw.Fix at 500mmcentres witha 25mm8 gaugeStainless SteelScrewFIGURE 3A OPTION 1: FIRST BOARDINSTALLED WITH SLIMLINE EDGE CAPFIGURE 3B OPTION 2: FASCIA EDGE CAPIn BAL-FZ rated areas, allopenings greater than 3mmmust be screened witha mesh with a maximumaperture of 2mm made ofcorrosion resistant steel orbronze.Minimum 50mmclearance to ground.FIGURE 4 BOTTOM FINISH AND CLEARANCE4.2 JointsFace fixedHardieDeck Finishing Boardat 500mm centresLeave at leasttwo rowsbetween endjoints in similarlocationsWingless Base Jointer(No.8)Snap-In TopStrip (No.3)Wingless BaseJointer (No.8)40mmmin.NOTE: No accessory required, butt joint must besupported by a framing member (joist or trimmer).FIGURE 5 OPTION 1: CONTINUOUS(STAGGERED) JOINTS40mm min.FIGURE 6 OPTION 2: SQUARE PANELLEDJOINTSFIGURE 7 OPTION 3: BREAKER BOARDJOINTS4.3 CornersInstall with HardieDeckTMSingle wing Base Jointer(No.7).NOTE: This will require joists to be parallelto the building at the change of directionFIGURE 8 OPTION 1: SQUARE CORNERJOINTFIGURE 9 OPTION 2: SQUARE PARALLELCORNER JOINTFIGURE 10 OPTION 3: STAGGERED 45ºCORNER JOINT4.4 Snap-In Top StripsFIGURE 11 SNAP-IN TOP STRIPFIGURE 12 SNAP-IN TOP STRIP FZHARDIEDECK SYSTEM INSTALLATION GUIDE5
4.7 Stairs and TreadsHardieDeck Finishing BoardStair Nose/Edge(supplied by others)Tread5. Product Info6. WarrantyMaterialWarrantyThe basic composition of James Hardie building products is Portland cement, groundsand, cellulose fibre, water and proprietaryadditives.The HardieDeck system supplied by JamesHardie is warranted for a period of 10 years.HardieDeck Board (May requirecutting, refer to note below)James Hardie building products aremanufactured AS/NZS 2908.2 ‘CelluloseCement Products-Flat Sheet’. These are alsocompliant with equivalent standard ISO 8336‘Fibre-cement flat sheets - Product specificationand test methods’. For product classificationrefer to the relevant Physical Properties DataSheet.Solid Stringer to conceal boardsand provide edge protectionDurabilityMinimumtwo fixingsper supportRiserCut Stringer for intermediate andedge supports. Min. 35mm wideHardieDeck boards have demonstratedresistance to permanent moisture induceddeterioration (rotting) by passing the followingtests in accordance with AS/NZS2908.2:Corrosion resistant bracketHardieDeck Boards Water permeability (Clause 8.2.2) Warm Water (Clause 8.2.4) Heat rain (Clause 6.5) Soak Dry (Clause 8.2.5)Resistance to FireEdgesupport,min. 35mmwideMinimum groundclearance 50mmTread: 285mm to suitHardieDeck Finishing Board.Max. Support Span 500mmNOTE: The above riser and tread dimensionsconsider board thickness and dimensions. Theresulting riser and going must be within 115190mm and 240-355 mm, respectively.FIGURE 11 DECK STAIR FRAMINGThe HardieDeck system is suitable wherenon-combustible materials are requiredin accordance with C1.9 of the NationalConstruction Code.James HardieTM building products have beentested by CSIRO in accordance with AS/NZS 3837 and are classified as conformingto Group 1 material (highest and best resultpossible), with an average specific extinctionarea far lower than the permissible 250m2/kg,as referenced in Specification C1.10a of theNational Construction Code (NCC).Resistance to termite attackBased on testing completed by CSIRO Divisionof Forest Products and Ensis Australia JamesHardieTM building products have demonstratedresistance to termite attack.Joist Spacing and Loading NotesIn all cases the deflection limit of span/200under 2.6kN Serviceability Limit State loadinghas not been exceeded. For residentialapplications, Table 3.1 of AS 1170.1 specifiesa concentrated load of 1.8kN on a 350mm2area, which is equivalent to a 21.1mm diameterround or 18.7mm square applicator. Forcommercial applications, the concentratedloads of 2.7kN and greater are applied overan area of 0.01m2, namely a 100mm squareapplicator. The concentrated load capacityfor the 350mm2 applicator (Residential Loads– Maximum Allowable Concentrated Load) isindependent of the joist spacing because thefailure mode will be punching shear. Unlessnoted otherwise, the HardieDeck system willprovide these load capacities even if the boardsbecome fully saturated.6HARDIEDECK SYSTEM INSTALLATION GUIDEPlease refer to the terms and conditionsstated in the warranty document available athardiedeck.com.au.The decking boards are not covered by theJames Hardies product warranty when usedwithout HardieDeck Double Winged BaseJointer and HardieDeck Snap-In Top Stripwhen installed horizontally.NOTEBoards are still warranted when installed ina vertical deck fascia application without thefixing system.This product is not warranted for use outside ofits intended application.
HARDIEDECK SYSTEM INSTALLATION GUIDE7
For information and advicecall 13 11 03 hardiedeck.com.auAustralia December 2020 2020 James Hardie Australia Pty Ltd ABN 12 084 635 558 and denote a trademark or registered mark owned by James Hardie Technology Limited.
Installation Guide PART 1 OF 2 Australia December 2020 Make sure your information is up to date. When specifying or installing James Hardie products, ensure that you have the current technical information and guides. If in doubt, or you need more information, visit www.jameshardie.com.au or Ask James Hardie on 13 11 03.