Transcription
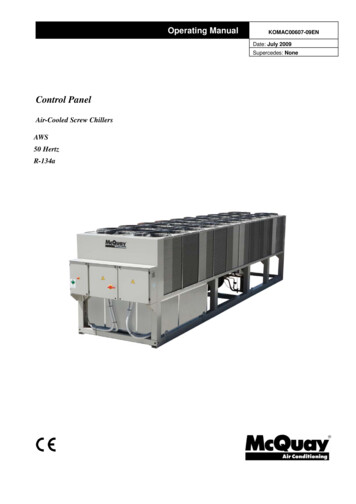
Operating ManualKOMAC00607-09ENDate: July 2009Supercedes: NoneControl PanelAir-Cooled Screw ChillersAWS50 HertzR-134a
Table of ContentsINTRODUCTION. 3UNIT CAPACITY CONTROL .26UNIT CAPACITY OVERRIDES .28OPERATING LIMITS:. 4 CIRCUIT FUNCTIONS .30CONTROLLER FEATURES . 4GENERAL DESCRIPTION . 5CONTROL PANEL LAYOUT . 5POWER PANEL LAYOUT . 6ECONOMIZER COMPONENTS . 7CONTROLLER DESCRIPTION. 9HARDWARE STRUCTURE . 9SYSTEM ARCHITECTURE. 10SEQUENCE OF OPERATION . 11CONTROLLER OPERATION . 14MICROTECH III INPUTS/OUTPUTS . 14EXTENSION I/O COMPRESSOR #1 TO #3. 15I/O EXV CIRCUIT #1 TO #3 . 15EXTENSION I/O FAN MODULE CIRCUIT #1 &2 . 16EXTENSION I/O FAN MODULE CIRCUIT #3 . 16EXTENSION I/O UNIT ALARM & LIMITING(POL). 16SETPOINTS . 17CALCULATIONS .30CIRCUIT CONTROL LOGIC .30CIRCUIT STATUS .32COMPRESSOR CONTROL .32CONDENSER FAN CONTROL .34EXV CONTROL .35ECONOMIZER CONTROL.36LIQUID INJECTION .36ALARMS AND EVENTS.37SIGNALING ALARMS .37CLEARING ALARMS .37DESCRIPTION OF ALARMS .37UNIT EVENTS.39CIRCUIT STOP ALARMS .40CIRCUIT EVENTS .44ALARM LOGGING .45USING THE CONTROLLER .46NAVIGATING .47OPTIONAL REMOTE USER INTERFACE.53START-UP AND SHUTDOWN .55UNIT FUNCTIONS . 21TEMPORARY SHUTDOWN .55EXTENDED (SEASONAL) SHUTDOWN .56CALCULATIONS . 21UNIT ENABLE . 21 FIELD WIRING DIAGRAM.58UNIT MODE SELECTION. 21UNIT CONTROL STATES . 22SYSTEM MAINTENANCE.60UNIT STATUS . 23PREVENTATIVE MAINTENANCE SCHEDULE 63ICE MODE START DELAY . 23EVAPORATOR PUMP CONTROL . 23APPENDIX .64NOISE REDUCTION . 24LEAVING WATER TEMPERATURE (LWT)DEFINITIONS .64RESET . 24Unit controllers are LONMARKcertified with an optional LONWORKScommunications moduleManufactured in an ISO Certified facility 2009 McQuay International. Information covers the McQuay International products at the time of publication and we reserve the right tomake changes in design and construction at anytime without notice. The following are trademarks or registered trademarks of theirrespective companies: BACnet from ASHRAE; LONMARK and LONWORKS from Echelon Corporation; McQuay, MicroTech III, Guardister,and Open Choice from McQuay International.2KOMAC00607-09EN
IntroductionThis manual provides setup, operating, troubleshooting and maintenance information for theMcQuay AWS chillers.HAZARD IDENTIFICATION INFORMATION!DANGERDangers indicate a hazardous situation which will result in death or serious injury if not avoided.!WARNINGWarnings indicate potentially hazardous situations, which can result in property damage, severepersonal injury, or death if not avoided.!CAUTIONCautions indicate potentially hazardous situations, which can result in personal injury orequipment damage if not avoided.Software Version: This manual covers units with Software Version XXXXXXX The unit’ssoftware version number can be viewed by pressing the MENU and ENTER keys (the two rightkeys) simultaneously. Then, pressing the MENU key will return to the Menu screen.BOOT Version: XXXBIOS Version: XXX!WARNINGElectric shock hazard: can cause personal injury or equipment damage. This equipment must beproperly grounded. Connections to, and service of, the MicroTech III control panel must beperformed only by personnel who are knowledgeable in the operation of this equipment .!CAUTIONStatic sensitive components. A static discharge while handling electronic circuit boards can causedamage to the components. Discharge any static electrical charge by touching the bare metalinside the control panel before performing any service work. Never unplug any cables, circuitboard terminal blocks, or power plugs while power is applied to the panel.NOTICEThis equipment generates, uses, and can radiate radio frequency energy and, if not installed andused in accordance with this instruction manual, can cause interference to radio communications.Operation of this equipment in a residential area can cause harmful interference, in which case theuser will be required to correct the interference at the user’s own expense. McQuay InternationalCorporation disclaims any liability resulting from any interference or for the correction thereof.KOMAC00607-09EN3
Operating Limits: Maximum standby ambient temperature, 55 C Maximum operating ambient temperature is 46 C, 52 C for Premium VersionMinimum operating ambient temperature (standard), 2 CMinimum operating ambient temperature (with optional low-ambient control), -18 C Leaving chilled water temperature, 4 C to 15 C Leaving chilled fluid temperatures (with anti-freeze), 3 C to -8 C. Unloading is notpermitted with fluid leaving temperatures below -1 C.Operating Delta-T range, 4 C to 8 C Maximum operating inlet fluid temperature, 24 C Maximum non-operating inlet fluid temperature, 38 CController FeaturesReadout of the following temperature and pressure readings:Entering and leaving chilled water temperatureSaturated evaporator refrigerant temperature and pressureSaturated condenser temperature and pressureOutside air temperatureSuction line, liquid line, and discharge line temperatures calculated superheat for dischargeand suction linesOil pressureAutomatic control of primary and standby chilled water pumps. The control will start one of thepumps (based on lowest run-hours) when the unit is enabled to run (not necessarily running on acall for cooling) and when the water temperature reaches a point of freeze possibility.Two levels of security protection against unauthorized changing of setpoints and other controlparameters.Warning and fault diagnostics to inform operators of warning and fault conditions in plainlanguage. All events and alarms are time and date-stamped for identification of when the faultcondition occurred. In addition, the operating conditions that existed just prior to an alarmshutdown can be recalled to aid in isolating the cause of the problem.Twenty-five previous alarms and related operating conditions are available.Remote input signals for chilled water reset, demand limiting, and unit enable.Test mode allows the service technician to manually control the controllers’ outputs and can beuseful for system checkout.Building Automation System (BAS) communication capability via LonTalk , Modbus , orBACnet standard protocols for all BAS manufacturers-simplified with McQuay’s OpenChoices feature.Pressure transducers for direct reading of system pressures. Preemptive control of lowevaporator pressure conditions and high discharge temperature and pressure to take correctiveaction prior to a fault trip.4KOMAC00607-09EN
General DescriptionThe control panel is located on the front of the unit at the compressor end. There are threedoors. The control panel is behind to left-hand door. The power panel is behind the middleand right-hand doors.General DescriptionThe MicroTech III control system consists of a microprocessor-based controller and anumber of extension modules, which vary depending on the unit size and conformation. Thecontrol system provides the monitoring and control functions required for the controlled,efficient operation of the chiller.The operator can monitor all critical operating conditions by using the screen located on themain controller. In addition to providing all normal operating controls, the MicroTech IIIcontrol system will take corrective action if the chiller is operating outside of its normaldesign conditions. If a fault condition develops, the controller will shut a compressor, or theentire unit, down and activate an alarm output. .The system is password protected and only allows access by authorized personnel. Exceptthat some basic information is viewable and alarms can be cleared without a password. Nosettings can be changed.Control Panel LayoutFigure 1, Control Panel ComponentsNOTES:1. The Emergency Switch Relay de-energizes circuit #1 #2 and #3 control power when activated, causing animmediate compressor and fan shutdown. The red emergency button switch is located on the bottom frontof the control panel door.2. The control power transformer is located in the power panel adjacent to the control panel.3. Additional extension (aka extension) modules are located elsewhere on the chiller.KOMAC00607-09EN5
Power Panel LayoutThe power panel is at the front of the unit, behind the two doors to the rightFigure 2, Power Panel, Left SideFigure 3, Power Panel, Right Side6KOMAC00607-09EN
Economizer ComponentsThe chiller may or may not have economizers depending on design capacityrequirements. An economizer is a well-proven device to increase a refrigerant circuit’scapacity and to a lesser extent, its efficiency.Figure 4, Economizer ComponentsBrazed-plate HeatExchangerGas to Comp.InterstageTXVLiquid fromCondenserLLSVLiquidFeed toEconomizerLiquidFeed toEvaporatorWarm liquid from the condenser is feed into the economizer where it is cooled by flashing offliquid also from the condenser. The flash gas is piped to a compressor interstage point.Lowering the liquid refrigerant temperature to the evaporator decreases its enthalpy (heatcontent) and results in a greater amount of heat absorption from the chilled water.KOMAC00607-09EN7
Figure 5, Piping Schematic with Economizer Circuit, One Circuit8KOMAC00607-09EN
Controller DescriptionHardware StructureThe MicroTech III control system for AWS chillers consists of a main unit controller with anumber of extension I/O modules attached depending on the chiller size and configuration.One of the optional BAS communication modules may be included.An optional Remote Operator Interface panel may be included, connected with up to nine AWSunits.The Advanced MicroTech III controllers used on AWS chillers are not interchangeable withprevious MicroTech II controllers.Figure 6, hardware structureRemote Operator InterfaceMicroTech III Unit ControllerBACnet/MSTPBACnet/IPCommunication CardsAWCMODbusLONExtension I/O ModulesKOMAC00607-09EN9
System ArchitectureThe overall controls architecture uses the following: One Microtech III main controller I/O extension modules (sometimes referred to as “controllers”) as needed dependingon the configuration of the unit Optional BAS interface as selectedFigure 6, System ArchitectureBAS Interface(Bacnet, Lon,Modbus)Microtech III Main ControllerPeripheral Bus10I/O ExtensionAlarm/LimitingI/O ExtensionFans Circuit 1and 2I/O ExtensionCompressor 1I/O ExtensionEXV 1I/O ExtensionCompressor 2I/O ExtensionEXV 2I/O ExtensionCompressor 3I/O ExtensionEXV 3I/O ExtensionCompressor 4I/O ExtensionEXV 4I/O ExtensionFans Circuit 3I/O ExtensionFans Circuit 3and 4I/O ExtensionFans Circuit 4KOMAC00607-09EN
Sequence of OperationFigure 7, Unit Sequence of Operation (see Figure 9 for circuit sequence of operation)AWS Chiller Sequence of Operation in Cool ModeUnit power upUnit in Off stateNoIs unit enabled?YesYesThe chiller may be disabled via the unit switch, the remote switch, the keypadenable setting, or the BAS network. In addition, the chiller will be disabled if allcircuits are disabled, or if there is a unit alarm. If the chiller is disabled, the unitstatus display will reflect this and also show why it is disabled.If the unit switch is off, the unit status will be Off:Unit Switch. If the chiller isdisabled due to network command, the unit status will be Off:BAS Disable. Whenthe remote switch is open, the unit status will be Off:Remote Switch. When a unitalarm is active, the unit status will be Off:Unit Alarm. In cases where no circuitsare enabled, the unit status will be Off:All Cir Disabled. If the unit is disabled viathe Chiller Enable set point, the unit status will be Off:Keypad Disable.Low ambient lockout will prevent the chiller from starting even if it is otherwiseenabled. When this lockout is active, the unit status will be Off:Low OAT Lock.Is low ambient lockoutactive?NoIf the chiller is enabled, then the unit will be in the Auto state and the evaporatorwater pump output will be activated.Evaporator pump output onNoThe chiller will then wait for the flow switch to close, during which time the unitstatus will be Auto:Wait for flow.Is flow present?YesAfter establishing flow, the chiller will wait some time to allow the chilled water loopto recirculate for an accurate reading of the leaving water temperature. The unitstatus during this time is Auto:Evap Recirc.Wait for chilled water loop torecirculate.Keep pump output on whilechiller is enabled and eitherrunning or ready to run.NoIs there enough load tostart chiller?The chiller is now ready to start if enough load is present. If the LWT is not higherthan the Active Setpoint plus the Start Up Delta T, the unit status will be Auto:Waitfor load.If the LWT is higher than the Active Setpoint plus the Start Up Delta T, the unitstatus will be Auto. A circuit can start at this time.YesKOMAC00607-09EN11
12KOMAC00607-09EN
Figure 8, Circuit Sequence of OperationAWS Sequence of Operation - CircuitsUnit power upWhen the circuit is in the Off state the EXV is closed, compressor is off, and all fansare off.Circuit is in Off stateNoIs circuit is enabled tostart?YesThe circuit must be enabled before it can run. It may be disabled for severalreasons. When the circuit switch is off, the status will be Off:Circuit Switch.If the BAS has disabled the circuit, the status will be Off:BAS Disable. If the circuithas an active stop alarm then the status will be Off:Cir Alarm. If the circuit hasbeen disabled via the circuit mode set point, the status will be Off:Cir ModeDisable.YesNoA minimum time must pass between the previous start and stop of a compressorand the next start. If this time has not passed, a cycle timer will be active and thecircuit status will be Off:Cycle Timer.Are compressor cycletimers active?NoIf the compressor is not ready due to refrigerant in the oil, the circuit cannot start.The circuit status will be Off:Refr In Oil.Is compressor oil sumpready?YesIf the compressor is ready to start when needed, the circuit status will beOff:Ready.Circuit is ready to startNoIs circuit commanded tostart?YesWhen the circuit begins to run, the compressor will be started and the EXV, fans,and other devices will be controlled as needed. The normal circuit status at thistime will be Run.Run circuitNoIs circuit commanded toshut down?YesPumpdown circuitKOMAC00607-09ENWhen the circuit is commanded to shut down, a normal shut down of the circuit willbe performed. The circuit status during this time will be Run:Pumpdown. Afterthe shut down is completed, the circuit status will normally be Off:Cycle Timerinitially.13
Controller OperationMicroTech III Inputs/OutputsI/O for the unit control and for circuits one and two are found on CP1.The chiller may be equipped with two or three compressors.Analog Inputs#AI1AI2AI3X1X2X4DescriptionEvaporator Entering Water TempEvaporator Leaving Water TempEvaporator #1 Leaving Water Temp (*)Evaporator #2 Leaving Water Temp (*)Outside Ambient TemperatureLWT ResetSignal SourceNTC Thermister (10K@25 C)NTC Thermister (10K@25 C)NTC Thermister (10K@25 C)NTC Thermister (10K@25 C)NTC Thermister (10K@25 C)4-20 mA CurrentExpected Range-50 C – 120 C-50 C – 120 C-50 C – 120 C-50 C – 120 C-50 C – 120 C1 to 23 mAAnalog Outputs#X5X6X7X8DescriptionFan VFD #1Fan VFD #2Fan VFD #3Fan VFD #4Output Signal0-10VDC0-10VDC0-10VDC0-10VDCRange0 to 100% (1000 steps resolution)0 to 100% (1000 steps resolution)0 to 100% (1000 steps resolution)0 to 100% (1000 steps resolution)Digital Inputs#DI1DI2DI3DI4DI5DI6DescriptionUnit PVMEvaporator Flow SwitchDouble Set Point/ Mode SwitchRemote SwitchUnit SwitchEmergency StopSignal OffFaultNo FlowCool modeRemote offUnit offUnit off/rapid stopSignal OnNo FaultFlowIce modeRemote onUnit onUnit onOutput OFFOutput ONPump OffPump OnAlarm Active(Flashing circuitalarm)Fan OnFan OnFan OnFan OnFan OnFan OnFan OnFan OnDigital Outputs#14DescriptionDO1Evaporator Water PumpDO2Unit AlarmDO3DO4DO5DO6DO7DO8DO9DO10Circuit #1 Fan Step #1Circuit #1 Fan Step #2Circuit #1 Fan Step #3Circuit #1 Fan Step #4Circuit #2 Fan Step #1Circuit #2 Fan Step #2Circuit #2 Fan Step #3Circuit #2 Fan Step #4Alarm not ActiveFan OffFan OffFan OffFan OffFan OffFan OffFan OffFan OffKOMAC00607-09EN
Extension I/O Compressor #1 to #3Analog Inputs#X1X2X3X4X7DescriptionDischarge TemperatureEvaporator PressureOil PressureCondenser PressureMotor ProtectionSignal SourceNTC Thermister (10K@25 C)Ratiometric (0,5-4,5 Vdc)Ratiometric (0,5-4,5 Vdc)Ratiometric (0,5-4,5 Vdc)PTC ThermistorExpected Range-50 C – 120 C0 to 5 Vdc0 to 5 Vdc0 to 5 Vdcn/aAnalog Outputs#DescriptionNot NeededOutput SignalRangeSignal OffFaultFaultSignal OnNo faultNo faultDigital Inputs#X6DI1DescriptionStarter FaultHigh Pressure SwitchDigital OutputsU.S. rt CompressorEconomizerNon-modulating Slide LoadLiquid InjectionModulating Slide LoadModulating Slide UnloadSpareSpareOutput OffCompressor OffSolenoid ClosedSolenoid ClosedSolenoid ClosedSolenoid ClosedSolenoid ClosedOutput OnCompressor OnSolenoid OpenSolenoid OpenSolenoid OpenSolenoid OpenSolenoid OpenI/O EXV Circuit #1 to #3Analog Inputs#X2DescriptionSuction TemperatureSignal SourceNTC Thermister 10K@25 C)Expected Range-50 C – 120 COutput SignalRangeSignal OffFaultSignal OnNo fault (optional)Output OffSolenoid ClosedSolenoid Open (optional)Analog Outputs#DescriptionNot NeededDigital Inputs#DI1DescriptionLow Pressure switch (optional)Digital Outputs#DO1DescriptionLiquid Line (optional)Output OnStepper Motor Output#M1 M1M2 M2-KOMAC00607-09ENDescriptionEXV Stepper Coil 1EXV Stepper Coil 215
Extension I/O Fan Module Circuit #1 & 2Digital Inputs#DescriptionOutput OffOutput OnDI1PVM/GFP Circuit #1FaultNo faultDI2PVM/GFP Circuit #2FaultNo faultDigital Outputs#DescriptionOutput OffOutput OnDO1Circuit #1 Fan Step #5Fan OffFan OnDO2Circuit #1 Fan Step #6Fan OffFan OnDO3Circuit #2 Fan Step #5Fan OffFan OnDO4Circuit #2 Fan Step #6Fan OffFan OnExtension I/O Fan Module Circuit #3Digital Outputs#DescriptionOutput OffOutput OnDO1Circuit #3 Fan Step #5Fan OffFan OnDO2Circuit #3 Fan Step #6Fan OffFan OnExtension I/O Unit Alarm & Limiting (POL)Analog Inputs#X3X4DescriptionDemand LimitUnit CurrentSignal Source4-20 mA4-20 mARange1 to 23 mA1 to 23 mAOutput SignalRangeAnalog Outputs#DescriptionNot NeededDigital Inputs#DescriptionSignal OffSignal OnX1X2X5X6X7External Alarm/EventCurrent Limit EnableCircuit Switch #1Circuit Switch #2Circuit Switch #3External Device FailureNo LimitingCircuit OffCircuit OffCircuit OffExternal Device OKLimitingCircuit OnCircuit OnCircuit OnOutput OffPump OffOutput OnPump OnNo AlarmNo AlarmNo AlarmAlarmAlarmAlarmDigital Outputs#DO1DO2DO3DO4DO516DescriptionEvaporator Water Pump #2OpenCircuit #1 AlarmCircuit #2 AlarmCircuit #3 AlarmKOMAC00607-09EN
SetpointsThe following parameters are remembered during power off, are factory set to the Defaultvalue, and can be adjusted to any value in the Range column.Read and write access to these set points is determined by the Global HMI (Human MachineInterface) Standard Specification.Table 1, Setpoint Value and RangeDescriptionUnitManufacturing LocationUnit EnableUnit Status after PowerFailureControl sourceAvailable ModesDefaultFt/LbSINot SelectedOFFOFFCool LWT 144 FCool LWT 2Ice LWTStartup Delta TShut Down Delta TStage Up Delta T (betweencompressors)Stage Down Delta T(between compressors)Max PulldownEvap Recirc TimerEvap ControlLWT Reset TypeMax ResetStart Reset Delta TStart Reset OATMax Reset OATSoft LoadBegin Capacity LimitSoft Load RampDemand LimitCurrent LimitCurrent @ 20mACurrent limit Set Point# of CircuitsIce Time DelayContinued next page.KOMAC00607-09ENLocalCoolRangeNot Selected, Europe, USAOFF, ONOFF, ONLocal, NetworkCOOLCOOL/w GLYCOLCOOL/ICE w GLYCOLICETEST7 C44 F25 F5 F2.7 F2 F7 C-4 C2,7 C1.5 C1 CSee section 0See section 020 to 38 F / -8 to 4 C0 to 10 F / 0 to 5 C0 to 3 F / 0 to 1,7 C0 to 3 F / 0 to 1,7 C1 F0,5 C0 to 3 F / 0 to 1,7 C3 F/min1,7 C/min0.5-5.0 F /min / 0,3 to 2,7 C/min30#1 OnlyNONE10 F10 F75 F60 F5 C5 C23.8 C15.5 COff40%20 minOffOff800 Amp800 Amp2120 to 300 seconds#1 Only, #2 Only, Auto,#1 Primary, #2 PrimaryNONE, RETURN, 4-20mA, OAT0 to 20 F / 0 to 10 C0 to 20 F / 0 to 10 C50 F - 85 F / 10.0 – 29.4 C50 F - 85 F / 10.0 – 29.4 COff, On20-100%1-60 minutesOff, OnOff, On0 to 2000 Amp 4 to 20 mA0 to 2000 Amp2-3-41-23 hours17
DescriptionUnitClear Ice TimerSSS CommunicationPVMNoise ReductionNoise Reduction Start TimeNoise Reduction End TimeNoise Reduction CondenserOffsetBAS ProtocolIdent numberBaud RateEvap LWT sensor offsetEvap EWT sensor offsetOAT sensor offsetCompressors-GlobalStart-start timerStop-start timerPumpdown PressurePumpdown Time LimitLight Load Stg Dn PointLoad Stg Up PointStage Up DelayStage Down DelayStage Delay ClearMax # Comps RunningSequence # Cir 1Sequence # Cir 2Sequence # Cir 3Number of Pulses 10% to50%Slide Load Delay MininumSlide Load DelayMaximumSlide Unload DelayMinimumSlide Unload DelayMaximumLiquid Injection ActivationLiquid Line SolenoidValvesDefaultFt/LbSINoNoMulti PointDisabled21:006:005 C10.0 FNone1192000 F0 F0 F0 C0 C0 CNo,YesNo, YesSingle Point, Multi Point , None(SSS)Disabled, Enabled18:00 – 23:595:00 – 9:590.0 to 25.0 FNone, BACnet, LonWorks, Modbus0-?1200,2400,4800,9600,19200-5.0 to 5.0 C / -9.0 to 9.0 F-5.0 to 5.0 C / -9.0 to 9.0 F-5.0 to 5.0 C / -9.0 to 9.0 FFt/LbSI20 min5 min14,3 PSI100 kPa120 sec50%50%5 min3 minNo41111015-60 minutes3-20 minutes10 to 40 PSI / 70 to 280 kPa0 to 180 sec20 to 50%50 to 100%0 to 60 min3 to 30 minNo, Yes1-41-41-41-410 to 2030 seconds150 seconds10 to 60 seconds60 to 300 seconds10 seconds5 to 20 seconds50 seconds30 to 75 seconds185 F85 CNoAlarm LimitsLow Evap Pressure-Unload23.2 PSI160 kPaLow Evap Pressure-Hold27.5 PSI190 kPaOil Press Delay30 secContinued next page.18Range75 to 90 CNo, YesSee section 0See section 010-180 secKOMAC00607-09EN
DescriptionUnitOil Press DifferentialLow Oil Level DelayHigh Discharge Temperat.High Lift Pressure DelayLow Pressure Ratio DelayStart Time LimitEvaporator Water FreezeEvaporator Flow ProofRecirculate TimeoutLow Ambient LockoutEnableLow Ambient LockoutDefaultFt/LbSI35 PSI250 kPa120 sec110 C230 F5 sec90 sec60 sec2,2 C36 F15 sec3 minDisable55 F12 CRange0-60 PSI / 0 to 415 kPa10 to 180 sec150 to 230 F / 65 to 110 C0 to 30 sec30-300 sec20 to 180 secSee section 05 to 15 sec1 to 10 minDisable, EnableSee section 0The following set points exist individually for each circuit:DescriptionDefaultRangeFt/LbSICircuit modeEnableDisable, enable, testCompressor SizeTo be VerifiedCapacity ControlAutoAuto, ManualManual Capacity0 to 100%See note 1 below tableClear Cycle TimersNoNo, yesEXV controlAutoAuto, manualEXV positionSee note 2 below table0% to 100%Oil Sump CheckEnableEnable, DisableService PumpdownNoNo,YesEvap pressure offset0PSI0kPa-14.5 to 14.5 PSI /-100 to 100 kPaCond pressure offset0PSI0kPa-14.5 to 14.5 PSI /-100 to 100 kPaOil pressure offset0PSI0kPa-14.5 to 14.5 PSI /-100 to 100 kPaSuction temp offset0 F0 C-5.0 to 5.0 degDischarge temp offset0 F0 C-5.0 to 5.0 degFansFan VFD enableOnOff, OnNumber of fans55 to 12Saturated Condenser Temp90 F32 C80.0-110.0 oF / 26.0 to 43.0 CTarget MinSaturated Condenser Temp110 F43 C90.0-120.0 oF / 32.0 to 50 CTarget MaxFan Stage Up Deadband 05 F2.5 C1-20 oF / 1-10 CFan Stage Up Deadband 15 F2.5 C1-20 oF / 1-10 CFan Stage Up Deadband 28 F4 C1-20 oF / 1-10 CFan Stage Up Deadband 310 F5 C1-20 oF / 1-10 CFan Stage Up Deadband 48 F4 C1-20 oF / 1-10 CFan Stage Up Deadband 58 F4 C1-20 oF / 1-10 CFan Stage Down Deadband 28 F4 C1-25 oF / 1-13 CFan Stage Down Deadband 37 F3.5 C1-25 oF / 1-13 CFan Stage Down Deadband 46 F3 C1-25 oF / 1-13 CFan Stage Down Deadband 55 F2.5 C1-25 oF / 1-13 CFan Stage Down Deadband 65 F2.5 C1-25 oF / 1-13 CVFD Max Speed100%90 to 110%VFD Min Speed25%20 to 60%Note 1 – This value will follow the actual capacity while Capacity Control Auto.Note 2 – This value will follow the actual EXV position while EXV Control MMM19
Auto Adjusted RangesSome settings have different ranges of adjustment based on other settings.Cool LWT 1 and Cool LWT 2Available Mode SelectionRange Imp. Range SIWithout Glycol40 to 60oF4 to 15 CWith Glycol25 to 60oF-4 to 15 CEvaporator Water FreezeAvailable Mode SelectionRange Imp.Range SIoWithout Glycol36 to 42 F2 to 6 CWith Glycol0 to 42oF-18 to 6 CLow Evaporator Pressure - HoldAvailable Mode SelectionRange Imp.Range SIWithout Glycol28 to 45195 to 310 kPaPSIGWith Glycol0 to 45 PSIG 0 to 310 kPaLow Evaporator Pressure - UnloadAvailable Mode SelectionRange Imp.Range SIWithout Glycol26 to 45 Psig 180 to 310 kPaWith Glycol0 to 45 Psig0 to 410 kPaLow Ambient LockoutFan VFDRange Imp.Range SI no for all circuits35 to 60oF2 to 15 C yes on any circuit-10 to 60oF-23 to 15 CDynamic Default ValuesThe fan staging dead bands have different default values based on the VFD enable setpoint.When the VFD enable setpoint is changed, a set of default values for the fan staging deadbands is loaded as follows:VFD is EnabledVFD is DisabledStage 2 On Deadband5Stage 2 On DeadbandDefaultloaded (oF)810Stage 3 On Deadband8Stage 3 On Deadband11Stage 4 On Deadband10Stage 4 On Deadband12Stage 5 On Deadband8Stage 5 On Deadband13Stage 6 On Deadband8Stage 6 On Deadband13Stage 7 On Deadband8Stage 7 On Deadband13Stage 8 On Deadband8Stage 8 On Deadband13Stage 2 Off Deadband8Stage 2 Off Deadband20Stage 3 Off Deadband7Stage 3 Off Deadband16Stage 4 Off Deadband6Stage 4 Off Deadband11Stage 5 Off Deadband5Stage 5 Off Deadband8Stage 6 Off Deadband5Stage 6 Off Deadband8Stage 7 Off Deadband5Stage 7 Off Deadband8Stage 8 Off Deadband5Stage 8 Off Deadband8SetpointDefaultloaded (oF)SetpointStage 1 On Deadband20KOMAC00607-09EN
Unit FunctionsCalculationsLWT SlopeLWT slope is calculated such that the slope represents the change in LWT over a time frameof one minute with at least five samples per minute.Pulldown RateThe slope value calculated above will be a negative value as the water temperature isdropping. For use in some control functions, the negative slope is converted to a positivevalue by multiplying by –1.Unit EnableEnabling and disabling the chiller is accomplished using set points and inputs to the chiller.The unit switch, remote switch input, and Unit Enable Set Point all are required to be on forthe unit to be enabled when the control source is set to local. The same is true if the controlsource is set to network, with the additional requirement that the BAS request must be on.Unit is enabled according to the following table.NOTE: An x indicates that the value is ignored.UnitSwitchOffxxOnxOnControlSource SetPointxxxLocalNetworkNetworkRemoteSwitch InputUnit EnableSet ffOnOffOffOffOnOffOnAll of the methods for disabling the chiller, discussed in this section, will cause a normalshutdown (pumpdown) of any running circuits.When the controller is powered up, the Unit Enable Set Point will be initialized to ‘off’ if theUnit Status After Power Failure Set Point is set to ‘off’.Unit Mode SelectionThe operating mode of the unit is determined by setpoints and inputs to the chiller. TheAvailable Modes Set Point determines what modes of operation can be used. This setpointalso determines whether the unit is configured for glycol use. The Control Source Set Pointdetermines where a command to change modes will come from. A digital input switchesbetween cool mode and ice mode if they are available and the control source is set to local.The BAS mode request switches between cool mode and ice mode if they are both availableand the control source is set to network.KOMAC00607-09EN21
The Available Modes Set Point must only be changed when the unit switch is off. This isto avoid changing modes of operation inadvertently while the chiller is running.Unit Mode is set according to the following table.NOTE: An “x” indicates that the value is ignored.Control SourceSet xxxBASRequestxxxxCoolIcexxAvailable ModesSet PointCoolCool w/GlycolCool/Ice w/GlycolCool/Ice w/GlycolCool/Ice w/GlycolCool/Ice w/GlycolIce w/GlycolTestUnit ModeCoolCoolCoolIceCoolIceIceTestGlycol ConfigurationIf the Available Modes Set Poi
Air-Cooled Screw Chillers AWS 50 Hertz R-134a . 2 KOMAC00607-09EN Table of Contents . efficient operation of the chiller. The operator can monitor all critical operating conditions by using the screen located on the main controller. In addition to providing all normal operating controls, the MicroTech III