Transcription
2022 Computer Proficiency Assessment TestA. Are you required to satisfy the Core Goal V: computer use?The Core Goal V requirement applies to full/part time undergraduate students who matriculated atthe University in the fall of 2005 or later. This requirement does not apply to transfer students whocame in with core-complete or to graduate students.B. How can you satisfy this requirement?Students can satisfy this goal by doing one of the following:o pass CSC 117o pass CSC 118o pass BIO 231 and BIO 232o pass CMG 103, CMG 117, CMG 221, CMG 233, CMG 331, and CMG 332o pass the Computer Proficiency Assessment Test (CPAT)C. Information about the CPATThe CPAT allows students to demonstrate proficiency by showing that they are skilled in usingMicrosoft Windows 10, Word 2019, Excel 2019 and PowerPoint 2019. See section “D. Topics of theCPAT” for a detailed list of topics. The computer science department offers multiple tests so thatyou can select a date that best fits your schedule.1) Date/Time/Locationo Section A:Wednesday, 04/13/2022, 1:00 – 5:00 pm (HUB 217)o Section B:Wednesday, 04/20/2022, 1:00 – 5:00 pm (HUB 217)2) RegistrationYou can register for the CPAT at http://utica.simnetonline.com. Note that you can register forSection A or Section B, but not both. The cost for the test is 20.00, and it is non-refundable.You must sign up between 03/10/2022 and 04/03/2021. See section “E. Information aboutRegistration” for complete details about the registration process. Seating is limited, and it is onfirst-come-first-served basis. Therefore, we recommend students register as soon as they havedecided to take the CPAT. Upon successful registration, you will receive a confirmation email.3) On the test dayStudents are required to bring a hardcopy of their confirmation email upon successfulregistration and their photo ID (e.g., Utica student ID card (recommended), driver’s license, orpassport) on the test day. No students will be allowed to take the test without them. Pleasearrive by 12:45 pm so that your identity can be checked before the test which will beginpromptly at 1:00 pm.4) Test resultsThe results of the test will be loaded into Banner no later than 04/29/2022, and students willbe able to see their results in the “Degree Evaluation” at https://bannerweb.utica.edu/.5) Person to contactIf you have any questions, please contact Professor Kim. Thank you. John Kim, Ph.D.Associate Professor of Computer SciencePhone: 315-792-3127Email: jkim@utica.edu Page 1 of 13
D. Topics of the CPATWINDOWS 10 Adding a New User Account Adjusting File Permissions Adjusting the Screen Resolution Changing Document Properties Changing Power and Sleep Options Changing the Lock Screen (Screensaver) Changing the Screen Background Connecting to a Network Copying Files to OneDrive Creating a System Backup Creating Folders in OneDrive Creating New Folders and Subfolders Deleting Files and Folders Downloading Files from OneDrive Getting Started with Windows 10 Installing a Printer Managing Your Sign-In Options Modifying a User Account Moving Files and Folders Navigating Folders Using File Explorer Opening Files from File Explorer Pinning Items to the Taskbar Renaming Files and Folders Repairing an App Restoring from a System Backup Saving Files to OneDrive Searching Using Cortana Selecting Multiple Files Sharing Files on OneDrive Shutting Down Your Computer and Putting It to Sleep Signing Out and Locking the Computer Understanding OneDrive and Cloud Storage Understanding the Settings Window Uploading Files to OneDrive Using File Explorer Using the Action Center Using the Backup and Restore (Windows 7) Utility Using the Control Panel Using the Quick Access List Using the Show Desktop Button Using the Start Menu Using the Task View Button Using the Taskbar Working with Apps Working with Downloaded Files Working with Windows Working with Zipped FilesPage 2 of 13
WORD I. Creating and Editing Documents Entering and Deleting Text Revealing Formatting Marks Selecting Text Using AutoCorrect Using Cut and Paste Using Copy and Paste Using Paste Options Using the Clipboard Using Undo and Redo Changing Fonts Changing Font Sizes Using Bold, Italic, and Underline Changing Text Case Changing Font Colors Using Format Painter Clearing Formatting Changing Paragraph Alignment Changing Line Spacing Adjusting Spacing Before and After Paragraphs Checking for Writing Errors as You Type Using the Editor Using the Thesaurus Using Word CountWORD II. Formatting and Customizing Documents Adjusting Margins Displaying the Ruler Changing How Pages Scroll Using the Tabs Dialog Using Tab Stops Adding Tab Leaders Applying Indents Inserting Page Numbers Adding Headers Adding an Automatic Date Stamp Inserting Property Controls Adding Footers Inserting Page Breaks Creating Bulleted Lists Creating Numbered Lists Using Styles Applying Document Themes Finding Text Replacing Text Adding Borders and Shading to Paragraphs Adding Page Borders Inserting HyperlinksWORD III. Collaborating with Others and Working with Reports Working with Comments Using Track ChangesPage 3 of 13
Hiding and Showing Changes in a DocumentAccepting and Rejecting Changes in a DocumentInserting Footnotes and EndnotesSelecting a Reference StyleAdding Citations to DocumentsUsing the Source ManagerUsing ResearcherCreating a BibliographyUsing StylesInserting a Table of ContentsAdding a Cover PageInserting Property ControlsInserting Page BreaksAdding HeadersAdding FootersWORD IV. Using Tables, Columns, and Graphics Creating a Table Working with Tables Inserting Rows and Columns Merging and Splitting Cells Deleting Columns, Rows, and Cells Sizing Tables, Columns, and Rows Sorting Data in Tables Adding Borders to a Table Applying Table Quick Styles Applying Columns Inserting a Column Break Inserting a Picture Adding Alt Text to Pictures Inserting Online Pictures Resizing Pictures Changing Picture Layouts Adding a Caption Inserting a Shape Inserting SmartArt Adding WordArt to Documents Applying Quick Styles to Pictures Adding IconsPOWER POINT I. Creating and Editing Presentations Creating a New Presentation Using a Template Understanding Views Starting the Slide Show Adding Slides to Presentations Changing Slide Layouts Adding Text to Slides Adding Numbered Lists Aligning Text Applying Character Effects Adding Bulleted Lists Using Format Painter Checking SpellingPage 4 of 13
Working with ThumbnailsCopying and Pasting SlidesChanging the Order of SlidesDeleting Slides from PresentationsChanging the Presentation ThemeCustomizing the ThemeAdding FootersAdding PicturesChanging the Size of ImagesAligning ObjectsApplying Slide TransitionsPrinting PresentationsPrinting HandoutsPOWER POINT II. Illustrating with Pictures and Information Graphics Adding Shapes Adding Text to Slides Applying Outlines to Drawing Objects Applying Fill Colors to Drawing Objects Using the Eyedropper Tool Adding WordArt Inserting an Icon Adding 3D Models Using the Picture Styles Gallery Applying Preset Picture Effects Adding Online Pictures Creating Tables in Presentations Applying Quick Styles to Tables Adding SmartArt Modifying SmartArt Adding Charts Customizing ChartsPOWER POINT III. Preparing for Delivery and Using a Slide Presentation Applying a Pattern to Slide Backgrounds Applying a Gradient to Slide Backgrounds Applying Animation Effects Modifying Animations Adding Notes Rehearsing Timings Changing the Size of Slides Using Presenter View Navigating the Slide Show Hiding and Unhiding Slides Using Presentation Tools Recording a Slide Show Packaging a PresentationEXCEL I. Creating and Editing Workbooks Entering and Editing Text and Numbers in Cells Clearing Cell Content Aligning Cells Navigating a WorkbookPage 5 of 13
Inserting Data Using AutoFillCutting, Copying, and Pasting Cell ContentUsing Paste OptionsUsing AutoSum to Insert a SUM FunctionUsing Functions in FormulasChanging Fonts, Font Size, and Font ColorApplying Bold, Italic, and UnderlineUsing Format PainterApplying Number FormatsAdding BordersApplying Cell StylesApplying ThemesModifying Column Widths and Row HeightsWrapping Text in CellsMerging Cells and Splitting Merged CellsInserting and Deleting Rows and ColumnsHiding and Unhiding Rows and ColumnsInserting WorksheetsDeleting WorksheetsNaming WorksheetsChanging the Color of Sheet TabsMoving and Copying WorksheetsChanging the Worksheet ViewChanging the Zoom LevelFreezing and Unfreezing Rows and ColumnsSplitting WorkbooksHiding and Unhiding WorksheetsArranging WorkbooksChecking SpellingSetting Up Margins for PrintingAdding Headers and FootersInserting Page BreaksShowing and Hiding Worksheet ElementsPrinting TitlesScaling Worksheets for PrintingSetting and Clearing the Print AreaPreviewing and Printing a WorksheetPrinting Selections, Worksheets, and WorkbooksEXCEL II. Working with Formulas and Functions Entering Simple Formulas Understanding Absolute and Relative References Creating Formulas Referencing Data from Other Worksheets Naming Ranges of Cells Finding Errors Using Trace Precedents and Trace Dependents Calculating Averages Creating Formulas Using Counting Functions Finding Minimum and Maximum Values Using Date and Time Functions Calculating Loan Payments Using the PMT Function Using the Logical Function IF Finding Data Using the VLOOKUP Function Rounding with FunctionsPage 6 of 13
Using SUMIF and SUMIFSCalculating Totals with SUMPRODUCTEXCEL III. Creating and Editing Charts Using the Recommended Charts Feature Resizing and Moving Charts Applying Quick Layouts to Charts Applying Quick Styles and Colors to Charts Showing and Hiding Chart Elements Adding and Removing Trendlines Inserting a Column Chart or a Bar Chart Changing the Chart Type Filtering Chart Data Adding a Data Series to a Chart Formatting a Data Point or a Data Series Formatting Other Chart Elements Inserting a Shape Applying Quick Styles and Other Formatting to Shapes Inserting a Pie Chart Emphasizing a Data Point in a Pie Chart Creating a Combination Chart Working with Hierarchy Charts Working with Waterfall Charts Inserting Sparklines Applying Quick Styles and Other Formatting to Sparklines Adding Markers to SparklinesEXCEL IV. Formatting, Organizing, and Getting Data Converting Data into Tables Applying Quick Styles to Tables Adding Total Rows to Tables Removing Duplicate Rows from Tables Filtering Table Data with Slicers Converting Tables to Ranges Applying Conditional Formatting with Highlight Cells Rules Applying Conditional Formatting with Top/Bottom Rules Applying Conditional Formatting Using the Quick Analysis Tool Applying Conditional Formatting with Data Bars, Color Scales, and Icon Sets Managing Conditional Formatting Rules Sorting Data Sorting Data on Multiple Criteria Filtering and Sorting Using Cell Attributes Filtering Data Creating a Custom Filter Using Advanced Filter Adding Subtotals Creating an Outline Importing Data from a Text File Importing Data from Access Inserting Data Using Flash Fill Exporting to Text Formats Creating PivotTables Using Recommended PivotTables Applying a Quick Style to a PivotTablePage 7 of 13
Refreshing Data in a PivotTableCreating a PivotChart from a PivotTablePage 8 of 13
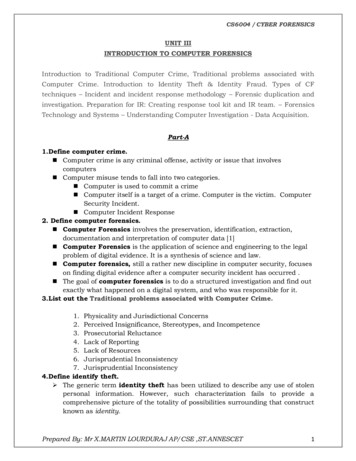
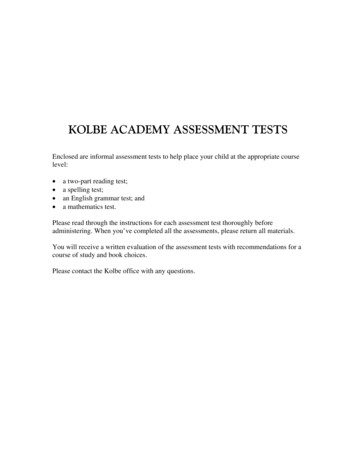
E. Information about Registration0. Go to http://utica.simnetonline.com/ and confirm the message at the top ofthe page: Utica University (Proficiency). Click the Buy online now link.1. Select Yes for the “Do you attend Utica University (Proficiency)?”question. Select No for the “Do you already have a SIMnet Onlineusername?” question. Then, click the Next button. If you did not pass theCPAT before and this is your second attempt, do not proceed with the nextsteps. Please contact Professor Kim as soon as you can.Page 9 of 13
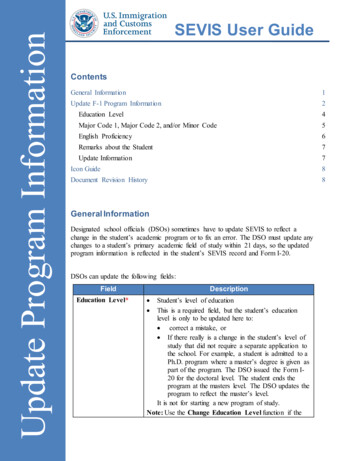
2. Review the End User License Agreement. Click the Check this box if youagree to the Terms of Service and have reviewed the Privacy Centercheck box, and then click the Next button.3. Select 2022 SPRING section, (A or B, but not both), and then click theNext button. Please see section “C. Information about the CPAT” for eachtest date.Page 10 of 13
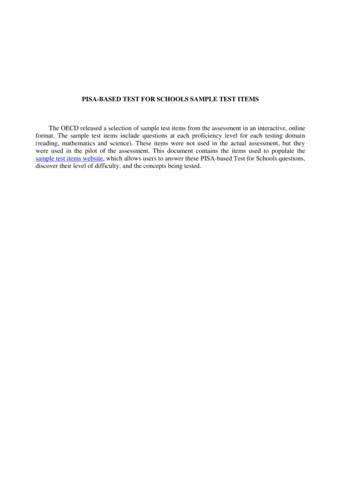
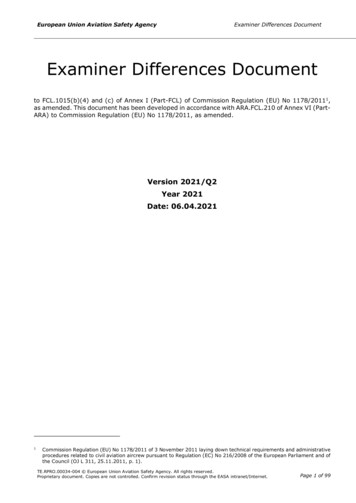
4. Select SIMnet 365/2019 – Standalone - Proficiency – Custom – Utica( 20.00), and then click the Next button.5. Enter your PersonalFirst Name:Last Name:Email:Student ID:Username:Password:& Login information, and then click the Next button.Your first name on your Utica student ID cardYour last name on your Utica student ID cardYour Utica emailEnter the first 9-digit numeric only (no dashes)Your Utica account username (case sensitive)Your Utica account password (case sensitive)For example,if your ID is 000998888-0,type 000998888Page 11 of 13
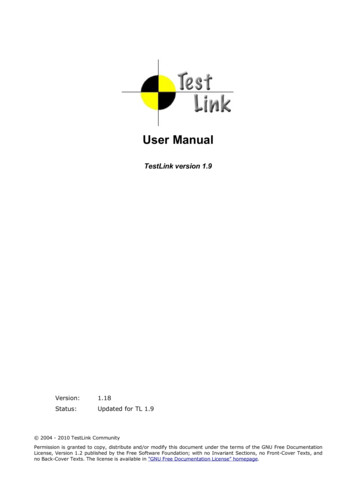
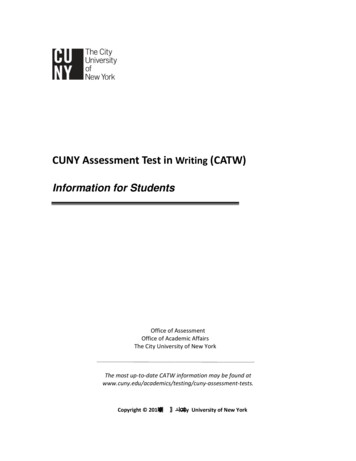
6. Enter your Billing Address information. Select your method of payment, andthen click the Next button.7. Enter your Payment detail, and then click the Buy button. The credit cardinformation and the billing address are needed to process your payment. It isneither visible to Utica University personnel nor saved to the SIMnetdatabase.Page 12 of 13
8. Be patient since the system may take a few minutes to process yourpayment. If your payment is accepted, you will see a confirmation page. Thesystem will also send you a receipt via email using the email address youentered as part of your SIMnet registration. Note that you will not receive aregistration code; your account is created automatically for you. Click theReturn to SIMnet button to return to the main page where you can nowenter your username and password to log in to SIMnet. If you can log in, yourregistration is successful.9. Don’t forget to check out your Utica email account and verify the confirmationmessage.Page 13 of 13
The computer science department offers multiple tests so that you can select a date that best fits your schedule. 1) Date/Time/Location o Section A: Wednesday, 04/13/2022, 1:00 - 5:00 pm (HUB 217) o Section B: Wednesday, 04/20/2022, 1:00 - 5:00 pm (HUB 217) 2) Registration