Transcription
HoneycombLogo MatStorage andHiveSmartbook
Table of ContentsIntro to Honeycomb . 3Benefits of Honeycomb. . 4-5How to Pay for Conversion . 6Before and After Examples . . 7Materials and Set Up Basics .8-11Install Overview 12Scrubbing your LOGOMATQRY List 13-16Schematics .17-20Ordering Raw Materials .21Labeling the Mats 22-24Keying in AS400 .25-26Install Best Practices .27-28How to Change Descriptions in AS400 29-32Hive Intro .33-36How to Access the Hive .37-39Maintaining Tube Statuses 40-50Hive Clean Up .51-52Hive List View . 53Competitive Advantage . .54
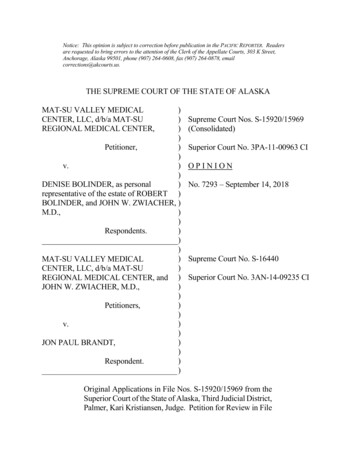
A Thing of the Past A common factor in all “good” logo mat locations before the honeycomb wasa partner who managed the program. Issue: When the logo mat partner was not at work (vacation, sick, etc.) thelocation would experience an increase in missing logo mats.Remedy: A good system that any partner can be trained on at any location toeffectively/efficiently operate; cohesion in our proceduresLocation 069 St. Petersburg, Florida
Benefits of Honeycomb Logo Mat Storage Safety Higher customer satisfaction Reduces the risk of injury: eliminates pulling mats from the bottom of cartsReduces missing matsNo more “Shake and Bake” resulting in higher mat qualityEmployee Morale SSR’s spend less time looking for missing logo matsDecrease in logo mat credits: positive impact on SSR’s walletSSR’s become more trusting of their loading partnersSSR’s have fewer tough conversations with customers about missing matshelping maintain a positive working relationship
Benefits to Honeycomb Logo Mat Storage Positive economic impact on location Image Logo mat credits decrease because of better accountabilityLogo mat life is extended due to reduction in compression wrinklesFewer logo mat re-ordersThe honeycomb system takes up approximately 15% less floor space than cartsLogo mats can be found faster, trucks can be loaded more quickly, resulting inreduction in labor expensesProvides world class aesthetic for visiting partners, customers and prospectsGrowth Minded Adding routes/re-routing is much easier; changes are made to AS400 only, nomore tracking down the mat to relabel it multiple times, the mat always stays in thesame tube
How to Pay for the Honeycomb Conversion CEA Honeycomb logo mat storage system can be classified under5 year machinery and equipment.Expenses include but are not limited to Pallet RackingTubesFoam CubesShippingContact you Mat Product Line Manager – Michelle Wilkins –for vendor information and order formswilkinsm@cintas.com
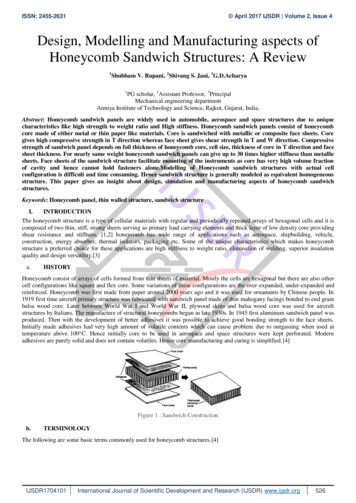
Before and AfterLocation 258 Lawrenceville, GeorgiaAfterBefore
Materials and Set Up BasicsOption 1: 7ft Racking and Tube DetailsTube Details: 138 - 6” Tubes per sectionPallet layout from bottomto top (12 rows total): 11tubes, 12, 11, 12, 11, 12,11, 12, 11, 12, 11, 12.8’6” 4757 FeetPallet Rack Details:76 - 8” Tubes per section8” Pallet layout from bottomto top (9 rows total): 8 tubes, 9, 8, 9, 8, 9, 8,9, 8.Tube wall thickness is 0.35” for both sizesNote: Top row of tubes will be approximately 6 feet off the ground.
Materials and Set Up BasicsOption 2: 8 Foot Racking and Tube DetailsMost Common Option Tube Details: 162 - 6” Tubes per section8’6”Pallet layout from bottomto top (12 rows total): 13TUBES, 14, 13, 14, 13,14, 13, 14, 13, 14, 13,14. 4758 FeetPallet Rack Details:95 - 8” Tubes per section8” Pallet layout from bottomto top (9 rows total): 11tubes, 10, 11, 10, 11, 10,11, 10, 11.Tube wall thickness is 0.35” for both sizesNote: Top row of tubes will be approximately 6 feet off the groundground.
Materials and Set Up BasicsExample of a Plant’s Honeycomb LayoutLogo Storage RacksMat RollerEMatTableDCBACARTSEmpty(Room for Growth)MLarge LogoMatsLBulk LogoAll SizesK3X5 & 4X63X5 & 4X63X5 & 4X63X5 & 4X63X10JHLogo Storage RacksGF
Materials and Set Up BasicsFoam SpongesHoneycomb logo mat storage is a manual system. In order forthe system to run effectively, it is essential to understand whatmats are missing as well as which tubes are available for a newlogo mat assignment.Yellow foam Tube is open for growth (currently no logo mat isassigned to the tube)Red foam Tube’s logo mat is missing and needs to be reordered (if mat is not found in one week)Maintaining and updating a master list of this information will bedone automatically through “the Hive”, our online managementsystem. Foam sponges enable effective management of thehoneycomb by comparing what the Hive shows versus what thehoneycomb shows (and discrepancies between the two can bequickly and visibly uncovered and addressed).The goal is for the honeycomb to look identical to the colorcoordination of the hive in terms of red (missing) and yellow(available) if compare at any given time.
Honeycomb Install Overview1. Run LOGOMATQRY in AS400 and complete a data file transfer to excel.2. Scrub logo mat list to determine what logo mats will be included in thehoneycomb (see next 4 slides for details on how to complete this step.)3. Send the scrubbed list to Michelle Wilkins (wilkinsm@cintas.com) for tubeassignments, pallet rack schematics, and completed order forms.4. Once the list is sent back to you, key tube assignments in AS400 (moreinformation on page 25) and label the backs of your mats with tube numbers5. Complete CEA and order tubes, foam cubes, and pallet racks (if new racking isneeded)6. Install Racks and Tubes and Label Tubes with Assigned Tube Numbers7. Insert mats into assigned tubes8. Request Hive to be activated (wilkinsm@cintas.com)
How to Scrub Your Logo Mat ListBefore your mats can be assigned with tube numbers, the logo mat list needs to be “scrubbed” inorder to determine which logo mats will be placed in the Honeycomb. Seek the SSR’s feedbackwhen there is a question about a mat.1. Remove all logo mats that are to be treated as “bulk logos”. Bulk logo mats are identified when there is a delivery quantity of 7 or more of thesame mat for a particular customer. These mats will not be assigned to a tube;there will be a designated “Bulk Logo Mat” area close to the Honeycomb for thesemats. Ex. All 3X5 Subway Mats Ex. The Machine Shop gets ten 3X5 portrait logo mats weekly2. Remove all logo mats that are EITHER more than 5 feet wide, ORmore than 12 feet long. These mats will be treated as “oversizedlogos” and be placed on a shelf, not assigned a tube. Oversized logo mats, as defined above, should not be put into a tube. They will beeither too long, or too wide to fit into the honeycomb tubes. Mats shouldn’t besticking out of the honeycomb, this poses a safety hazard.
How to Scrub Your Logo Mat List3. Ensure that all item numbers match item descriptions(example: 84401 6X12 logo mat, this is not right. Is it a6X12 mat or a 4X6 mat?)Item number is 84401,which is the item number fora 4X6 logo mat.Item description is for a6X12 logo mat. Ask theSSR if the item number orthe item description isaccurate. Then, correct theerror in the AS400 (andmake the correction on thespreadsheet, too).
How to Scrub Your Logo Mat List4. Make sure that inventory and delivery quantities areaccurate (example: inventory of 2, delivery of 2 isn’tcorrect. It should read inventory 4, delivery 2 ORinventory 2, delivery 1)Inventory should always bedouble the delivery quantity.Ask the SSR to verify if the deliveryquantity is correct. Then, correct theerror in the AS400 (and make thecorrection on the spreadsheet, too).Note: Typically, the delivery quantity is the accurate number whenever there’s a discrepancylike the one above because this is what we are invoicing our customers for, however, don’tassume this to always be true. Verify it with the SSR.
How to Scrub Your Logo Mat List5. If there are any 4X6 logo mats that are 90 mil thickness,those need to be assigned 8” tubes, not 6” tubes likenormal thickness 4X6 logo mats. There probably won’t be many (if any) instances of 90 mil 4X6 logomats at your location. Standard thickness 4X6 logo mats can fit in a 6 inch tube. 90 mil4X6 logo mats are too thick to fit in a 6 inch tube they must beassigned an 8 inch tube. Make a note on your list to the product line manager so that he/sheknows to assign that mat to the proper tube size.
What should be done next? Once you have your location’s logo mat list scrubbed, send it toyour Mat Product Line Manager (see below) A conference call should occur between your Product LineManager, Plant Manager, GM and Production Director (ifpossible) to determine Where the honeycomb footprint will be within your plant floor. Are you going to use existing pallet racking? What are the width, depthand height measurements of each rack? Where/how are you going to store bulk logos and oversized logo mats? Review next steps and timeline After the call, your Product Line Manager will create yourschematic package and send it back to you for you for nextstep actionMichelle Wilkins, Product Line Manager – Matswilkinsm@cintas.com770-361-7004
Schematic PackageA spreadsheet will be created for you that shows all logo mat tubeassignments
Schematic PackagePallet Racking Schematics (for all racks) will also be created foryou to assist in rack assembly and tube labelling. You will use thisschematic to assist in your Honeycomb install.
Schematic PackageOrder forms will be filled out for you and attached to your schematicpackage to make it easier for converting locations to order the correctproduct quantities.
Vendor InformationPallet Racking:Contact Millennium to order Racking typically takes less than 2 weeks to reach location from time of order Beams and Risers are blue, wire racking is grayFoam Cubes:Contact Millennium to order 6” yellow cubes should cost 0.42 per cube 6” red cubes should cost 0.43 per cube 8” yellow cubes should cost about 0.95 per cube 8” red cubes should cost about 0.95 per cubeTubes:Contact Ty Austin 6” Tubes should cost varies based on location (due to shipping) 8” Tubes should cost varies based on location (due to shipping)Millennium Mat Customer Service877-620-3822
Honeycomb Pre-Install: Labelling Mats Once you have received your finalized schematic package youmust begin physically labelling all logo mats that have beenassigned tubesBest Practices If a logo mat has a delivery quantity of more than 1, be sure to label themat with the tube range, or all of the tube numbers that have beenassigned to those mats, not just one specific tube number Ex. Subway gets a delivery quantity of four 3x5 logo mats. They are assigned totubes A0001-A0004. This tube range is what should go on the back of the mats forease of putting the mats away in the tubeEx. Subway gets a delivery quantity of three 3x5 logo mats. They are assigned totubes A0001, B0189, and C0302. You can label the back of all 6 mats (for everydelivery quantity of 1, there are 2 physical mats), with all 3 tube numbers
Honeycomb Pre-Install: Labelling MatsMarkers Use on all mats that have a white square on the back of themat For logo mats that don’t have a white square on the back of the mat,staple a white emblem on the back of each end of the mat and use ablack sharpie to write the tube number on the white emblem. This isthe recommended method for labeling logo mats without a whitesquare. An oil based paint pen tends to come off after numerous washes andis a far less reliable solution compared to the emblem method. Thisis not the recommended method for labeling logo mats without awhite square.Dremel (Best Practice): A dremel tool can be used to carve out the tube assignment number into the white square on the back of themat. This proves to be the longest lasting method. By “carve” it is actually just removing the paint from the white square, not physically carving a divotinto the mat.
Honeycomb Pre-Install: Labelling MatsSpend at least 4 weeks labeling mats prior to install (thoroughmat labeling is essential to a smooth logo mat storagetransition)Option 1: SSRs label their route’s logo mats. Give the SSR their list and have them write the tube number twice on thedirty logo mat they are picking up, twice on the clean logo mat they areputting down, then cross that tube number off of their list. Make sure to note if there is a delivery quantity of more than 1 for anygiven mat. When this happens, the mat should be labeled with thecorresponding tube range or multiple tube numbers for all of the mats (asmentioned on the previous slide. Have Service Managers spot check the SSRs’ progress of crossingevery logo mat off of their list.Option 2: Assign one partner the task of labelling all logo mats as theycome into the plant and/or are loaded onto trucks
Honeycomb Pre-Install: AS400 Keying1. Key logo mats in AS400 on multiple lines if customer has multiple mats: forevery INV QTY of 2 DEL QTY of 1, there needs to be one line item (i.e.4 separate invoice lines if the delivery quantity is 4 logo mats).2. The item description MUST begin with the tube number and should alwaysbe keyed alphanumerically as one letter and 4 numbers. Example: A00014X6 McDonaldsNote: In order for the Hive to display accurate data, it is imperative thatall mats are keyed correctly in AS400; the first 5 characters of the itemdescription must be the tube number (more on the next page).3. Once the location’s existing logo mats are physically labelled with tubenumbers, all future logo mats can be ordered with the tube numbersalready printed on the backs of the mats. The cintasmats.com ordering siteasks if your logo mat is for the Hive and then prompts you to key a tubeassignment.Should have 1 letter and 4 numbers
Honeycomb Pre-Install: AS400 Keying4 Rules for Keying Logo Mats in AS4001. The first 5 characters of the item description must be 1 letter followed by 4numbers. Example: A0001 4X6 ED’S PUB2. Each invoice line must be a delivery quantity of 1. If you have an account thatis delivered 3 of the same logo mat, you will need 3 invoice lines. Eachinvoice line will have a unique tube number for the particular logo matplacement.EX: Joe’s Garage gets three 3X5 logo mats weekly. The invoice should show 3 line items:B0163 Joe’s Garage 3X5B0189 Joe’s Garage 3X5C0298 Joe’s Garage 3X53. Two different accounts and/or mats can’t be assigned to the same tube.4. If a mat is assigned to a tube, it must be given a logo mat itemnumber. There are 10 total logo mat item numbers:84001, 84101, 84201, 84301, 84401, 84501, 84601, 84701, 84801, and 84901.
Honeycomb InstallOnce the tubes and pallet racking have arrived, assemble according to the layout in theschematic package.Install Best Practices1. Request tubes to be delivered one day prior to yourconversion day as they take up a significant amount of spacein your plant and must be kept indoors2. Ask all SSRs on conversion day to put all of their respectiveroute’s logo mats in the proper tubes. Purge “extra” mats.3. On the day prior to the conversion date, have the load teamput the conversion date’s logo mats AND the next day’s logomats on the trucks. This will give the location an extra day toensure all logo mats are put away in the correct honeycombtubes.
Getting and Staying OrganizedPost Install Best Practices1. Any “extra” logo mats should not be kept freely around theHoneycomb. All extra mats (bulk and oversized logos) should have adesignated storage area in the plant (in a bin, cart or rack separatefrom the Honeycomb). Shortages occur when a mat is placed in areasclose to the Honeycomb such as on top of the top row of tubes, or ontop of the pallet racking.2. Have only one or two specific partners (i.e. Plant Manager, or NewAccount Coordinator) at the location assign tubes to logo mats beforea logo mat is ordered. This helps prevent double assigning mats to thesame tube.3. Designate an area for accounts on hold and new accounts. Onemat goes in each tube, so accounts on hold and newly ordered logomats will have two mats in the production team’s possession. Put onein the tube, and the other in a designated area prepared for delivery.
How to change item description in AS400
How to change item description in AS400(continued)
How to change item description in AS400(continued)
How to change item description in AS400(continued)A0001 4X6 LAROSA’S
Automated Tube Tracking
The PhysicalLocation 544 New Orleans
Meets Digital
How the Hive WorksDaily Data Feed A query is set up to automatically send daily updates from alocation’s AS400 box to the Hive. Thus, every tube’s statusis updated daily. The query picks up the logo mat item number (must be oneof the ten listed on page 26) and the first 5 digits of the logomat’s item description and fills in the correspondinginformation into the respective space in the Hive.NOTE: If there is a typo in the item description OR if one of theten logo mat item numbers isn’t being used, the mat won’t showup in the Hive. This is why it is important to take your time keyinglogo mats in AS400.
How to Accesswww.cintasmats.comThen click “the hive” icon
The Hive HomepageThe locations youhave access toview/manageHive ViewList ViewYourHoneycombHow to viewother racks inyour honeycombsystemTube Status Key
Honeycomb and Hive VisualThe homepage of the Hive is the “A” rack of yourcurrent Honeycomb system. You should be ableto look at this screen and/or toggle between anyof the other racks in your system and then go tothe physical rack in the plant, and they shouldlook exactly the same.
Tube StatusAvailable (Yellow): Denotes a tube is available and ready to have logo matassigned to it.Cancelled (Blue): Denotes the logo mat assigned to that tube has beencancelled. A few actions can cause this to happen:1)2)3)4)AnAnAnAnaccount has been determined lostactive customer wants to stop the logo mats on their invoiceinvoice has been zeroed out 4 times in a row (but is not a lost account)account is on holdFilled (Gray): Denotes a logo mat is currently assigned to this tube andfilled.Missing (Red): Someone (i.e. loader, plant manager/supervisor) assigns atube as “missing” a mat when they go to load that particular mat and itis not in its assigned tube. Follow up actions must be taken to eitherlocate the mat, or order a replacement.Reserved (Black): Denotes that a mat has been ordered and was assignedto this tube number. Marking a space as “reserved” prevents other matsfrom being assigned to that space during the delivery process.
Software DemoClick on a tube and see account detailsNote: Logo mats added after the install of the honeycomb/hive will have the approvedsketch/image for that mat. Any mats that were already in the system before the addition of thehoneycomb/hive won’t have the image.Manuallychanging a tubestatus is as easyas clicking thestatus square(Example: activetube can bechanged to“missing”)
“Available” If a space in the Hive is marked “Available,” it is ready to have amat assigned to it. There should be a yellow foam cube in the corresponding tubeof the Honeycomb All tubes/spaces not in use should be marked “Available.” It is important to perform a cleanup from time to time of all matsthat are marked “Cancelled,” “Missing,” or “Reserved” becausemats in this state, will not change back to “Available” or “Filled”on their own. If any of those spaces are in fact not in use, youmust mark them as “Available” in order to free up that space inthe Honeycomb.***More on the available function to come
Available Tubes on the Hive
“Cancelled”A mat shows as cancelled in the Hive when one of the followingactions take place in the AS4001) An account has been lost2) An active customer wants to stop the logo mats on theirinvoice3) An invoice has been zeroed out 3 times in a row (but is nota lost account4) An account is on holdCLEAN UP NOTES:When a mat is listed as “Cancelled” it must be determined if that mat is in factstill active or not. Regardless, the space will still need to be marked as“Available” so when the AS400 download occurs, it will either mark the space as“Available” if the mat is truly cancelled or the space will be changed back to“Filled” if the mat was “Cancelled” temporarily or in error (See #3 and #4 above).***The big takeaway is to perform a clean up from time to time to make“Cancelled” mats available in order to free up tube space.***DON’T FORGET TO PULL CANCELLED MATS OUT OF THE TUBES
Making Cancelled Tubes Available
“Filled” The “Filled” function can only be marked by the AS400 datadownload or by a partner when a “Missing” mat is found. Thisaids to the checks and balances of the system and prevents aspace from being marked “Filled” erroneously. In the event a space should be marked as “Filled” but is labeledas something different, first check the AS400 to make sure theitem description is keyed correctly for that mat, then check tosee if the item number for the mat is one of the ten options theHive recognizes. Once you’ve made your corrections, mark themat as “Available.” When the AS400 download comes in for theday, the update will change that space to “Filled.” If the mat is keyed correctly but is still showing a status otherthan “Filled” run LOGOMATQRY and see if another mat is alsoassigned to that tube. Often, when 2 mats are assigned to thesame tube, they will show as “Available” instead of “Filled”
“Missing” The “Missing” function denotes a mat is missing. Please notethat this function needs to be manually marked in the Hive. If a mat is noted to be “Missing” the person with access to theHive must be notified immediately in order to mark the tube onthe Honeycomb and Hive as such. That person can determineif the mat can be located elsewhere or if it needs to bereordered and act accordingly. If a mat is no longer “Missing,” that space will need to bemarked as “Filled.” This is the ONLY time a partner can mark aspace as “Filled.” If the mat is never located and the customer wants to stop it, apartner can mark that “Cancelled” space as “Available.”
Marking a “Missing” Mat as “Filled”
“Reserved” When a new mat is ordered and needs to be assigned to atube, the person placing the order will go into the Hive anddetermine which space is available. Once the tube number isdetermined, there is a box that needs to be checked on theorder screen of cintasmats.com that asks “Is this a HoneycombItem?” When you check the box, you will key the selected tubenumber. In order to key a range, or multiple tube numbers on the back ofa mat, you need to key this information in the “ID Label 1” boxafter you select your backing. You must fill in all of this information in order for the mat tocome with the tube assignment printed on it. See the next page for a screenshot of the above info Once a mat that is “Reserved” becomes active in AS400, thespace in the Hive should automatically change to “Filled.”
“Reserved”
Clean Up Summary As stated in the previous slides, it is veryimportant to perform a regular clean up of yourHive. In order to do this, you must make it a weeklyhabit to go in a double check all tubes that aremarked “Missing,” “Reserved,” and “Cancelled”to see if they are in fact still in that state. If any of these tubes should be coded as“Available” or “Filled”, you must mark thosetubes as “Available” so the AS400 downloadcan update your Hive for the following day.
Clean UpDon’t let your Hiveget to this point. All ofthese “Cancelled”tubes present anopportunity to bemade “Available.”Performing regularclean ups will helpkeep your Hive up todate and ready to befilled with new mats.The same rules applyto “Reserved” and“Cancelled” mats.
Software DemoFind Available Tubes EasilyList function shows all available tubes that a new logo mat can beassigned
Competitive Advantage How can Cintas take advantageof the Honeycomb and the Hiveto keep accounts and earn newbusiness?The Hive can be accessed on asmartphone. A Service Manageror Sales Rep, for example, canshow customers and prospectsCintas’ ability to track logo mats.How does our competitionaccount for logo mat inventory?
A Thing of the Past A common factor in all "good" logo mat locations before the honeycomb was a partner who managed the program. Issue: When the logo mat partner was not at work (vacation, sick, etc.) the location would experience an increase in missing logo mats. Remedy: A good system that any partner can be trained on at any location to