Transcription
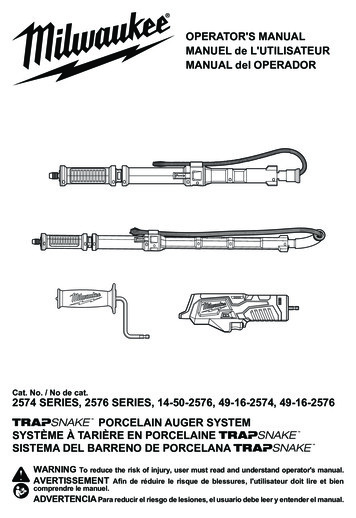
OPERATOR'S MANUALMANUEL de L'UTILISATEURMANUAL del OPERADORCat. No. / No de cat.2574 SERIES, 2576 SERIES, 14-50-2576, 49-16-2574, 49-16-2576PORCELAIN AUGER SYSTEMSYSTÈME À TARIÈRE EN PORCELAINESISTEMA DEL BARRENO DE PORCELANAWARNING To reduce the risk of injury, user must read and understand operator's manual.AVERTISSEMENT Afin de réduire le risque de blessures, l'utilisateur doit lire et biencomprendre le manuel.ADVERTENCIA Para reducir el riesgo de lesiones, el usuario debe leer y entender el manual.
GENERAL POWER TOOLSAFETY WARNINGSRead all safety warnings, instrucWARNING tions,illustrations and specifica- Do not overreach. Keep proper footing and balanceat all times. This enables better control of the powertool in unexpected situations. Dress properly. Do not wear loose clothing orjewelry. Keep your hair and clothing away frommoving parts. Loose clothes, jewelry or long hair canbe caught in moving parts. If devices are provided for the connection of dustextraction and collection facilities, ensure theseare connected and properly used. Use of dust collection can reduce dust-related hazards. Do not let familiarity gained from frequent useof tools allow you to become complacent andignore tool safety principles. A careless action cancause severe injury within a fraction of a second.tions provided with this power tool. Failure to followall instructions listed below may result in electric shock,fire and/or serious injury. Save all warnings and instructions for future reference. The term "power tool"in the warnings refers to your mains-operated (corded)power tool or battery-operated (cordless) power tool.WORK AREA SAFETY212SPECIFIC SAFETY RULES43563 Only grasp the rotating cable with gloves recommended by the manufacturer. Latex or loose fittinggloves or rags can become wrapped around the cableand may result in serious personal injury. Do not allow the cutter to stop turning while thecable is turning. This can overstress the cable andmay cause twisting, kinking or breaking of the cableand may result in serious personal injury. Use latex or rubber gloves inside the gloves recommended by the manufacturer, goggles, faceshields, protective clothing, and respirator whenchemicals, bacteria or other toxic or infectious substances are suspected to be in a drain line. Drainsmay contain chemicals, bacteria and other substancesthat may cause burns, be toxic or infectious or mayresult in other serious personal injury. Practice good hygiene. Do not eat or smoke whilehandling or operating the tool. After handling oroperating drain cleaning equipment, use hot, soapywater to wash hands and other body parts exposedto drain contents. This will help reduce the risk of healthhazards due to exposure to toxic or infectious material. Only use the drain cleaner for the recommendeddrain sizes. Using the wrong size drain cleaner canlead to twisting, kinking or breaking of the cable and14-50-2576may result in personal injury. Inspect cable for wear and damage before use. M12 Trapsnake Driver 14Replace a worn or damaged cable before using thetool. Do not twist, kink or over bend cables. Breaking ofAuger Handlethe cable may result in serious personal injury. Inspect the drain to be cleaned before use. If possible, determine the access point(s) to the drain, the1213size(s) and length(s) of the drain, distance to mainlines,14the nature of the blockage, presence of drain clean- 1. Auger socketing chemicals or other chemicals, etc. If chemicals 2. Detent ballare present in the drain, it is important to understand 3. Cable sleevethe specific safety measures required to work around 4. Cable lock indicator10. Cablethose chemicals. Contact the chemical manufacturerline11. Protective rubberfor required information.5. Handle capboot If needed, place protective covers in the work area. 6. Upper grip12. Forward/reverseThe drain cleaning process can be messy.switch7. Lower grip Do not operate the tool in reverse rotation except as 8. Lock/unlock icon13. Triggerdescribed in this manual. Running the tool in reverse14. Auger connectionfor extended periods can cause damage to the cable 9. Cable clipand accessories.3456787989101011112 Maintain labels and nameplates. These carry important information. If unreadable or missing, contacta MILWAUKEE service facility for a free replacement. WARNING Some dust created by power sanding,sawing, grinding, drilling, and otherconstruction activities contains chemicals known tocause cancer, birth defects or other reproductive harm.Some examples of these chemicals are: lead from lead-based paint crystalline silica from bricks and cement and othermasonry products, and arsenic and chromium from chemically-treated lumber.Your risk from these exposures varies, depending onhow often you do this type of work. To reduce yourexposure to these chemicals: work in a well ventilatedarea, and work with approved safety equipment, suchSERVICEas those dust masks that are specially designed to Have your power tool serviced by a qualified repair filter out microscopic particles.person using only identical replacement parts.FUNCTIONAL DESCRIPTIONThis will ensure that the safety of the power tool ismaintained.49-16-257449-16-2576 Never service damaged battery packs. Service ofTrapsnake 4'Trapsnake 6'battery packs should only be performed by the manuUrinal AugerToilet Augerfacturer or authorized service providers.1 Keep work area clean and well lit. Cluttered or darkareas invite accidents. Do not operate power tools in explosive atmospheres, such as in the presence of flammablePOWER TOOL USE AND CAREliquids, gases or dust. Power tools create sparks Do not force the power tool. Use the correct powerwhich may ignite the dust or fumes.tool for your application. The correct power tool will Keep children and bystanders away while operat- do the job better and safer at the rate for which it wasing a power tool. Distractions can cause you to lose designed.control. Do not use the power tool if the switch does not turnit on and off. Any power tool that cannot be controlledELECTRICAL SAFETY Power tool plugs must match the outlet. Never with the switch is dangerous and must be repaired. modify the plug in any way. Do not use any adapter Disconnect the plug from the power source and/plugs with earthed (grounded) power tools. Un- or remove the battery pack, if detachable, frommodified plugs and matching outlets will reduce risk the power tool before making any adjustments,changing accessories, or storing power tools. Suchof electric shock. Avoid body contact with earthed or grounded preventive safety measures reduce the risk of startingsurfaces, such as pipes, radiators, ranges and the power tool accidentally.refrigerators. There is an increased risk of electric Store idle power tools out of the reach of childrenand do not allow persons unfamiliar with the powershock if your body is earthed or grounded. Do not expose power tools to rain or wet condi- tool or these instructions to operate the power tool.tions. Water entering a power tool will increase the Power tools are dangerous in the hands of untrainedusers.risk of electric shock. Do not abuse the cord. Never use the cord for car- Maintain power tools and accessories. Check forrying, pulling or unplugging the power tool. Keep misalignment or binding of moving parts, breakagecord away from heat, oil, sharp edges or moving of parts and any other condition that may affect theparts. Damaged or entangled cords increase the risk power tool’s operation. If damaged, have the powertool repaired before use. Many accidents are causedof electric shock. When operating a power tool outdoors, use an by poorly maintained power tools.extension cord suitable for outdoor use. Use of a Keep cutting tools sharp and clean. Properly maincord suitable for outdoor use reduces the risk of electric tained cutting tools with sharp cutting edges are lesslikely to bind and are easier to control.shock. If operating a power tool in a damp location is Use the power tool, accessories and tool bits etc.unavoidable, use a ground fault circuit interrupter in accordance with these instructions, taking into(GFCI) protected supply. Use of an GFCI reduces account the working conditions and the work tobe performed. Use of the power tool for operationsthe risk of electric shock.different from those intended could result in a hazardPERSONAL SAFETYous situation. Stay alert, watch what you are doing and use com- Keep handles and grasping surfaces dry, cleanmon sense when operating a power tool. Do not and free from oil and grease. Slippery handlesuse a power tool while you are tired or under the and grasping surfaces do not allow for safe handlinginfluence of drugs, alcohol or medication. A moment and control of the tool in unexpected situations.of inattention while operating power tools may resultBATTERY TOOL USE AND CAREin serious personal injury. Use personal protective equipment. Always wear Recharge only with the charger specified by theeye protection. Protective equipment such as a dust manufacturer. A charger that is suitable for one typemask, non-skid safety shoes, hard hat or hearing of battery pack may create a risk of fire when used withprotection used for appropriate conditions will reduce another battery pack. Use power tools only with specifically designatedpersonal injuries. Prevent unintentional starting. Ensure the switch battery packs. Use of any other battery packs mayis in the off-position before connecting to power create a risk of injury and fire.source and/or battery pack, picking up or carrying When battery pack is not in use, keep it away fromthe tool. Carrying power tools with your finger on the other metal objects, like paper clips, coins, keys,switch or energizing power tools that have the switch nails, screws or other small metal objects, that canmake a connection from one terminal to another.on invites accidents. Remove any adjusting key or wrench before turn- Shorting the battery terminals together may causeing the power tool on. A wrench or a key left attached burns or a fire.to a rotating part of the power tool may result in per- Under abusive conditions, liquid may be ejectedfrom the battery; avoid contact. If contact acsonal injury.cidentally occurs, flush with water. If liquid contacts eyes, additionally seek medical help. Liquidejected from the battery may cause irritation or burns. Do not use a battery pack or tool that is damaged ormodified. Damaged or modified batteries may exhibitunpredictable behavior resulting in fire, explosion orrisk of injury. Do not expose a battery pack or tool to fire or excessive temperature. Exposure to fire or temperatureabove 265 F (130 C) may cause explosion. Follow all charging instructions and do not chargethe battery pack or tool outside the temperaturerange specified in the instructions. Charging improperly or at temperatures outside the specified rangemay damage the battery and increase the risk of fire.
SYMBOLOGYOPERATIONremove battery pack beforeWARNING Alwayschanging or removing accessories.VoltsOnly use accessories specifically recommendedfor this tool. Others may be hazardous.To reduce the risk of injury, wear safety gogglesor glasses with side shields. Always wear leathergloves.Direct CurrentNo-Load Revolutions per Minute (RPM)CUSUL Listing Mark forCanada and U.S.Operating the Trapsnake DriverAlways wear leather glovesUsing the forward/reverse switch:1. For forward (clockwise) rotation, push in the forward/SPECIFICATIONSreverse switch from the right side of the tool . CheckCat. No. 49-16-2574the direction of rotation before use.Description.Trapsnake 4' Urinal Auger 2. For reverse (counterclockwise) rotation, push in theforward/reverse switch from the left side of the toolApplications. Urinal . Check direction of rotation before use.Cable Type.3/8" x 4' BulbCat. No. 49-16-2576 3. To lock the trigger, push the forward/reverse switchto the center position. The trigger will not work whileDescription.Trapsnake 6' Toilet Augerthe forward/reverse switch is in the center lockedApplications. Toiletposition. Always lock the trigger or remove the batCable Type. 1/2" x 6' Retriever Bulbtery pack before performing maintenance, changingCat. No. 14-50-2576accessories, storing the tool and any time the tool isDescription. M12 Trapsnake Drivernot in use.Applications.Toilet, Urinal, Floor TrapVolts.12 DC Starting, stopping and controlling speed:No Load RPM.0 - 500 The Trapsnake driver may be used at any speed fromBattery Type. M12 0 RPM to full speed.Charger Type. M12 1. To start the Trapsnake driver, insert an M12 battery and pull the trigger.ASSEMBLY2. To vary the driving speed, increase or decrease presRecharge only with the chargersure on the trigger. The further the trigger is pulled,WARNING specifiedfor the battery. For spethe greater the speed.cific charging instructions, read the operator’s 3. To stop the tool, release the trigger.manual supplied with your charger and battery.APPLICATIONSRemoving/Inserting the Batteryremove battery pack beforeWARNING Alwayschanging or removing accessories.To remove the battery, push in the release buttons andpull the battery pack away from the Trapsnake driver.remove battery pack beforeWARNING Alwayschanging or removing accessories.To insert the battery, slide the pack into the body ofthe Trapsnake driver. Make sure it latches securelyinto place.Only use accessories specifically recommendedfor this tool. Others may be hazardous.To reduce the risk of injury, wear safety gogglesor glasses with side shields. Always wear leathergloves.Inserting Auger into DrainFuel GaugeTo determine the amount of charge left in the battery, 1. Unclip the cable from the cable clip.pull the Trapsnake driver trigger. The fuel gauge 2. Pull the cable sleeve back so that only the cable tipis visible at the boot.will light up for 2-3 seconds.To signal the end of charge, 1 light on the fuel gauge 3. Carefully insert the boot into the drain, tilting theauger for easy entry.will flash for 2-3 seconds.WARNING! The boot must be in the drain to supportthe cable from whipping. The cable can damageInstalling the Auger Handle/porcelain.Trapsnake Driver4.Ifusing the Trapsnake driver, set the forward/Always remove the battery before inserting or removreverse switch to the forward position . Pull theing the Trapsnake driver.trigger while pushing down on the driver to advance1. To install the auger handle or Trapsnake driver,the cable into the drain. If using the auger handle,press the auger connection into the auger socketrotate the handle in a clockwise motion while pushinguntil the auger collar snaps back and the augerdown on the handle.connection is locked into place.2. To remove the auger handle or Trapsnake driver, NOTE: If the cable is not advancing, set the forward/pull out the auger collar, then pull out the auger reverse switch to the reverse position , and continueadvancing the cable. Once the cable becomes unstuck,connection.set the forward/reverse switch back to the forwardposition .5. If more cable is needed, release the second half ofthe cable.4Releasing the Second Half of CableReturning the Second Half of Cable1. Pull up the cable sleeve to the red cable lock indicator 1. Pull the cable sleeve up as far as it will go, and pushline.down on the lower grip to lock the cable in place .NOTE: The red line should be just below the handle cap. 2. Push the detent ball in and push the cable sleeve2. Push down on the lower grip to lock the cable indown until the ball locks into the next detent.place .3. Pull the lower grip up to unlock the cable , and3. Press in the cable detent ball and pull up the cablecontinue returning the cable from the drain.sleeve until the ball locks into the next detent.4. Pull the lower grip up to unlock the cable .5. Continue feeding the cable into the drain.231324MAINTENANCECable InstallationRemoving the Blockage1. When the clog is reached, move the tool in a backand forth motion until the obstruction is cleared. Ifthe tool binds, release the trigger immediately.NOTE: If the cable is not advancing, please see the"Unbinding Auger Cables" section.2. Repeat until the drain is clear.NOTE: The toilet auger can also be used to retrieveobstructions from the drain.To reduce the risk of injury, wearWARNING safetygoggles or glasses with sideshields. Always wear leather gloves. Cable tip maybe sharp.Replace cables as needed. See chart for accessorypart numbers and compatibility.To remove the cable:1. Remove the auger handle or Trapsnake driver fromthe auger.2. Unclip the cable from the cable clip.3. Remove the two screws from the auger handle cap.4. Pull the cable sleeve up to the red cable lock indicator line. Push down on the lower grip to lock thecable .5. Press the cable detent ball in and pull the cablesleeve up until the ball locks into the next detent.6. Pull the lower grip up to unlock the cable .Press the cable detent ball in once more and pull thecable out from the bottom of the auger.7. When cleaning or maintaining the cable, follow thecleaning instructions under "Maintenance".To install the cable:1. Remove the auger handle or Trapsnake driver fromthe auger.2. Remove the two screws from the auger handle cap.3. Pull the lower grip up to unlock the cable .4. Feed the cable into the auger through the bottom ofthe tool until the cable detent section reaches throughthe upper grip.5. Push down on the lower grip to lock the cable .Line up the cable detent ball with the cable sleevedetent. Press the cable detent ball in and push thecable sleeve down until the ball locks into the firstdetent.6. Press the cable detent ball in once more and pushthe cable sleeve down until the ball locks into thenext detent.Unbinding Cables1. If using the Trapsnake driver, set the forward/reverse switch to the reverse position . If usingthe auger handle, rotate the handle in a counterclockwise motion.2. Withdraw the tool a few inches while in reverse tofree the cable.3. Stop the tool.4. After the tool has come to a complete stop, switchback to the forward position .the tool in reverse for extendedCAUTION Runningperiods can cause damage to the cableand accessories.Removing Cable from Drain1. Set the Trapsnake driver forward/reverse switchto the forward position .2. Pull the trigger slightly and pull the tool back toremove the cable from the drain. If using the augerhandle, rotate the handle in a clockwise motion whilepulling up on the handle until the cable is retractedfrom the drain.3. If the second half of the cable was released, theadditional cable must be returned.5
SERVICE - UNITED STATES7. Pull the lower grip up to unlock the cable . Push thecable sleeve down until it returns fully to the handle.8. Reinstall the two screws. Tighten securely.NOTE: Hand tighten the screws to avoid stripping thehandle cap plastic.9. Remove the protective tip from new cables beforeuse.reduce the risk of injury, alwaysWARNING Tounplug the charger and remove thebattery pack from the charger or tool before performing any maintenance. Never disassemble thetool, battery pack or charger. Contact a MILWAUKEEservice facility for ALL repairs.1-800-SAWDUST (1.800.729.3878)Monday-Friday, 7:00 AM - 6:30 PM CSTor visit www.milwaukeetool.comContact Corporate After Sales Service TechnicalSupport with technical, service/repair, or warrantyquestions.Email: metproductsupport@milwaukeetool.comBecome a Heavy Duty Club Member atwww.milwaukeetool.com to receive importantnotifications regarding your tool purchases.Maintaining ToolSERVICE - CANADAMilwaukee Tool (Canada) Ltd1.800.268.4015Keep your tool, battery pack and charger in good repairby adopting a regular maintenance program. Inspectyour tool for issues such as undue noise, misalignmentor binding of moving parts, breakage of parts, or anyother condition that may affect the tool operation. Returnthe tool, battery pack, and charger to a MILWAUKEEservice facility for repair. After six months to one year,depending on use, return the tool, battery pack andcharger to a MILWAUKEE service facility for inspection.If the tool does not start or operate at full power with afully charged battery pack, clean the contacts on the battery pack. If the tool still does not work properly, returnthe tool, charger and battery pack, to a MILWAUKEEservice facility for repairs.reduce the risk of personal injuryWARNING Toand damage, never immerse yourtool, battery pack or charger in liquid or allow aliquid to flow inside them.Monday-Friday, 7:00 AM - 4:30 PM CSTor visit www.milwaukeetool.caLIMITED WARRANTYUSA & CANADAEvery MILWAUKEE power tool* (see exceptions below) is warrantedto the original purchaser only to be free from defects in material andworkmanship. Subject to certain exceptions, MILWAUKEE will repair orreplace any part on an electric power tool which, after examination, isdetermined by MILWAUKEE to be defective in material or workmanshipfor a period of five (5) years** after the date of purchase unless otherwisenoted. Return of the power tool to a MILWAUKEE factory Service Centerlocation or MILWAUKEE Authorized Service Station, freight prepaid andinsured, is required. A copy of the proof of purchase should be includedwith the return product. This warranty does not apply to damage thatMILWAUKEE determines to be from repairs made or attempted byanyone other than MILWAUKEE authorized personnel, misuse, alterations, abuse, normal wear and tear, lack of maintenance, or accidents.Normal Wear: Many power tools need periodic parts replacement andservice to achieve best performance. This warranty does not cover repairwhen normal use has exhausted the life of a part including, but not limitedto, chucks, brushes, cords, saw shoes, blade clamps, o-rings, seals, bumpers, driver blades, pistons, strikers, lifters, and bumper cover washers.*This warranty does not cover Air Nailers & Staplers; Airless PaintSprayer; Cordless Battery Packs; Gasoline Driven Portable PowerGenerators; Hand Tools; Hoist – Electric, Lever & Hand Chain; M12 Heated Gear; Reconditioned Product; and Test & Measurement Products.There are separate and distinct warranties available for these products.**The warranty period for Job Site Radios, M12 Power Port, M18 Power Source, Jobsite Fan and Trade Titan Industrial Work Carts isone (1) year from the date of purchase. The warranty period for the DrainCleaning Cables is two (2) years from the date of purchase. The warrantyperiod for the LED in the LED Work Light and the LED Upgrade Bulbfor the Work Light is the lifetime of the product subject to the limitationsabove. If during normal use the LED or LED Bulb fails, the part will bereplaced free of charge.Warranty Registration is not necessary to obtain the applicable warrantyon a MILWAUKEE power tool product. The manufacturing date of theproduct will be used to determine the warranty period if no proof of purchase is provided at the time warranty service is requested.ACCEPTANCE OF THE EXCLUSIVE REPAIR AND REPLACEMENTREMEDIES DESCRIBED HEREIN IS A CONDITION OF THE CONTRACT FOR THE PURCHASE OF EVERY MILWAUKEE PRODUCT.IF YOU DO NOT AGREE TO THIS CONDITION, YOU SHOULD NOTPURCHASE THE PRODUCT. IN NO EVENT SHALL MILWAUKEEBE LIABLE FOR ANY INCIDENTAL, SPECIAL, CONSEQUENTIALOR PUNITIVE DAMAGES, OR FOR ANY COSTS, ATTORNEY FEES,EXPENSES, LOSSES OR DELAYS ALLEGED TO BE AS A CONSEQUENCE OF ANY DAMAGE TO, FAILURE OF, OR DEFECT INANY PRODUCT INCLUDING, BUT NOT LIMITED TO, ANY CLAIMSFOR LOSS OF PROFITS. SOME STATES DO NOT ALLOW THEEXCLUSION OR LIMITATION OF INCIDENTAL OR CONSEQUENTIALDAMAGES, SO THE ABOVE LIMITATION OR EXCLUSION MAY NOTAPPLY TO YOU. THIS WARRANTY IS EXCLUSIVE AND IN LIEU OFALL OTHER EXPRESS WARRANTIES, WRITTEN OR ORAL. TO THEEXTENT PERMITTED BY LAW, MILWAUKEE DISCLAIMS ANY IMPLIEDWARRANTIES, INCLUDING WITHOUT LIMITATION ANY IMPLIEDWARRANTY OF MERCHANTABILITY OR FITNESS FOR A PARTICULAR USE OR PURPOSE; TO THE EXTENT SUCH DISCLAIMER IS NOTPERMITTED BY LAW, SUCH IMPLIED WARRANTIES ARE LIMITEDTO THE DURATION OF THE APPLICABLE EXPRESS WARRANTY ASDESCRIBED ABOVE. SOME STATES DO NOT ALLOW LIMITATIONSON HOW LONG AN IMPLIED WARRANTY LASTS, SO THE ABOVELIMITATION MAY NOT APPLY TO YOU, THIS WARRANTY GIVESYOU SPECIFIC LEGAL RIGHTS, AND YOU MAY ALSO HAVE OTHERRIGHTS WHICH VARY FROM STATE TO STATE.CleaningClean dust and debris from vents. Keep handles clean,dry and free of oil or grease. Use only mild soap and adamp cloth to clean, since certain cleaning agents andsolvents are harmful to plastics and other insulatedparts. Some of these include gasoline, turpentine,lacquer thinner, paint thinner, chlorinated cleaning solvents, ammonia and household detergents containingammonia. Never use flammable or combustible solventsaround tools.Cleaning CablesCables should be thoroughly flushed with water afterevery use to prevent damaging effects of sediment anddrain cleaning compounds. WARNING! Wear leathergloves. After washing, dry the cable completely. Then,wipe cable with an oiled rag.RepairsFor repairs, return the tool, battery pack and charger tothe nearest service center.ACCESSORIESonly recommended accessories.WARNING UseOthers may be hazardous.Cat. " x 6'Retriever Bulb48-53-2577Urinal3/8" x 4'BulbFor a complete listing of accessories, go online to www.milwaukeetool.com or contact a distributor.6SÉCURITÉ ÉLECTRIQUEThis warranty applies to product sold in the U.S.A. and Canada only.Please consult the ‘Service Center Search’ in the Parts & Service section of MILWAUKEE’s website www.milwaukeetool.com or call 1.800.SAWDUST (1.800.729.3878) to locate your nearest service facility forwarranty and non-warranty service on a Milwaukee electric power tool. Les fiches des outils électriques doivent correspondre à la prise secteur utilisée. Ne jamaismodifier la fiche, de quelque façon que ce soit.Ne jamais utiliser d'adaptateurs de fiche avec desoutils mis à la terre. Les fiches et prises non modifiéesréduisent le risque de choc électrique. Éviter tout contact avec des surfaces mises àla terre comme des tuyaux, des radiateurs, descuisinières et des réfrigérateurs. Le risque de chocélectrique est accru lorsque le corps est mis à la terre. Ne pas exposer les outils électriques à l'eau oul'humidité. La pénétration d’eau dans ces outils accroîtle risque de choc électrique. Ne pas maltraiter le cordon d'alimentation. Nejamais utiliser le cordon d’alimentation pour transporter l’outil électrique et ne jamais débrancher cedernier en tirant sur le cordon. Garder le cordon àl'écart de la chaleur, de l'huile, des objets tranchantset des pièces en mouvement. Un cordon endommagé ou emmêlé accroît le risque de choc électrique. Pour les travaux à l’extérieur, utiliser un cordonspécialement conçu à cet effet. Utiliser un cordonconçu pour l'usage extérieur réduit les risques de chocélectrique. Si l’utilisation d’un outil électrique est inévitable dans un endroit humide, utiliser une sourced’alimentation munie d’un disjoncteur de fuite deterre. L’utilisation d’un disjoncteur de fuite de terre réduit le risque de choc électrique. sécurité individuelle.LIMITED WARRANTY - MEXICO,CENTRAL AMERICA & CARIBBEANTECHTRONIC INDUSTRIES' warranty is for 5 year since the originalpurchase date.This warranty card covers any defect in material and workmanship onthis Power Tool.To make this warranty valid, present this warranty card, sealed/stampedby the distributor or store where you purchased the product, to theAuthorized Service Center (ASC). Or, if this card has not been sealed/stamped, present the original proof of purchase to the ASC.Call toll-free 1 800 832 1949 to find the nearest ASC, for service, parts,accessories or components.Procedure to make this warranty validTake the product to the ASC, along with the warranty card sealed/stampedby the distributor or store where you purchased the product, and thereany faulty piece or component will be replaced without cost for you. Wewill cover all freight costs relative with this warranty process.ExceptionsThis warranty is not valid in the following situations:a) When the product is used in a different manners from the end-userguide or instruction manual.b) When the conditions of use are not normal.c) When the product was modified or repaired by people not authorizedby TECHTRONIC INDUSTRIES.Note: If cord set is damaged, it should be replaced by an AuthorizedService Center to avoid electric risks.SERVICE AND ATTENTION CENTER:Av Presidente Mazarik 29 Piso 7, 11570 Chapultepec MoralesMiguel Hidalgo, Distrito Federal, MexicoPh. 52 55 4160-3547IMPORTED AND COMMERCIALIZED BY:TECHTRONIC INDUSTRIES MEXICO, .S.A. DE C.V.Av Presidente Mazarik 29 Piso 7, 11570 Chapultepec MoralesMiguel Hidalgo, Distrito Federal, MexicoSÉCURITÉ INDIVIDUELLEModel: Rester attentif, prêter attention au travail et fairepreuve de bon sens lors de l'utilisation de tout outilélectrique. Ne pas utiliser cet appareil en cas defatigue ou sous l’influence de l’alcool, de droguesou de médicaments. Un moment d’inattention pendant l’utilisation d’un outil électrique peut entraîner desblessures graves. Porter l’équipement de protection individuel requis. Toujours porter une protection oculaire. Selonles conditions, porter aussi un masque antipoussières,des bottes de sécurité antidérapantes, un casqueprotecteur ou une protection auditi
If pos-sible, determine the access point(s) to the drain, the size(s) and length(s) of the drain, distance to mainlines, the nature of the blockage, presence of drain clean-ing chemicals or other chemicals, etc. If chemicals are present in the drain, it is important to understand the specific safety measures required to work around those chemicals.
