Transcription
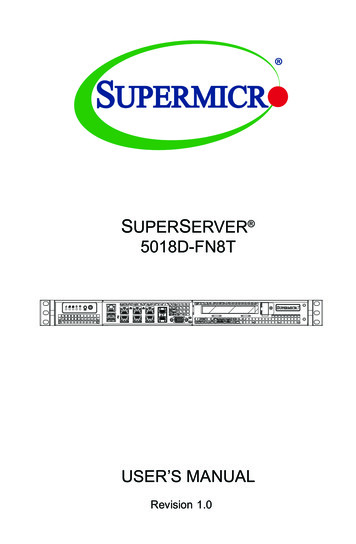
SUPERSERVER 5018D-FN8TUSER’S MANUALRevision 1.0
The information in this User’s Manual has been carefully reviewed and is believed to be accurate.The vendor assumes no responsibility for any inaccuracies that may be contained in this document,makes no commitment to update or to keep current the information in this manual, or to notify anyperson or organization of the updates. Please Note: For the most up-to-date version of thismanual, please see our web site at www.supermicro.com.Super Micro Computer, Inc. ("Supermicro") reserves the right to make changes to the productdescribed in this manual at any time and without notice. This product, including software anddocumentation, is the property of Supermicro and/or its licensors, and is supplied only under alicense. Any use or reproduction of this product is not allowed, except as expressly permitted bythe terms of said license.IN NO EVENT WILL SUPERMICRO BE LIABLE FOR DIRECT, INDIRECT, SPECIAL, INCIDENTAL,SPECULATIVE OR CONSEQUENTIAL DAMAGES ARISING FROM THE USE OR INABILITY TOUSE THIS PRODUCT OR DOCUMENTATION, EVEN IF ADVISED OF THE POSSIBILITY OFSUCH DAMAGES. IN PARTICULAR, SUPERMICRO SHALL NOT HAVE LIABILITY FOR ANYHARDWARE, SOFTWARE, OR DATA STORED OR USED WITH THE PRODUCT, INCLUDING THECOSTS OF REPAIRING, REPLACING, INTEGRATING, INSTALLING OR RECOVERING SUCHHARDWARE, SOFTWARE, OR DATA.Any disputes arising between manufacturer and customer shall be governed by the laws of SantaClara County in the State of California, USA. The State of California, County of Santa Clara shallbe the exclusive venue for the resolution of any such disputes. Super Micro's total liability for allclaims will not exceed the price paid for the hardware product.FCC Statement: This equipment has been tested and found to comply with the limits for a ClassA digital device pursuant to Part 15 of the FCC Rules. These limits are designed to providereasonable protection against harmful interference when the equipment is operated in a commercialenvironment. This equipment generates, uses, and can radiate radio frequency energy and, if notinstalled and used in accordance with the manufacturer’s instruction manual, may cause harmfulinterference with radio communications. Operation of this equipment in a residential area is likelyto cause harmful interference, in which case you will be required to correct the interference at yourown expense.California Best Management Practices Regulations for Perchlorate Materials: This Perchloratewarning applies only to products containing CR (Manganese Dioxide) Lithium coin cells. “PerchlorateMaterial-special handling may apply. See NG: Handling of lead solder materials used in thisproduct may expose you to lead, a chemical known tothe State of California to cause birth defects and otherreproductive harm.Manual Revision 1.0Release Date: June 22, 2016Unless you request and receive written permission from Super Micro Computer, Inc., you may notcopy any part of this document.Information in this document is subject to change without notice. Other products and companiesreferred to herein are trademarks or registered trademarks of their respective companies or markholders.Copyright 2016 by Super Micro Computer, Inc.All rights reserved.Printed in the United States of America
PrefacePrefaceAbout this ManualThis manual is written for professional system integrators and PC technicians. Itprovides information for the installation and use of the SuperServer. Installation andmaintenance should be performed by experienced technicians only.Please refer to the server specifications page on our Web site for updates onsupported memory, processors and operating systems (http://www.supermicro.com).WarningsSpecial attention should be given to the following symbols used in this manual.Warning! Indicates important information given to prevent equipment/property damage or personal injury.Warning! Indicates high voltage may be encountered when performinga procedure.iii
SUPERSERVER 5018D-FN8T ManualContentsChapter 1 Introduction1-1Overview. 1-11-2Motherboard Features. 1-2Processors . 1-2Memory. 1-2Serial ATA . 1-2Input/Output Ports. 1-2PCI Expansion Slots. 1-21-3Server Chassis Features . 1-4System Power. 1-4Drives. 1-4Control Panel . 1-4PCI Expansion. 1-4Cooling System . 1-41-4Contacting Supermicro. 1-5Chapter 2 Installation in a Rack2-1Preparing for Setup. 2-1Choosing a Setup Location. 2-12-2Warnings and Precautions. 2-2Rack Precautions. 2-2Server Precautions. 2-2Rack Mounting Considerations. 2-3Ambient Operating Temperature. 2-3Reduced Airflow. 2-3Mechanical Loading. 2-3Circuit Overloading. 2-3Reliable Ground. 2-32-3Installing the System into a Rack . 2-4Installing the Chassis into a Rack:. 2-4Chapter 3 System Interface3-1Overview . 3-13-2Control Panel Buttons. 3-23-3Control Panel LEDs. 3-2Overheating. 3-3Overheat Temperature Setting. 3-3Responses. 3-33-4Power Supply LEDs. 3-4iv
ContentsChapter 4 Standardized Warning Statements for AC SystemsAbout Standardized Warning Statements. 4-1Warning Definition. 4-1Installation Instructions. 4-4Circuit Breaker. 4-5Power Disconnection Warning. 4-6Equipment Installation. 4-8Restricted Area. 4-9Battery Handling. 4-10Redundant Power Supplies (if applicable to your system). 4-12Backplane Voltage (if applicable to your system). 4-13Comply with Local and National Electrical Codes. 4-14Product Disposal. 4-15Hot Swap Fan Warning (if applicable to your system). 4-16Power Cable and AC Adapter . 4-18Chapter 5 Advanced Motherboard Setup5-1Handling the Motherboard. 5-1Precautions. 5-1Unpacking. 5-15-2Connecting Cables. 5-2Connecting Data Cables. 5-2Connecting Power Cables. 5-2Connecting the Control Panel. 5-25-3Input/Output Ports. 5-35-4Memory Support. 5-4Memory Population Guidelines. 5-4Memory Installation Guidelines . 5-5Installing DIMM Memory Modules. 5-55-5Expansion Cards. 5-55-6Motherboard Details. 5-65-7Connector Definitions . 5-9Power Connectors . 5-9Other Motherboard Connectors. 5-135-8Jumper Settings. 5-165-9Onboard Indicators. 5-205-10SATA Ports. 5-215-11Installing Software. 5-22SuperDoctor 5. 5-235-12Serverboard Battery. 5-24v
SUPERSERVER 5018D-FN8T ManualChapter 6 Advanced Chassis Setup and Maintenance6-1Static-Sensitive Devices. 6-1Precautions. 6-16-2Removing Power from the System. 6-26-3Removing the Chassis Cover. 6-36-4Installing Hard DrivesInstalling 3.5" Fixed Hard Drives. 6-5Installing 2.5" Fixed Hard Drives. 6-56-5Installing an Expansion Card. 6-66-6System Fans. 6-7Checking the Chassis Airflow. 6-86-7Power Supply. 6-8Chapter 7 BIOS7-1Introduction. 7-1Starting BIOS Setup Utility. 7-1How To Change the Configuration Data. 7-17-2Main Setup. 7-2Starting the Setup Utility. 7-27-3Advanced Setup Configurations. 7-47-4Event Logs. 7-287-5IPMI. 7-307-6Security Settings. 7-327-7Boot Settings. 7-357-8Save & Exit. 7-37Appendix A BIOS POST Error CodesAppendix B UEFI BIOS Recovery InstructionsAppendix C System Specificationsvi
ContentsContacting SupermicroHeadquartersAddress:Super Micro Computer, Inc.980 Rock Ave.San Jose, CA 95131 U.S.A.Tel: 1 (408) 503-8000Fax: 1 (408) 503-8008Email:marketing@supermicro.com (General Information)support@supermicro.com (Technical Support)Web Site:www.supermicro.comEuropeAddress:Super Micro Computer B.V.Het Sterrenbeeld 28, 5215 ML's-Hertogenbosch, The NetherlandsTel: 31 (0) 73-6400390Fax: 31 (0) 73-6416525Email:sales@supermicro.nl (General Information)support@supermicro.nl (Technical Support)rma@supermicro.nl (Customer Support)Web Site:www.supermicro.nlAsia-PacificAddress:Super Micro Computer, Inc.3F, No. 150, Jian 1st Rd.Zhonghe Dist., New Taipei City 235Taiwan (R.O.C)Tel: 886-(2) 8226-3990Fax: 886-(2) 8226-3992Email:support@supermicro.com.twWeb Site:www.supermicro.com.twvii
SUPERSERVER 5018D-FN8T ManualNotesviii
Chapter 1: IntroductionChapter 1Introduction1-1OverviewThe SuperServer 5018D-FN8T is a compact, low-power network appliancecomprised of two main subsystems: the SC505-203B 1U server chassis and theX10SDV-TP8F single processor motherboard. Certified operating systems are listedat www.supermicro.com.In addition to the motherboard and chassis, various hardware components arelisted below: One riser card (RSC-RR1U-E8) and bracket for a PCI expansion card Cooling: One 4-cm fan (FAN-0065L4)Note: For your system to work properly, please follow the links below to downloadall necessary drivers/utilities and the user’s manual for your server. Product manuals: http://www.supermicro.com/support/manuals/Product drivers and utilities: ftp://ftp.supermicro.comProduct safety es/safety information.cfmFor support, email support@supermicro.com.1-1
SUPERSERVER 5018D-FN8T User's Manual1-2Motherboard FeaturesThe SuperServer 5018D-FN8T is built around the X10SDV-TP8F, a single processormotherboard designed to provide maximum performance. Below are the mainfeatures. (see Figure 1-1 for a block diagram)ProcessorsThe motherboard supports a single Intel Xeon D-1518 four Core 35W embeddedprocessor.MemoryThe motherboard has four DDR4 slots that can support up to 128 GB of ECC RDIMMor 64GB ECC/Non-ECC UDIMM with a max data rate of 2133MHz.Serial ATAThe system supports up to four SATA3 (6Gbps) 2.5" hard drives or one 3.5" drive.It also includes one SATA DOM (Disk on Module) power connector.Input/Output PortsExternallly accessable ports include eight LAN ports--six RJ-45 at 1GbE speed,and two SFP 10GbE, plus a dedicated IPMI LAN port. The system also offers twoUSB 3.0 ports, and a VGA port.The motherboard includes four USB 2.0, one USB Type-A header, and a serialport header.PCI Expansion SlotsThe motherboard supports: One M.2 PCIe 3.0 x4 Slot, M Key for SSD, SATA 3.0 support (Mux with I-SATA4) One Mini PCIe 2.0 x1 slot with mSATA support (Mux with I-SATA5)1-2
Chapter 1: IntroductionDDR4 1600/1866/2133SATA3.0#4 SATA3.0#5SATA3.0#3SATA3.0#2SATA3.0#1SATA3.0#0LSI SAS2116M.2 CONNLAN I210LAN I210SFP KRiXFIINPHI CS4227SATA Gen3PCIE 2.0 x1PCIE 2.0USBUSB 2.0x2USB 3.0 connector x2(compatible with 2.0)PCIE 2.0 x1PCIE 2.0 x1x1JLAN3 JLAN2LAN I350A1APCIE 3.0 x3USB 3.0JLAN1A2APCIE 3.0 x3SATA GEN 3mini PCIeB1DDR4 DIMMSOCPROCESSORSAS2BDDR4 DIMMPCIE 3.0 x8MINI-SAS HDB1DDR4 DIMMJPCIE2 PCIE 3.0 x8BDDR4 DIMMJPCIE1 PCIE 3.0 x8PCIE 3.0 x8USB HUBGL854GUSB 2.0 Header x2USB 2.0 TypeAPCIE 2.0 x4PCI-E 2.0USB 2.0 Header x2LPCDDR 3PCIE 2.0 x1BMCAST2400COM1FLASHSPIx13rd LAN USB3.0FrontREAR I/OIO1G LAN 1G LAN 1G LANSFP VGAIPMI LANPHYRTL8211FVGACONNFigure 1-1. System Block DiagramNote: This is a general block diagram. Refer to Chapter 5 for details.1-3
SUPERSERVER 5018D-FN8T User's Manual1-3Server Chassis FeaturesThe appliance 5018D-FN8T is built on the SC505-203B, a small form factor 1Urackmount server chassis. The following is a general outline of the main features.System PowerThe system has a single 200 watt low-noise AC-DC power supply with PFC.DrivesThe chassis is designed to support fixed internal hard drives or SSDs--up to two3.5" or up to four 2.5" drives. SATA DOM is also supported.Control PanelThe control panel provides system monitoring and power control. LEDs indicatepower on, network activity, hard disk drive activity and system overheat. The controlpanel also includes a main power button and a reset button.PCI ExpansionThe chassis provides one front PCI-E expansion card slot. If the server is configuredwith one 3.5" drive (low profile) or two 2.5" drives (full height), it accepts anexpansion card. If the server is configured with four 2.5" drives, there is no roomfor an expansion card.Cooling SystemThe chassis has includes one 4-cm fan, and supports up to three fans. Fan speedmay be controlled using IPMI.1-4
Chapter 1: Introduction1-4Contacting SupermicroHeadquartersAddress:Super Micro Computer, Inc.980 Rock Ave.San Jose, CA 95131 U.S.A.Tel: 1 (408) 503-8000Fax: 1 (408) 503-8008Email:marketing@supermicro.com (General Information)support@supermicro.com (Technical per Micro Computer B.V.Het Sterrenbeeld 28, 5215 ML's-Hertogenbosch, The NetherlandsTel: 31 (0) 73-6400390Fax: 31 (0) 73-6416525Email:sales@supermicro.nl (General Information)support@supermicro.nl (Technical Support)rma@supermicro.nl (Customer ss:Super Micro Computer, Inc.3F, No. 150, Jian 1st Rd.Zhonghe Dist., New Taipei City 235Taiwan (R.O.C)Tel: 886-(2) 8226-3990Fax: 886-(2) w.supermicro.com.tw1-5
SUPERSERVER 5018D-FN8T User's ManualNotes1-6
Chapter 2: Installation in a RackChapter 2Installation in a RackThis chapter provides instructions for mounting your chassis in a rack.2-1Preparing for SetupThe box in which your system was shipped should include the mounting screwsto mount the system into the rack. Please read this chapter in its entirety beforebeginning the installation procedure.Choosing a Setup LocationDecide on a suitable location for the rack unit that will hold your system. It shouldbe a clean, dust-free area that is well ventilated. Avoid areas where heat, electricalnoise and electromagnetic fields are generated. A nearby grounded power outlet.is required Leave at least 25 inches clearance in front of the rack to open the front doorcompletely.Leave approximately 30 inches of clearance in the back of the rack to allow forsufficient airflow and access for servicing.It should be a restricted access location, such as a dedicated equipment roomor a service closet.2-1
SUPERSERVER 5018D-FN8T User's Manual2-2 Warnings and PrecautionsRack PrecautionsEnsure that the leveling jacks on the bottom of the rack are fully extended tothe floor with the full weight of the rack resting on them.In single rack installation, stabilizers should be attached to the rack. In multiplerack installations, the racks should be coupled together.Always make sure the rack is stable before extending a component from therack.You should extend only one component at a time - extending two or moresimultaneously may cause the rack to become unstable.Server PrecautionsReview the electrical and general safety precautions in Chapter 4.Determine the placement of each component in the rack before you install therails.Install the heaviest server components on the bottom of the rack first, and thenwork up.Use a regulating uninterruptible power supply (UPS) to protect the server frompower surges, voltage spikes and to keep your system operating in case of apower failure.Allow the hot plug SAS drives and power supply modules to cool before touchingthem.Always keep the rack's front door and all panels and components on the serversclosed when not servicing to maintain proper cooling.2-2
Chapter 2Installation in a RackRack Mounting ConsiderationsAmbient Operating TemperatureIf installed in a closed or multi-unit rack assembly, the ambient operatingtemperature of the rack environment may be greater than the ambient temperatureof the room. Therefore, consideration should be given to installing the equipmentin an environment compatible with the manufacturer’s maximum rated ambienttemperature (Tmra).Reduced AirflowEquipment should be mounted into a rack so that the amount of airflow requiredfor safe operation is not compromised.Mechanical LoadingEquipment should be mounted into a rack so that a hazardous condition does notarise due to uneven mechanical loading.Circuit OverloadingConsideration should be given to the connection of the equipment to the powersupply circuitry and the effect that any possible overloading of circuits might haveon overcurrent protection and power supply wiring. Appropriate consideration ofequipment nameplate ratings should be used when addressing this concern.Reliable GroundA reliable ground must be maintained at all times. To ensure this, the rackitself should be grounded. Particular attention should be given to power supplyconnections other than the direct connections to the branch circuit (i.e. the use ofpower strips, etc.).To prevent bodily injury when mounting or servicing this unit in a rack, youmust take special precautions to ensure that the system remains stable.The following guidelines are provided to ensure your safety: This unit should be mounted at the bottom of the rack if it is the only unitin the rack.When mounting this unit in a partially filled rack, load the rack from thebottom to the top with the heaviest component at the bottom of the rack.If the rack is provided with stabilizing devices, install the stabilizers beforemounting or servicing the unit in the rack.Slide rail mounted equipment is not to be used as a shelf or a work space.2-3
SUPERSERVER 5018D-FN8T User's Manual2-3Installing the System into a RackThe system can be installed into a rack directly using screws.Figure 2-1. Installing the Chassis into a RackNote: Figures are for illustrative purposes only. Always install servers into racksfrom the bottom up.Warning: Do not pick up the server by the front handles. They are designedto pull the system from a rack only.Stability hazard. The rack stabilizing mechanism must be in place, or therack must be bolted to the floor before you slide the unit out for servicing.Failure to stabilize the rack can cause the rack to tip over.Installing the Chassis into a Rack1. Find the four included mounting screws required to mount the chassis into a rack.2. Align the mounting holes of the chassis with the thru-holes of the rack.3. Insert the mounting screws into the thru-holes in the front of the chassis andthrough the thru-holes in the rack2-4
Chapter 3System InterfaceChapter 3System Interface3-1OverviewThe chassis includes a control panel on the front that includes power buttons andstatus monitoring lights, and status lights for the power supplyFigure 3-1. Control Panel3-1
SUPERSERVER 5018D-FN8T User's Manual3-2Control Panel ButtonsThe chassis includes two push-buttons that control power to the system.Power: The main power switch is used to apply or remove power from the powersupply to the server. Turning off system power with this button removes the mainpower but maintains standby power. To perform many maintenance tasks, you mustunplug system before servicing.Reset: The reset button is used to reboot the system.3-3Control Panel LEDsThere are five LEDs that provide status information about the system.Information LED: Alerts operator of several states, as noted in the table below.Information LEDStatusDescriptionContinuously on and redAn overheat condition has occured.(This may be caused by cable congestion.)Blinking red (1Hz)Fan failure, check for an inoperative fan.Blinking red (0.25Hz)Power failure, check for a non-operational power supply.Solid blueLocal UID has been activated. Use this function to locatethe server in a rack mount environment.Blinking blueRemote UID is on. Use this function to identify theserver from a remote location.NIC2: Indicates network activity on GLAN2 when flashing.3-2
Chapter 3System InterfaceNIC1: Indicates network activity on GLAN1 when flashing.HDD: Indicates IDE channel activity on the hard drive when flashing.Power: Indicates power is being supplied to the system power supply units. ThisLED should normally be illuminated when the system is operating.OverheatingThere are several possible responses if the system overheats.Overheat Temperature SettingSome backplanes allow the overheat temperature to be set at 45, 50, or 55 degreesby changing a jumper setting. For more information, consult the backplane usermanual on the Supermicro website.ResponsesIf the server overheats1. Use the LEDs to determine the nature of the overheating condition.2. Confirm that the chassis covers are installed properly.3. Check the routing of the cables and make sure all fans are present and operatingnormally.4. Verify that the heatsinks are installed properly.3-3
SUPERSERVER 5018D-FN8T User's ManualNotes.3-4
Chapter 4: Warning Statements for AC SystemsChapter 4Standardized Warning Statements for AC SystemsAbout Standardized Warning StatementsThe following statements are industry standard warnings, provided to warn the userof situations which have the potential for bodily injury. Should you have questionsor experience difficulty, contact Supermicro's Technical Support departmentfor assistance. Only certified technicians should attempt to install or configurecomponents.Read this chapter in its entirety before installing or configuring components in theSupermicro chassis. Some warnings may not apply for your system.These warnings may also be found on our web site at http://www.supermicro.com/about/policies/safety information.cfm.Warning DefinitionWarning!This warning symbol means danger. You are in a situation that could cause bodilyinjury. Before you work on any equipment, be aware of the hazards involved withelectrical circuitry and be familiar with standard practices for preventing 1
SUPERSERVER 5018D-FN8T User's ManualWarnungWICHTIGE SICHERHEITSHINWEISEDieses Warnsymbol bedeutet Gefahr. Sie befinden sich in einer Situation, die zuVerletzungen führen kann. Machen Sie sich vor der Arbeit mit Geräten mit denGefahren elektrischer Schaltungen und den üblichen Verfahren zur Vorbeugungvor Unfällen vertraut. Suchen Sie mit der am Ende jeder Warnung angegebenenAnweisungsnummer nach der jeweiligen Übersetzung in den übersetztenSicherheitshinweisen, die zusammen mit diesem Gerät ausgeliefert wurden.BEWAHREN SIE DIESE HINWEISE GUT AUF.INSTRUCCIONES IMPORTANTES DE SEGURIDADEste símbolo de aviso indica peligro. Existe riesgo para su integridad física. Antesde manipular cualquier equipo, considere los riesgos de la corriente eléctrica yfamiliarícese con los procedimientos estándar de prevención de accidentes. Alfinal de cada advertencia encontrará el número que le ayudará a encontrar el textotraducido en el apartado de traducciones que acompaña a este dispositivo.G
support@supermicro.com (Technical Support) Web Site: www.supermicro.com Europe Address: Super Micro Computer B.V. Het Sterrenbeeld 28, 5215 ML 's-Hertogenbosch, The Netherlands Tel: 31 (0) 73-6400390 Fax: 31 (0) 73-6416525 Email: sales@supermicro.nl (General Information) support@supermicro.nl (Technical Support) rma@supermicro.nl (Customer .


