Transcription
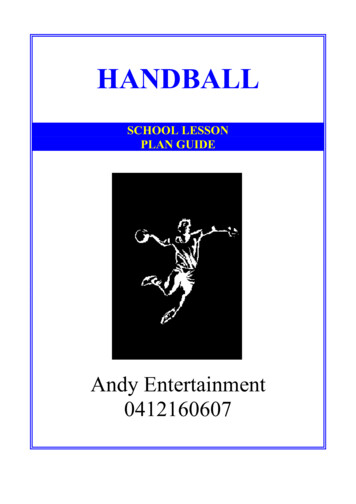
HANDBALLSCHOOL LESSONPLAN GUIDEAndy Entertainment0412160607
Mini Handball School Lesson Plan GuidePage 2
TABLE OF CONTENTSOverviewPage 3ObjectivesPage 3Other ResourcesPage 3What is Handball?Page 4Points to Remember When Coaching JuniorsPage 5 - 6Coaching for Fun and SuccessPage 7Handball Action PicturesPage 8Lesson 1Page 9Lesson 1BPage 10Lesson 2Page 11Lesson 2BPage 12Lesson 3Page 13Lesson 3BPage 14Lesson 4Page 15Lesson 4BPage 16Appendix A - Throwing and CatchingPage 17Appendix B - Warm Up GamesPage 18 – 20Appendix C - Lesson ActivitiesPage 21 – 22Appendix D - Modified GamesPage 23 – 25AcknowledgmentsPage 26Mini Handball School Lesson Plan GuidePage 3
OVERVIEWThe approach of Mini Handball is to provide modified games and activities which allow children todevelop the skills and concepts of the game of Handball. By adapting the rules, equipment andactivities, all participants will have a better chance of developing the correct motor patterns, willhave more fun, become more actively involved, and gain a better understanding of the concepts ofthe game.This booklet is a set of 4 x 1 hour, plus an additional 4 x 40 minute lesson plans which willintroduce primary school aged students to the skills and activities of Handball. The lesson plans inthis program have been put together to allow for the progression of both skill and knowledgedevelopment in junior athletes.OBJECTIVESThe objectives of this program are to:1. Ensure that all participants have fun and enjoy themselves.2. Increase the awareness and understanding of the game of Handball.3. Allow students and teachers to improve their skills and concept of the game of Handball.OTHER RESOURCESThe following resources are recommended for Development Officers to increase their knowledgeand expertise when undertaking school coaching lessons. COACHING CHILDREN, Australian Coaching Council, Canberra (1992). MINIHANDBALL, European Handball Federation (EHF) & International Handball Federation(IHF), Vienna (1994) CHILDREN’S HANDBALL, International Handball Federation and Swedish HandballFederation, Switzerland (1996) AUSSIE SPORT CODES OF BEHAVIOUR, Aussie Sport pamphlet SAFETY GUIDELINES FOR CHILDREN IN SPORT AND RECREATION, SportsMedicine Australia (1997)Mini Handball School Lesson Plan GuidePage 4
WHAT IS HANDBALL?OVERVIEWHandball is a fast, exciting, skilful sport that can be played either indoors or outdoors, and by allages & sexes. Handball is usually described as a mix of different sports including: waterpolo onland, soccer with hands, and basketball & netball with more steps and body contact. Utilising thebasic skills of running, jumping, throwing, catching & bouncing, Handball is enjoyed by millions ofparticipants and spectators around the world who marvel at the speed and continuous play,spectacular goals, miraculous keeper saves and body contact.Handball develops natural athletic skills that can be used in all other sports, promotes team workwhilst still allowing for moments of individual brilliance, and increases fitness and general wellbeing. Handball is truly a sport that can be enjoyed by everyone.BASIC RULESHandball is played between two teams, each consisting of six court players and one goalkeeper, on acourt that is 40m x 20m for adults or 25m x 15m (min) for juniors. The object of the game is tothrow the ball into the opposition goal which is 2m x 3m for adults or 1.5m x 2m (min) for juniors.A game is played over 2 x 30min halves, with junior games played over a suitably shorter period.When defending, a team will stand just in front of their 6m line to form a wall. The attacking teamwill pass the ball to each other in an effort to create a hole/gap in the defensive wall and allow athrow at the goal.The magic number in Handball is 3. Players are allowed to hold the ball for 3 seconds, then eitherpass, take 3 steps (no pivoting like basketball) or dribble the ball unlimited. A player can then takeanother 3 steps before either passing the ball or throwing at the goal. Defensive players must be 3maway from their opponent when awarded a free throw or taking a sideline throw.When defending, players are allowed to use their hands or arms to block or gain possession of theball but can not pull or hit the ball out of an opponents hand. A defender can also use their body toobstruct an opponent even if they are not in possession of the ball, but can not hold, push, run orjump into an opposition player. Players who undertake dangerous play or repeated infringementsmay be suspended for either 2 minutes or the rest of the match.A full explanation of the rules of Handball can be found at the following website: http://wwwpersonal.monash.edu.au/ lipcsey/handball/.WHY TEACH HANDBALL? It’s easy to play either indoors or outdoors It’s an inexpensive activity that can easily beincorporated into your program It promotes team work, co-operation andfriendships It develops the basic athletic skills used in all othersports (hand-eye co-ordination, running, jumping,throwing, catching) It’s easily modified to fit your space, time andnumber of participants It can be played be people of all sizes, ages andgenders.Mini Handball School Lesson Plan GuideHANDBALL IS FOR ALL SIZESPage 5
POINTS TO REMEMBERWHEN COACHING JUNIORSGENERALLY They may have no clear idea of the ideal performance they are trying to achieve. They may not be able to distinguish between relevant and irrelevant information. They have a low attention span. They may be slow to process information. They may take everything you say literally. Allow them to contribute to their own learning. Utilise a wide variety of activities. Recognise junior’s capacities. Be prepared to include variations of gender and ability groupings. Focus on individual needs Protect them from the likelihood of experiencing failure. Encourage ALL children (boys, girls, talented, try-hards, rich, poor) to participate to the best oftheir ability.PRIOR TO THE LESSON Make sure you (the coach) are well prepared. Make sure all the equipment is available. Check with the school/venue to make sure the times are correct/booked. Make sure that the players and the parents/teachers know what time the lesson will finish.Continued overMini Handball School Lesson Plan Guide Page 6
POINTS TO REMEMBERWHEN COACHING JUNIORSDURING THE LESSON Keep control of the group/s at all times. Make sure the activity rate is high. When introducing a skill or drill, demonstrate it verbally as well as practically. Don’t be tootechnical. Highlight the major points. Ensure everyone can see. Remember that you are responsible for the students safety, so ensure NO STUDENTBREACHES THE SAFETY RULES. Use common sense.POST LESSON Make sure all the equipment is returned. Thank the students for their time and co-operation. Attain feedback from the students and teachers on the lesson. Distribute any promotional material.The fundamental aim of children’s sport is to provide an opportunity to become involved inphysical activity in a way which promotes immediate and long-term benefits for the participants.These benefits will be observed in terms of higher levels of fitness, better health, pleasurable socialinvolvement and the satisfaction derived from skilled performance in individual and groupactivities.Children’s sport should be free from adult pressures and demands.CHILDREN ARE NOT LITTLE ADULTS.Mini Handball School Lesson Plan GuidePage 7
COACHING FOR FUN ANDSUCCESSMake it PositiveInclude VarietyA coach can easily get trappedinto behaving and communicatingin a negative way.Try some of the following:A variety of different kinds ofpositive play opportunitiesshould be included in allsessions. Remember to: Provide equal opportunityfor all players to play Provide an opportunity toplay in all positions Include individual, partnerand group activities Include competitive andnon-competitive activities Include time for free playGreet players using their nameSmileTalk and joke with themShow interest in themParticipate in the gamesAsk for their input into gamesDon’t say “Don’t”Answer all of their questionsPraise often and in publicA thumb-up signDo Not: Criticise in public Yell or abuse a player Use obscene or offensivelanguageTeach It Tips1. Explanation andDemonstration Choose the best positionfor the demonstration Use simple language Not too many words Ask questions to ensureeveryone understands2. Teaching the Skill Show the whole skill, thenbreak it down into parts,then link the parts up toform the whole again. Don’t show what not to do.3. Give Effective Feedback Be specific, not general Don’t talk while the playeris practicing Be constructive Reinforce key points Provide it sooner not laterDON’T TALK TOO MUCHMini Handball School Lesson Plan GuidePage 8
Mini Handball School Lesson Plan GuidePage 9
LESSON 1LESSON OBJECTIVESEQUIPMENT To ensure that ALL participants have fun To gain awareness of the sport of Handball To introduce the skills of passing and catching12 - 15 balls (size 2)16 - 20 markers/witches hats12 - 15 bibs/sashesACTIVITYINTRODUCTIONDURATION8 minsDESCRIPTION Introduce yourself Explain the sport of Handball- cross between basketball and water polo- played with 6 players and 1 goalie on each team- aim is to throw a ball into the goal Outline the lessonWARM UP7 mins Follow the leader. (see appendix B)- make sure the “activities” are fun and differentBALL SKILLS15 minsorganise students into groups of 2 or 3 facing each other Explain the major points of throwing and catching. (seeappendix A)perform each skill 6 - 8 times per student roll ball underarm chest pass two hand overhead pass overarm throw overarm bounce pass sideway throw (flick) three step overarm throw three step jump overarm throwACTIVITY10 minsorganise students into 4 teams of approx. 6 - 8 players 10 pass game (see appendix C)- Utilise 2 playing areas- Explain 3 step and 3 second ruleMOD GAME15 mins Same teams and rules as 10 pass game Now teams are trying to throw the ball into a goal area Reduce the number of passes to a minimum of 5Mini Handball School Lesson Plan GuidePage 10
LESSON 1BLESSON OBJECTIVESEQUIPMENT To ensure that ALL participants have fun To reinforce the skills introduced in Lesson 1 To increase the teachers knowledge of activities forHandball4 - 5 balls (size 2)8 - 10 markers/witches hatsACTIVITYDURATIONDESCRIPTIONWARM UP5 mins Partner Tag (see appendix B)- 2 players join arms/hands and are IT. They chase all theother players and try to tag them.- When a player is tagged they join to the other players.- When a group of 4 players are joined together, they break upinto 2 groups of 2 and continue tagging until everyone iscaught.ACTIVITY10 mins Circle Ball (see appendix C)organise students into circles of approx. 6 - 8 players.- players pass the ball in one direction and try to beat the ballback by running in the other direction.10 mins Leader Ball (see appendix C)keep students in the same groups as the previous activity.- The Leader passes the ball to a student who runs around thegroup and back to their spot before passing back to the leader.15 mins Same as Lesson 1MOD GAMENOTES:Mini Handball School Lesson Plan GuidePage 11
LESSON 2LESSON OBJECTIVESEQUIPMENT To ensure that ALL participants have fun To introduce the skills of moving and throwing at the sametime To improve the students concept of the game of Handball12 - 15 balls (size 2)16 - 20 markers/witches hats12 - 15 bibs/sashes6 - 8 targets/hoopsACTIVITYINTRODUCTIONDURATION5 minsDESCRIPTION Review previous lesson Outline lesson planWARM UP10 mins Colour Game (see appendix B)- call out a colour and body part, and the students have toplace that part on the colour Good Hands (see appendix B)organise students into groups of 3 - 4- front player runs to a spot and performs one of the followingdrills before returning and passing to the next player pass ball around the body pass ball around the knees pass ball around the head figure 8 between the knees toss ball up, turn 180 and catchBALL SKILLS10 minsorganise students into groups of 2 facing another group of 2 Revise the skills of throwing and catchingperform each skill 6 - 8 times per student- ensure students are moving forward when catching the ball chest pass and rotate with partner two hand overhead pass and rotate overarm throw and rotate overarm bounce pass and rotate sideways pass (flick) and rotate 3 step overarm throw and rotate 3 step jump overarm throw and rotate10 mins Running with ball and throwing to partner- run from one end of the court to the other- work on overarm throws, sideways throws and bouncepasses15 mins King Ball (see appendix D)MOD GAMEMini Handball School Lesson Plan GuidePage 12
LESSON 2BLESSON OBJECTIVESEQUIPMENT To ensure that ALL participants have funTo reinforce the skills introduced in Lesson 2To improve the students concept of the game of HandballTo increase the teachers knowledge of activities forHandballenough balls for 1 between 2 (size 2)approx. 20 - 30 markers/witches hats3 - 4 skittles/plastic bottlesACTIVITYDURATIONDESCRIPTIONWARM UP10 mins GOTCHA Tag (see appendix B)organise students into 2 even teams.- a player enters the other teams area and whilst continuallysaying “GOTCHA GOTCHA GOTCHA” must try to tag asmany players as possible before running out of breath.ACTIVITY10 mins Court Running (see appendix C)organise students into pairs- standing approx. 5 meters away from each other, each pairrun up the court passing to one another- should practice different running and passing skillsie running forward, backward, sideways, skipping etc., andthrowing overarm, sideways, bounce, chest, jump etc.MOD GAME15 mins Team Tower Ball (see appendix D)NOTES:Mini Handball School Lesson Plan GuidePage 13
LESSON 3LESSON OBJECTIVESEQUIPMENT To ensure that ALL participants have fun To continue to improve the students throwing and catchingskills and accuracy To introduce modified versions of the game of Handball5 - 6 balls (size 2)16 - 20 markers/witches hats12 - 15 bibs/sashes2 - 4 targets (big boxes, or gym mats)ACTIVITYINTRODUCTIONDURATION5 minsDESCRIPTION Review previous lesson Outline lesson planWARM UP10 mins Circle Pass (see appendix B)- 5/6 players in a circle with 2 students in the middle- circle players pass a ball around and the middle players musttry and intercept it- have students practice their overarm, sideways and bouncepassesACTIVITY15 mins Ball Tag (see appendix C)- one team must pass a ball amongst themselves and try to tagthe opposite team.- each player with the ball is only allowed to take 3 steps, orhold for 3 seconds before tagging or passing onMOD GAME20 mins Mat Ball (see appendix D)Mini Handball School Lesson Plan GuidePage 14
LESSON 3BLESSON OBJECTIVESEQUIPMENT To ensure that ALL participants have funTo reinforce the skills introduced in Lesson 3To improve the students concept of the game of HandballTo increase the teachers knowledge of activities forHandball12 - 15 balls minimum(size 2)16 - 20 markers/witches hats12 - 15 bibs/sashes2 - 4 mats/hoopsACTIVITYDURATIONDESCRIPTIONWARM UP10 mins Full Court Relay (see appendix B)organise students into groups of 5 - 6 players- spaced out along the entire length of the playing area, playersmove the ball to the next player by performing various passes.ACTIVITY10 mins Target Ball (see appendix C)organise students into 2 evenly numbered groups- have groups face each other approx. 10 - 15 meters apart.- each group has 5 - 6 balls which they must throw at 2 - 3balls placed in the middle of both groups.- the object of the game is to hit the balls over the oppositionline to score a point.MOD GAME20 mins Choose either King Ball or Mat Ball from previous lessons.NOTES:Mini Handball School Lesson Plan GuidePage 15
LESSON 4LESSON OBJECTIVESEQUIPMENT To ensure that ALL participants have fun To allow the students to participate in a Mini Handballgame4 - 6 balls (size 2)16 - 20 markers/witches hats12 - 15 bibs/sashes2 - 4 targets (big boxes, or gym mats)ACTIVITYINTRODUCTIONDURATION5 minsDESCRIPTION Review previous lesson Outline lesson planWARM UP15 mins Relay Races (see appendix B)organise students into 4 - 6 groups, facing each otherperform each skill 2 - 3 times per student overarm throw (rotate with own players) bounce pass (rotate with own players) dribbling (exchange with players opposite) 3 steps, bounce, 3 steps, overarm throw (exchange withplayers opposite)arrange groups into 4 - 6 single lines, ie not facing anyone 3 steps, dribble through witches hats, hand-off 3 steps, bounce, shoot (retrieve ball) 3 steps, bounce, handoffMOD GAME30 minsMini Handball (see appendix D)Mini Handball School Lesson Plan GuidePage 16
LESSON 4BLESSON OBJECTIVESEQUIPMENT To ensure that ALL participants have funTo reinforce the skills introduced in Lesson 4To improve the students concept of the game of HandballTo increase the teachers knowledge of activities forHandball6 - 8 balls (size 2)16 - 20 markers/witches hats12 - 15 bibs/sashes2 - 4 targets (big boxes, or gym mats)ACTIVITYDURATIONDESCRIPTIONWARM UP5 mins Rats & Rabbits (see appendix B)organise students into two even groups- standing back to back, one line are rats and the other arerabbits.- when the teacher calls out a group they must turn and chasethe others before they reach a designated lineACTIVITY10 mins2 v 1 (see appendix C)organise players into 2 or 4 groups- front players in the first two groups pass the ball to eachother 3 - 4 times and try and throw the ball at a goal/targetwhich is protected by a defender.- next group proceeds as soon as the previous groups throws atthe target.MOD GAME30 minsMini HandballNOTES:Mini Handball School Lesson Plan GuidePage 17
APPENDIX AMAJOR POINTS OF THROWINGFeet Forward The feet should be placed in a slight forward-backwardstance to allow weight transference and balance. ie right hand thrower left foot slightly forwardLook To Target The eyes should be looking at the targetArm Follows Through The arm should follow through, in the direction of thetarget, upon the release of the ball.THROWING DIAGNOSTICS CHECKLISTHolding the Ball Hold with the fingers, ensure a good grip Elbow bent Raise to ear levelFoot Placement The foot opposite to the throwing arm is slightly forward Trunk twisted back towards the throwing armThrow Elbow forward The sequence is: Elbow - Wrist - ReleaseRelease Release at shoulder height Follow through - point to where you want the ball to goWeight Transfer Step forward onto the foot opposite the throwing armMAJOR POINTS OF CATCHINGLook at the Ball Watch the flight of the ball from the time of releaseHand Preparation Have both hands up at chest height ready to catch the ballMoment of the Catch Always catch with two hands Ensure that thumbs point up (for balls above waist height)Follow Through and Hold Arms and hands should “give” to absorb the impact of theball Ensure the player has control of the ballMini Handball School Lesson Plan GuidePage 18
APPENDIX BWARM UP GAMES1. Follow the Leader (page 7)Equipment: none (objects in the vicinity can be utilised)Playing Area: the entire sports hall or playing field Have one person out-in-front performing an activity. All the other players must follow what theleader is doing. Change the leaders after a specific distance or time period. New leaders must perform something different. Activities could include running (forward, backwards, sideways), jumping, skipping, hopping,short sprints, rolls (forward, backward, log), sit-ups, pushups, tuckjumps, zig zags, etc.2. Partner Tag (page 8)Equipment: nonePlaying Area: the court/playing area Two (2) players are chosen to start the game as taggers. With arms/hands joined, they run around and try to tag the other players. Once a person is tagged, they must join up with the other taggers, and then continue chasing theother players. When 4 people are joined together, they break up into 2 groups of 2 players, and both groupscontinue tagging the other players. A player is not caught if the taggers are not joined.3. Colour Game (page 9)Equipment: nonePlaying Area: the entire sports hall, or playing field The teacher/coach calls out a body part (ie knee, foot, ear, etc.) and a colour. Players must run and place the body part on something of that colour.4. Good Hands (page 9)Equipment: 1 ball per groupPlaying Area: utilise the playing court Players are organised into groups of three (3) or four (4), and stand one behind the other on thebase or halfway line. The front player, carries/dribbles the ball out to a specific spot, and performs the requiredactivity, before returning to the rest of the group and handing the ball to the next person. This exercise can be performed in both a competitive and non-competitive manner.5. GOTCHA Tag (page 10)Equipment: NonePlaying Area: utilise the playing court, which is divided into two equal areas with a center line. This is an activity of speed, agility and breath control for a large number of participants. Players are divided into two (2) groups, with 1 group on 1 side of the center line and the secondgroup on the other side. The two groups take turns sending 1 participant across the center line. Before crossing the lineinto opposition territory, the player takes a deep breath.Mini Handball School Lesson Plan GuidePage 19
From the moment a player crosses the center line, they must say aloud “GOTCHA GOTCHAGOTCHA” in a continuous flow, without taking a breath. The purpose is to touch as many players of the opposing team and safely return back to their ownside, all in one (1) breath. If at any time, whilst in the opponents territory, a player stops making the GOTCHA sound, theyhave to return to their own side. If the player can make it back to their side before running out of breath, all the opponents theparticipant touched must come over to the other teams area. If the player does not make it backbefore running out of breath, they opposing players they touched do not change sides. Players can move around in their own area to try and evade being touched. The winners are the team that can get all the opposition players over to one side, or after bothteams have had an equal number of opportunities to capture players.6. Circle Pass (page 11)Equipment: 1 ball per groupPlaying Area: large enough for players to form a circle approx. 5m in diameter Five (5) or six (6) players form a circle approx. 5 meters in diameter. Two (2) other playersstand in the middle of the circle. The circle players must pass the ball to each other, whilst the two (2) middle players try andintercept or knock the ball away. If a ball is intercepted or knocked away, the middle player swaps with the person who threw theball. Players are not allowed to pass to the person directly next to them. Players should practice all the variations of passes (ie chest, overarm, bounce, etc.) as well aswith both hands.7. Full Court Relay (page 12)Equipment: 1 ball and 1 target per groupPlaying Area: utilise the playing court Players are organised into groups of 5 or 6, with each group spaced out evenly along the lengthof the playing court. Starting at one end, the first player passes the ball to the next, who passes to the next player andso on to the last player who turns and throws it at a target (either on the wall, or ground). After retrieving the ball, the player then runs up to the position of the first player, whilst all theother players move down to the next position. The movement is continued until all members of a group have had a turn in each position. Players should practice performing the different passes to each other. (ie all groups are expectedto perform the same throw/pass at the same time, but change each time a player runs to the firstposition).8. Relay Races (page 13)Equipment: 1 ball and 1 target per groupPlaying Area: utilise the playing court Students are organised into an even number of groups, with approx. 4 - 5 players in each. In the first four (4) activities arrange each group so that they are facing another group, with theplayers standing one behind the other in each group. The first person then performs the required skill/action before either moving to the end of theirown group, or swapping with the group in front.Mini Handball School Lesson Plan GuidePage 20
In the last two (2) activities arrange each group so that they are not facing another group, ie allgroups facing the same direction with players standing one behind the other in each group. The first person then performs the required skill/action before moving to the end of their owngroup. Players should perform each skill/activity 2 - 3 times.9. Rats & Rabbits (page 14)Equipment: possibly 4 - 6 markers to define areaPlaying Area: utilise playing court (an area approx. 20 meters in length, and wide enough toaccommodate all the players. Players are divided into two teams, and stand back to back in two lines (about 1 meter spacebetween the two lines) One team are the “rats” and the other team the “rabbits”. A parallel line is marked around 8 - 10 meters in front of each team, which designates that teamssafety zone. The teacher stands to the side of both lines and calls out “Raaaaaaa.ts!” or “Raaaaaaa.bitts!” The team whose name is called out must turn and chase the other players before they reach theirdesignated safety line/zone. When players are tagged they either sit out, or preferably join the other team. The winners are the team who finish with all the players.Mini Handball School Lesson Plan GuidePage 21
APPENDIX CACTIVITIES1. 10 Pass Game (page 7)Equipment: 1 ball per groupPlaying Area: square 10m x 10m Players are organised into two even groups. Try to keep numbers to a maximum of 10 playersper group. One team is given the ball and must pass it amongst themselves, aiming to get 10 consecutivepasses. The opposite team is trying to gain control of the ball, so that they may then try and make 10consecutive passes. When a team makes 10 consecutive passes they get a point, and the ball is then given to the otherteam. The opposition players are only allowed to play for the ball when it is being passed. They are notallowed to hit it out of another players hands. No contact is allowed between players. Various rules may be introduced at any stage, ie players can only hold the ball for 3 secondsbefore passing and/or they can only take 3 steps before passing.2. Circle Ball (page 8)Equipment: 1 ball per groupPlaying Area: large enough for 4 - 5 circles of approx. 5 meters in diameter Players are organised into groups of 6 - 8, which then form a circle approx. 5 meters in diameter. A player passes the ball in one direction (either an overarm, chest, bounce, etc.) and then runsaround the outside of the circle in the other direction. The aim is for the person to get back to their spot before the ball is passed all the way around thecircle. When the player gets back to their spot the ball is given to the next player who performs thesame task. Players should vary their passes.3. Leader Ball (page 8)Equipment: 1 ball and 2 markers/witches hats per groupPlaying Area: utilise the playing court Players are organised into teams of 4 - 5, which stand in a straight line with one arm’s distancebetween each participant. The leader stands in front of the line, about 2 meters from the first team member. The leader throws the ball to the first player, who holds it and runs down the end of the line,around the last player, up around the leader, and back to their own spot. The ball is then passedback to the leader, before the player crouches down. The leader then passes the ball to the second player who repeats the action. The game continues until all the players have had a turn. The first team with all players crouching down, and the leader holding onto the ball are thewinners.Mini Handball School Lesson Plan GuidePage 22
4. Court Running (page 10)Equipment: 1 ball per pairPlaying Area: utilise the playing court Players are organised into pairs, and line up at one end of the court about 3 - 4 meters apart. With a ball they then practice passing the ball to each other whilst running up to the other end ofthe court. Players should practice different forms of running (ie forward, backward, sideways, skipping,etc.) as well as the different forms of passing (ie overarm, chest, sideways, bounce, etc.). The aim is for the players to perform the tasks without any mistakes like dropping the ball whencatching, or throwing a bad pass.5. Ball Tag (page 11)Equipment: 1 ball (possibly 2)Playing Area: the playing court Players are divided into two teams. One team are the taggers, the other team are the runners. The taggers have one (1) ball which they pass around to each other and try and tag the runners. Taggers can only take three (3) steps or hold the ball for three (3) seconds before either tagging arunner or passing to a team mate. Explain that balls are not allowed to be thrown, runners must be tagged to be caught. When a runner is tagged/caught, they stand still, with their legs apart and arms up in the air. Arunner can resume the game when one of their team mates crawl between their legs. Teams swap roles after everyone has been tagged/caught, or after a specific time period. Two (2) or three (3) balls may be used at the same time depending on the number and ability ofthe players.6. Target Ball (page 12)Equipment: As many balls as possible, a minimum of 12 - 15. 4 markers/witches hatsPlaying Area: utilise an area that is around 15 meters square. Players are organised into two teams, which stand opposite each other about 15 meters apart. 2 - 3 balls are placed in the middle of both teams. Each team starts off with 5 - 6 balls. The players then throw the balls, aiming for the balls in th
This booklet is a set of 4 x 1 hour, plus an additional 4 x 40 minute lesson plans which will introduce primary school aged students to the skills and activities of Handball. The lesson plans in this program have been put together to allow for the progression of both skill and knowledge development in junior athletes. OBJECTIVES
