Transcription
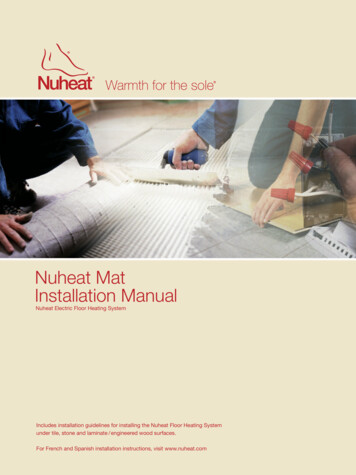
Nuheat MatInstallation ManualNuheat Electric Floor Heating SystemIncludes installation guidelines for installing the Nuheat Floor Heating Systemunder tile, stone and laminate / engineered wood surfaces.For French and Spanish installation instructions, visit www.nuheat.com
Nuheat Industries Limited 2010 Nuheat Industries Limited. All rights reserved.The entire contents of this manual, including but not limited to text, images, and the selection and arrangement of information(collectively the “Materials”), are protected by copyright and other intellectual property laws under the laws of Canada andother countries.Important Installation GuidelinesFirst time installers should contact Nuheat’s First Time Installer Line for Nuheat Mat at 1 (800) 778-WARM(9276) THE INSTALLATION OF THIS HEATING PRODUCT SHALL BE IN ACCORDANCE WITH THE MANUFACTURER’SINSTRUCTIONS AND IN ACCORDANCE WITH THE CANADIAN ELECTRICAL CODE PART 1 OR THE NATIONALELECTRICAL CODE (US) WHICHEVER IS APPLICABLE. THIS EQUIPMENT SHALL BE INSTALLED ONLY BY QUALIFIED PERSONNEL WHO ARE FAMILIAR WITH THECONSTRUCTION AND OPERATION OF THE APPARATUS AND RISKS INVOLVED. CAUTION SHOULD BE TAKEN TO GUARD AGAINST RISK OF ELECTRIC SHOCK, FIRE AND BODILY INJURYDURING THE INSTALLATION OF THIS EQUIPMENT. Nuheat Mat should be connected to a dedicated electrical circuit. It is mandatory to install a Class “A” GFCI or GFCI circuit breaker with each Nuheat Mat Installation. DO NOT USE sharp tools or power tools to clean grout lines. Cleaning grout lines with sharp tools or power tools mayNOTE: All Nuheat thermostats come equipped with a built-in Class “A” GFCI.damage the Nuheat Mat System and WILL VOID THE NUHEAT WARRANTY. Indicate on the electrical panel which circuit is used for the electric floor heating system. Subfloor must be prepared in accordance to ANSI specifications. Nuheat Mat cannot be overlapped, crossed, cut, shortened or modified. The ambient air temperature must be above 0 C or 32 F when the Nuheat Mat Floor Heating System is installed.Heating Cable Series Type 1B and 2D Canada, Type C USA
ContentsFast FactsNuheat MatMeasuring InstructionsGetting StartedNuheat MatInstallation124 Installation Guidelines5 Testing Nuheat6 Securing Nuheat Mat to the Subfloor8 Install Flooring:Tile and Stone9 Install Flooring:Floating Laminate and Engineered Wood11 Install Flooring:Glue Down Laminate and Engineered Wood12 Connecting the Electrical & Final StepsNuheat Controls14Nuheat Accessories17Troubleshooting18 Replacing a Broken Tile
The Nuheat Registered Installer ProgramA Nuheat Floor Heating System promises a homeowner soothing comfort in any room.Delivering that comfort requires proper Nuheat installation from trained and experiencedinstallers and electricians.Our goal is to deliver a simple and hassle-free experience when purchasing and installing ourfloor heating system. Part of our superior service is our Nuheat Registered Installer Program.The Nuheat Registered Installer Program is a network of Nuheat trained individuals andcompanies across North America.Referral BusinessNuheat refers thousands of homeowners to only those on our master list of registeredinstallers. Our installers are committed to quality installations in the residential constructionindustry. Nuheat referrals will only go to installers who are registered and who are customersof a Nuheat Authorized Distributor. Our website, www.nuheat.com, allows homeowners tofind an installer in their local area.Publicity and PromotionsRegistered installers have use of the Nuheat logo on approved promotional materials and areeligible for seasonal promotions.
Nuheat MatFast Facts Pre-built like an electric blanket, Nuheat Mat is an electric floor heating system that is only 1/8” thick andeasy to install. Nuheat Mat draws 12 watts per square foot and produces 41 BTUs per square foot, providing even heatwith no cold spots. Nuheat Mat typically reaches a temperature of 80º - 90ºF (27º - 32º C). Nuheat Mats are available in 120V and 240V and in over 60 standard sizes (squares and rectangles). Nuheat also offers custom-sized mats for rooms with curves and angles. Floor temperature is controlled by a variety of programmable and non-programmable thermostat options(refer to Controls section). Nuheat carries a 25-year warranty. Nuheat must be installed on a dedicated 20 amp circuit. The maximum load the thermostat can handle is 15 amps; this translates to 150 square feet at 120V and300 square feet at 240V. Subfloor must be prepared according to ANSI standards. Nuheat Mats are not warranted in exterior applications.1
Nuheat MatMeasuring InstructionsIMPORTANT:Measure tight to the perimeter for all your measurements. DO NOT make any allowances inyour measurements.An interactive online measuring tutorial is available at www.nuheat.com88”For assistance with18”measuring,youcan speak to a Designer directly by18” 18”VanityShowercalling our Design Direct lineat 1 (800) 778-9276.Design Direct hours are65”20”75”Monday-Friday 5am-5pmPST.Shower30”5”30”Tub60” room7” and use 5”5” as the starting point for your1. Pick a corner of thethat25”5”38”measurements. Rememberthatyoumustreturn to this starting pointTubToilet Drain 38”at the end of your measurements.40”Toilet Drain88”2. Measure and draw the walls of the room on grid paper and recordthe measurements.ShowerTubToilet Draina.88”18”Shower20”18”88”Each time the wallchanges directions, record the18”18” 18”VanityShowerto measure the next wall.measurement65”before continuing20”75” around fixtures such as shower bases and tubs underMeasurewhich Nuheat would not be 38”TubTubToilet Drain88”b.18”Shower20”Toilet Drain 38”6”19”40”88”Be sure18”to includeanydimensions such as framing walls18” small18”VanityShower65”for entryways into smaller ”30”7”5”25”5”Tub38”Toilet 40”18”18”18”VanityMeasure/Drawthe room on thegrid paper and record theShower65”measurementsuntilyoureachthestarting point identified in Step 1.20”75”18”T120V7”10”5”60”Toilet Drain 38”30”7”5”38”Tub6”Toilet ��38”TubToilet �5”5”50”38”
Nuheat MatMeasuring Instructions18”Shower88”Vanity18”3. Draw the location of all cabinets and vanities,including �30”7”5”5”25”5”38”Toilet DrainTubToilet Drain 38”40”a.ShowerFor cabinets and vanities, make sure to takethe measurement right up to the toe-kick.Toilet Drain18”Shower88”Vanity18”Shower65”20”4. Measure and draw the location of floor featuressuch as:a.Toilet drainsi.measure from the walls to the centerof the toilet ”5”25”5”38”TubToilet Drain18”ShowerToilet Drain �75”10”30”5”60”5”5”Tub18”Toilet ��Toilet Drain19”30”5”25”5”Toilet Drain 38”5. Indicate thermostat location and voltage if ��50”38”Shower”5”25”5”Toilet Drain30”30”7”VentsOther fixed floor 0”38”40”3
Getting StartedInstallation GuidelinesBefore You StartA successful Nuheat application requires the following tools: Grouting float Acrylic or latex modified thinset Digital ohm / multimeter Duct tape Sponge 1 4” square notch trowel Bucket of water Small plastic bristled brush Margin trowelAvoid the following activities that may damage Nuheat: Connecting the mat to power when foldedStaplingNailingFolding, bending or overlapping matsDo not use grout scrapers or utility knives to clean grout lines. Cleaning grout lines withsharp tools may damage the mat. Using these tools will void the Nuheat warranty.Tip: Clean grout lines with a sponge as you go.Note: The MatSense Pro electrical fault indicator should be attached to the mat at all timesduring installation. It does not replace the resistance testing. For information aboutthe MatSense Pro, refer to page 17.DO NOT CONNECT THE MAT TO POWER DURING TESTING.4
MUSTNCE TESTATISSERANDN AND, DURING,INSUL ATIOEROFEBTRMEDHE NUHEATFOBE PERFONIOTINSTALL AT Y.AFTER THEE WARRANHTETAIDALMATS TO VGetting StartedTesting NuheatInsulation TestTo ensure that the copper conductors are fully insulated: Acquire a digital ohm / multimeter with alligator clip attachments or equivalent testingdevice. Place one probe on the ground outer metallic braid and the other probe on theconductor wire inside the white lead. The mat(s) should be laid out flat. Do not hold probes or wires in your hands. Confirm that the reading is OL or infinity. Repeat this step to check the reading between the metallic braid and the conductorwire inside the black lead.Resistance TestTo ensure continuity in your heating mat: Set the ohm meter to the appropriate setting. For 120V mats, place one of the probeson the conductor wire in the white lead and the other probe on the conductor wire inthe black lead. For 240V mats, the leads are red and black. For testing mats with ohm readings over 200 the ohm meter willneed to be set higher than 200 Ω (i.e. 2000 Ω) in order to get anaccurate reading. Confirm that your ohm reading is within 10% or -5% of the factoryreading listed on the mat tag. Record reading in the Mat ResistanceLog, provided in the installation instructions included with each Nuheat Mat. After testing mats connect a MatSense Pro to the lead wires tosimultaneously monitor continuous separation of conductor & braid (ground) withunbroken insulation and continuous continuity between conductors. Test sensor probe. Put resistance range to 20K Ω. Probe wires should readbetween 8K - 12K ohms.5
Nuheat Mat InstallationSecuring Nuheat Mat to the SubfloorSUBFLOOR MUST BE PREPARED IN ACCORDANCE TO ANSI sPECIFICATIONS.Step 1Ensure the subfloor is clean and free of debris. Dry fit the mats to ensure it fits the contours ofthe room and provides proper coverage. There is no “up” or “down” side to Nuheat StandardMats. You can flip the mat in any direction to place the lead wires as close as possible tothe junction box. Choose the side that is more convenient when running the cold lead to thethermostat location.Mark the locations of the connecting cable and connection patch on the subfloor. Lay outthe path of the cold lead to the junction box around the perimeter of the mat. If leads do notreach the Nuheat thermostat or designated junction box, please contact Nuheat CustomerCare at 1 (800) 778-9276.Note: Conduct insulation & resistance tests.Note:6Connect the MatSense Pro to the lead wires to monitor hot, neutral and ground wiresduring your Nuheat Mat Installation.
Nuheat Mat InstallationSecuring Nuheat Mat to the SubfloorStep 2Prepare the acrylic / latex modified thinset according to manufacturer’s instructions.Using at least a 1 4” x 1 4” square notch trowel, spread a coat of fresh acrylic / latex modifiedthinset over the area to be covered by Nuheat. If laying Nuheat in a large area make sure towork on one manageable section at a time.Place the mat onto the fresh thinset. Press entire surface firmly with a rubber grout or similartool. Create 100% contact between the heating mat, the thinset and the subfloor.Tip:When using multiple mats, ensure that the outside wires of adjacent mats are within 2’’ ofone another to keep the wire spacing and heat distribution consistent across the floor.Note: Conduct insulation and resistance tests.7
Nuheat Mat InstallationInstall Flooring:Tile and StoneStep 1Install Nuheat Mat as per the instructions on page 6 and 7.If installing a floor-sensing thermostat with GFCI, ensure thatthe sensor is installed at this point. Install the probe on top ofthe mat a minimum of 12” in from the edge of the heated area.Tape the sensor probe in place between two heating wires.”12Step 2Apply a coat of thinset according to the thickness required for your tile or stone and install flooring.Tip:Clean excess thinset from grout lines with a sponge or small plastic brush and wateras tile is being laid.Note: Conduct insulation and resistance tests.Step 3Apply grout. The use of grout scrapers or utility knives to clean grout joints may damage themat and will void the Nuheat warranty.8Before activating the Nuheat System, allow the thinset and grout to cure according tothe manufacturer’s guidelines.
Nuheat Mat InstallationInstall Flooring:Floating Laminate and Engineered WoodStep 1Install Nuheat Mat as per the instructions on page 6 and 7.Using the flat side of a trowel, apply a minimum 1 / 4” thick coat of thinset over the mat andsupply leads. Ensure the thinset is level and smooth.Allow thinset to cure as per manufacturer’s guidelines.Note: Conduct insulation and resistance tests.9
Nuheat Mat InstallationInstall Flooring:Floating Laminate and Engineered WoodStep 2Install vapor barrier, if applicable, and underlay as per manufacturer’s instructions.Step 3Install the sensor probe on top of the underlay, a minimumof 12” in from the edge of the heated area. Tape the sensorprobe in place and run the sensor wire up to the thermostatlocation. The thermostat sensor probe should be placedabove the underlay to avoid compromising the performanceof the Nuheat System.Install laminate / engineered wood as per manufacturer’sinstructions. After installation, gradually increase the NuheatMat temperature over a period 72 hours to the maximumtemperature or 82 F or 28 C.10min.”12
Nuheat Mat InstallationInstall Flooring:Glue Down Laminate and Engineered WoodStep 1Install Nuheat Mat as per the instructions on page 6 and 7.Using the flat side of a trowel, apply a minimum 1/4” thick coat of thinset over the mat andsupply leads. Ensure the thinset is level and smooth.Allow thinset to cure as per manufacturer’s guidelines.Step 2Install the sensor probe on top of the thinset layer, a minimum of 12” in from theedge of the heated area.Step 3Using a notched trowel, apply a layer of adhesive following adhesivemanufacturer’s instructions.in.”12mInstall laminate / engineered wood as per the manufacturer’s instructions.TIP: To ensure adequate bonding, apply weights to hold the floor on top of the sensor probe.11
Nuheat Mat InstallationConnecting the Electrical & Final Stepselectrical CONNECTIONS MUST BE MADE BY A CERTIFIED ELECTRICIAN TOVALIDATE WARRANTY.Electrical InstallationAll wiring must follow specifications set out in Part 1 of the Canadian Electrical Code, the USNational Electrical Code and local electrical inspection regulations. All Nuheat Mats must beconnected to the electrical service through a Ground Fault Circuit Interrupter (GFCI) which isbuilt into all Nuheat controls.Step 1Determine the number of circuits you require based on the amperage draw of the heatingsystem (the amperage is located on the silver UL tag attached to the leads.) For specialwiring instructions or diagrams please call Nuheat Customer Care at 1 (800) 778-9276.Step 2Install the circuit(s) at the electrical panel.Note: Conduct insulation & resistance tests.Step 3Attach the connecting wires to the outlet box using CSA Certified / UL Listed cable fittings.Make the electrical connection only after the flooring is complete. Resistance test the mat(s)before setting tile.Tip:12When connecting multiple Nuheat Mats, it may be easier to connect the mat at a floorlevel junction box rather than directly to the thermostat.
Nuheat Mat InstallationConnecting the Electrical & Final StepsStep 3 (continued)Final Connections (using a Nuheat Floor-Sensing Thermostat) Connect the black line wire to the black control wire (line side) Join the white line wire to the white control wire (line side) Fasten the black mat lead wire to the black control wire (load side) Connect the white mat lead wire to the white control wire (load side)Step 4 Connect the braided ground wire to the grounded copper conductor (wire nut orground screw) Fasten the thermostat probe wires to the sensor terminals at the back of the floorsensing thermostat Place the wires and control into the junction boxHelpful Tips There is no “up” or “down” side to Nuheat Standard Mats. You can flip the mat in anydirection to place the lead wires as close as possible to the thermostat or junction box. To test the bond between the mat and the subfloor, peel a portion of the mat back fromthe thinset you have adhered to the subfloor. At least 80% of the mat pulled from thefloor should be covered with thinset. It is mandatory to install a Class A GFCI or GFCI circuit breaker when feeding matsthrough a relay with each Nuheat Mat installation. If using a Nuheat control, noadditional GFCI is required. Discarding mat label voids the warranty.TroubleshootingShould you have any questions or difficulties installing or controlling your Nuheat Mat, pleasecontact Nuheat directly at 1 (800) 778-9276.After the Nuheat Mat InstallationAllow thinset or adhesive to cure according to manufacturer specifications before activatingthe Nuheat Mat System.13
Nuheat ControlsProgrammable Floor-Sensing ThermostatsHarmonyHarmony Thermostat — Flush-mounted, designer inspiredThe Harmony thermostat is exclusive to Nuheat. Blending style and function, the Harmonythermostat is the only flush mounted, designer inspired thermostat in the floor heating category.A seamless fit behind any double-gang face plate allows homeowners the ability to integrateboth style and warmth into their room decor. It may also be mounted beside your other controlsif you choose to use a face plate larger than two-gang.Harmony Benefits: Exclusively designed for NuheatProgrammable 7-day settingsAvailable in 120V & 240VFor tile, stone andlaminate / engineered wood floorsBacklit screenOn / off switchBuilt-in Class A GFCIManufacturer’s limitedthree (3) year warranty* the Harmony thermostat requires a two gang deep box** face plate not included14120 Volt Specifications240 Volt SpecificationsModel: HMY 110Supply: 120 VACLoad: 15 A max. (resistive load)Power: 1800 W max. @ 120 VACGFCI: Class A (5 mA TRIP LEVEL)Approvals: CSA / C, USDisplay range: 32 to 140 F (0 to 60 C)Setting range: 40 to 104 F (5 to 40 C)Econo default setting: 64 F (18 C)Storage: -4 to 120 F (-20 to 50 C)Model: HMY 220Supply: 240 VACLoad: 15 A max. (resistive load)Power: 3600 W max. @ 240 VACGFCI: Class A (5 mA TRIP LEVEL)Approvals: CSA / C, USDisplay range: 32 to 140 F (0 to 60 C)Setting range: 40 to 82 F (5 to 40 C)Econo default setting: 64 F (18 C)Storage: -4 to 120 F (-20 to 50 C)
Nuheat ControlsProgrammable Floor-Sensing ThermostatsSOLOSOLO Thermostat — Universal Floor Heating ThermostatThe SOLO Thermostat boast an industry-first design, exclusive to Nuheat. Anotherexample of ongoing innovation from the leader in electric radiant systems, Nuheat’s newthermostat offers features such as a full menu screen, dual voltage (120V & 240V), 7- dayprogrammability and the ability to network multiple SOLO thermostats within the home.SOLO Benefits: Dual voltage (120V & 240V)Programmable 7-day settingsFull menu screenEnergy efficientBacklit screenFor tile, stone and laminate / engineeredwood floors Built-in Class A GFCI Manufacturer’s limitedthree (3) year warranty120 & 240 Volt SpecificationsModel: SOLOSupply: 120V / 240V, 50 / 60 HzLoad: 15 A max. (resistive load)Power: 1800W @ 120V3600W @ 240VGFCI: Class A ( 5 mA TRIP LEVEL)Approvals: CSA / C, USDisplay range: 32 F to 140 F (0 C to 60 C)Setting Range: 40 F to 82 F or 104 F (5 C to 28 C or 40 C)Storage: -4 F to 120 F (-20 C to 50 C)15
Nuheat ControlsNon - Programmable OptionTempoTempoInstallation of a floor-sensor probe is required for temperature display.Tempo benefits: 120V & 240V volt specificationsModel: TEMPOSupply: 120V / 240V, 50 / 60 HzLoad: 15 A max. (resistive load)Power: 1800W @ 120V3600W @ 240VGFCI: Class A ( 5 mA TRIP LEVEL)Approvals: CSA / C, USDisplay range: 32 F to 140 F (0 C to 60 C)Setting Range: 40 F to 82 F or 104 F (5 C to 28 C or 40 C)Storage: -4 F to 120 F (-20 C to 50 C)16Suitable for tile and stone floorsDigital temperature displayBacklit screenOn / off switchDual Voltage (120V & 240V)Built-in Class A GFCIManufacturer’s limitedthree (3) year warranty
Nuheat AccessoriesMatSense Pro Electrical Fault IndicatorMatSense ProOur electrical fault indicator is a device that simultaneously monitors the hot, neutral andground wires during your Nuheat installation. Use an electric fault indicator to ensure acorrect Nuheat installation every time.The MatSense Pro will set off a distinct alarm when: the sensor finds an open circuit the sensor detects a short circuitThe MatSense Pro is the installer’s safeguardto ensure homeowners that their Nuheat FloorHeating System is installed correctly every time.Simply connect the conductor wires and groundwires to the MatSense Pro and turn it on.The MatSense Pro is available for sale at all Nuheat Authorized Distributor locations. Fora location near you, please log onto www.nuheat.com and click “Where to buy” or simplycall 1 (800) 778-9276.Using the MatSense Pro DOES NOT replace the need to conduct insulation or resistancetests of Nuheat Mat prior, during and after the installation. For more information oninstallation please visit www.nuheat.com.NOTE:Nuheat Mat is repairable if damaged. If Nuheat Mat is damaged, please contactNuheat Customer Care at 1 (800) 778-9276.17
TroubleshootingReplacing a Broken TileReplacing Tile Over NuheatTo prevent damage to your Nuheat Floor Heating System while replacing a tile, please followthese instructions:Step 1Turn off the power to Nuheat Mat at the main power box or have a certified electriciandisconnect the wires from the relay or junction box.Step 2Perform a continuous insulation test with your ohm/ multimeter. Monitor the readings on yourohm / multimeter as you replace the tile to ensure that the mat has not been damaged.Step 3Use a grout scraper to score the grout 1/8” deeparound the tile to be removed, this must be donecarefully by hand. Do not use a power tool.Step 4Take a round-head hammer and carefully break upthe tile starting from the center. Use only the forcerequired to break the tile.Step 5Position a cold chisel at a steep angle and beginremoving the tile from the thinset. When you find amat wire, move the chisel parallel to it rememberingthat wires are spaced apart by approximately 1 1 2”– never cross the wires directly with your chisel.Step 6Use a round-head hammer to break up the remaining thinset over the mat. Remember to useonly the force required to break the thinset.18
TroubleshootingReplacing a Broken TileStep 7Locate a wire in the mat. Position a cold chisel beside the wire. Run your chisel parallel to thewire line to remove the thinset – never cross the wires with your chisel. Carefully remove theremaining grout around the bare space with your cold chisel to ensure that the replacementtile fits properly.Step 8Set your digital ohm / multimeter to the 200 ohms setting. Add alligator clips to theohm / multimeter to make testing easier. Connect the black and white mat lead wires to theprobes of the multimeter. Ensure that the resistance reading is within the range of 10% to-5% of the resistance rating listed on your mat tag. Document your test results.Step 9To lay your replacement tile evenly to the surrounding tiles, try grinding down the back of thetile to remove some of the depth.Step 10Apply a coat of thinset. Set the tile into place andensure that it is level with the floor.Step 11Test the mat.Step 12Reconnect the Nuheat Mat system.19
Nuheat Standard Mat Listing120 Volt and 240 VoltNuheat Standard Mat Sizes (120V)Dimensions (inches)3.5ft Series4ft Series5ft Series6ft Series7ft Series8ft Series9ft Series10ft 8243036424860728496108116Sq. Ft.OhmsAmpsWattsModel 882694410621141Nuheat Standard Mat Sizes (240V)Dimensions (inches)5ft Series6ft Series7ft Series8ft Series9ft Series10ft SeriesSq. 9G1810G1812G1815G1818G2106G2108G2109G2110G211284 x 6084 x 7284 x 2.527.031.536.045.0Model Number108 x 72108 x 84108 x xxxxxxxxxxxx108243036424860728496108116Mat dimensions listed in inches.Information subject to change at any time. For acomplete list of up to date specifications please visitwww.nuheat.com.Nuheat Industries Limited 2010 Nuheat Industries Limited. All rights reserved.Nuheat Floor Heating Systemstoll free 1 (800) 778-WARM(9276)fax (604) 529-4404www.nuheat.cominfo@nuheat.comNuheatTM is the registered Trademark of Nuheat Industries Limited.Printed in Canada
Nuheat Mat Installation Manual Nuheat Electric Floor Heating System Includes installation guidelines for installing the Nuheat Floor Heating System . Mark the locations of the connecting cable and connection patch on the subfloor. Lay out the path of the cold lead to the junction box around the perimeter of the mat. If leads do not