Transcription
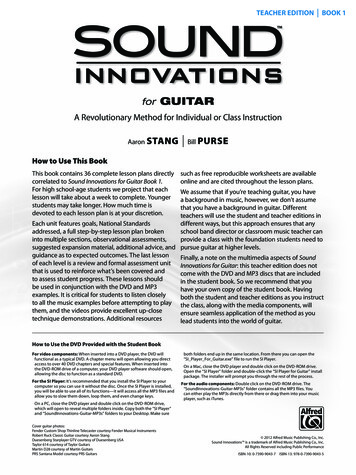
TEACHER EDITION BOOK 1for GUITARA Revolutionary Method for Individual or Class InstructionAaron STANG Bill PURSEHow to Use This BookThis book contains 36 complete lesson plans directlycorrelated to Sound Innovations for Guitar Book 1.For high school-age students we project that eachlesson will take about a week to complete. Youngerstudents may take longer. How much time isdevoted to each lesson plan is at your discretion.such as free reproducible worksheets are availableonline and are cited throughout the lesson plans.We assume that if you’re teaching guitar, you havea background in music, however, we don’t assumethat you have a background in guitar. Differentteachers will use the student and teacher editions inEach unit features goals, National Standardsdifferent ways, but this approach ensures that anyschool band director or classroom music teacher canaddressed, a full step-by-step lesson plan brokenprovide a class with the foundation students need tointo multiple sections, observational assessments,suggested expansion material, additional advice, and pursue guitar at higher levels.guidance as to expected outcomes. The last lessonFinally, a note on the multimedia aspects of Soundof each level is a review and formal assessment unit Innovations for Guitar: this teacher edition does notthat is used to reinforce what’s been covered andcome with the DVD and MP3 discs that are includedto assess student progress. These lessons shouldin the student book. So we recommend that yoube used in conjunction with the DVD and MP3have your own copy of the student book. Havingexamples. It is critical for students to listen closelyboth the student and teacher editions as you instructto all the music examples before attempting to play the class, along with the media components, willthem, and the videos provide excellent up-closeensure seamless application of the method as youtechnique demonstrations. Additional resourceslead students into the world of guitar.How to Use the DVD Provided with the Student BookFor video components: When inserted into a DVD player, the DVD willfunctional as a typical DVD. A chapter menu will open allowing you directaccess to over 40 DVD chapters and special features. When inserted intothe DVD-ROM drive of a computer, your DVD player software should open,allowing the disc to function as a standard DVD.For the SI Player: It’s recommended that you install the SI Player to yourcomputer so you can use it without the disc. Once the SI Player is installed,you will be able to use all of its functions—it will access all the MP3 files andallow you to slow them down, loop them, and even change keys.On a PC, close the DVD player and double click on the DVD-ROM drive,which will open to reveal multiple folders inside. Copy both the “SI Player”and “SoundInnovations-Guitar-MP3s” folders to your Desktop. Make sureCover guitar photos:Fender Custom Shop Thinline Telecaster courtesy Fender Musical InstrumentsRobert Ruck Classic Guitar courtesy Aaron StangDuesenberg Starplayer GTV courtesy of Duesenberg USATaylor 614 courtesy of Taylor GuitarsMartin D28 courtesy of Martin GuitarsPRS Santana Model courtesy PRS Guitarsboth folders end up in the same location. From there you can open the“SI Player For Guitar.exe” file to run the SI Player.On a Mac, close the DVD player and double click on the DVD-ROM drive.Open the “SI Player” folder and double-click the “SI Player for Guitar” installpackage. The installer will prompt you through the rest of the process.For the audio components: Double click on the DVD-ROM drive. The“SoundInnovations-Guitar-MP3s” folder contains all the MP3 files. Youcan either play the MP3s directly from there or drag them into your musicplayer, such as iTunes. 2012 Alfred Music Publishing Co., Inc.Sound Innovations is a trademark of Alfred Music Publishing Co., Inc.All Rights Reserved including Public PerformanceISBN-10: 0-7390-9043-7 ISBN-13: 978-0-7390-9043-5
ContentsLEVEL 1Lesson 1: Notes on the 6th String and First Chords. 4Lesson 2: Notes on the 5th String and the Am Chord. 6Lesson 3: Accidentals, the E Minor Chord. 83Lesson 4: 4 Time Signature and Fingerpicking.10Lesson 5: Fingerpicking in A Minor, Moving Chord Shapes, Acoustic Fantasy.12Lesson 6: Review and Assessment.14LEVEL 2Lesson 1: Notes on the 4th and 3rd Strings, New Chord: E7.16Lesson 2: Chromatic Strength Builder with Chord Review.18Lesson 3: The Blues Song Form and the Blues Boogie Rhythm. 203Lesson 4: Fingerpicking in 4 . 22Lesson 5: Plaisir d’ Amour. 24Lesson 6: Review and Assessment. 26LEVEL 3Lesson 1: Notes on the 2nd and 1st Strings. 28Lesson 2: Alternate Picking, Amazing Grace . 30Lesson 3: Flamenco Mood Ensemble. 32Lesson 4: Ode to Joy and Chromatic Strength Builder. 34Lesson 5: The One Grip Blues. 36Lesson 6: Review and Assessment. 38LEVEL 4Lesson 1: Basic Theory, I–V7, Playing by Ear. 40Lesson 2: Simple Gifts. 42Lesson 3: Für Elise. 43Lesson 4: Swing Feel and When the Saints Go Marchin’ In. 44Lesson 5: Looking Back. 46Lesson 6: Review and Assessment. 482
ContentsLEVEL 5Lesson 1: Three-Chord Rock and Roll. 50Lesson 2: Alternating Thumb–Pluck Pattern and Corinna, Corinna. 52Lesson 3: A Blues Shuffle, Improvised Rhythm Guitar. 54Lesson 4: F chord, Barre Chords, and Barre Chords by the Bay. 55Lesson 5: Looking Back. 56Lesson 6: Review and Assessment. 57LEVEL 6Lesson 1: Minuet in G. 58Lesson 2: Aguado Study, plus Dm. 60Lesson 3: Triplets and Blues. 62Lesson 4: Romanza, plus B7, Em9, and Am6. 64Lesson 5: Simple Gifts. 66Lesson 6: Review and Assessment.67APPENDIX 1Classroom Management and Advice. 69APPENDIX 2The Nature of Guitar Tablature. 70APPENDIX 3National Standards for the Arts. 723
Level 1LESSON 1 Notes on the 6th String and First ChordsGOALSNATIONALSTANDARDS Learn low E, F, and G; ledger lines; quarter notes and half notes; and rhythm slash notation. Play simple bass line examples with correct rhythm and strum first chords (E, F Flamenco, and G Flamenco). Explore Flamenco music.NS2 (Playing), NS5 (Reading), NS6 (Listening), NS8 (Making Connections), NS9 (History & Culture)LESSON 1A (First Notes, Page 4)1. D VD chapter 2 introduces the first notes. Studentsshould always view the DVD chapters before learningnew material and then use them as a review resource.Note If you are using the Sound Innovations DVD in acomputer or DVD player that has the option of using titlesor chapters, make sure it is set to chapters to follow the DVDchapter numbers in the Sound Innovations guitar method.a. Demonstrate and describe the low E, F, and Gnotes. Call out the notes and have students play asrequested. Students should play and say the notestogether out loud. Circulate throughout the classchecking hand position and fingering, assisting withany difficulties.sound before they play. Demonstrate moving the Echord shape up one fret to play F Flamenco and thenreleasing all strings to play the G Flamenco chord (alldemonstrated on DVD chapter 3). Students shouldretain the “E grip” so they can easily land back on FFlamenco. Ask students to perform line 7. Circulatethroughout the class checking hand position andfingering, assisting with any difficulties.4. Line 8: “Flamenco Mood.” This is the students’ firstopportunity to perform a real duet. Watch DVDchapter 4 first (or listen to MP3 track 8). Ask studentsto break into groups and begin practicing line 8,“Flamenco Mood.” Important: All students should learnand perform both the guitar 1 and guitar 2 parts.b. Describe and explain ledger lines. (See Worksheet #1, OBSERVATIONAL ASSESSMENTSavailable as a free, reproducible document online at When playing the E chord, fingers should be curved and fering with, or muting, adjacent strings. Ask students to2. L ine 2: “First Notes.” Perform line 2 with students. Makesure to use divided counting throughout.3. L ines 3–4: Students should break into small groups oftwo to four each to practice and perform lines 3 and 4.Students can also play along with MP3 tracks 2–4. Gofrom group to group assisting as needed.OBSERVATIONAL ASSESSMENTS Left hand: Fingers curved, playing on fingertips. Fingersdo not interfere with adjacent strings. Thumb centeredbehind neck. Right hand: Pick is held between thumb and index finger, handis relaxed, and all notes are played with a down-stroke of thepick: pick strikes the string with a downward attack, towardsthe floor, coming to rest on the 5th string. Rhythm: Notes should be played with a steady beat.LESSON 1B (First Chords, Page 5) Ask students to slide the E shape up one fret to F Flamenco.Fingers should move in perfect tandem—the “E grip” just slidesup the neck. All duets should be in time with a solid beat. As students gain confidence suggest they add variety and interestby playing louder and softer, explore slower and faster tempos, etc.SOUND ADVICE To reinforce music literacy and ledger lines, print and distributeWorksheet #1 from www.alfred.com/SoundInnovations/SIGuitar. Discuss and research Flamenco music as described on thenext page.FLAMENCO MUSIC2. L ines 5 and 6: Demonstrate and describe the E chord.Listen to MP3 track 6 then ask students to perform line6. Circulate throughout the class checking hand positionand fingering and assisting with any difficulties.Flamenco music is an exciting and often virtuosicshowcase for the guitarist. This style of guitar playingoriginated in Andalusia, a region in Spain. Flamenco isactually the native folk music of the Andalusia Gypsiesfrom southern Spain. Flamenco style combines song anddance and the Flamenco musicians often grow up totallyimmersed in the culture, coming from generations ofFlamenco dancers and musicians.3. L ine 7: “Moving Chords.” Play MP3 track 7 beforeasking students to perform. Always let students hearthe corresponding MP3 tracks before they attempt toplay. We want them to know how their songs shouldFlamenco guitarists use a nylon string guitar, similar toa classical guitar but unique to their style of music. Thestrings on a Flamenco guitar are usually very close to thefingerboard making it easier to play the lightening-quick1. D VD chapter 3 introduces the E, F Flamenco, andG Flamenco chords.4hold the E chord and play one string at a time. All six stringsshould ring clearly. Same is true for all chords.
Level 1runs associated with this style. Also, the guitars are madeof cypress and spruce, giving them a much brighter soundthan the classical guitar. The guitars usually have violinstyle tuning keys, instead of modern tuners with metalgears, and they have plastic tap-plates on the top of theguitar. Flamenco guitarists often tap out percussion partsand loud accents on these tap plates with their fingernails.INNOVATIONS @HOMEAsk the class to research Flamenco music on the Internet. Findvideos and audio record
This book contains 36 complete lesson plans directly correlated to . Sound Innovations for Guitar Book 1. For high school-age students we project that each lesson will take about a week to complete. Younger students may take longer. How much time is devoted to each lesson plan is at your discretion. Each unit features goals, National Standards addressed, a full step-by-step lesson plan broken .
