Transcription
verha sios nbe ofen there stir ofed twareSage 300 Constructionand Real EstateThisMyAssistant Installation GuideVersion 17.1
NOTICEThis document and the Sage 300 Construction and Real Estate MyAssistant software may be used only inaccordance with the accompanying Innovative Software Design End User License Agreement. You may not use,copy, modify, or transfer the Sage 300 Construction and Real Estate MyAssistant software or this documentationexcept as expressly provided in the license agreement. 2017 Innovative Software Design. All rights reserved.Installation GuidePage 2
Table of ContentsConventions Used in this Document . 3Before You Install . 5Hardware and Software Compatibility. 7Minimum Hardware Requirements . 7Supported Software . 7Email Server Compatibility . 7Support and Training . 8Telephone Support . 8Sage Customer Portal . 8Training . 8Sage University . 8MyAssistant YouTube Channel . 8Local Business Partner . 8Chapter 1 – Installing MyAssistant Server . 9Step 1 – MyAssistant Server Installation . 10Step 2 – MyAssistant License Agreement . 11Step 3 – Prerequisites for MyAssistant Server . 12Step 4 – MyAssistant Software . 13Step 5 – You Have Completed Installing the MyAssistant Server . 14Start the MyAssistant Configuration Manager . 15Chapter 2 – MyAssistant Server Configuration .16Read this section carefully . 16MyAssistant Server Configuration steps: . 16Considerations before you begin: . 16Step 1 – Welcome . 17Step 2 – Product Activation . 18Step 3 – Database Connection . 19Step 4 – Create the MyAssistant Database . 20Step 5 – Sage 300 CRE Data Folders . 21Import Sage Database Customizations . 22Step 6 – Notification E-Mail Account . 23Determining Mail Settings in Outlook for Microsoft Office 365 and Outlook 2016 . 24Determining Mail Settings in Outlook 2013 . 25Determining Mail Settings in Outlook 2010 . 26Step 7 – Server Options . 27Installation GuidePage 3
Chapter 3 – Installing MyAssistant Workstation .29Step 1 – Welcome . 30Step 2 – MyAssistant License Agreement . 31Step 3 – Prerequisites for MyAssistant Workstation. 32Step 4 – Install the Software . 33Step 5 – You Have Completed Installing MyAssistant . 34Chapter 4 – MyAssistant Workstation Configuration .35Step 1 – Welcome Screen . 35Step 2 – Product Activation . 36Step 3 – Entering Sage 300 CRE Data Folder Information . 37Step 4 – User Profile . 38Chapter 5 – Additional Settings .39Antivirus Exceptions . 39MyAssistant Drive Mapper Tool . 39Chapter 6 – Installing on a Terminal Server .43What is Involved. 43Before Installing . 43Installing the MyAssistant Server. 43Activating the MyAssistant Workstation . 43Conclusion .43Installation GuidePage 2
IntroductionConventions Used in this DocumentThis document uses the following conventions: The names of screens, windows, fields, and other features displayed by the software are shownin bold type.Information you enter into the software is in bold type, as in the following example: EnterMiscellaneous in the Amount Type box.Names of keys are shown in capitals; for example, ENTER, TAB. A plus sign ( ) between two keynames indicates that you should press both keys at the same time; for example, SHIFT TAB.The names of buttons you can click with your mouse are enclosed in bold type; for example, [OK]and [Post].TIP: Helpful information to make your experience better.NOTE: This symbol draws your attention to information of particular interest such as informationnot included in steps.CAUTION: This symbol draws your attention to information that is important because it can helpyou avoid a costly or time-consuming error.IMPORTANT: This symbol draws your attention to information that is of critical importance.Installation GuidePage 3
IntroductionMyAssistant Installation GuideThis document steps through installing and configuring Sage 300 CRE MyAssistant 17.1. This processconsists of the following steps:1. Installing the MyAssistant Server software on your Sage 300 CRE Server.2. Configuring the MyAssistant Server by completing the MyAssistant Configuration Wizard.3. (Optional): Installing the MyAssistant Drive Mapper tool. Refer to Chapter 5 to determine if you needto install this tool.4. Installing MyAssistant on the desktop computers or Terminal/Citrix Servers where MyAssistant will beused.5. Activating and configuring the MyAssistant software for each Windows user that will use MyAssistant.Installing and configuring the MyAssistant server should take approximately 40 minutes. Installing eachMyAssistant workstation should take approximately 10 minutes.CAUTION: If you are upgrading from a previous version of MyAssistant, please refer to theMyAssistant Upgrade Guide for upgrade instructions. Please contact Sage Support if you need a copy ofthe Sage 300 MyAssistant Upgrade Guide.Installation GuidePage 4
IntroductionBefore You Install1. Identify the computer where the MyAssistant Server will be installed. It’s recommended that theMyAssistant Server is installed on your Sage 300 CRE server. If not an option, the MyAssistantServer can be installed on another server with a compatible version of Sage 300 CRE installed.2. The computer where the MyAssistant Server is installed must meet the minimum Sage 300 CREMyAssistant Hardware & Software requirements and must be left on 24/7.3. Identify a Sage 300 CRE User and password that MyAssistant will use to access Sage 300 CRE data.This User should have sufficient security privileges to access the Sage 300 CRE data that you wantMyAssistant to monitor.IMPORTANT: Confirm that the password for this Sage 300 CRE User is set to never expire.4. Select the Email account/address that MyAssistant will use to send Notification email messages. Youwill need the name or IP address for the outgoing mail server, as well as the username and passwordused to log into the email account. See Chapter 2, Step 6 for instructions.5. Identify the computers (desktops or Citrix/Terminal servers) where the MyAssistant Workstation(s) willbe installed. MyAssistant Workstations need to be installed for all users who will set up MyAssistantTasks, view Notifications from the MyAssistant Live Tile, run MyAssistant Tasks and/or work with theirNotifications in the Sage Desktop.6. If your network is monitored by a proxy server, you will need to provide a proxy server user andpassword to activate MyAssistant.NOTE: MyAssistant will need to be activated for each Windows user that will use the software. Thisapplies to the use of MyAssistant on standalone workstations and Citrix or Terminal servers. TheMyAssistant Product Key determines the features available to each user: The MyAssistant Server product key is for activating the MyAssistant Server. The MyAssistant Designer product key provides access to setup features such as creatingand scheduling MyAssistant Tasks and defining security. This key provides all of thefunctionality of the MyAssistant application. The MyAssistant product key allows users to run Tasks and send emails via theMyAssistant application, as well as view and work with Notifications using the Sage Desktopand MyAssistant Live Tile.7. Verify you can start the Sage 300 CRE software on each computer, including the server where theMyAssistant Server will be installed.8. If you are using the Sage 300 CRE Service Management application, open Service Management andrun a report to ensure that an ODBC connection to the SM database has been established.9. Ensure the latest Microsoft Windows and Microsoft Office updates have been installed, including onthe server. We recommend installing all High Priority updates at a minimum.TIP: Restart the server where the MyAssistant Server will be installed prior to beginning. This willcomplete any Windows or other software updates where a restart is required to complete.Installation GuidePage 5
Introduction10. Confirm that Windows User Access Control (UAC) is turned off on ALL machines where MyAssistantwill be installed. User Account Control settings can be found by going to Control Panel UserAccounts User Accounts Change User Account Control settings. If the MyAssistant Server is going to be installed on a Windows 2008 R2 server or later, UACwill need to be deactivated in the registry at the following path: HKEY LOCAL Policies\System Double click on “EnableLUA” and change the value to “0”, then click “OK”UAC needs to remain off on any machine where the MyAssistant Server is installed. Thisincludes when the MyAssistant Server is installed on the Terminal/Citrix server.IMPORTANT: Turn off any antivirus and firewall software on server where the MyAssistant server willbe installed. That software can be turned on again after the MyAssistant Server installation and configurationhave both completed, but exceptions will need to be added (see Chapter 5 for more details).11. Sage 300 CRE MyAssistant installs the following software: Microsoft SQL Server 2012 Express (On the Server Only)Sage 300 CRE MyAssistant softwareRemoving any of the above will disable the Sage 300 CRE MyAssistant software.IMPORTANT: Confirm that the Windows users installing and configuring have access to thefollowing locations: On the MyAssistant Server: Access to Program Files, Program Data, and can write to theLocal Machine hive of the Windows Registry. On a MyAssistant Workstation: Access to Program Files, Program Data, and can write to theCurrent User hive of the Windows Registry.Installation GuidePage 6
IntroductionHardware and Software CompatibilityMinimum Hardware RequirementsThe following are the minimum hardware requirements for Sage 300 CRE MyAssistant.MyAssistant Workstation Installation 2 GB of available memory 1 GB of available disk space Video card capable of 1024 x 768 resolutionMyAssistant Server Installation 4 GB of available memory 5 GB of available disk space Video card capable of 1024 x 768 resolutionSupported SoftwareSage 300 CRE MyAssistant 17.1 must be installed on a computer running one of the following operatingsystems: Windows 7 (32 or 64 bit)Windows Server 2008 R2 (32 or 64 bit)Windows Server 2012Windows Server 2012 R2Windows Server 2016Windows 8.1 (32 or 64 bit)Windows 10 (32 or 64 bit)If possible, install the MyAssistant Server software on your Sage 300 CRE server. If not possible, theMyAssistant server software can be installed on another machine running one of the Windows Serveroperating systems listed above.MyAssistant must be installed on a computer with a constant connection to the Internet for access to theMyAssistant Activation server.MyAssistant version 17.1 is compatible with Sage 300 Construction and Real Estate v17.1.Sage 300 CRE Security must be enabled to send reports listed on a Report menu in a supported Sage300 CRE application. This includes reports designed with either the Sage 300 CRE Report Designer orCrystal Reports applications.Email Server CompatibilityMyAssistant is compatible with most SMTP compatible email servers. MyAssistant has been tested withMicrosoft Exchange and Gmail.Installation GuidePage 7
IntroductionSupport and TrainingTelephone SupportWhen you would like to speak to a customer support analyst directly, call us at 800-551-8307. Telephonesupport is available Monday through Friday from 6 a.m. to 5 p.m. Pacific Time with the followingexceptions: Every Thursday from 2 p.m. to 3 p.m. Pacific time (closed for customer support staff meetings) Standard United States holidays Quarterly company meetingsSage Customer PortalYou may log on to the Sage Customer Portal al/anonymous/login.The portal provides access to the following services: Knowledgebase: Find answers to your questions, access downloads, and subscribe to yourfavorite articles. This service is available online 24/7. Live Chat: Chat online with a customer support analyst, a great option for quick questions. Chathours are Monday through Friday from 6 a.m. to 3 p.m. Pacific Time, with the same exceptions astelephone support. Online Support Request: If you have a question or an issue that is not urgent, you can submit anonline support ticket. A customer support analyst will contact you during regular telephonesupport hours.TrainingSage UniversitySage University offers both recorded and live training sessions. Visit SageU.com for currently availableand upcoming classes.How to access MyAssistant training options in Sage University:1. Enter www.SageU.com in your web address bar.2. Click [Customer Training] and select your Sage 300 Product from the list.3. In the page that opens, click [Product Training] on the left side of the screen.4. Click [MyAssistant] in the list that opened.5. Select either [Realtime Learning] or [Replay Leaning] and review the available options in each.How to access Complimentary MyAssistant Training in Sage University:1. Enter www.SageU.com in your web address bar.2. Click [Customer Training] and select your Sage 300 Product from the list.3. Click [Complimentary Training] on the left side of the screen.4. Review the list of complimentary classes for a MyAssistant option.MyAssistant YouTube ChannelThe MyAssistant YouTube channel offers a variety of MyAssistant training videos. Subscribe to theMyAssistant YouTube channel to be notified when new videos are added.How to access the MyAssistant YouTube channel:1. Enter www.YouTube.com/MyAssistantTraining into a web browser.2. The channel will open with all available videos listed.3. Click on a video to watch.Local Business PartnerContact your local Business Partner to learn what types of MyAssistant training they can provide.Installation GuidePage 8
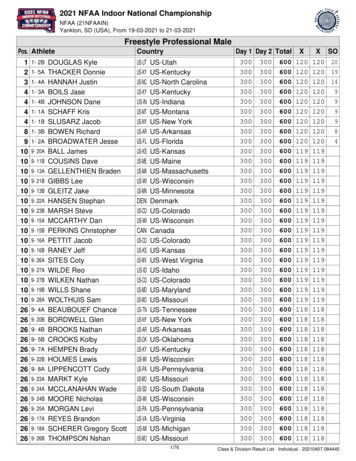
Server InstallationChapter 1 – Installing MyAssistant ServerPerform the following to initiate the MyAssistant Server installation:1. Log on to your future MyAssistant Server with a Windows user that has Administrator permissions.2. Confirm this operating environment (hardware and software) meets the Sage 300 CREMyAssistant hardware and software requirements, which are outlined in the Before You Installsection of this document.3. Confirm that you have closed all applications and disabled any User Access Control (UAC), antivirus or Firewall software that may be running.4. Confirm that all system software updates/installations have been completed by restarting theserver prior to installing MyAssistant. After restarting, log back into the server as a Windows userwith Administrator permissions.5. Using the link provided by Sage Software, download the MyAssistant installation files and savethe .ZIP file to a folder on your machine. Consider saving the .ZIP file to a shared folder so it isaccessible from any workstations where MyAssistant will be installed.6. Perform the following to initiate the MyAssistant Server Installation:a) Open the location of the downloaded MyAssistant Installation files.b) Unzip the files to the same location as the .ZIP file (either a local or shared folder).c) Open the folder of unzipped MyAssistant installation files and double click autorun.hta7. The Sage 300 CRE MyAssistant Installation hub will open.Click [Install Server] to initiate the MyAssistant Server installation.Installation GuidePage 9
Server InstallationStep 1 – MyAssistant Server InstallationThe MyAssistant Installation Wizard opens after selecting the type of install.Click [Next] to continue.Installation GuidePage 10
Server InstallationStep 2 – MyAssistant License AgreementYou must accept the License Agreement below to use the Sage 300 CRE MyAssistant software. A completecopy of the Innovative Software Design License Agreement is provided with the MyAssistant installation files.If you agree to the terms of the License Agreement, check the I accept the terms in the license agreementcheckbox and click [Next] to continue.Installation GuidePage 11
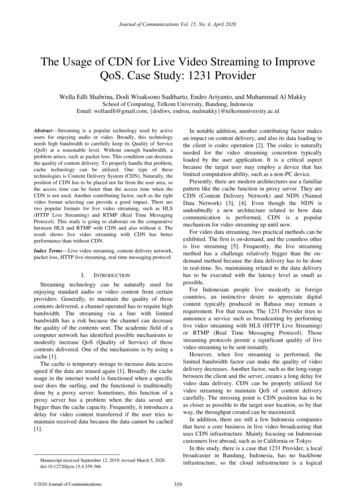
Server InstallationStep 3 – Prerequisites for MyAssistant ServerThis window is only displayed if any MyAssistant prerequisites are missing. Green check marks indicateprerequisites that are already installed, while the blue circle indicates those that are missing.NOTE: Only check the “Do not install SQL Server Express” box if you have separately purchased,installed and will be using a full version of the Microsoft SQL Server database. Do not check this box ifyou are unsure if you have a full version of Microsoft SQL Server installed. By checking this box you aretaking full responsibility for the installation, setup, and maintenance of the SQL Server instance used withMyAssistant.Given the system resource requirements of Microsoft SQL Server Express, installing more than two SQLServer Express instances on the same machine will likely result in performance issues. To prevent this,you can install the MyAssistant Server software on another server if it meets the hardware and softwarerequirements specified in the “Before You Begin” section of this document.Click [Next] to begin the install of the necessary prerequisite software.IMPORTANT: The SQL Server install can take up to 20 minutes. Please be patient, and do notcancel the SQL install.Installation GuidePage 12
Server InstallationStep 4 – MyAssistant SoftwareIn this step you determine where the MyAssistant program files will be installed on your server.Accept the default location or use the [Browse] button to specify a different location.Click [Next] to install the MyAssistant software.Installation GuidePage 13
Server InstallationStep 5 – You Have Completed Installing the MyAssistant ServerCongratulations, you have completed installing MyAssistant Server software.Click [Finish] to close the wizard.NOTE: You must complete the Configuration Manager on the server before installing MyAssistanton any Workstations.Installation GuidePage 14
Server InstallationStart the MyAssistant Configuration ManagerAfter clicking Finish, you will be prompted to start the MyAssistant Configuration Manager.Click [Yes]. Continue to Chapter 2 to walk through configuring the MyAssistant Server.If you do not configure your MyAssistant Server at this time, you can do it later by running the MyAssistantConfiguration Manager. This can be opened with the icon installed on your desktop or by going to Start AllPrograms MyAssistant MyAssistant Configuration Manager.Installation GuidePage 15
Additional SettingsChapter 2 – MyAssistant Server ConfigurationThis chapter walks through configuring the MyAssistant Server software. This process must be done beforeinstalling MyAssistant on any Workstations.Read this section carefullyMyAssistant Server Configuration steps:1. Activate the software.2. Select a list of prebuilt Tasks (Construction or Real Estate) to create with your MyAssistant database.3. Enter the Sage 300 CRE user name and password that MyAssistant will use to access Sage 300CRE data, and specify the Sage 300 CRE data folders MyAssistant will monitor.4. Configure server options, including preferences on daily email summaries, error notifications andservice settings for running Tasks and sending emails with Notifications.NOTE: Configuring the MyAssistant Server will take approximately 10 minutes.Considerations before you begin:1. If you use Service Management in the Sage 300 Construction and Real Estate software, open themodule and run a report. This will verify your connection to the ODBC driver.2. Confirm that the password associated with the Sage 300 CRE user that MyAssistant will use toaccess the Sage 300 CRE database does not expire.3. Any of the configuration settings except the prebuilt Tasks list can be changed after initial setup.Installation GuidePage 16
Additional SettingsStep 1 – WelcomeIf the MyAssistant Configuration Wizard doesn’t start, it can be opened using the desktop icon or by followingthis path: Start All Programs MyAssistant MyAssistant Configuration Manager.Check the box next to Show Advanced Options if: You are using a Web Proxy Server. You are using a full version of the Microsoft SQL Server database. You will define the Microsoft SQL Server credentials that will be used access MyAssistant data.CAUTION: SQL Server credentials should only be changed by someone with in-depth knowledgeof SQL Server. Changing the credentials to something other than the default could break the connectionto the MyAssistant database.Installation GuidePage 17
Additional SettingsStep 2 – Product ActivationIn this step you will activate the MyAssistant Server, as well as enter any Web Proxy Settings.To activate the software, enter a valid customer number and server product key, both of which were providedwith the MyAssistant software. If you do not have this information, please contact Sage Support. Customer number – Enter your Sage customer number. Product Key – Enter your Server product key.NOTE: The Web Proxy Server checkbox will only appear if you selected Show Advanced Options inthe Welcome step (Step 1).If you use a Web Proxy Server, check the box displayed under the Server Product Key field andprovide the requested information.After the MyAssistant Server has been activated, click [Next] to continue.Installation GuidePage 18
Additional SettingsStep 3 – Database ConnectionNOTE: This step will only be available if you click [Show Advanced Options] in the Welcomestep.This step gives you access to the server name, SQL Server credentials, and SQL Instance and PortNumber MyAssistant is using to connect to the Database.CAUTION: Making changes in this step can break the connection to the MyAssistant database.These fields should only be changed by someone with in-depth knowledge of SQL Server.Click [Next] to continue.Installation GuidePage 19
Additional SettingsStep 4 – Create the MyAssistant DatabaseSelect the type of prebuilt MyAssistant Tasks to install. This selection is permanent and cannot bechanged for the database being created.Once a set of prebuilt Tasks is selected, click [Next] to create the database.NOTE: See the “Prebuilt Task List” documents in the MyAssistant install files for a list of theConstruction and Real Estate prebuilt Tasks. Use these lists to determine which set of prebuilt Tasks youwant to install.Installation GuidePage 20
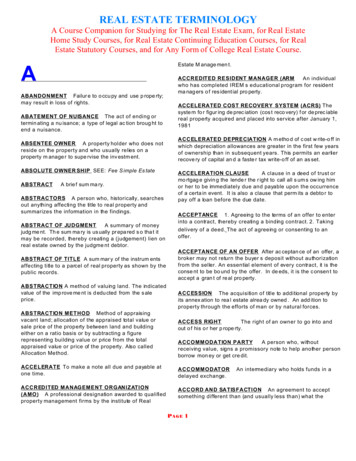
Additional SettingsStep 5 – Sage 300 CRE Data FoldersThis step is used to specify the Sage 300 CRE data folder(s) that MyAssistant will monitor. Multiple Sage 300CRE data folders can be entered.Sage 300 CRE User – Enter the Sage 300 CRE user name MyAssistant will use to access the Sage 300CRE database when Tasks are run.IMPORTANT: Using a Sage 300 CRE user name with a password that does not expire is highlyrecommended. Also confirm the Sage 300 CRE user name entered has access and privileges to all Sagerecords you want to monitor in MyAssistant.Sage 300 CRE password – Enter the password associated with the Sage user entered.Specify the Sage 300 CRE Data Folder(s) – Click in the open field below Sage 300 Data Folder Location.Click [ ] to open a dialog listing all available Sage 300 Data folders and their file paths. Select the data folderyou want and click [OK]. Repeat in the next row down to add another data folder, as often as desired.MyAssistant will automatically create an ODBC data connection (Windows DSN) for each Sage 300 CRE datafolder specified.Installation GuidePage 21
Additional SettingsIMPORTANT: If the MyAssistant Server is not on the same computer as the Sage 300 CRE Server, tryto select a data folder with a local drive or UNC path. If you must use a mapped drive, the MyAssistant DriveMapper will need to be set up. Please see Chapter 5 for more information on the MyAssistant Drive Mapper.Click [Next] to continue.Import Sage Database CustomizationsIf you select one data folder, MyAssistant automatically imports the Sage Database Customizations for thatfolder when you click [Next]. If more than one folder is selected, clicking [Next] opens a window asking you tospecify which data folder’s database customizations to import. Importing database customizations can be runas often as necessary, and accessed any time after the initial installation via the MyAssistant ConfigurationManager. Please note only one folder’s Sage database customizations can be in the MyAssistant database ata given time.The connections to the Sage 300 CRE data folders will be tested when you click [Next].NOTE: When you create a custom field in Sage 300 CRE you must import Sage databasecustomizations for My
MyAssistant version 17.1 is compatible with Sage 300 Construction and Real Estate v17.1. Sage 300 CRE Security must be enabled to send reports listed on a Report menu in a supported Sage 300 CRE application. This includes reports designed with either the Sage 300 CRE Report Designer or Crystal Reports applications. Email Server Compatibility