Transcription
Catalog No.: L40001 / L40002Document No.: L44001Revision Date: November 07, 2014SW Version: 1.4.41
IMPORTANTThe LUNA-II Automated Cell Counter is a Laboratory Electrical Instrumentfor Scientific Research Use Only, BUT NOT A MEDICAL or THERAPEUTIC orIN VITRO DIAGNOTICS DEVICE.2
Table of ContentsSafety Information --------------------------------------5General Guidelines ------------------------------------7Environment Conditions ------------------------------8Chapter 1 – Introduction --------------------91.1 Product Overview ------------------------------91.2 Key Features ------------------------------------101.3 Product Contents -------------------------------111.4 Product Specifications ------------------------121.5 Product Description ----------------------------13Chapter 2 – Setting up ------------------------ 152.1 Installation ----------------------------------------152.2 Start-Up Screen ---------------------------------172.3 Settings -------------------------------------------182.4 Calibrating the Touchscreen (Calibrate Touchscreen) -----------------------------------202.5 Changing Options for Cell Counting (Counting Options) -------------------------------222.6 Setting the Date and Time -------------------252.7 Calibrating LUNA-II (Calibrate) ----------262.8 Updating the Software (Update Software) 0Chapter 3 – Protocol Setting -------------- 313.1 Parameters in the Protocol -------------------313.2 Setting the Protocols --------------------------333.3 Selection of Protocol ---------------------------37Chapter 4 – Counting Cells ----------------394.1 Preparing the Instrument ---------------------394.2 Sample Preparation ----------------------------404.3 Loading Samples into the Luna Cell Counting Slide ----------------------------------404.4 Counting Cells -----------------------------------414.5 After Counting: Image View ------------------444.6 After Counting: Histogram & Gating -------464.7 After Counting: Saving and Printing the Results ------------------------------------------494.8 After Counting: Calculation for Subsequent Experiments ------------------------------523
Chapter 5 – Focusing Option ------------- 535.1 Autofocusing -------------------------------------535.2 Manual Focusing -------------------------------54Chapter 6 – Review the Previous Results r 7 – Maintenance and Troubleshooting ---------------------------------587.1 Turn On/Off LUNA-II ------------------------587.2 Cleaning ------------------------------------------587.3 Calibrating the Touchscreen -----------------597.4 Calibrating LUNA-II -------------------------597.5 Updating the Software ------------------------597.6 Troubleshooting ---------------------------------60Chapter 8 - Ordering Information ------- 61Chapter 9 - Purchaser Notification ---- 629.1 Limited Use Label License -------------------629.2 Instrument Warranty ---------------------------64Contact Information ---------------------------- 654
Safety InformationFor best results with the LUNA-II Automated Cell Counter, follow the instructions below in additionto the general precautions for using electrical instruments.1. Be careful to avoid electric shock while operating the instrument. Do not touch it and othercomponents with wet hands. Do not place it in a humid environment such as an incubator. Foroperating environment, see page 9.2. Trypan blue stain is known as a hazardous material. While handling the solution, always wearproper personal protective equipment (PPE) to avoid exposure.3. Before use, make sure that the input voltage is compatible with the instrument’s power supplyvoltage.4. For optimal operation, place the instrument on a flat surface and avoid any vibration.5. Turn on the instrument only after connecting both ends of its power cord to the wall outlet as wellas the instrument. Always turn off the instrument before disconnecting the power cord and/ormoving the instrument.6. Ensure that the power cord is firmly plugged into the power inlet, the wall outlet and AC adapter.7. When the instrument is operating for a long time, its temperature can become too high. Pleasebe careful that the instrument’s temperature does not become too high during long andcontinuous operation times. When operating, leave enough space around the instrument so thereis enough room for air circulation and cooling.8. Do not disassemble the instrument in any event. If the instrument is out of order or dropped orbroken, please contact a service person. Disassembling the instrument invalidates its warranty.9. Use only authorized components (adaptor, power cord, and USB drive).10. If the instrument emits smoke, disconnect the power cord immediately from the wall outlet andcontact a service person.11. Used counting slides must be disposed as biohazard wastes.5
Symbols used in this User Manual The WEEE (Waste Electrical and Electronic Equipment) symbol indicates that usersof this instrument have the responsibility of returning and disposing of WEEE in anecologically friendly manner. Follow waste ordinances of your region for properdisposal provisions.The CE mark indicates that this instrument conforms to all applicable EuropeanCommunity provisions for which this marking is required. Users must be aware ofand follow the conditions described in this manual for operating the instrument. Theprotection provided by the instrument may be impaired if the instrument is used ina manner not specified by this manual.Protective earth (Ground)6
General Guidelines for Using the LUNA-II Automated CellCounterIn order to achieve the best results with the LUNA-II Automated Cell Counter, follow the instructionsbelow carefully.1.The instrument must be operated in compliance with the operating environment described onpage 9. In particular, the temperature and humidity conditions are important.2.Samples must be handled in an appropriate way, depending on user’s requirements.3.Hold the Luna Cell Counting Slide by the edges to avoid touching its optical surface. Makesure that no damage or contamination occurs on the optical surfaces of the slide.4.After mixing the cell sample with trypan blue stain, perform cell counting as soon as possible,within 3 minutes for accurate cell viability measurement. If needed, count your sample at least 2times (duplicate readings) and take an average.5.Since the LUNA-II Automated Cell Counter is calibrated before shipping, you do not need tore-calibrate before use. However, if re-calibration is needed, please refer to Section 5.3Calibrating the Counter.6.Do not touch trypan blue solution with bare hands as it is a hazardous chemical. After using thecounting slides, dispose of it as hazardous wastes. Do not reuse the slides.7
Environment ConditionsOperating Power100 ‒ 240 VAC, 1.2 AFrequency50/60 HzElectrical Input12 VDC, 3.3 AInstallation SiteIndoor use onlyOperating Temperature10 ‒ 35 Maximum Relative Humidity20 ‒ 80%Altitude 2,000 mPollution Degree28
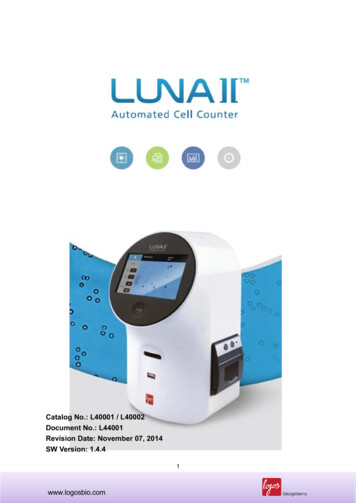
Chapter 1 – Introduction1.1 Product OverviewThe LUNA-II Automated Cell Counter is a small, fast, and affordable image-based cell countingdevice that automatically counts various kinds of cells for research purpose.The LUNA-II Automated Cell Counter helps measure the number, as well as viability of cells (live,dead, total cells) with sophisticated optical components and advanced image analysis algorithms.Due to several innovations introduced by Logos Biosystems, LUNA-II provides a state of the artcell counting device and eliminates the tedium and subjectivity of manual cell counting.The LUNA-II Automated Cell Counter can be used in a very simple procedure. First, mix 10 ml ofthe cell sample with 10 ml of trypan blue stain. Second, load the cell suspension into the Luna CellCounting Slide. Third, insert the slide into the slide port of the instrument and chose [AutofocusedCounting] or adjust the focus by clicking arrows to get an appropriate cell image. Last, press the[Count] button and then the results of cell count and viability will be displayed on the screen. Thecounting image can be downloaded onto a USB drive in TIF format for review and/or record keeping.The LUNA-II Automated Cell Counter provides key data as below:lNumber of live and dead cells/mllNumber of total cells/mllViability percentage (% live cells to total cells)lCell images (showing live cells as green circles and dead cells as red circles)lHistograms of cell size distributionsThe Luna Cell Counting Slide is disposable and specifically designed for the LUNA-II AutomatedCell Counter. Each counting slide has 2 chambers, labeled as A and B, respectively, so that one slidecan be used for the same sample reading in duplicate or for 2 different samples if preferred.9
1.2 Key FeaturesKey featuresDescriptionSmall footprintCompact size with light weight saves space and is suitable foreither laboratory table or biosafety cabinet.Accuracy & precisionWith sophisticated optical components and counting algorithm,LUNA-II provides optimized and reproducible results everytime.AutofocusingAdvanced liquid lens technology provides fast autofocusingwithout mechanical moving. Autofocusing enables reliable cellcounting and excludes human error.Easy-to-operate user interfaceThe intuitive user interface based on a touch screen enablessimple and easy operation.Shortest time-to-resultsResults for most cell lines are available within 15 (withoutautofocusing) or 22 (with autofocusing) seconds after pressingthe [Count].Built-in printer (Optional)An integrated thermal printer provides concise Cell CountReport facilitating record keeping.Innovative counting slideLUNA-II adopts an innovative counting slide made with “TBOND” technology without using hazardous organic solvents.Cell concentration & viability rangeMeasurements can be made for cells at concentrations rangingfrom 5 x 10⁴ to 1 x 10⁷ cells/ml and for cells within the 3 ‒ 60mm diameter range.Easy-to-use calculatorSetup & maintenanceNo external calculator is needed to calculate subsequentdilution.Just plug in and it is ready for use, with virtually no maintenancecosts.Counting image acquisitionThe captured image of cells can be downloaded onto a USBdrive in TIFF (Tag Image File Format) for review or recordkeeping.Individual protocolDifferent protocols (up to 300 protocols) can be saved withpersonalized parameters.DocumentationLUNA-II provides a PDF (Portable Document Format) reportwhich includes File name, Date, Cell count results, Cell images,and histograms.10
1.3 Product ContentsThe product package of the LUNA-II Automated Cell Counter contains the following components.ComponentQuantityLUNA-II Automated Cell Counter1(with or without printer)Power cord (including an adapter)1Luna Cell Counting Slides1 box (50 slides for 100 counts)Trypan Blue Stain (0.4 %)2 x 1 mlLuna USB drive1After receiving the product package, please immediately unpack it and check the components listedabove to ensure that all parts are included and no damage has been occurred during shipping. Thewarranty does not cover damage that may occur during shipping and handling. Any damage claimsmust be filed with the carrier.Note: The LUNA-II Automated Cell Counter is only for research purpose, not for human or animaltherapeutic or diagnostic use.11
1.4 Product Specifications1.4.1. LUNA-II Automated Cell Counter specificationsInstrument TypeBenchtop cell counterDimensions (WxDxH)16 x 18 x 28 cm (6.3 x 7.0 x 11.0 inch)Weight1.6 kg (3.5 lb) without the external power adaptorCell Concentration Range5 x 104 ‒ 1 x 10⁷ cells/mlCell Diameter Range3 ‒ 60 mm (optimal 8-30 mm)Cell Viability Range0 ‒ 100%Image Resolution5 mega pixels (5 MP)Image TypeTIF format (Optimized for LUNA-II only)SoftwareLUNA-II software (www.logosbio.com)DocumentationPDF reportProcessing TimeNominal time for cell counting is less than 10 (withoutautofocusing) or 15 (with autofocusing) seconds at 1 x 10⁶cell/ml concentration.(Processing time may vary by cell type and concentration)1.4.2 Luna Cell Counting Slide specificationsMaterialPolystyreneDimensions (WxDxH)25 x 75x 2.4 mmChamber Depth100 mmChamber Volume10 mlNote: One Luna USB Drive (4 Gigabytes) and 0.4% Trypan Blue Stain solution (2 x 1 ml) areincluded in the starter package.12
1.5 Product Description1.5.1 Front view of the LUNA-II Automated Cell CounterThe front view of the LUNA-II Automated Cell Counter shows various parts as shown below.·Wide touchscreen located in the upper front of the instruments contains buttons for all functionsneeded to operate the instrument and displays data acquired.·Power button is used to turn on the instrument.·Counting slide port is used to insert the Luna Cell Counting Slide containing sample to analyze.·The front USB port provides easy-to-access data retrieving to transfer.1.5.2 Rear view of the LUNA-II Automated Cell CounterThe rear view of the LUNA-II Automated Cell Counter shows two additional USB ports and a powerinlet to connect the instrument to an electrical outlet with the power cord and plug which are providedin the product package. Be sure to check the electrical outlet configuration in your country.13
1.5.3 Right side view of the LUNA-II Automated Cell CounterThe right side view of the LUNA-II Automated Cell Counter shows a built-in printer (L40001 modelonly) which allows rapid printing the cell counting results.1.5.5 Luna Cell Counting SlideThe Luna Cell Counting Slide is a plastic disposable cell counting slide consists of 2 chambers,labeled as A or B, that can be used for the same sample as duplicate or for 2 different samples. Thedepth of the counting chamber is 100 mm. The volume of cells counted is about 0.5 ml, almost thesame as five (1 mm x 1 mm) squares in a standard hemocytometer.14
Chapter 2 – Setting up2.1 InstallationUpon receiving the product package, unpack it carefully and ensure that every component is includedand no damage has been occurred.Place the LUNA-II Automated Cell Counter on a flat and stable surface.Insert one end of the power cord into the instrument and plug the other end of the power cord into anelectrical outlet after checking the outlet configuration in your local area.Turn on the instrument using the power button located on the front of the instrument. Initializing screenafter company logo will be displayed a few seconds as below.Company logoInitializing screen of the LUNA-II Automated Cell Counter. In the initializingscreen, the current version of LUNA-II OS can be identified in the right lowercorner. Initializing screen will be followed by LOADING sign as below.15
LOADING sign of the LUNA-II Automated Cell Counter.The Start-Up screen will be displayed on the touchscreen as shown below in 2.2.See Section 7.1 for Turn on and Turn off the instrument.16
2.2 Start-Up ScreenThe Start-Up screen will show 5 compartments; Power icon, count, review, protocol, and settings.The Power icon in the Start-Up screen can be used to turn off the instrument. See Section 7.1. forfurther information to turn on/off the instrument.17
2.3 SettingsGenerally, there is no need to change the settings of the instrument since they are preset at the timeof manufacture.If users need to reset the date, time, or other options, users can adjust or change theoptions/parameters in the “Settings” menu described below.Press [settings] located on the right of the Start-Up screen as below.Then, the following Settings screen will be displayed.In the Settings screen, users can see the followings:lHome image: by Pressing Home image, you can go to the Start-Up screen.lCurrent protocol and date in the upper right corner.lDate and values of last calibration.lDate and software version of latest software update.18
The Settings menu allows you to perform the followings:lChange options for cell counting by pressing [Counting Options].lSet the date and/or time by pressing [Date / Time].lRe-calibrate the instrument by pressing [Calibrate].lUpdate the software by pressing [Update Software].lCalibrate the touchscreen by pressing [Calibrate Touchscreen].19
2.4 Calibrating the Touchscreen (Calibrate Touchscreen)This function can be used when the response of touchscreen is abnormal.On the Settings screen, press [Calibrate Touchscreen] as below.Now, users can see the following screen. If users want to calibrate the touchscreen, press [OK]. If not,press [Cancel].20
Now, small cross mark will be appeared in the upper left corner in the grey screen as below.Press the cross mark, then the cross mark will move to the upper right corner as below.Press the cross mark again. The mark will move to lower right corner of screen. Press it again. Thecross mark will further move to lower left corner and center of screen after each touch. After touchthe cross mark in the center, the following sign will be displayed in the center of screen.After a few seconds, the Settings screen will be re-appeared spontaneously.Press the Home image to go to the Start-Up screen.21
2.5 Changing Options for Cell Counting (Counting Options)The LUNA-II Automated Cell Counter provides two options for cell counting: “With Trypan Blue” or“Without Trypan Blue”. This function provides inter-change of these options.OptionWith Trypan Blue*DescriptionThis option can be used for regular bright field counting, when cellsamples are mixed with 0.4% trypan blue stain in a 1:1 ratio. This optioncan generate cell viability data. For cell counting with this option, thedilution factor in the Protocol should be set to value “2”.**Without Trypan BlueWhen samples do not contain trypan blue stain, turn on this option andfollow the directions in the message boxes. For cell counting with thisoption, please make sure that the dilution factor in the Protocolshould be set to value “1”.***The cell counting parameters of LUNA-II are optimized with the use of trypan blue. Low contrast from nouse of trypan blue stain may cause abnormal results.**The “Dilution Factor” in the “Protocol” is not changed automatically. After changing the “Counting Options”,the “Dilution Factor” should be changed manually. Improper use of the Dilution Factor causes incorrectcalculation of cell concentrations.On the Settings screen, press [Counting Options].22
In the Counting Options screen, current option will be marked as blue mark as below.The counting option can be easily changed by pressing un-selected option.If [Without Trypan Blue] is chosen, the following screen will be displayed.23
If [With Trypan Blue] is chosen, the following sign will be displayed.The Counting Option is simply changed by pressing [OK]. Otherwise press [Cancel] to return theprevious option.Press [ ] in the upper left corner to move to the Settings screen.24
2.6 Setting the Date and TimeThe LUNA-II Automated Cell Counter provides current date and time for record keeping. Users maywant to change the date and time, since factory setting is adjusted to the local time of Korean.Once the date and time are set, no additional setting is required for routine laboratory use.On the Settings screen, press [Date / Time] as below.The following screen will be displayed.Press desired field to erase the current number. Put number by pressing numbers on the right paneland press [Apply] to save changes.Press [ ] in the upper left corner to move to the Settings screen.25
2.7 Calibrating LUNA-II (Calibrate)Background calibration is a prerequisite for successful detection of cells. The LUNA-II AutomatedCell Counter provides easy-to-use automatic self-calibration of background.On the Settings screen, press [Calibrate] as below.The following screen will be displayed.For the Calibration Step 1, the counting slide port should be emptied. As directed on the screen,remove the counting slide from the counting slide port of the instrument. Press [Start].26
Following screen will be displayed with increasing red bar over the time.The Calibration Step 1 will take a few seconds. Do not turn off the instrument.During the process, prepare diluted trypan blue solution by mixing 0.4% trypan blue stain with equalvolume of either distilled water, phosphate buffered saline (PBS), or plain medium.Put 10 ml of diluted trypan blue solution into the chamber of new cell counting slide (see Section 4.3).After completion of the Calibration Step 1, following screen will be displayed.Now, place the cell counting slide containing diluted trypan blue solution into the counting slide port.Be sure the chamber containing the trypan blue solution to be placed inside the instrument. Do notturn the cell counting slide upside-down.27
Press [Start] to initiate the Calibration Step 2. Following screen will be displayed with increasing redbar over the time. Do not turn off the instrument.After completing calibration, the instrument will display following sign on the screen.Press [Exit] to move to the Settings screen.28
Now, the date of last calibration is changed (Compare to the Settings screen in page 26).29
2.8 Updating the Software (Update Software)Logos Biosystems provides continuous update of software to maintain optimal performance.The current version of software can be identified either in the Initializing screen (see page 15) or theSettings screen as above.The up-to-date software, consisting of single file, can be downloaded from Logos Biosystems Website(http://www.logosbio.com). This software should be saved into the root directory of the USB drive.Before starting, download the new software into the Luna USB drive and connect the USB drive tothe USB port of the instrument.Press [Update Software] to start.The following sign will be displayed on the touchscreen.Press [Start]. Software update will be proceeded automatically. Do not turn off the instrument duringupdate. After finishing, the current version of software and the date of last update will be changedautomatically.IMPORTANTThe re-calibration must be done after the software update. Please see Section2.7.30
Chapter 3 – Protocol SettingThe LUNA-II Automated Cell Counter provides a basic (DEFAULT) protocol which can be used formost common cell lines. In addition, LUNA-II also provides tools to setup individual protocols. Allthe parameters in the protocol can be modified by users and saved as alternative protocol. Users cansave up to 300 protocols. These functions provide personalized protocol for optimal use.3.1 Parameters in the ProtocolIn the protocol menu, the LUNA-II Automated Cell Counter provides following parametersParameterRangeDEFAULTDilution Factor1 ‒ 1002Noise Reduction0 ‒ 105Roundness0 ‒ 100%60Min. Cell Size3 ‒ 59 µm3Max. Cell Size4 ‒ 60 µm60None, Low, Medium, HighMediumDeclustering LevelDilution Factor: The value for dilution factor in the DEFAULT protocol is preset as 2 for With TrypanBlue. However, users can modify this value according to the dilution of the original sample. TheDilution Factor can be adjusted either by a scale of 1 or a scale of 10 between 2 to 10 and 10-100,respectively. The Dilution Factor is used to automatically calculate the concentration of cells in originalsample from the cell counting result. Adjusting Dilution Factor will be helpful for users handling highdensity cells such as fermented CHO cells. In such cases, serial dilutions and repeated counting willbe needed with appropriate Dilution Factor.Noise Reduction: Noise Reduction means the decrease of the background for counting. With higherNoise Reduction, the instrument dose not detect faint signals of weakly stained objects. With lowerNoise Reduction, the instrument can detect objects with faint signals. Since staining intensity of cellswith trypan blue may vary from cell to cell, adjusting Noise Reduction will be helpful for optimaldetection of specific type of cells.Roundness: Roundness refers to the roundness of the objects in the image. Since the shape of cellsmay vary and not complete sphere, adjusting Roundness enables optimal detection of cells. Theinstrument with higher Roundness counts objects with more roundness as cells and excludes objectswith less roundness for counting as cells. LUNA-II with lower Roundness will be suitable to countcells with irregular shape since it detects objects with less roundness as cells.31
Min. & Max. Cell Size: Average size of cells also may vary from cell type to cell type. With thisparameter, users can optimize the instrument to efficiently detect their own cells. The value can beadjusted with 1 µm of increase per step.Declustering Level: Cultured mammalian cells may form clumps during culture or handling.Declustering function of LUNA-II provides efficient detection of clumped cells. LUNA-II provides4 alternates: None, Low, Medium and High. This function is helpful to count sticky cells or rod-shapedspores. High level declustering takes more time to analyze.32
3.2 Setting the ProtocolsIn the Start-Up screen, press [protocol] as below.In the Protocol screen, users can identify all the parameters as below.The selected protocol is marked with white letters and blue back ground in the left panel of screen.The value of each parameter is displayed in the right panel of screen.33
Note: The factory setting DEFAULT protocol cannot be modified.Press other protocol or [New Protocol] and press [Load] as below.Now LUNA-II display following sign on the screen.34
Press [OK].To delete the selected protocol, press [Delete].To edit the selected protocol, press [Edit].After pressing [Edit], the arrows (upward and downward) will be activated and marked as solidarrows as below.Press the arrows to edit the values. Then press [Save as].35
Now users can see the Save as screen as below.Using keyboard in the screen, put the desired name and press [Save] in the lower right corner.Now, new protocol named James is displayed in the Protocol panel of Protocol screen.36
3.3 Selection of ProtocolTo change protocol to be used, press the protocol button in the Set-Up screen.Select desired protocol by pressing the protocol name and press [Load] to apply selected protocolto use.37
LUNA-II will display following sign on the screen.Now the instrument is ready to count cells with selected protocol.IMPORTANTSelecting the protocol name does not mean changing protocol to be used. Touse selected protocol, users should press [Load].38
Chapter 4 – Counting Cells4.1 Preparing the InstrumentTurn on or activate the LUNA-II Automated Cell Counter (See Section 7.1).Press [count] on the Start-Up screen.LUNA-II will display the Count screen.In the Count screen, users can identify the Staining option and selected protocol in the upper panelof screen. To change the Staining option, see Section 2.5 Changing Options for Cell Counting. Tochange the Protocol, see Section 3.3 Selection of Protocol.Users can also identify the date and time in the upper right corner of screen. To change the dateand time, see Section 2.6 Setting the Date and Time.Now LUNA-II is ready to count.39
4.2 Sample Preparation4.2.1 Materials requiredlCell suspensionlLuna Cell Counting SlideslTrypan Blue Stain 0.4 %lLuna USB drive or equivalent4.2.2 Prepare cell suspension according to standard cell biology procedure. Please avoid clumpingof cells for accurate counting.4.2.3 Mix 10 ml of the cell suspension with 10 ml of Trypan Blue Stain in an appropriate tube by gentlepipetting up and down.4.3 Loading Samples into the Luna Cell Counting SlideHold the edge of the slide and load 10 ‒ 12 ml of the mixed cell sample into the sample loading portof one chamber of the counting slide. Alternatively, the slide can be placed on a clean surface duringsample loading.For easy and accurate loading, tilt the pipette 45 ‒ 60 degrees as shown below.Note: Be careful not to over-load or under-load the sample into the chamber.40
4.4 Counting Cells4.4.1 Insert the sample-loaded slide into the counting slide port of LUNA-II , ensuring that the loadedch
cell counting device and eliminates the tedium and subjectivity of manual cell counting. The LUNA-II Automated Cell Counter can be used in a very simple procedure. First, mix 10 ml of the cell sample with 10 ml of trypan blue stain. Second, load the cell suspension into the Luna Cell Counting Slide.
