Transcription
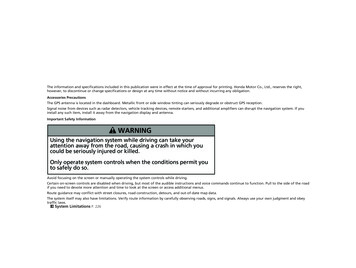
HOSTED VOICEGroup Administrator User GuideTechnology working for you.Welcome to the Hosted Voice Group Administrator User Guide. While Hosted Voice is a fullymanaged service, there are many tasks you can perform yourself at your convenience, such as:managing account settings and calling features for all users, configuring settings for AutoAttendant, Hunt Groups, and Music On Hold. This guide will help you easily manage andcustomize your settings and features so you can get started with your new Hosted Voiceservice.1GETTING STARTEDEasy to get. Easy to use.1. Portal Access2. Managing Users3. Reset Password1-1Portal Access1. https://uc-portal.brighthouse.com/2. Enter your Group Admin User Name and PasswordExample: Portal Log InPage 1 of 21Hosted Voice Group Admin Portal - User Guide
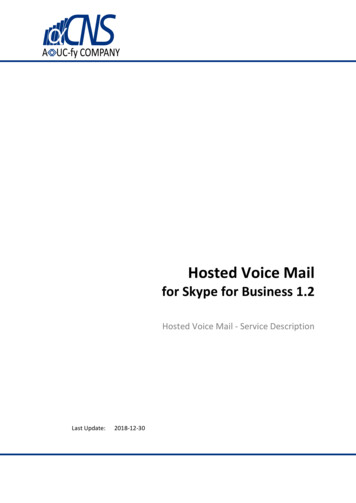
HOSTED VOICEHOSTEDVOICEGROUP ADMIN PORTAL – USER GUIDE1-2 Managing UsersAfter login, you will be routed to the Dashboard. A list of all the users in your Group willdisplay.1. Click Settings to modify a user. The most common services to be configured willdisplay.2. Under the Settings menu, click View All Services for a list of all services that canbe customized.3. From here, you can modify users’ calling features, update their profile information,and change passwords and passcodes. (NOTE: This is the same view an individualuser would see of their features at login.Page 2 of 21Hosted Voice Group Admin Portal - User Guide
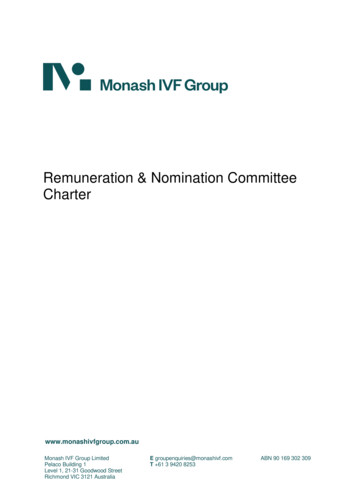
HOSTED VOICEHOSTEDVOICEGROUP ADMIN PORTAL – USER GUIDE1-3 Reset PasswordExample:Dashboard– s an Admin you have the ability to reset a user’s password or voicemail passcode. Thepassword is used to change a user’s User Portal password, or Receptionist Consolepassword. The passcode is used to change a user’s voicemail passcode.1. To change a user’s password or voice portal passcode, go to the user on theDashboard. Click on the user name, and then enter the new password orpasscode.2. You can also go to the user full feature section and make changes from theProfile Tab.a) Click M anage Users. Select the User to modify.b) Click the Profile tab.c) Scroll to Change Password.Page 3 of 21Hosted Voice Group Admin Portal - User Guide
HOSTED VOICEHOSTEDVOICEGROUP ADMIN PORTAL – USER GUIDEExample: Dashboard – UserName/Profile TabPage 4 of 21Hosted Voice Group Admin Portal - User Guide
HOSTED VOICEHOSTEDVOICEGROUP ADMIN PORTAL – USER GUIDE2MANAGING GROUP FEATURESKeeping you connected 24/7/365.1. Holiday Schedules2. Auto Attendant Basic Modifications Greetings Keypad Setup Quick Edits3. Hunt Group Profile Modifying your Profile Distribution Policies No Answer Settings Hunt Group Users Quick Edits4. Admin Login – Call Details5. Music On Hold6. Customer Care and SupportExample: Group Profile TabPage 5 of 21Hosted Voice Group Admin Portal - User Guide
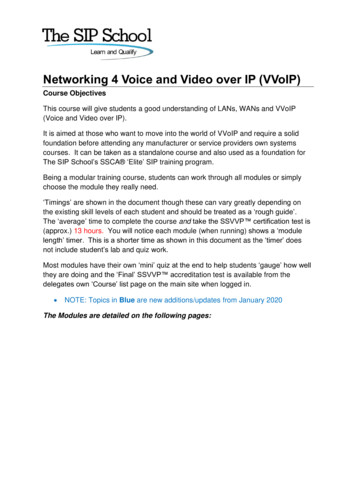
HOSTED VOICEHOSTEDVOICEGROUP ADMIN PORTAL – USER GUIDE2-1HOLIDAY SCHEDULESSimple Setup. Simple Solution.Holiday Schedules are assigned to Auto Attendants and other features that allow for timebased routing. As a managed service, certain Hosted Voice features, such as Time Schedules,can only be edited by a Spectrum Business Administrator. You can initially set up your timeschedules with the following steps:1. Click the Group Profile tab.2. Click Holiday Schedules.3. Click Add Holiday Schedule or select an existing Holiday Schedule and pressedit.4. Enter a name for the Holiday Schedule.5. Enter the holidays to include on the schedule.6. Select reoccurrence, if applicable.7. Click Save.Example: Group Profile Tab /Holiday SchedulePage 6 of 21Hosted Voice Group Admin Portal - User Guide
HOSTED VOICEHOSTEDVOICEGROUP ADMIN PORTAL – USER GUIDE2-2 AUTO ATTENDANTThe right calls to the right destinations.Auto Attendant/Basic ModificationsAuto Attendant is your virtual receptionist greeting your customers and routing calls to variousdestinations including employees within your company, specific groups of employees, voicemail, or other outside numbers.The service includes greeting and menu options for routingcalls both during business hours, after hours, and designated holidays.Example: Group Services Tab / AutoAttendant1. To modify your Auto Attendant, click the Group Service tab.a. Select Auto Attendant and select your Auto Attendant from the drop-downmenu.b. From the Profile tab you can change the name of your Auto Attendant. Forexample, “Main Line Auto Attendant.”2. Be sure the time zone is correct, then select your Business Hours time schedulefrom the drop-down menu. This is the time schedule that tells the Auto Attendantwhen to play your Business Hours Greeting. If you select every day all day, then theBusiness Hours Greeting will be played regardless of the time of day your companyreceives calls.3. You can also assign a holiday schedule. This will route callers to your After HoursGreeting during your pre-configured holiday schedule.Page 7 of 21Hosted Voice Group Admin Portal - User Guide
HOSTED VOICEHOSTEDVOICEGROUP ADMIN PORTAL – USER GUIDEa. Select your Holidays Schedule from the drop-down menu.b. To update the holiday greeting, you’ll need to update the After Hours greetingannouncement through the voice portal or by uploading a customannouncement.NOTE: It is recommended to create your time schedule and holiday schedulesprior to modifying your Auto Attendant options.Auto Attendant/Basic Modifications Cont’d.4. Next, select the scope of dialing options. These can be configured for users that aredialing by extension or name.a. Options include Enterprise, Group and Departm ent.b. To configure the Dial By Extension options, select either Enterprise orGroup.c. If Enterprise is selected, callers that reach the Auto Attendant will have theability to dial the extension for any user within your company, regardless of sitelocation.d. If Group is selected, callers that reach the Auto Attendant have the ability todial the extension of anyone within your company location.e. To configure Dial By Nam e options select either Enterprise or Group.5. If Enterprise is selected, callers that reach the Auto Attendant will have the ability todial by name for anyone within your company, regardless of site location.6. If Group is selected, callers that reach the Auto Attendant have the ability to dial byname for anyone within your company location.7. To select the order in which the caller will enter the name of the party they wish toreach, configure the Nam e Dialing Entries option. If LastNam e FirstNam e isselected, the Auto Attendant prompts the caller to enter the last name before the firstname.Page 8 of 21Hosted Voice Group Admin Portal - User Guide
HOSTED VOICEHOSTEDVOICEGROUP ADMIN PORTAL – USER GUIDENote: If LastNam e FirstNam e and FirstNam e LastNam e is selected, thecaller has the option of entering either the last name or the first name, firstAuto Attendant/GreetingsFrom the profile page of Auto Attendant you can set up your greetings for both BusinessHours and After Hours. You have two options: record a personal greeting or upload a prerecorded greeting.1. To record and set up your own greeting, click Personal Greeting. Record thisgreeting using the microphone on your computer. Click the m icrophone button,click OK to enable the microphone, then start recording. Save your recordedgreeting on your com puter as a .wav file (example BusinessGreeting.wav).2. To upload a pre-recorded greeting click Choose File and select the file to beuploaded.Page 9 of 21Hosted Voice Group Admin Portal - User Guide
HOSTED VOICEHOSTEDVOICEGROUP ADMIN PORTAL – USER GUIDEExample: Auto Attendant GreetingsAuto Attendant/Keypad SetupYou can customize what action Auto Attendant will take when an incoming caller chooses aparticular number or symbol on the keypad for both Business Hours and After Hours.1. To modify the actions Auto Attendant will take during Business Hours, click theBusiness Hours menu.2. The keypad numbers that can be configured are displayed here. They include numberszero through nine (0-9), star (*), and pound (#).3. To configure a keypad number for the Auto Attendant Business Hours menu, click onthe row of the keypad number.a. Then, enter the Key Description. For example, “Sales.”Page 10 of 21Hosted Voice Group Admin Portal - User Guide
HOSTED VOICEHOSTEDVOICEGROUP ADMIN PORTAL – USER GUIDEAuto Attendant/Keypad Setup Cont’d.b. Then select the Action from the drop-down menu. Options include:i. Transfer with Prom pt: This will route callers to a selected user’sphone number or any extension within the company. A messageprompt will play before the call is sent. If chosen, the message will playthe user’s name as recorded in the voice mailbox.ii. Transfer without Prom pt: This will route callers to a selected user’sphone number or any extension within the company, without a messageprompt.iii. Transfer to Operator: This will redirect callers to a configuredoperator, who will receive all calls that ‘time out’ if the caller does notchoose an option from Auto Attendant.iv. Nam e Dialing: This action allows callers to dial by recipient name,using the letters on the keypad.v. Extension Dialing: This action lets callers dial by recipient extension,using the numbers on the keypad.vi. Repeat M enu: If selected, this action will repeat the greeting andmenu options.vii. Exit M enu: This action allows callers to exit the menu system. This willterminate the call.c. Next, enter the destination to which the call should be transferred.i. NOTE: This doesn’t apply if the dial by name, dial by extension, repeatmenu, or exit menu options are selected.4. If your company requires a different greeting/menu for After Hours click the AfterHours tab and repeat these steps.5. Click Save to save your changes. Once you hit SAVE, the changes go into effectimmediately. There is no UNDO button.6. Remember, if you make any changes to your Auto Attendant, you will need to record anew message to reflect those changes.Page 11 of 21Hosted Voice Group Admin Portal - User Guide
HOSTED VOICEHOSTEDVOICEGROUP ADMIN PORTAL – USER GUIDEExample: Auto Attendant KeypadSetupAuto Attendant/Quick EditsQuick Edits to your dialing menu and greeting can easily be managed from the Dashboard.1. Click the name of the Auto Attendant to change its name.2. Click the Settings button on the Auto Attendant to change the options, and record orupload a new greeting.Page 12 of 21Hosted Voice Group Admin Portal - User Guide
HOSTED VOICEHOSTEDVOICEGROUP ADMIN PORTAL – USER GUIDEExample: Dashboard/Auto AttendantSettingsPage 13 of 21Hosted Voice Group Admin Portal - User Guide
HOSTED VOICEHOSTEDVOICEGROUP ADMIN PORTAL – USER GUIDE2-3 HUNT GROUPSCalling One and Calling All.Hunt Groups/Modifying Your ProfileHunt Groups are used to route callers to groups of users. These users can be in or acrossmultiple locations and users can be assigned to multiple hunt groups.1. To modify a Hunt Group, go to Group Services, then Site Services and selectHunt Group.2. Select your Hunt Group from the drop-down menu.3. Update the Last and First name of the hunt group. This is the information that isdisplayed on a user’s phone when they receive a call from the hunt group.4. Click Call W aiting on agents to allow users to receive a new Hunt Group call whilecurrently on a Hunt Group call.5. Next select the Hunt Group policy option.i. Circularii. Regulariii. Simultaneousiv. Uniformv. WeightedExample: Dashboard/Hunt GroupPage 14 of 21Hosted Voice Group Admin Portal - User Guide
HOSTED VOICEHOSTEDVOICEGROUP ADMIN PORTAL – USER GUIDEHunt Groups/Distribution PoliciesDistribution Policies determine the order a user’s phone will ring in when a call comes in to theHunt Group. The options are: Regular – rings each user in the order they appear on the User List Simultaneous – rings all users at once Circular – notes the last user to answer a call and then rings the next user on the UserList Uniform - rings the user that has been idle the longestHunt Groups/No Answer SettingsN o Answer Settings determine how calls are treated when unanswered. There are twooptions:1. Skip to next agent - you can determine number of ringsNote: If skip to next agent is turned on (Simultaneous doesn't need this setting as allphones will ring regardless) you will need to make sure there is enough time allotted toskip to all agents before the call is forwarded i.e. if there are 3 users in a hunt groupand you want each user to ring 1 time before the call skips to the next agent, you willneed to set the call forward time to 18 seconds(6 seconds a ring).2. Forward call – choose the wait time and the forward-to numberPage 15 of 21Hosted Voice Group Admin Portal - User Guide
HOSTED VOICEHOSTEDVOICEGROUP ADMIN PORTAL – USER GUIDENote: Call forwarding in a hunt group must be tuned on because the call needs toterminate somewhere.Example: Hunt Group Policies/NoAnswer SettingsHunt Groups/Hunt Group UsersThis function allows you to add users or change the order of the Hunt Group.1. To add users, select the user(s) from the Available Users list, then select Add.Page 16 of 21Hosted Voice Group Admin Portal - User Guide
HOSTED VOICEHOSTEDVOICEGROUP ADMIN PORTAL – USER GUIDE2. To change the order of the Hunt Group, select a user then select either M ove Up orM ove Down to rearrange the order.Example: Hunt Group UsersHunt Groups/Quick EditsPage 17 of 21Hosted Voice Group Admin Portal - User Guide
HOSTED VOICEHOSTEDVOICEGROUP ADMIN PORTAL – USER GUIDEUse the Dashboard to make Quick Edits to Group Policy, No Answer Settings, and GroupUsers.1. To access Quick Edits, scroll down to Hunt Groups. Click the Settings button next tothe desired Hunt Group.2. Make the desired edits by following the directions for Group Policy, No Answer Settings,or Group Users outlined in previous sections.Page 18 of 21Hosted Voice Group Admin Portal - User Guide
HOSTED VOICEHOSTEDVOICEGROUP ADMIN PORTAL – USER GUIDE2-4 ADMIN LOGIN - CALL DETAILSEverything you need to know.As the Group Admin, you have the ability to run Call Detail reports on All Users or aSpecific User.To generate a report:1. Click the Call Details Tab2. Select the specific User or All Users3. Sort by date range and call types (Inbound, Missed and / or Outbound)4. Click Create ReportThere are three options for exporting the report:1. Em ail – Enter the recipient’s email address and click Subm it.2. Export report to PDF – Click Subm it to generate the report.3. Export report to CSV – Click Subm it to generate the report.Page 19 of 21Hosted Voice Group Admin Portal - User Guide
HOSTED VOICEHOSTEDVOICEGROUP ADMIN PORTAL – USER GUIDEExample: Call Details Tab2-5 MUSIC ON HOLDWith a professional touchMusic On Hold can be configured for both incoming and internal calls. Only copyright free HoldMusic (available from a variety of easily searchable online sites) should be used. Uploadedmusic should never be copyrighted material.To configure Music On Hold:1. Go to Group Services, click Site Services, then select Music On Hold.2. Select the Group/Departm ent from the drop-down menu.3. Under General Settings select when you want Music On Hold to play.a. During Call HoldPage 20 of 21Hosted Voice Group Admin Portal - User Guide
HOSTED VOICEHOSTEDVOICEGROUP ADMIN PORTAL – USER GUIDEb. During Call Parkc. During Busy Cam p On4. Select your M usic On Hold. Options include:a. System Defined M usicb. External Sourcec. Customd. Select Use Alternate Source for Internal Calls if you prefer a differentMusic On Hold file to play when internal calls are being held, and select theMusic On Hold option (same as above).Example: Music On Hold Settings2-6 CUSTOMER CARE AND SUPPORTCALL: 1.877.424.9246 or 611 from your Spectrum Business phoneVISIT: SpectrumBiz.comPage 21 of 21Hosted Voice Group Admin Portal - User Guide
Hosted Voice Group Admin Portal - User Guide 2-1 HOLIDAY SCHEDULES Simple Setup. Simple Solution. Holiday Schedules are assigned to Auto Attendants and other features that allow for time based routing. As a managed service, certain Hosted Voice features, such as Time Schedules, can only be edited by a Spectrum Business Administrator.