Transcription
ContentsIntroducing Auto-Tune Vocal EQ3Quick Start – License ActivationStep 1: Open Antares CentralStep 2: Activate Your LicenseStep 3: Open Your DAWStep 4: Insert Vocal EQ44444ControlsGlobal ControlsAntares CentralAuto-Tune Pitch MeteringInput TypeLearnPreset SelectionSpectrum AnalyzerUndoRedoSettingsGlobal BypassDry/Wet MixInput GainOutput GainWindow ResizingFilter GraphKeyboard Shortcuts/Key CommandsPresetsSaving PresetsLoading PresetsManaging Presets6666777888889999101112121212
ContentsDynamic EQ eAttackReleaseSide ChainEnableSoloAir EQ BandEnableFrequencyGainTilt EQ BandEnableFrequencyTiltLow Pass Filter / High Pass FilterEnableSoloFrequencyFilter SlopeSettingsAppearancePitch ReferenceReset Window SizeEnable OpenGL DrawingView TooltipsView Help TopicsSave All Settings As 2021212122222323232323232324
Contents3Introducing Auto-Tune Vocal EQAuto-Tune Vocal EQ is the world’s first dynamic equalizer with built-in Auto-Tune PitchTracking technology!Featuring 6 fully customizable dynamic EQ bands, Auto-Tune Vocal EQ helps you isolateand accentuate precise frequencies while suppressing interference and resonance tocarve out the right spaces in your mix.Watch a vocalist’s pitch move across the filter graph for real-time analysis, and lock anEQ band to the vocalist’s pitch to focus on fundamentals.Automatically determine the input type and set the vocal range to jump start yourequalizing process.Find the perfect mix with Auto-Tune Vocal EQ: Clarity Above All.
Contents4Quick Start – License ActivationStep 1: Open Antares CentralAfter installing Auto-Tune Vocal EQ, you’ll find Antares Central in your computer’sapplications folder:MacOS/Applications/Antares Audio TechnologiesWindowsC:\Program Files\Antares Audio TechnologiesOpen Antares Central, then log into your Antares account.Step 2: Activate Your LicenseAfter logging in, click on “Manage Licenses” to view your available licenses. Click“Activate” on your Auto-Tune Unlimited license, and wait until the process completes.Please be patient, as the activation process may take up to 1-2 minutes.Step 3: Open Your DAWNow that your license has been activated, open up your DAW of choice.For the latest DAW Compatibility information, please visit this page on our website.Step 4: Insert Vocal EQAntares plug-in files are installed in the common VST3, AU, and AAX folders on yourcomputer. They should be recognized by your DAW automatically, but please visit thissupport article if you have trouble locating the plug-in.
Contents5Below, you’ll find instructions on how to insert Vocal EQ onto a track in various DAWs:Pro ToolsChoose an empty insert slot on one of your audio tracks, instrument tracks, or buses.Then select Auto-Tune Vocal EQ from the pop-up menu in either the Dynamics or EQcategory.Logic ProChoose an empty insert slot on one of your audio tracks, instrument tracks or buses andselect Auto-Tune Vocal EQ from the pop-up menu. You will find Auto-Tune Vocal EQ inthe Audio Units Antares section (named Auto-Tune Vocal EQ).Ableton LiveIn either Session or Arrangement View, select the track you would like to placeAuto-Tune Vocal EQ on by clicking the track name.At the top left of Ableton's interface, click on the Plug-in Device Browser icon. From theplug-ins list, double-click Auto-Tune Vocal EQ, or drag it onto the track.CubaseChoose an empty insert slot, for example in the Mixer, and select Auto-Tune Vocal EQfrom the menu that appears.Studio OneClick the ' ' button next to the Inserts tab of an audio track, and select 'Auto-Tune VocalEQ' from the drop-down menu.ReaperClick the ‘FX’ button next to the track name of an audio track, and select ‘Auto-TuneVocal EQ’ from the EQ or Dynamics category.Digital PerformerIn the Digital Performer Mixing Board, click an empty insert slot to open the InsertEffects list. Select Auto-Tune Vocal EQ from the list, or use the search bar to locate itquickly.
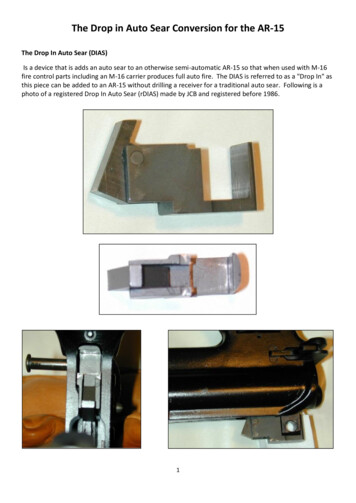
Contents6ControlsGlobal ControlsAntares CentralClick on the Antares logo in the top left corner to open the Antares Central application.Antares Central is a standalone application used for managing Antares licenseactivations. Check out the support article here to learn more.Auto-Tune Pitch MeteringAuto-Tune Pitch Metering uses the Auto-Tune PitchAlgorithm to follow the fundamental frequency of your vocalin real-time.When Auto-Tune Pitch Metering is enabled, a visual cue will be displayed on thekeyboard in the Filter Graph to show you where the fundamental pitch was detected:
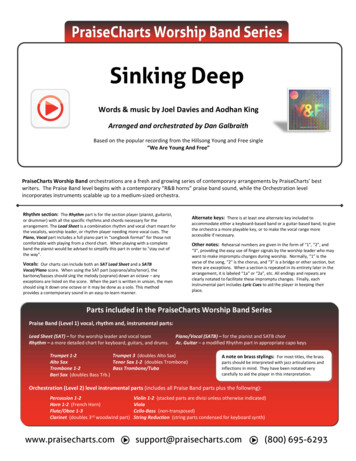
Contents7Input TypeAuto-Tune Vocal EQ offers a selection of processingalgorithms optimized for different pitch ranges of inputaudio.Options include: Soprano, Alto/Tenor, Low Male, and Instrument.For more accurate pitch detection, choose the Input Type that best fits the pitch rangeof your audio.After selecting an Input Type, the frequency range of the Input Type will be shaded blueon the Filter Graph.LearnIf you’re not sure which Input Type is best for your audio, the Learnfunction is here to help!The Learn button utilizes machine learning to listen to your audio for 5 seconds, thensets the most appropriate Input Type and adjusts the High Pass Filter’s frequency to fitthe vocal range.Please note the Learn function will only listen to the audio on the same track that VocalEQ is applied to, and only while audio is playing on your DAW.Preset SelectionAuto-Tune Vocal EQ comes equipped with a collection offactory presets to get you started. Open the drop downmenu or use the left and right buttons to select a preset.See the Presets chapter to learn how to save and manage custom presets.
Contents8Spectrum AnalyzerThe Spectrum Analyzer is shown within the FilterGraph to provide a real-time view of the energywithin the signal before or after being processed: Off: Disable the spectrum analyzer from the Filter Graph. Pre: Display the original audio signal. Will not visually reflect changes made byVocal EQ. Post: Display audio after it has been processed by Vocal EQ.UndoClick on the Undo button to undo up to 99 previous edits.RedoClick the Redo button to restore previously undone edits.SettingsClick the gear icon to open the Settings Menu.Global BypassClick on the Global Bypass button to bypass Auto-Tune Vocal EQ in your DAW.Dry/Wet MixUse the Dry/Wet Mix knob to adjust the balance of processed andunprocessed audio signals.Turn the knob all the way to the left (0%) to output only the “dry”,unprocessed signal. Alternatively, turning the knob all the way to the right(100%) to only output the “wet”, processed signal.
Contents9Input GainUse the Input Gain Meter to adjust the level of your audio before it getsprocessed by Auto-Tune Vocal EQ.Turn the meter down to decrease the volume, or turn it up to increase thevolume.The clipping indicator above the Input Gain Meter will turn red when it detectsthat the audio has clipped. Click on the clipping indicator to reset it.Output GainThe Output Gain Meter will adjust the level of your audio after beingprocessed by Auto-Tune Vocal EQ.Turn the meter down to decrease the volume, or turn it up to increase thevolume.The clipping indicator above the Output Gain Meter will turn red when itdetects that the audio has clipped. Click on the clipping indicator to reset it.Window ResizingYou can resize the Auto-Tune Vocal EQ GUI by clicking and dragging on the bottom rightcorner of the plug-in window. Making the window larger will help you make more preciseadjustments.To reset the window size to default, open the settings, and click ‘Reset Window Size’.
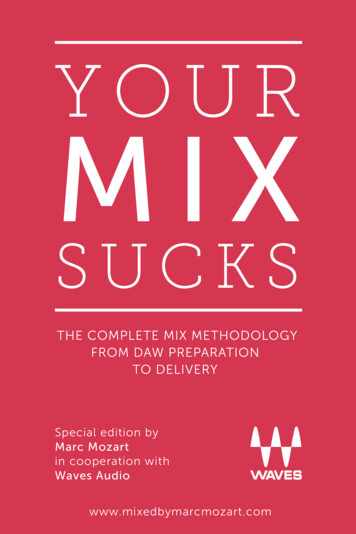
Contents10Filter GraphThe Filter Graph provides a real-time display of your audio as it interacts with Auto-TuneVocal EQ. Use the Spectrum Analyzer controls to select how the energy of the signal isdisplayed.Click and drag the band markers to adjust the corresponding EQ band’s frequency andgain.The piano roll at the top of the Filter Graph helps you identify octave and pitch. Turn onAuto-Tune Pitch Metering to see a visual aid that follows along with the fundamentalpitch of your vocals.The EQ Tabs below the Filter Graph offer another method for revealing a band’scontrols.
Contents11Keyboard Shortcuts/Key CommandsDouble-ClickToggle EQ Band On/OffRight-Click HoldMomentary Solo EQ BandShift-and-DragFrequency LockCommand-and-Drag (MacOS only)Gain LockOption (Alt) ClickReset Gain to 0Control ClickCycle through filter ShapesRight-Click (EQ Tab)Toggle Band On/Off
Contents12PresetsSaving PresetsAfter making your adjustments, you can save the current state ofAuto-Tune Vocal EQ as a preset by opening the preset dropdownmenu, and clicking ‘Save’.Custom presets will be saved to the ‘User’ folder.Loading PresetsTo load a preset, open the preset menu, hover over the variouscategories, and click on the preset you want to open.Factory presets are organized by vocal input type to help youpick a preset tailored to the audio you’re working with.Managing PresetsClick on the thumbs up button to the left of the preset name to‘Favorite’ a preset, and add it to the Favorites folder.By default, all Auto-Tune Vocal EQ presets are saved to these filelocations:MacOS/Users/Shared/Antares/Auto-Tune Vocal s\Auto-Tune Vocal EQ\PresetsTo navigate to these folders quickly, select “Show Preset Folder” in the preset dropdownmenu.
Contents13Dynamic EQ BandsAuto-Tune Vocal EQ features 6 Dynamic EQ Bands which can be modifiedindependently. On the right side of the band control section, you’ll find a collection ofcompression controls to customize the dynamics of each band.Click on the band markers in the Filter Graph or the corresponding EQ tab to reveal thatband’s controls.FrequencyThe Frequency Knob sets the frequency of the selected bandfrom 18 Hz to 21 kHz.You can also adjust the frequency of a band by dragging its bandmarker horizontally within the Filter Graph.Hint: For precise adjustments in the Filter Graph, hold Command to lockthe band gain. (MacOS only)TrackThe Track button locks a band onto the fundamental pitch or a harmonic ofyour vocals. The band will follow along with the fundamental pitch orharmonic in real-time on the Filter Graph.When Track is enabled, the Frequency knob becomes the Harmonic knob.HarmonicThe Harmonic Knob determines the interval (in octaves abovethe fundamental) that a band tracks.
Contents14QQ determines the sharpness (or width) of the selected band, allowing youto attenuate or boost a very narrow or wide range of frequencies withineach EQ band.A higher Q setting results in a sharper (narrower) filter band.ShapeUse the Shape buttons to change the filter shape of the selectedband. Options include: Low Shelf, Peak, and High Shelf.GainUse the Gain control slider to set the gain in dB of the selected bandbetween -18 and 18 dB.You can also adjust the gain of a band within the Filter Graph by draggingthe band marker vertically.Hint: For precise gain adjustments in the Filter Graph, hold Shift to lock the band’sfrequency in place.ThresholdThreshold is used to determine the level at which dynamic processingbegins. When the level of a signal passes above the threshold, it will becompressed.For example, if the threshold level is set to -15 dB, only signal peaks thatgo over that level will be compressed. The rest of the time, nocompression will take place.
Contents15RangeRange determines how much a signal is expanded or compressed afterreaching the threshold.If you set the range to a negative value, the signal will be compressed. Apositive range value will expand the signal instead.AttackSets attack time in milliseconds for the dynamics of the selected band.Attack time determines how quickly processing goes into full effect. Turnthe knob all the way to the left (1.0 ms) for an almost immediate onset.ReleaseSets the release time in milliseconds for the dynamics of the selectedband.Similar to attack time, release time determines how quickly an effectfades away.Side ChainAuto-Tune Vocal EQ can be sidechained either internally orexternally to other audio sources.Please consult your DAW’s manual to learn how to connect a sidechain signal to VocalEQ.
Contents16EnableThe Enable button will turn the band on or off.Hint: double click the band marker in the Filter Graph to turn the band on/off.SoloClick on the Solo button to isolate the band.This will temporarily disable all other bands, making it easier to hear theeffect of the selected band as you make adjustments.Hint: Right-Click Hold the band marker to momentarily solo the band.
Contents17Air EQ BandThe Air Band is similar to a high-frequency shelving filter, but the corner frequencystretches well beyond the audible range. This is helpful for adding sparkle and clarity tovocals and instruments, as well as bringing out other unique harmonic characteristics.EnableTurn on the Air Band using the Enable Button. Alternatively, double click the AirBand Marker (‘A’) in the Filter Graph to toggle it on or off.FrequencyThis Frequency Knob sets the Air Band frequency from 2.5 kHz to40 kHz.Pro TipThe Air Band can be placed from 12khz to 21khz within the Filter Graph, butit can be placed anywhere up to 40 kHz using the Frequency knob.
Contents18GainUse the Gain control to set the gain in dB of the Air Band between -18 and 18 dB.You can also adjust the gain by dragging the Air Band Marker (‘A’)vertically within the Filter Graph.
Contents19Tilt EQ BandThe Tilt EQ Band is akin to very wide high and low shelving filters at frequencies thatresult in a straight line ‘see-saw’ curve. This curve can be used to simultaneously boostone end of the spectrum while cutting the other.EnableTurn on the Tilt Band using the Enable Button. Alternatively, double click theTilt Band Marker (‘X’) in the Filter Graph to toggle it on or off.FrequencyThis Frequency dial sets the frequency of the Tilt Band from 18 Hzto 21 kHz.You can also adjust the Tilt Band’s center frequency by draggingits anchor (‘X’) horizontally across the Filter Graph.
Contents20TiltThe Tilt Knob is what gives the Tilt Band its characteristic‘see-saw’ curve.This parameter can also be adjusted in the Filter Graph bydragging the Tilt Band anchor (‘X’) vertically.
Contents21Low Pass Filter / High Pass FilterThe Low and High Pass Filters are found on opposite ends of the Filter Graph. Low PassFilters eliminate frequencies above the cutoff frequency. High Pass Filters do theopposite – they eliminate frequencies below the cutoff frequency.EnableUse the Enable button to turn the Low and High Pass Filters on/off.Alternatively, double click their EQ Band Markers in the Filter Graph to togglethem on or off.SoloClick on the Solo button to solo the band. This will temporarily disable allother bands, making it easier to hear the effect of the selected band.
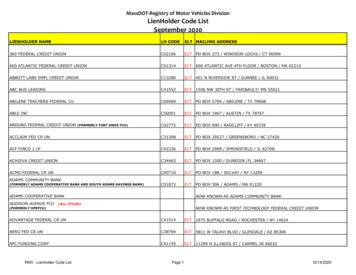
Contents22FrequencyThis Frequency knob sets the cutoff frequencies for the Low andHigh Pass Filters from 18 Hz to 21 kHz.Note: The High Pass Filter frequency and slope will be adjustedautomatically after using the Input Type Learn function.Filter SlopeThe Filter Slope determines the steepness of the Low and High PassFilters from 6 dB/octave to 24 dB/octave.A 6dB/octave slope is a gradual decline, useful for gentle shaping. On theother hand, a 24dB/octave slope provides a more dramatic curve.A side by side comparison is pictured below:
Contents23SettingsThe Settings Menu gives you quick access to the settings of Auto-Tune Vocal EQ.AppearanceUse this setting to change the Appearance of Auto-Tune Vocal EQ. You may select Light,Dark, or have Auto-Tune Vocal EQ follow your system’s theme setting.Pitch ReferenceThis setting pertains to the Learn Function. If a stereo source track is applied to VocalEQ, and is hard panned to the left or right, use this setting to select which channel tolisten to.Reset Window SizeYou can resize the Auto-Tune Vocal EQ GUI by clicking and dragging on the bottom rightcorner of the plug-in window. Use this setting to go back to the default window size.Enable OpenGL DrawingAuto-Tune Vocal EQ uses OpenGL for improved graphics on computers with compatiblegraphics card hardware.To improve performance, OpenGL is disabled by default on Mac. On Windows, OpenGLis enabled by default.OpenGL can be toggled On/Off on either platform in the settings menu.View TooltipsWhen this setting is on, hover your mouse over any of the controls in Auto-Tune VocalEQ for a brief explanation of what the control does.View Help TopicsClick on this setting to open the Auto-Tune Vocal EQ Help Page in your web browser.
Contents24Save All Settings As DefaultToggle this setting on to save current settings as default when opening new instancesof Auto-Tune Vocal EQ.If you want to make a temporary change to the preferences just for this instance,without overwriting your default preferences, untoggle this setting.
At the top left of Ableton's inter face, click on the Plug-in De vice Browser icon. From the plug-ins list, double-click A uto-Tune Vocal EQ, or drag it onto the track. Cu b ase Choose an empty inser t slot, for example in the Mix er, and select A uto-Tune Vocal EQ from the menu that appears. S t u d io O ne