Transcription
Creating a webpage inHTML & CSS from ScratchA Tutorial
As its name suggests, HTML isa Markup Language which means youuse HTML to simply "mark-up" a textdocument with tags that tell a Webbrowser how to structure it todisplay.Hypertext refers to the way in whichWeb pages (HTML documents) arelinked together. Thus, the linkavailable on a webpage is calledHypertext.Hypertext Markup LanguageHTML is written in the form of HTMLelements consisting of markup tags.These markup tags are thefundamental characteristic of HTML.Every markup tag is composed of akeyword, surrounded by anglebrackets, suchas html , head , body , title , p , and so on.
What is HTML?Most of the stuff on the web is nodifferent than the stuff on yourcomputer — it’s just a whole load offiles sorted into a whole load ofdirectories.HTML files are nothing more thansimple text files, so to start writing inHTML, you need nothing more than asimple text editor.
Creating Your First HTML WebpageFirst off, you need to open your HTML editor, where you will find a clean white page on which to write yourcodeStep 1: Open Notepad (PC)Windows 8 or later:Open the Start Screen (thewindow symbol at the bottomleft on your screen).Type Notepad.Windows 7 or earlier:Open Start Programs Accessories NotepadBe careful. It is important that the extension “.html” is specified - some text editors, suchas Notepad, will automatically save it as “.txt” otherwise.You also need to ensure that your file is being saved as plain text. TextEdit, for example,will start new files as “Rich text”, containing lots of formatting extras, by default. In suchcases, go into the preferences and make sure you check the “Plain text” formatoption before creating a new file.Step 1: Open TextEdit (Mac)Open Finder Applications TextEdit1Also change somepreferences to get theapplication to save filescorrectly. In Preferences Format choose "Plain Text"2Then under "Open and Save",check the box that says"Display HTML files as HTMLcode instead of formattedtext".3Then open a new documentto place the code
Step 2: WriteSome HTMLWrite or copy the followingHTML code into Notepad: !DOCTYPE html html body h1 My First Heading /h1 p My first paragraph. /p /body /html
Step 3: Save theHTML PageSave the file on your computer.Select File Save as in theNotepad menu.Name the file "index.htm" andset the encoding to UTF-8 (whichis the preferred encoding forHTML files).
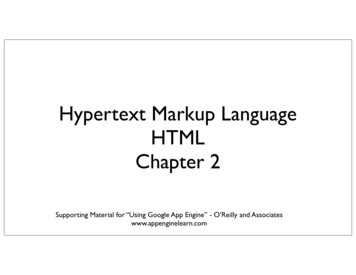
Step 4: View the HTML Page in YourBrowserOpen the saved HTML file inyour favorite browser (doubleclick on the file, or right-click and choose "Open with").The result will look much likethis:
BASIC CONSTRUCTIONOF AN HTML PAGEAlthough the basics of HTML is plain text, we need a bitmore to make it a nice and shiny HTML document.There are sections that I am asking you to practice. Pleas make sure to experiment on the pages where you seenew HTML.
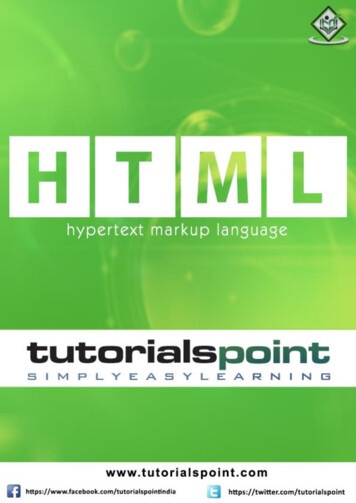
.HTML TagsThe basic structure of an HTML document includes tags, which surroundcontent and apply meaning to it.These tags should be placed underneath each other at the top of every HTMLpage that you create.Tip: The html , head , and body tags makeup the basic skeleton of every web page.Content inside the head and /head areinvisible to users with one exception: the textbetween title and /title tags whichappears as the title on a browser tab. !DOCTYPE html — is a document type declaration and it lets thebrowser know which flavor of HTML you’re using (HTML5, in this case). It’svery important to stick this in - If you don’t, browsers will assume you don’treally know what you’re doing and act in a very peculiar way. html — This tag signals that from here on we are going to write in HTML code.It is the opening tag that kicks things off and tells the browser thateverything between that and the /html closing tag is an HTMLdocument. head — This is where all the metadata for the page goes — stuff mostly meantfor search engines and other computer programs. body — This is where the content of the page goes. This is how your average HTML page is structured visually.
HTML tags normally come in pairs like html and /html . The first tag in a pair is often called the opening tag (orstart tag), and the second tag is called the closing tag (or end tag).An opening tag and a closing tag are identical, except a slash (/) after the opening angle bracket of the closing tag, totell the browser that the command has been completed.In between the start and end tags you can place appropriate contents. For example, a paragraph, which is representedby the p element, would be written as: p This is a paragraph. /p !-- Paragraph with nested element -- p This is b another /b paragraph. /p HTML Tags, continuedNot all tags have closing tags like this ( html /html ) sometags, which do not wrap around content will close themselves.The line-break tag for example, looks like this : br - a line breakdoesn’t hold any content, so the tag merrily sits by its lonelyself.We will come across these examples later. All you need toremember is that all tags with content between them should beclosed, in the format of opening tag content closing tag.
Tags can also have attributes, which are extra bits ofinformation. Attributes appear inside the opening tag andtheir values sit inside quotation marks.They look something like: tag attribute "value" Margarine /tag We will come across tags with attributes later.ATTRIBUTES
ELEMENTSTags tend not to do much more than mark the beginning and end of an element. Elements are the bits that makeup web pages.You would say, for example, that everything that is in between (and includes) the body and /body tags is thebody element.As another example, whereas “ title ” and “ /title ” are tags, “ title Rumple Stiltskin /title ” is a title element.
Correct html body p /p /body /html Incorrect html body p /html /body /p WHEN YOU NEST HTML ELEMENTS, MAKE SURE YOU CLOSE THEM IN THE RIGHT ORDER.THE ELEMENT WHICH WAS OPENED LAST MUST BE THE FIRST TO CLOSE:
An HTML element is an individual component of an HTMLdocument. It represents semantics, or meaning. For example,the title element represents the title of the document.HTML ELEMENTSYNTAXMost HTML elements are written with a start tag (or opening tag)and an end tag (or closing tag), with content in between. Elementscan also contain attributes that defines its additional properties. Forexample, a paragraph, which is represented by the p element, wouldbe written as:
Page TitlesAll HTML pages should have a page title
Try to add a title to your page.Change your code so that it looks like this: !DOCTYPE html html head title My first web page /title /head body This is my first web page /body /html If you look at this document in the browser (save andreload as before), you will see that “My first web page” willappear on a tab or the title bar of the window (not theactual canvas area). The text that you put in between thetitle tags has become the title of the document (surprise!).If you were to add this page to your “favorites” (or“bookmarks”, depending on your browser), you would seethat the title is also used there.I have added two new elements here, that start with the head tag and the title tag.The head element (that which starts with the head opening tag and ends with the /head closing tag) appears before the body element (startingwith body and ending with /body ) and contains information about the page.The information in the head element does not appear in the browser window.
Now that you have the basic structure of an HTML document, you can mess around with thecontent a bit.Go back to your text editor and add another line to your page: !DOCTYPE html html head title My first web page /title /head Paragraphs body This is my first web pageHow exciting /body /html Look at the document in your browser.You might have expected your document to appear as you typed it, on two lines, but instead youshould see something like this:This is my first web page How exciting.This is because web browsers don’t usually take any notice of what line your code is on. It alsodoesn’t take any notice of spaces (you would get the same result if you typed “This is my first webpageHow exciting”).
If you want text to appear on different lines or, rather, if youintend there to be two distinct blocks of text (because,remember, HTML is about meaning, not presentation), you needto explicitly state that.Paragraphs,ContinuedChange your two lines of content so that they look like this: p This is my first web page /p p How exciting /p The p tag is used for paragraphs.Look at the results of this. The two lines will now appear on twolines because the browser recognizes them as separateparagraphs.Think of the HTML content as if it were a book - withparagraphs where appropriate.
EmphasisYou can emphasize text in a paragraphusing em (emphasis) and strong (strong importance).
The line-break tag can also be used to separatelines like this:LinebreaksThis is my first web page br How excitingThere’s no content involved in breaking lines sothere is no closing tag.It could be tempting to over-use line breaksand br shouldn’t be used if two blocks of text areintended to be separate from one another(because if that’s what you want to do youprobably want the p tag).
Headings h1 The Main Heading /h1 !-- stuff -- Headings do not have to appearin section elements, as shown in thisexample.If they do, however, becausethese section elements are semanticallyregarded as sub-sections of their parent,their content could begin with h1 elementsand these headings would be regarded assub-headings. section h2 A Subheading /h2 !-- sub-stuff -- /section section h2 Another Subheading /h2 !-- sub-stuff -- h3 A Subheading of a Subheading /h3 !-- sub-sub stuff -- /section
!DOCTYPE html Try Your OwnHeadingIf you have documents with genuine headings, thenthere are HTML tags specifically designed just forthem.oThey are h1, h2, h3, h4, h5 and h6o h1 being the almighty emperor of headingsand h6 being the lowest plebeNote that the h1 tag is only used once, as the mainheading of the page. h2 to h6, however, can beused as often as desired, but they should always beused in order, as they were intended. For example,an h4 should be a sub-heading of an h3, whichshould be a sub-heading of an h2.Change your code to the following html head title My first web page /title /head body h1 My first web page /h1 h2 What this is /h2 p A simple page put togetherusing HTML /p h2 Why this is /h2 p To learn HTML /p /body /html
ListsThere are three types of list; unordered lists, ordered lists and definition lists. Wewill look at the first two here (the last type is a little more advanced).Unordered lists and ordered lists work the same way, except that the former is usedfor non-sequential lists with list items usually preceded by bullets and the latter isfor sequential lists, which are normally represented by incremental numbers.The ul tag is used to define unordered lists and the ol tag is used to define orderedlists. Inside the lists, the li tag is used to define each list item.
Try Your Own List (1)CHANGE YOUR CODE TO THEFOLLOWING: !DOCTYPE html html head title My first web page /title /head body h1 My first web page /h1 h2 What this is /h2 p A simple page put together using HTML /p h2 Why this is /h2 ul li To learn HTML /li li To show off /li li Because I've fallen in love with my computer and want togive her some HTML loving. /li /ul /body /html If you look at this in your browser, you will see abulleted list.Simply change the ul tags to ol and you will seethat the list will become numbered.Lists can also be included in lists to form astructured hierarchy of items.
Try Your Own List (2)REPLACE THE ABOVE LIST CODE WITH THEFOLLOWING: ul li To learn HTML /li li To show off ol li To my boss /li li To my friends /li li To my cat /li li To the little talking duck in my brain /li /ol /li li Because I've fallen in love with mycomputer and want to give her some HTMLloving. /li /ul Et voilà. A list within a list. And you could put another listwithin that. And another within that. And so on and so forth.Related pages
LinksSo far you’ve been making a stand-alone web page,which is all very well and nice, but what makes theInternet so special is that it all links together.The “H” and “T” in “HTML” stand for “hypertext”,which basically means a system of linked text.An anchor tag (a) is used to define a link, but you alsoneed to add something to the anchor tag —the destination of the link.
!DOCTYPE html html head title My first web page /title Add yourOwn Link /head body h1 My first web page /h1 h2 What this is /h2 p A simple page put together using HTML /p h2 Why this is /h2 p To learn HTML /p h2 Where to find the tutorial /h2 p a href "https://www.imdb.com/title/tt6432466/" Moxie, the Movie /a /p /body /html
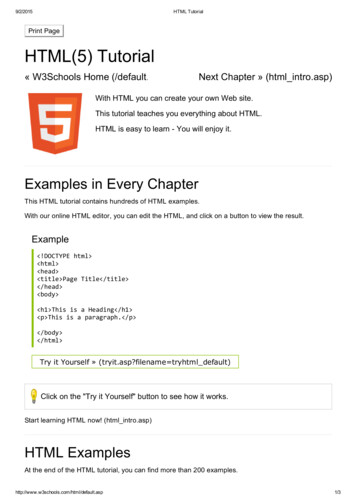
ImagesThings might seem a little bland and boring with all of this text formatting. Of course, theweb is not just about text, it is a multi-media extravaganza and the most common form ofsparkle is the image.The img tag is used to put an image in an HTML document and it looks like this: img src /0x0/moxiemovienetflix1614801038540.jpg" width "120" height "90" alt “Riot Grrl"
IMAGE – HTML ExplainedThe src attribute tells the browser where to find the image. Like the a tag, this can be absolute, as the aboveexample demonstrates, but is usually relative. For example, if you create your own image and save it as“alienpie.jpg” in a directory called “images” then the code would be img src "images/alienpie.jpg".The width and height attributes are necessary because if they are excluded, the browser will tend tocalculate the size as the image loads, instead of when the page loads, which means that the layout of thedocument may jump around while the page is loading.The alt attribute is the alternative description. This is an accessibility consideration, providing meaningfulinformation for users who are unable to see the image (if they are visually impaired, for example).Note that, like the br tag, because the img element does not enclose any content, no closing tag is required.
!DOCTYPE html html head title My first web page /title /head body !-- Main content -- h1 My first web page - Woohoo /h1 h2 What this is? /h2 p A simple page put together using HTML. em I said a simple page put together using HTML. /em A simple page put together using HTML. A simple page put together usingHTML. A simple page put together using HTML. A simple page put together using HTML. A simple page put together using HTML. A simple page put together using HTML. A simplepage put together using HTML. /p p You can find all of this information on the a href "https://www.gebeasley.org/390" Tutorial /a /p h2 Why this is? /h2 ul li To learn HTML /li li To show off ol li To my boss /li li To my friends /li li To my cat /li li To the little talking duck in my brain /li /ol /li li Because I have fallen in love with my computer and want to give her some HTML loving. /li /ul h2 Where to find a good movie /h2 p a href " https://www.imdb.com/title/tt6432466" Moxie, the Movie /a /p p img src " 0x0/moxiemovienetflix-1614801038540.jpg" width "500" height "300" alt "Riot Grrl" /p /body /html
Create your first HTML PageIf you have gone through all of thepages in this HTML Tutorial thenyou should be a competentHTMLer. In fact, you should bebetter than most.The following code incorporatesall of the methods that have beenexplained in the previous pages,please follow the steps in usingyour chosen Text Editor (SLIDE 4)and post a screenshot of your finalproduct on your WordPress site.
OTHER KEYELEMENTSTHEY ARE ASFOLLOWS:This list includes the elements you most likely willuse. For a full list of HTML Elements, go to thisreference sheet: HTML Element Reference - ByCategoryElementMeaningPurpose b BoldHighlight important information strong StrongSimilarly to bold, to highlight key text i ItalicTo denote text em Emphasised TextUsually used as image captions mark Marked TextHighlight the background of the text small Small TextTo shrink the text strike Striked Out TextTo place a horizontal line across the text u Underlined TextUsed for links or text highlights ins Inserted TextDisplayed with an underline to show aninserted text sub Subscript TextTypographical stylistic choice sup Superscript TextAnother typographical presentation style
body !-- Site navigation menu -- ul class "navbar" Adding SiteNavigation li a href "index.html" Home page /a li a href "musings.html" About /a li a href "town.html" Musings /a li a href "links.html" Links /a /ul !-- Main content --
CSSLet’s style your HTML
CSS is used to define styles for your web pages,including the design, layout and variations indisplay for different devices and screen sizes.Why Use CSS?
CSS Solved a Big ProblemHTML was NEVER intended to contain tags for formatting a web page!HTML was created to describe the content of a web page, like: h1 This is a heading /h1 p This is a paragraph. /p When tags like font , and color attributes were added to the HTML3.2 specification, it started a nightmare for web developers.Development of large websites, where fonts and color informationwere added to every single page, became a long and expensiveprocess.To solve this problem, the World Wide Web Consortium (W3C) createdCSS.CSS removed the style formatting from the HTML page!
CSS SyntaxThe selector points to the HTML element you want to style.The declaration block contains one or more declarations separated by semicolons.Each declaration includes a CSS property name and a value, separated by a colon.Multiple CSS declarations are separated with semicolons, and declaration blocks are surrounded by curly braces.ExampleIn this example all p elements will be center-aligned, with a red text color:p{color: red;text-align: center;}Example Explained p is a selector in CSS (it points to the HTML element you want to style: p ). color is a property, and red is the property value text-align is a property, and center is the property value
You probably see some black text on a white background, but itdepends on how the browser is configured. So one easy thing wecan do to make the page more stylish is to add some colors.(Leave the browser open, we will use it again later.)We will start with a style sheet embedded inside the HTML file.Later, we will put the HTML and the CSS in separate files. Separatefiles is good, since it makes it easier to use the same style sheetfor multiple HTML files: you only have to write the style sheetonce. But for this step, we just keep everything in one file.We need to add a style element to the HTML file. The stylesheet will be inside that element. So go back to the editor windowand add the following five lines in the head part of the HTML file.The lines to add are shown in red.Adding SomeColors
Adding Some Colors, Explained head title My first styled page /title style type "text/css" body {color: purple;background-color: #d8da3d } /style /head Style sheets in CSS are made up of rules. Each rule has threeparts:The first line says that this is a style sheet and that it is writtenin CSS (“text/css”). The second line says that we add style tothe “body” element. The third line sets the color of the text topurple and the next line sets the background to a sort ofgreenish yellow.1. the selector (in the example: “body”), which tells thebrowser which part of the document is affected by therule;2. the property (in the example, 'color' and 'backgroundcolor' are both properties), which specifies what aspect ofthe layout is being set;3. and the value ('purple' and '#d8da3d'), which gives thevalue for the style property.
The example shows that rules can be combined. We have set two properties, so we could have madetwo separate rules:body { color: purple }body { background-color: #d8da3d }But since both rules affect the body, we only wrote “body” once and put the properties and valuestogether.Colors,ExplainedThe background of the body element will also be the background of the whole document. We haven'tgiven any of the other elements (p, li, address ) any explicit background, so by default they will havenone (or: will be transparent). The 'color' property sets the color of the text for the body element, but allother elements inside the body inherit that color, unless explicitly overridden. (We will add some othercolors later.)Colors can be specified in CSS in several ways. This example shows two of them: by name (“purple”)and by hexadecimal code (“#d8da3d”). There are about 140 color names and the hexadecimal codesallow for over 16 million colors.oI tend to use Adobe Color to play around with colors: Color wheel, a color palette generator Adobe ColorNow save this file (use “Save” from the File menu) and go back to the browser window. If you press the“Reload” button, the display should change from the “boring” page to a colored (but still rather boring)page. Apart from the list of links at the top, the text should now be purple against a greenish yellowbackground.
Adding FontsAnother thing that is easy to do is to make some distinction in the fonts for the various elements of the page. Solet's set the text in the “Georgia” font, except for the h1 heading, which we'll give “Helvetica.”On the Web, you can never be sure what fonts your readers have on their computers, so we add somealternatives as well: if Georgia is not available, Times New Roman or Times are also fine, and if all else fails, thebrowser may use any other font with serifs. If Helvetica is absent, Geneva, Arial and SunSans-Regular are quitesimilar in shape, and if none of these work, the browser can choose any other font that is serif-less.Another way to explore fonts: CSS Font Stack: Web Safe and Web Font Family with HTML and CSS code.Google Fonts allows some options, but merging to CSS takes a little more work: Browse Fonts - Google Fonts
In the text editor add the following lines: head title My first styled page /title style type "text/css" body {font-family: Georgia, "Times New Roman",Times, serif;AddingFonts, Cont.color: purple;background-color: #d8da3d }h1 {font-family: Helvetica, Geneva, Arial,SunSans-Regular, sans-serif;color: #2C3252 } /style /head body [etc.]If you save the file again and press “Reload” in the browser, there should now be different fontsfor the heading and the other text.
The list at the top of the HTML page is meant to become a navigation menu. ManyWeb sites have some sort of menu along the top or on the side of the page and thispage should have one as well. We will put it on the left side, because that is a littlemore interesting than at the top Adding aNavigationMenuThe menu is already in the HTML page. It is the ul list at the top. The links in itdon't work, since our “Web site” so far consists of only one page, but that doesn'tmatter now. On a real Web site, there should not be any broken links, of course.So we need to move the list to the left and move the rest of the text a little to theright, to make room for it.The CSS properties we use for that are 'padding-left' (to move the body text) and'position', 'left' and 'top' (to move the menu).There are other ways to do it, but this one is OK for our purposes.
In the editor window, add the following lines to the HTML file:. head title My first styled page /title style type "text/css" body {padding-left: 11em;font-family: Georgia, "Times New Roman",Adding ANavigationMenu, Cont.Times, serif;color: purple;background-color: #d8da3d }ul.navbar {position: absolute;top: 2em;left: 1em;width: 9em }h1 {font-family: Helvetica, Geneva, Arial,SunSans-Regular, sans-serif } /style /head body [etc.]If you save the file again and reload it in the browser, you should now have the list of links to the left of the maintext. That already looks much more interesting, doesn't it?
head title My first styled page /title style type "text/css" body {padding-left: 11em;font-family: Georgia, "Times New Roman",A NavigationMenu,ExplainedTimes, serif;The 'position: absolute' says that the ul element ispositioned independently of any text that comesbefore or after it in the document and the 'left' and'top' indicate what that position is. In this case, 2emfrom the top and 1em from the left side of thewindow.color: purple;background-color: #d8da3d }ul.navbar {position: absolute;top: 2em;left: 1em;width: 9em }'2em' means 2 times the size of the current font. E.g.,if the menu is displayed with a font of 12 points, then'2em' is 24 points. The 'em' is a very useful unit in CSS,since it can adapt automatically to the font that thereader happens to use.h1 {font-family: Helvetica, Geneva, Arial,SunSans-Regular, sans-serif } /style /head body [etc.]Most browsers have a menu for increasing ordecreasing the font size: you can try it and see thatthe menu increases in size as the font increases, whichwould not have been the case, if we had used a size inpixels instead.
Styling the linksThe navigation menu still looks like a list, instead of a menu. Let's add some style toit. We'll remove the list bullet and move the items to the left, to where the bulletwas. We'll also give each item its own white background and a black square. (Why?no particular reason, just because we can.)We also haven't said what the colors of the links should be, so let's add that as well:blue for links that the user hasn't seen yet and purple for links already visited:
body {padding-left: 11em;font-family: Georgia, "Times New Roman",Times, serif;color: purple;background-color: #d8da3d }ul.navbar {list-style-type: none;padding: 0;margin: 0;position: absolute;top: 2em;left: 1em;width: 9em }h1 {font-family: Helvetica, Geneva, Arial,SunSans-Regular, sans-serif }Styling the Navigation, Part 1
h1 {font-family: Helvetica, Geneva, Arial,SunSans-Regular, sans-serif }ul.navbar li {background: white;Styling theNavigation,Part 2margin: 0.5em 0;padding: 0.3em;border-right: 1em solid black }ul.navbar a {text-decoration: none }a:link {color: blue }a:visited {color: purple } /style /head body [etc.]
background: white;margin: 0.5em 0;padding: 0.3em;border-right: 1em solid black }Styling theNavigation,Explainedul.navbar a {text-decoration: none }a:link {color: blue }a:visited {color: purple }Traditionally, browsers show hyperlinks with underlines and with colors. Usually, thecolors are similar to what we specificed here: blue for links to pages that you haven'tvisited yet (or visited a long time ago), purple for pages that you have already seen.In HTML, hyperlinks are created with a elements, so to specify the color, we need toadd a style rule for “a”.To differentiate between visited and unvisited links, CSS provides two “pseudo-classes”(:link and :visited). They are called “pseudo-classes” to distinguish them from classattributes, that appear in the HTML directly, e.g., the class "navbar" in our example.
Styling LinksMuch in the same way, we styled the links for yourNavigation Menu, you can style links within thebody of your webpage.The hyperlink, itself follows the same rules we didabove where you place an address and text in thebody of your page. p You can find all of this information on the ahref "https://www.gebeasley.org/spring21" Tutorial /a /p style /* unvisited link */a:link {color: #ff0000;text-decoration: none;border-bottom: 1px solid;}/* visited link */a:visited {color: #ff00ff;}/* mouse over link */a:hover {color: #00ff00;border-bottom: none;}/* active link */a:active {color: #00ffff;}[Etc.]
Styling ListsSo, we worked on lists in HTML. If youwould like to change the style of yourbullets (ul) or numbers (ol), you can addsome information into your style tagusing CSS.You can change the list-style-type:disc circle square decimal lower-roman upperroman lower-greek lower-latin upper-latin loweralpha upper-alpha none inherit style ul.list-styles {list-style-type: square;}ul.list-styles2 {list-style-type: disc;}ol {list-style-type: upper-roman;} /style /head body h2 Unordered List /h2 ul class "list-styles" li List Item 1 /li li List Item 2 /li li List Item 3 /li /ul h2 Ordered List /h2 ol li List Item 1 /li li List Item 2 /li li List Item 3 /li /ol h2 Unordered List Again /h2 ul class "list-styles2" li Cold Drinks /li li Hot Drinks /li li Ice-Creams /li /body /html
Adding ElementBordersThe border is precisely the boundary of theelement, sitting between its padding andmargin, and it's width will impact thecomputed element dimensionsThe outline is next to but outside of theborder, overlapping both box-shadow andmargin, but not affecting the element'sdimensionsBy default, box-shadow extends out fromedge of the border covering the amount ofspace in the direction(s) defined, and it willalso not affect the element's dimensions
Adding Element Borders.p.one {color: linear-gradient(to right, purple, pink) 1;border: 2px solid; border-image: lineargradient(to right, purple, pink) 1;}p.two {color: #3F1D5C;outline: 2px solid;} /style !-- Main content -- p class "one" The border color ofthis paragraph is a gradient. /p p class "two" The outline color ofthis paragraph is same as theelement's text color. /p
How to Style a HorizontalLineA horizontal rule is commonly used as content or section divider. As ahorizontal rule the hr element is used. Originally the hr elementwas styled using attributes. Nowadays, in HTML5, the hr element tellsthe browser that there is a paragraph-level thematic break. Let’s seehow to style the hr element with CSS.Change the s
HTML & CSS from Scratch A Tutorial. H yper t ext M arkup L anguage As its name suggests, HTML is a Markup Language which means you use HTML to simply "mark-up" a text document with tags that tell a Web browser how to structure it to display. Hypertextrefers to the way in which