Transcription
Biology 201L Introduction MBL: Aseptic Technique, Safety & Clean-up (8-29-13)Before we begin our project for the semester, it’s important to set some ground rules. Themolecular biology lab is different from a chemistry lab in one fundamental way: rather thanfearing contamination OF you by the experiment, we are now most concerned with preventingcontamination of the experiment BY you! To prevent such contamination, always follow theguidelines below regarding: 1) Aseptic technique, 2) Safety, and 3) Cleaning up.1) Aseptic TechniqueTo avoid unwanted and costly contamination in the molecular biological laboratory, it is veryimportant to use aseptic technique. Contamination can include the presence of unwantedorganisms growing in a culture (i.e. bacteria) or unwanted DNA or RNA in a molecular reactionsuch as polymerase chain reaction (PCR). The former type of contamination can destroy aculture and the later type of contamination can lead to false positive results in an experiment.We must also be concerned with unwanted nucleases, which are enzymes that can rapidlydegrade DNA or RNA. Nucleases are found on human skin; therefore, one must avoid direct orindirect contact of fingers with nucleic acids. While most DNases are not very stable, manyRNases are highly stable and can adsorb to glass or plastic and remain active(http://userpages.umbc.edu/ jwolf/method2.htm).Some Steps to Prevent Contamination: You do NOT need safety goggles or closed-toe shoes for this lab. However, you shouldalways wear clothing that will not interfere with the activity for the day (i.e., no scarves ordangling threads). If you have long hair, you should always tie it back before beginninglab to prevent your hair from contaminating your samples. Bring ONLY relevant lab materials to your bench. These include: the lab protocol, awriting instrument, and any associated documents (background, pre-labs, etc.). Youshould NOT bring your bookbag or cell phone or computer (unless instructed to do so byyour TA). There will be a designated shelf in the lab for your other belongings. Always wear clean gloves while working in the molecular biological laboratory. Onecommon source of nuclease contamination is gloves that have become contaminated bytouching surfaces in contact with human hands, such as doorknobs (or cell phones!). Youmay have to fight the urge to touch your face or hair while wearing gloves, but rememberthat you are the main source of potential contamination for your project! Always sterilize your bench area with 70% ethanol before beginning lab procedures, orafter a break in the procedure. Use your hands or a chem-wipe/paper towel to spread asmall amount of ethanol over the entire surface of your bench. Never leave open any bottles of reagents (including sterile water) or tubes and plates withyeast cultures. Likewise, never leave open containers of sterile micropipette tips. Openjust before use and close immediately after you are finished. Never allow your gloves to touch the inside of any bottles of reagents or tubes and plateswith yeast cultures.
Biology 201L Introduction MBL: Aseptic Technique, Safety & Clean-up (8-29-13) Never allow the micropipettor to touch the inside of containers with reagents or yeastcultures. Only the pipette tip should touch the sample being removed. Follow the sameprocedure when adding a reagent or volume of yeast culture to a microcentrifuge tube. Always use a fresh, non-aerosol pipette tip when removing cultures or reagents from theircontainers. Never use a pipette tip twice for this purpose! It is essential to carry out proper use of the micropipettors! Otherwise, they will becomecontaminated or damaged. Always be mindful about the sources of contamination and, most importantly, use commonsense.2) Safety in the Molecular Biological LaboratoryYou must assume that all cultures used in the lab are biologically hazardous, as they might beinfected with latent viruses that are not characterized. Also, given the right circumstances (e.g.,compromised immune system, or a cut or wound that provides a portal of entry for the microbe),many microorganisms have the potential to be opportunistic pathogens. Some have evenreported Saccharomyces cerevisiae as an emerging opportunistic pathogen (McCusker 2006).Note that one does not need to have HIV/AIDS to be immunocompromised; other conditionscan weaken the immune system, such as the common cold, the flu, poor diet, and stress. Evenbenign microorganisms may evolve pathogenicity, so treat all microorganisms in the lab aspotential pathogens and follow lab safety protocols. NO eating or drinking! No food or drink should be out at any point during lab. If you need adrink of water, ask your TA if you can step outside briefly. Wash your hands thoroughly after handling cultures and before you leave the lab each labperiod. Do not remove anything from the lab (e.g., slides or cultures). Use proper aseptic technique as explained above.3) Clean-upOne of the most important ways to prevent contamination, as well as being courteous toyour classmates and the prep staff, is to clean up your bench before you leave. Beforeleaving the lab, ALWAYS do the following: Put away all items in their proper place (as they were when you first entered the lab).Recap all reagents tightly and securely. Make sure your pipettors are securely in their rackswith the dials facing out. Dispose of waste items PROPERLY! Proper disposal of all cultures, glassware and othermaterials is very important for your safety and the safety of your classmates, TAs, and theprep staff. The cultures used in this lab are potential pathogens (see above), so follow labsafety protocols.
Biology 201L Introduction MBL: Aseptic Technique, Safety & Clean-up (8-29-13)! Contaminated plastics (e.g., Petri plates, pipet tips, etc.) go into the orange biohazardbags. By law, these must be autoclaved before going into the landfill. Do NOT placeglass (broken or intact) into biohazard bags. There are two sizes of orange biohazardbags. The small bags are provided on each bench for the disposal of pipet tips and smallmicrocentrifuge tubes ONLY. Chemical solid waste (i.e., pipette tips and microcentrifugetubes contaminated with non-biological agents) should be disposed of in their ownproperly labeled receptacles, NOT in the biohazard solid waste containers. Chemicalwaste and biohazard waste are subject to different EPA disposal guidelines, so youMUST pay attention when discarding solid waste in lab! Do NOT eject liquid waste intoeither the biohazard solid waste bags or the chemical solid waste containers!! Do NOT place any gloves or larger contaminated materials (chem-wipes, paper towels)into the small biohazard solid waste containers!! Use only the larger biohazardcontainers for this purpose.! Liquid waste should be disposed of in the proper receptacles, either Biohazard (forcellular materials) or Chemical (for reagents and post-cellular material). These wastebottles will be clearly labeled. Be careful NOT to eject your pipette tips into the liquidwaste!! Broken glass should be placed in the broken-glass containers (labeled cardboard boxesusually containing a clear plastic bag lining). Your TA will know where this container islocated. Do NOT place broken glass anywhere else. Make sure the microcentrifuges at the end of your bench are closed, locked and turned off. Clean your bench space with 70% ethanol and paper towels after you have disposed ofeverything properly. Use the 70% ethanol in the red squirt bottles on your bench tops. Push your chair back under the bench, and wash your hand thoroughly!ReferencesDrosten C, Gunther S, Preiser W, van der Werf S, Brodt HR, Becker S, et al. 2003. Identificationof a novel coronavirus in patients with severe acute respiratory syndrome. New England Journalof Medicine 348:1967-76.Emery SL, Erdman DD, Bowen MD, Newton BR, Winchell JM, Meyer RF, Tong S, Cook BT,Holloway BP, McCaustland KA, Rota PA, Bankamp B, Lowe LE, Ksiazek TG, Bellini WJ, and LJAnderson. 2004. Real-time reverse transcription-polymerase chain reaction assay for SARSassociated coronavirus. Emerging Infectious Diseases 10:311-316.McCusker, John “Saccharomyces cerevisiae: an Emerging and Model Pathogenic Fungus.” inMolecular Principles of Fungal Pathogenesis. Joseph Heitman, et al., eds. ASM Press, 2006.Mifflin TE. 1997. Control of contamination associated with PCR and other amplificationreactions. Molecular BioProducts, Inc.
Biology 201L Introduction MBL: Micropipettor (8-29-13)This lab will often involve the use of math to impress upon you the extreme scales of themolecular world, from the small (a yeast cell is TINY, but how tiny?) to the large (even a tiny cellhas LOTS of molecules, but exactly how many?), so it is important for you to be comfortablemanipulating numbers in scientific notation. If you do not use scientific notation on your labassignments, you will lose valuable points! Below are some basic facts about metric units,conversions, and the micropipettors you will be using all semester to measure volumes ofvarious reagents and samples.Part 1: Metric units and conversionsBefore we start the lab, it is important that you review metric measurements and the prefixesthat are used for describing very small, or large, volumes or lengths. Most of our work in the labwill be with liquid measurements based on the liter, but the same prefixes also apply tomeasurements of dry weight based on the gram and measurements of length based on themeter. If you are unfamiliar with how to go between orders of magnitude or want a reminder onthe importance of keeping track of your units, consult the Helpful Background Knowledge pageentitled “A Refresher on Dimensional Analysis”.Prefixes used for describing objects that are larger or smaller than the base e trillionthOne billionthOne millionthOne thousandthOne hundredthOne thousand timesOne million timesPart 2: Using the MicropipettorThe liquid pipetting you will do in the lab this semester involves very small volumes that are lessthan 1 mL. Your lab benches are supplied with three standard versions of the micropipettor ormicropipette: the P-1000, P-200 and the P-20 (and occasionally the P-10). It is essential thatyou learn the proper use of these instruments so you can ensure accuracy in your lab work andyou don’t break the micropipettors. These are delicate and very expensive instruments! Tointroduce you to the micropipette, we have provided written rules below for working with themicropipettor in the lab. We suggest you review the written material first and then watch theYouTube video “Using a Micropipette- University of Leicester.”http://www.youtube.com/watch?v uEy NGDfo 8The maximum volume a micropipettor can dispense is printed at the top of the instrument on theplunger. The units are in microliters (1000 µL 1mL). Thus, a P-1000 dispenses up to 1000 µL( 1 mL), a P-200 up to 200 µL ( 0.2 mL), and a P-20 up to 20 µL ( 0.02 mL). When theinstrument is labeled with two numbers, this is the range of volumes that the micropipettor willaccurately dispense. Thus a micropipettor labeled 100/1000 should not be used to pipet lessthan 100 µL or more than 1000 µL. Of course, since you will almost always have both a P-1000AND a P-200, you should use the P-200 for volumes under 200 µL.
Biology 201L Introduction MBL: Micropipettor (8-29-13)Exploring the Micropipette:The plunger can be pushed down to 2 different levels, called stops. The first stop is used to pickup the exact volume on the display. Once you pick up a volume with a pipettor and want todispense this volume, push the plunger slowly to the first stop, then continue to push theplunger down until the second stop. This second stop allows you to dispense the entire volumecontained in the tip. Once you have dispensed the proper volume, the ejector button is used toeject the plastic tip into the proper waste container.Rules for Proper Micropipettor Use1. Do not set the pipettor higher than the maximum volume listed ontop of the pipettor or lower than the recommended minimum. If youare not sure how to properly set the pipettor or are unsure of itsvolume limits, ASK YOUR TA.2. When setting the volume, never force the pipettor. The propervolume should be easily set. It should not be hard to turn the knob.3. Do not use the pipettor without a pipette tip. Press firmly to attachthe tip. Do NOT “jack-hammer” the tip onto the pipettor or you maynot be able to eject it safely!4. Do not turn a pipettor upside down or sideways when there is liquidin the tip. This can contaminate the pipettor.5. Use the first stop when drawing up liquids, NEVER the second stop.Using the second stop will result in an inaccurate measurement, andmay draw liquid into the pipettor, contaminating it.6. Always draw up and dispense liquids SLOWLY. Many of thesolutions we work with in this lab have low surface tension and willrush into the pipette tip and pull air with them, resulting in aninaccurate volume.7. Immediately eject your pipette tip into the proper waste receptaclewhen you are finished using it.8. When not in use, place the pipettor in a rack (not on the bench!).For further reading see:Micropipetting: An Important Laboratory Skill for Molecular BiologyJon S Miller; Michell E Sass; Susan J Wong; James Nienhuis The AmericanBiology Teacher; Apr 2004; 66, 4; Research Library pg. 291Credit To Professor Rytas Vilgalys for “Rules for Proper Micropipettor Use”
Biology 201L Introduction MBL: Micropipettor (8-29-13)Reading a micropipettor’s dial takes a little getting used to, but there are a few tricks to make iteasier. For a P-1000, the RED digit is the thousands place and should always be either a 0 or a1. A P-200 does not any red digits, and shows the hundreds, tens, and ones places. A P-20 hasa red digit for the TENTHS place.
Biology 201LLab 1 Protocol: Part 1: Measurements and MicropipettingObjective: To learn how to accurately measure and pipette small volumes usingmicropipettes.Part A: Learning the RopesMicropipettes differ in the volume of liquid they can accurately measure. The numberon the top of the micropipette indicates the range of volume it can pipette. A P1000 isused to measure from 200-1000µL; a P200 is used to measure volumes from 20-200µL;a P20 is used to measure volumes from 2-20µL and a P10 is used to measure volumesfrom 0.5-10µL. In Part 1 of this exercise, you will use the various micropipettes at yourstation to combine all of the volumes listed on the table in one tube together. Recordthe pipette you use and the setting in the window.Example:ColorVolume to add to thetubeWhich micropipette wasused?Record the setting as itappears in the windowBlue150µLP200150Find the white/clear canister on the shelf above your bench and get out ONE smallmicrocentrifuge tube. Add the following amounts to your tube. NOTE: all of theamounts will be added to the same tube!ColorVolume to add to thetubeBlue400 µLYellow150 µLBlue17 µLWhich micropipette wasused?Record the setting as itappears in the windowa) What is the final volume of your tube in µL?b) What is the final volume of your tube in mL?1
Biology 201LLab 1 Protocol: Part 1: Measurements and MicropipettingPart B: Small Volume PipettingGee, Roy and Biv are having problems with their science lab. The question they aretrying to answer requires very precise measurements, and the results come outdifferently each time they attempt the experiment. The teacher suspects pipettingerrors, and asks them to complete the following exercises to check their technique. Usethe following directions to complete the same task and check your technique.To begin, find the canister on the shelf above your bench with the clear microcentrifugetubes (also called “Eppendorf” tubes) and put six tubes in a rack on your bench top.Label the caps of the tubes “1-6” with a black Sharpie (also on the shelf above yourbench).Carefully follow steps 1-12 below putting a check mark to the left of eachinstruction line upon completion. Be sure to eject the yellow pipet tip into thesmall biohazard bin after each use.1. Put 19µL of red liquid into tube number 1.2. Put 22 µL of yellow liquid into tube number 3.3. Put 25 µL of blue liquid into tube number 5.4. Take 4 µL from tube number 1 and put it into tube number 2.5. Take 4 µL from tube number 1 and put it into tube number 6.6. Take 4 µL from tube number 3 and put it into tube number 4.7. Take 7 µL from tube number 3 and put it into tube number 2.8. Take 7 µL from tube number 5 and put it into tube number 4.9. Take 7 µL from tube number 5 and put it into tube number 6.10. Calculate the total volume in each tube.11. Compare the amount of liquid in your tubes with your partners. Are the volumesthe same or different? If the amounts are different, try to figure out why. Watcheach other micropipette and check each other’s technique.2
Biology 201LLab 1 Protocol: Part 1: Measurements and MicropipettingAnalysis:1. What common error in handling a micropipette can account for pipetting too muchreagent into a tube?2. What common error in handling a micropipette can account for pipetting too littlereagent into a tube?3. Complete the following conversions:1µL mL10µL mL100µL mLµL 1 mLThanks to Kathleen Miglia for sharing this lab protocol and background information3
Master Mix Lab1LabellingBecause most samples and reactions are indistinguishable by eye, it is essential to label tubes insuch a way that you can distinguish them. Note that the the teaching lab does not allow tubes withwriting on top in the PCR machines, so be sure to label the side of any tubes that will go in thePCR machine, not the top.2Keeping Track2.1Tube ShufflingWhen adding multiple reagents to a reaction it is easy to lose track of what you have already added,so many experienced molecular biologist develop one or more systems for keeping track. Here is onesystem:1. Put the "reaction tube", the microcentrifuge tube (MCT) in which you will be preparing thereaction in the first row, first column of the tube rack.2. Put the MCTs containing reagents in the second row of the tube rack, in the order that youwill add that reagent, starting in the third column.3. When it is time to add reagent A, move its tube to the first row.4. Set the micropipette to the volume of reagent A that you will need5. Pick up a tip with the micropipette6. Open tube A.7. Draw up reagent A into the pipette tip8. Dispense reagent A into the reaction tube9. Close tube A and move it to the last row in the rack10. Repeat steps 3-9 with the rest of the reagents2.2Marking OffAnother system is to mark off reagents in the protocol as you add them.1
2.3Et ceteraAsk the TAs, instructor, or other experienced molecular biologists in the class what systems theyuse.3EnzymesEnzymes are the workhorses of molecular biology, so we will be using several different enzymesduring the RNA-Seq library preparation process. Enzymes are molecular machines, so they canbe fragile. Vortexing enzymes can denature (i.e. break) them, so it is considered good practice toavoid vortexing any solution containing enzymes. There are two common methods for safely mixingsolutions containing enzymes:1. Pipette up and down (gently)2. Flick the tube, then spin down in a picofuge to collect the solution at the bottom (otherwiseyou might lose any that is on or around the cap.If you are unsure at a given step whether you are using an enzyme, you can play it safe, or checkwith a TA or the instructor.4Master Mixes4.1Master Mixes ExplanationFor many of the steps in the library prep you will need to add multiple reagents to each of yoursix samples. The naive approach, adding reagents one at a time to each sample tube, is bothtedious and error prone. It is error prone in two ways: a) you might forget to add a reagent tosome samples, or add the wrong amount b) even if you don’t make any mistakes, you might adddifferent amounts to different samples due to inherent pipetting variation. The smart way to solvethis problem is to make master mixes. Bonus: You get an extra benefit from master mixes becauseyou will be working with larger volumes, which is always easier and more accurate. For example, ifyour reaction requires 0.5ul of a reagent and you are making a 10x master mix, you will be pipetting5ul, instead of a tricky 0.5ul.Exceptions: Of course there are always exceptions - there are rare cases where reagentsshould not be pre-mixed, but unless warned otherwise, you can assume that mastermixes are safe.What is a master mix? It is a combination of all the components of a reaction that are the samefor all samples, in the correct proportions. Let’s say you have the following recipe for a reaction:ReagentAwesome EnzymeReaction BufferSecret IngredientSample DNATotalVolume0.3 ul10 ul2.7 ul2 ul15 ulIf you have 9 samples, you would make the following master mix2
ReagentAwesome EnzymeReaction BufferSecret IngredientTotal1 rxn0.3 ul10 ul2.7 ul13 ul10 rxn3 ul10 ul27 ulOnce I make the master mix and mix it (see discussion above about enzymes) I will add 13ul ofmaster mix to each reaction tube, then add the 2ul of sample, for a total reaction volume of 15ul.Margin of error: Why did I make a master mix for 10 reactions if I only have 9 samples?To allow for pipetting error. You always need to make a little extra master mix. A goodrule of thumb is 5-10% extra, although it is often easiest to round to the nearest 0.5 or1 reaction.4.2Master Mix SetupNow your turn! You have 6 samples to test, here is the recipe for one "reaction". Calculate enoughmaster mix for 6 samples. Have a TA or instructor review your master mix calculations before youcontinue.ReagentPCJ IndicatorDilution BufferThickenerSampleTotalVolume160 ul10 ul10 ul20 ul200 ulFill in the following :In tube A I will put . . . . . . . . . . . . . . . . . . . . . . . . . . . . . . . . . .In tube B I will put . . . . . . . . . . . . . . . . . . . . . . . . . . . . . . . . . .In tube C I will put . . . . . . . . . . . . . . . . . . . . . . . . . . . . . . . . . .In tube D I will put . . . . . . . . . . . . . . . . . . . . . . . . . . . . . . . . . .In tube E I will put . . . . . . . . . . . . . . . . . . . . . . . . . . . . . . . . . .In tube F I will put . . . . . . . . . . . . . . . . . . . . . . . . . . . . . . . . . .Once the above has been checked, assemble you master mix in a microcentrifuge tube, then setup the individual reactions in 0.2ml PCR tubes and observe the color. Once you have prepared youreactions, run them with the "PCJ" program in one of the thermal cyclers.3
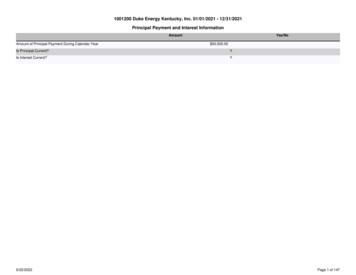
Instructions for Using the ABI 2720 Thermal CyclerThe ABI 2720:Lid Open1. Once the instrument is turned on, the Main Menu will appear on the display screen afterseveral seconds:2. Lift up the lever to open the instrument lid. Make sure the MicroAmp 96-well sample trayis in the sample block in proper orientation, with well A1 located in the upper left-handcorner of the tray, and the notched end in the upper right-hand corner:
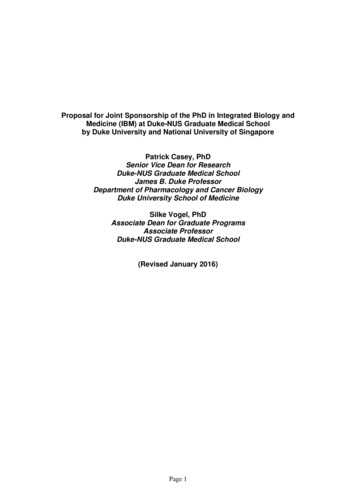
Proper Orientation3. Place the PCR tubes into the wells. Make sure the caps are completely closed, otherwiseevaporation during cycling will occur. Only the sides of the PCR tubes should be labeled,NOT the tops of the tube caps. Carefully pull the lever down to close the instrument lidafter all of the tubes have been inserted into the wells.4. To start a run, first select “User” by pressing key F5:
5. The “Select User Name” screen will appear. Using the Arrow Keys, highlight the user name“hts.” (Note: This user name is not shown below.) Press key F1 to accept this user name.6. The stored “Methods” screen will appear. Using the Arrow Keys, highlight the storedmethod named “Test PCR.” (Note: This method name is not shown below.) Press the keyF1 to start.7. The “Select Method Options” screen will appear. Enter the volume of your PCR samplesand press key F1 to start the thermal cycling method you selected.
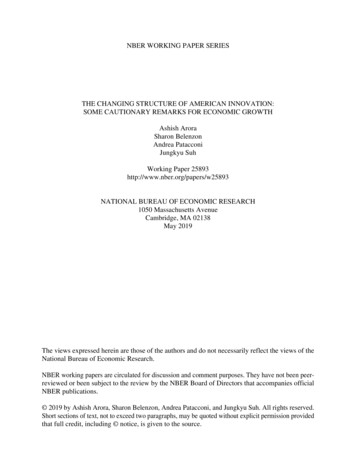
8. If the heated cover is less than 103oC, the following screen will appear:9. Once the cover reaches 103oC, the “Run Time” screen will appear. The screen will displaydetails of the method you selected and its progression during cycling. At each cycle step inprogress, the bar between the temperature and time will be flashing. (For example, whenthe cycling method begins, the bar between 55.0oC and 2:00 minutes will be flashing.)Step 110. The run is complete when the last step is completed, which is 4.0oC for infinity (bar between 4.0 andwill be flashing when the temperature reaches 4.0oC.). TheBar willbeflashing
11. To stop the run, press the “STOP” key. The “Confirm Stop” screen will appear:12. Press the “STOP” key again. The “End of Run” screen will appear.:13. Press key F5 (Exit) to return to the Main Menu screen:Main Menu Screen14. Lift the instrument lid and remove your samples from the thermal cycler. Close theinstrument lid when finished.
Drosten C, Gunther S, Preiser W, van der Werf S, Brodt HR, Becker S, et al. 2003. Identification of a novel coronavirus in patients with severe acute respiratory syndrome. New England Journal . molecular world, from the small (a yeast cell is TINY, but how tiny?) to the large (even a tiny cell has LOTS of molecules, but exactly how many?), so .