Transcription
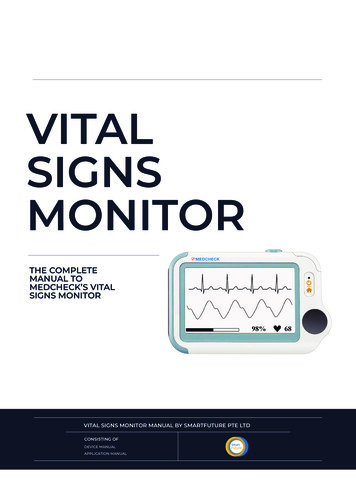
VITALSIGNSMONITORTHE COMPLETEMANUAL TOMEDCHECK’S VITALSIGNS MONITORVITAL SIGNS MONITOR MANUAL BY SMARTFUTURE PTE LTDCONSISTING OFDEVICE MANUALAPPLICATION MANUAL
DISCLAIMERThis manual and product are not meant as a substitute foradvice provided by your doctor. You are not to use theinformation contained herein, or this product for diagnosing ortreating a health problem or prescribing any medication. If youhave or suspect that you have a medical problem, promptlyconsult your healthcare provider.INTENDED USEThe Vital Signs Monitor is intended to be used for measuring,displaying, reviewing and storing of multiple physiologicalparameters including ECG, pulse oxygen saturation (SpO2), pulserate, temperature and blood pressure variation in home orhealthcare facilities environment.ECG and Blood pressure variation is intended for use with adult.The data and results provided by this device are for pre-checkscreening purpose only and cannot be directly used for diagnosticor treatment.
Warnings and Cautionary Advices We recommend not to use this device if you have a pacemaker orother implanted devices. Follow the advice given by your doctor, ifapplicable. Do not use this device with a defibrillator. Do not use this device during MRI examination. Do not use the device in a combustible environment (i.e.,oxygen-enriched environment). Do not place this device in pressure vessels or gas sterilization device. This device is not intended for use by people (including children) withrestricted physical, sensory or mental skills or a lack of experienceand/or a lack of knowledge, unless they are supervised by a person whohas responsibility for their safety or they receive instructions from thisperson on how to use the device. Do not allow the electrodes of the device to come into contact withother conductive parts (including earth). Do not store the device in the following locations: locations in whichthe device is exposed to direct sunlight, high temperatures or levels ofmoisture, or heavy contamination; locations near to sources of water orfire; or locations that are subject to strong electromagnetic influences. Vital signs measurements, such as those taken with this device,cannot identify all diseases. Regardless of the measurement takenusing this device, you should consult your doctor immediately if youexperience symptoms that could indicate acute disease. Do not self-diagnose or self-medicate on the basis of this devicewithout consulting your doctor. In particular, do not start taking anynew medication or change the type and/or dosage of any existingmedication without prior approval. The device has no alarms and will not sound if the measurementreading is too low or too high. Check the SpO2 sensor application site every 6-8 hours to determinethe positioning of the sensor and the circulation and skin sensitivity ofthe patient. Patient sensitivity varies depending on medical status orskin condition. For patients with poor peripheral blood circulation orsensitive skin, inspect the sensor site more frequently. Do not use the Oximeter on the same hand/arm when using a bloodINTRODUCTION- SAFETYpressure cuff or monitor.
DEVICE OVERVIEW12345671. Touch Screen2. Infrared temperature sensor3. Internal SpO2 sensor4. LED indicator Off: the monitor is turned off or working in Standby Mode; Green: the monitor is turned on, and working normally; or when thebattery is fully charged; Blue: the battery is being charged; Red: the battery is low;5. Multi-functional connectorIt connects with external SpO2 cable, ECG cable, or charging cable.6. Home, Power On/Off When the monitor is off, press this button to power it on. When the monitor is on, press and hold it for 2 seconds to turn it off. During operation, press this button will switch to Main Screen, orCalendar Screen, or return to upper menu.7. ECG right electrodeRest right thumb against it.DEVICE OVERVIEW
DEVICE OVERVIEW8119108. Speaker9. ECG left electrodePut it to your left palm, left abdomen or left knee.10. Neck stripe hole11. ECG back electrodeUse right forefinger or middle finger to press on it.Main ScreenThe Main Screen is shown as below. Slipping your finger from right to left canswitch to the second page, and vice versa.DEVICE OVERVIEW
DEVICE OVERVIEWCalendar Screen / Standby ModeThe device will enter Calendar Screen / Standby Mode when: No operation is detected for 120 seconds in other screen interface, the device willautomatically switch to the Calendar Screen. Pressing the Home button in the Main Screen.31247651. Current time2. Current dateWhen a reminder event happens, this area displays the event name, e.g.“Daily Check”.You are allowed to change the current time and date when the device ispowered on at the first time. Or you can also go to the Setting menu tochange it.3. This arrow indicates users to press the Home button to exit the CalendarScreen / Standby Mode.4. Battery indicator5. If you failed to respond to the previous reminder event, then that eventwill be shown in this area.6. This icon appears when Quick ECG is enabled.7. This icon appears if you have set reminder event.1.6 Result ScreenFor each measurement, a Result report will be provided after themeasurement is finished. An example is shown as below.DEVICE OVERVIEW
DEVICE OVERVIEWResult ScreenFor each measurement, a Result report will be provided after the measurement isfinished. An example is shown as below.13241. Measured parameters and readings2. A summary of this measurement3. A graphic indicator about the health status: All measured parameters are within the reference range;: One or more than one measured parameter(s) is (are) out of referencerange. When theicon appears, it is suggested to test again, and consultyour doctor for help.4. Buttons Selectbutton to start a measurement again. Press and hold thebutton to add voice memo. Voice memo is onlyavailable for Daily Check and ECG Recorder measurements.DEVICE OVERVIEW Selectbutton to review previous results. Pressbutton to open the help information.
SYMBOLS DEFINITIONSDEFINITIONSSYMBOLSApplication part type BFManufacturerCE0197In conformity with Directive 93/42/EECEuropean RepresentativeSymbol for “ENVIRONMENT PROTECTION – Waste electricalproducts should not be disposed of with household waste. Pleaserecycle where facilities exist. Check with your local authority orretailer for recycling advice”.IP22Against ingress of solid foreign objects 12.5mm diameter,Against dripping(15 tilted)Follow operating instructionsNo alarm system.Prior to UseCharge the BatteryTo charge the battery,1. Connect the smaller end of the USB charging cable to themulti-functional connector2. Connect the other end of the USB charging cable to the USB chargingport.3. When the LED turns to green, it means the battery is fully charged.Warnings and Cautionary Advices The device cannot be used for any measurement during charging. Use charging adapter provided by manufacturer, or USB chargingdevices which comply with the standard of IEC 60950.Power On/OffPress the Power On/Off button to power on the device. Press and holdPower On/Off button for 2 seconds to power off the device.
DAILY CHECKDaily Check measurement is a function that combines the measuringof ECG (Electrocardiograph), SpO2 (blood oxygenation) and systolicblood pressure. It takes only 20 seconds to collect your vital signsbefore giving you vital signs readings and your health evaluation.Using Daily CheckTo start a Daily Check, follow the steps as below.1. If you have not created user, then please follow the instruction in[Settings Section] to add your user account.2. Tap the Daily Check icon in the middle of the screen.3. Choose the right user.4. Hold the device according to the instruction, keep the device at thesame level as your heart, and keep stable posture and stay calm. Don’texert too much pressure on the ECG electrode, which may result inEMG (electromyograph) interference. Just hold gently and ensuregood contact with the ECG electrode. Do not exert pressure on thefinger that put in the SpO2 sensor. Just fit it inside but gently toensure good blood perfusion.(1)(4)(2)(3)(1) Put the right forefinger into the built-in SpO2 sensor. Use the fingernail to squeeze the edge of the SpO2 sensorcover, then move in upward to the leftto raise it up as shown below.(2) Press the right thumb on the rightelectrode.(3) Press the right middle finger on the backelectrode.(4) Press the left electrode to the left palm.5. Once the device detects stable waveform, it will automatically startthe measurement. Thecountdown bar moves from left to right.6. When the bar is fully filled, the device will analysis your data, andMEASUREMENTPROCEDUREthen show the measurement result.
Daily Check provides the trending graph of heart rate, SpO2 and bloodpressure. To view the trend, tap the button, then select one record, andthen tap the button.BP CalibrationWarnings and Cautionary Advices For a given user, it is suggested to make BP calibration every threemonths.To get blood pressure readings, this device should be calibrated by adoctor with a traditional cuff blood pressure (BP) meter. Because ofindividual differences, each user must make his/her own calibrationbefore using Daily Check to measure or track the blood pressure. Thecalibration should be performed when the user is under calm status.To calibrate with a cuff BP meter, follow the steps as below.1. Select the Settings icon, select BP Calibration , and then choosethe right user.2. Ensure that the cuff and the Vital Signs Monitor are at the same level asyour heart. Then start the blood pressure measurement from the cuff BPmeter.3. Press thebutton on thescreen, and start the DailyCheckmeasurement.4. When the blood pressure measurement is finished, manually input thereadings of systolic pressure.5. Repeat the calibration once again by following the above steps.ECG RecorderAbout ECG RecorderThe ECG recorder offers four different methods to measuring ECG. Tap theficon to switch between two pages.As shown above, from left to right, there are: Method A: Lead I, right hand to left hand Method B: Lead II, right hand to left abdomen Method C: Lead I, left wrist to right wrist Method D: Lead II, right wrist to left lower abdomenST segment analysis is performed on selected LEAD.MEASUREMENTPROCEDURE
Method A and B offer maximum comfort, than method C and D, but no STsegment value. No matter which method you choose to measure ECG,please keep stable posture and stay calm during the measurement.Measuring without CableTo start an ECG Recorder measurement without cable,1. Choose the method A or B.2. Follow the instruction according to the mode you selected. Press the right thumb on the right electrode; Press the right forefinger on the back electrode; For method A, press the left electrode to the left palm; For method B, press the left electrode to the left lower abdomen;Do not press the device too firmly against your skin, which may result inEMG (electromyograph) interference. After you finish the above steps,hold the device stably and stay calm.3. Once the device detects stable waveform, it will automatically start themeasurement. The countdown bar moves from left to right.4. When the bar if fully filled, the device will analysis your data, and thenshow the measurement result.MEASUREMENTPROCEDURE
Measuring with CableTo start an ECG Recorder measurement with cable,1. Choose the method C or D.2. Follow the instructions to connect the ECG cable and place the ECGelectrodes. Sit down or stand, / stay calm; Palms facing up, place an electrode in the middle of right wrist; For method C, place another electrode in the middle of left wrist; For method D, place another electrode in the left lower abdomen;3. The display will then show your ECG waveform.The device will monitor your ECG continuously, however no data will be saveduntil you press the4. Press thebutton.button to start collecting your ECG data. The countdown barmoves from left to right.5. When the bar is fully filled, the device will analysis your data, and thenshow the measurement result.Quick ECGIf the Quick ECG function is enabled, then you can start an ECGmeasurement very quickly by picking up the device and hold it according tomethod A. This saves time and is much easier for use.In the Settings menu and tap Quick ECG to enable or disable this function.MEASUREMENTPROCEDURE
TemperatureAbout thermometerWarnings and Cautionary AdvicesThe thermometer is only designed for the measuring area on thehuman body stated in this manual. The device needs to be in the room which the measurement is takenfor at least 10 minutes before use. Physical activity, increased perspiration on the forehead, takingvasoconstictive medication and skin irritations can distort the result. The forehead (temples) must be free from perspiration andcosmetics.Influences on forehead temperature include but not limited toA person’s individual metabolism; Age; Forehead temperature is higher in babies and infants than inadults. Greater temperature fluctuations occur faster and more often inchildren. Normal forehead temperature decreases with age. Environmental temperature; Time of day; Forehead temperature is lower in the morning andincreases throughout the day towards evening. Activities; Physical and, to the lesser extent, mental activities increasesforehead temperature.Taking Temperature MeasurementTo start a temperature measurement,1. In the Main Screen, select Thermometer .2. Put the thermometer sensor on your temple.Putsensorontemple, click buttonthenscantoforehead until youhear a beep3. Press the Home button once, you will hear “Bi-Bi” beep, whichindicates the measurement starts. Then move the thermometeraround the temple for around 3 seconds until you hear a long “Bi” beep,which indicates the measurement is finished.4. Take down the device, and the screen shows the measurementresult.In the Settings menu, tap the Thermometer area to change betweenCelsius degree ( C) and Fahrenheit degree ( F).MEASUREMENTPROCEDURE
OximeterThe Vital Signs Monitor measures the amount of oxygen in your blood,your pulse rate and pulse index. The oxygen saturation (SpO2) ismeasured and displayed as a percentage of full capacity.Measuring without CableTo start a Oximeter measurement without cable,1. In the Main Screen, tap the Pulse Oximeter 2. Insert the forefinger into the built-in SpO2 sensor as shown below.3. When the device detects stable waveform, it will automatically startthe measurement. The countdown bar moves from left to right.4. When the bar is fully filled, the device will analysis your data, and thenshow the measurement result.Measuring with Cable1. Connect the external SpO2 sensor to the multi-functional connector.2. Put your index finger or middle finger into the external SpO2 sensor.Make sure the cable is positioned along the top of the hand, and thefinger nail is in the position as shown below.Finger nail position3. Tap the Pulse Oximeter icon.4. The display will then show your PLETH waveform, SpO2 and pulse rate.The device will monitor continuously, however nodata will be saved until you press thebutton.MEASUREMENTPROCEDURE5. Press the button to start collecting your SpO2 data. The countdown barmove from left to right.6. When the bar is fully filled, the device will analysis your data, and thenshow the measurement result.
Sleep MonitorVital Signs Monitor offers a non-invasive method to monitor sleepstatus for adult users who have sleep problem, sleep related breathingdisorders and obstructive sleep apnea.To start a sleep monitor measurement,1. Tie the wristband on one of your left hand.2.InserttheSpO2cableintothemulti-functional connector.3. Put one of your finger into the sensor.Forefinger or middle finger is suggested. Ifneeded, remove the colored nail polish fromthe finger. Make sure that the sensor iscorrectly placed so that the cable goes aboveyour hand back.4. Press the Home button to enter the Main Screen. Then Tap the SleepMonitor icon to enter the screen as below.5. Tap thebutton to start the sleep monitoring. During monitoring, acountdown timer is always displayed at the lower left part.6. You can press Home button to lock the screen, as shown below. Thedevice will work in a very low power consumption mode.7. Insert the device into the wrist band cover, and then begin to sleep.8. When you get up, or when you want to stop monitoring, you canpress the Home button again to unlock the screen, and then tapiconto stop sleep monitoring.9. You can tap button to view the SpO2 trending during your sleep, ortap “Close” button and return to the Main Screen.MEASUREMENTPROCEDURE
PedometerTo start a Pedometer measurement,1. In the Main Screen, select Pedometer icon. If you have not createduser, then please add your user account.2. Select a user to enter the screen as below.3. Tap thebutton to set your target, if needed.4. Tapthe button to start calculating steps.5. Place the device into your pocket.6. When you finished calculating steps, press the Home button to stopthe pedometer.7. Press Home button again to exit pedometer function.ReminderUp to 6 reminder events can be set by user. You can add, edit and deletereminder events.MEASUREMENTPROCEDURE
SettingsChanging Sound VolumeIn the Settings menu, tap the Volume area to change volumedirectly. “X” means the volume is turned off.Enabling/Disabling Voice GuideIn the Settings menu, tap the Voice Guide to enable or disable thisfunction.User ManagementTo use the Daily Check measurement, you must create your account. Ifthe Daily Check measurement is used by more than one user, theneach user must create his/her own account.To create a user account:1. In the Settings menu, choose User Management .2. Tap a “ ” button to open the menu below.3. Tap each button to edit corresponding information.4. Tap “X” to return to User Management menu.To edit the information of a user:1. In the Settings menu, choose User Management .2. Choose the user that you want to edit.3. Tap the information that you want to edit, and then modify.4. Tap OK and “X” to return to the User Management menu.To delete a user:1. In the Settings menu, choose User Management .2. Choose the user that you want to delete.3. Tap thebutton.4. Choose Yes to confirm.SETTINGS
Setting Date & Time1. In the Settings menu, choose Date & Time 2. Tap “ ” or “-” button to change the date, then tap3. Tap “ ” or “-” button to change the time.4. Tapto finish the setting.Choosing Language1. In the Settings menu, choose Language .2. Choose the language from the list.Changing ECG waveform lengthTo change the length of ECG waveform saved for each ECG Recordermeasurement:1. In the Settings menu, choose ECG Length .2. Then choose among 30s , 60s . And tap OK to enable thechange.Setting ECG BandwidthIn the Setting menu and choose ECG bandwidth to change between Normal and Wide .SETTINGS
Erasing DataIn the Setting menu, Tap Erase All Data , and then Yes .All measurements saved in the device will be deleted.Factory ResetIn the Setting menu, tap Factory Reset , then tap Yes .All measurements, user information and other settings saved in thedevice will be deleted, and the device will be restored to the factorydefault settings.ReviewReviewing Daily CheckTo review Daily Check records,1. In the Review menu, select DailyCheck .2. Choose the right user to open the list as below, then select one recordto review more information as below.In this menu, you can: Selectto delete this measurement Selectto replay the ECG waveform as shown below.When the ECG waveform is being replayed, you can Selectto change the waveform amplitude. Selectto pause it. Selectto return Daily Check list. Selectto view the trend of heart rate, SpO2 and blood pressure.SETTINGS Selectto return to the Daily Check list.
MaintenanceCare and CleaningClean the device per week, carefully swabbing the device surface with asoft cloth or cotton swab with rubbing alcohol.Trouble ShootingProblemThe device doesnot turn on.Possible Cause1. The battery may be low.2. The device might bedamagedThe ECG waveformamplitude is smallECG waveformdriftsThe lead you choose is notsuitable for you.1. The pressure exerted on theelectrode is not stable or toomuch.2. Hand or body may bemoving.1. Finger may not be insertedcorrectly.2. Finger or hand may bemoving.The Bluetooth may not beturned on.SpO2 or pulse rateshows no value, orthe numberfluctuatesThe app cannotfind the device.“System Error”occurred.BP calibrationfailed.No voice duringECG and SpO2measurement.Temperature valueis too low.MAINTENANCE &TROUBLESHOOTINGSoftware or hardware failure.1. Wrong height.2. The difference between twocalibrations is too large.Solution1. Charge the battery andtry again.2. Please contact withyour local distributor.Change another lead andtry again.1. Hold the device stablyand gently.2. Try to keep perfectlystill and test again.1. Remove finger andreinsert, as directed.2. Try to keep perfectlystill and test again.Turn on the Bluetooth onthe second page of MainScreen.Restart the device andmeasure again.If theerror persists, markdown the error numberand contact with yourlocal distributor.1. Reconfirm your height.2. Try to keep perfectlystill and calibrate again.The speaker is muted.Unmuted the speaker inthe Settings menu.1. The measurement area iscovered by hair.2. The thermometer sensor istoo far away from your skin.3. The thermometer sensor isdirty.1. Remove hair from themeasurement area.2. Keep the sensorcontact with your skin.3. Clean the sensor witha soft cloth or cotton.
AccessoriesWarnings and Cautionary Advices Use accessories specified in this chapter. Using other accessories maycause damage to the device or not meet the claimed specifications. Depending on the configuration, May not all the accessories areincluded in your package.Part 8-00540-00354-00DescriptionECG cable with 2 leadwires, snapSpO finger sensor, 25 cm, FP-10USB charging cable, micro DECG electrode, 10 pcsMinimonitor adaptor2SpecificationsClassificationsMDD, 93/42/EECEC DirectiveR&TTE, 1999/5/ECROHS 2.0, 2011/65/EUDegree protection against electrical shockType BFEnvironmentalItemOperatingStorageTemperature5 to 45 C-25 to 70 CRelative humidity (noncondensing)10% to 95%10% to 95%Barometric700 to 1060 hPa700 to 1060 hPaDegree of dust & water resistanceIP22Drop test1.0 mPhysicalSize88 56 13 mmPacking size178*123*75 mmWeightLess than 80 g (main unit)Display2.7” touch screen, HDConnectorMicro D connectorWireless connectivityBuilt-in Bluetooth dual mode, support 4.0 BLEPower SupplyBattery typeRechargeable lithium-polymer batteryBattery run timeOnly daily check: 1000 timesContinuous sleep monitoring: 12 hoursPure standby calendar mode: 3 monthsCharge timeLess than 2 hours to 90%
ECGLead typeIntegrated ECG electrodesExternal ECG cable and electrodesLead setLead I, lead IIMeasurement modeEpisode, continuousSampling rate500 HzSampling accuracy16 bitDisplay Gain1.25 mm/mV, 2.5 mm/mV, 5 mm/mV10 mm/mV, 20 mm/mVSweep speed25 mm/sBandwidth*0.05 to 40 HzElectrode offset potentialtolerance 300 mVHR measurement range30 to 250 bpmAccuracy 2 bpm or 2%, whichever is greaterST measurement range-0.5 to 0.5 mVMeasurement summaryECG Rhythm, High Heart Rate, Low Heart Rate, High QRS Value, High STHeart rate**, QRS duration, ST segment***,QT/QTc Rhythm analysis (RegularValue***, Low ST Value***, Irregular ECG Rhythm, Unable to analyze)SpO2StandardsMeet standards of ISO 80601-2-61Measurement accuracy verification: The SpO2 accuracy has been verified in human experiments bycomparing with arterial blood sample reference measured with a CO-oximeter. Pulse oximeter measurementare statistically distributed and about two-thirds of the measurements are expected to come within thespecified accuracy range compared to CO-oximeter measurements.SpO range70% to 100%SpO Accuracy (Arms)80-100%: 2%, 70-79%: 3%PR range30 to 250 bpmPR accuracy 2 bpm or 2%,whichever is greater
PI rangeMeasurement summary0.5-15SpO2, PR, PI, Summary (Normal Blood Oxygen, Low Blood Oxygen, Unableto analyze)Blood Pressure VariationMeasurement methodCuff-free non-invasive technologyMeasurement summarySystolic pressure based on individual calibration coefficientThermometerTechniqueInfrared body temperatureEnvironment temperature16.0 to 40.0 CMeasurement siteTempleMeasurement time3sMeasurement range34.0 to 42.2 C (94.0 to 108.0 F)Accuracy 0.2 C or 0.4 FSleep MonitorMonitoring timeUp to 10 hoursData storageStore SpO2 and pulse rateTotal duration, 90% STAT, Average saturation, Lowest saturation,Measurement summarySummary(No abnormal detected, blood oxygen drop detected, Unable toanalyze)PedometerRange0 to 99999 stepsDistance0.00 to 999.99 kmTimer0 to 1999 minutesCalories0.00 to 9999.99 kcalFat0.00 to 199.99 gReminderNo. of reminder6Reminder eventWake up, Check me, Medicine, Self-defineReviewData reviewGraphic trend, list trendWaveform reviewFull disclosure waveformDaily check100 pcs of records without audio memoECG recorder100 pcs of records without audio memoOximeter100 pcs of recordsThermometer100 pcs of recordsSleep record review5 pcs of records, 10 hours each recordMobile APPOperating systemIOS CapabilityIOS 7.0 or above, Android 4.4 or aboveiPhone 4s and models launched subsequently; iPad 3 and models launchedsubsequently;Android CapabilityMobile phone or tablet with Bluetooth 2.1 or aboveFunctionalityData export, data review, waveform replay, trend review, data sharing* : External ECG cable, bandwidth mode set to wide**: Heart rate is calculated based on average of every 5 to 30 QRS complex.***: Only for measurement with external ECG cable, bandwidth mode set to wide
Electromagnetic CompatibilityThe device meets the requirements of EN 60601-1-2. All the accessoriesalso meet the requirements of EN 60601-1-2 when in use with thisdevice.Warnings and Cautionary Advices Using accessories other than those specified in this manual asedelectromagnetic immunity of the equipment. The device or its components should not be used adjacent to orstacked with other equipment. The device needs special precautions regarding EMC and needs to beinstalled and put into service according to the EMC informationprovided below. Other devices may interfere with this device even though they meetthe requirements of CISPR. When the inputted signal is below the minimum amplitude providedin technical specifications, erroneous measurements could result. Portable and mobile communication equipment may affect theperformance of this device. Other devices that have RF transmitter or source may affect thisdevice (e.g. cell phones, PDAs, and PCs with wireless function).Guidance and Declaration - Electromagnetic EmissionsThe Health Monitor is intended for use in the electromagnetic environment specified below. The customer or the user of the deviceshould assure that it is used in such an environment.Emission testsComplianceRF emissions CISPR 11Group 1Electromagnetic environment - guidanceThe device uses RF energy only for its internal function. Therefore,its RF emissions are very low and are not likely to cause anyinterference in nearby electronic equipment.RF emissions CISPR 11Class BThe device is suitable for use in all establishments, includingHarmonic emissions IEC61000-3-2Class Adomestic establishments and those directly connected to theVoltageCompliesFluctuations/FlickerEmissions IEC 61000-3-3public low-voltage power supply network that supplies buildingsused for domestic purposes.Guidance and Declaration - Electromagnetic ImmunityThe Health Monitor is intended for use in the electromagnetic environment specified below. The customer or the user of the HealthMonitor should assure that it is used in such an environment.
Electromagnetic CompatibilityThe device meets the requirements of EN 60601-1-2. All the accessoriesalso meet the requirements of EN 60601-1-2 when in use with thisdevice.Warnings and Cautionary Advices Using accessories other than those specified in this manual asedelectromagnetic immunity of the equipment. The device or its components should not be used adjacent to orstacked with other equipment. The device needs special precautions regarding EMC and needs to beinstalled and put into service according to the EMC informationprovided below. Other devices may interfere with this device even though they meetthe requirements of CISPR. When the inputted signal is below the minimum amplitude providedin technical specifications, erroneous measurements could result. Portable and mobile communication equipment may affect theperformance of this device. Other devices that have RF transmitter or source may affect thisdevice (e.g. cell phones, PDAs, and PCs with wireless function).Guidance and Declaration - Electromagnetic EmissionsThe Health Monitor is intended for use in the electromagnetic environment specified below. The customer or the user of the deviceshould assure that it is used in such an environment.Emission testsComplianceRF emissions CISPR 11Group 1Electromagnetic environment - guidanceThe device uses RF energy only for its internal function. Therefore,its RF emissions are very low and are not likely to cause anyinterference in nearby electronic equipment.RF emissions CISPR 11Class BThe device is suitable for use in all establishments, includingHarmonic emissions IEC61000-3-2Class Adomestic establishments and those directly connected to theVoltageCompliesFluctuations/FlickerEmissions IEC 61000-3-3public low-voltage power supply network that supplies buildingsused for domestic purposes.Guidance and Declaration - Electromagnetic ImmunityThe Health Monitor is intended for use in the electromagnetic environment specified below. The customer or the
The Vital Signs Monitor is intended to be used for measuring, displaying, reviewing and storing of multiple physiological . healthcare facilities environment. ECG and Blood pressure variation is intended for use with adult. The data and results provided by this device are for pre-check screening purpose only and cannot be directly used for .
