Transcription
AxiomUser GuideEnglish
Table of ContentsEnglish . . . . . . . . . . . . . . . . . . . . . . . . . . . . . . . . . . . . . . . . . . . . . . . . . . . . . . . . . . . . . . . . . . . . . . . . . 3Introduction . . . . . . . . . .What’s in the Box? . . . . . .Axiom Keyboard Overview .About This Manual . . . . . .Section 1: Getting Started . . . . . . . . . . . . . . . . . . . . . . . . . . . . . . . . . . . . . . . . . . . . . . . . . . . . . . . . . . . . 3. . . . . . . . . . . . . . . . . . . . . . . . . . . . . . . . . . . . . . . . . . . . . . . . . . . . . . . . . . . . 3. . . . . . . . . . . . . . . . . . . . . . . . . . . . . . . . . . . . . . . . . . . . . . . . . . . . . . . . . . . . 3. . . . . . . . . . . . . . . . . . . . . . . . . . . . . . . . . . . . . . . . . . . . . . . . . . . . . . . . . . . . 3. .1.1 Axiom Keyboards Overview .1.2 Setup . . . . . . . . . . . . .1.3 Driver Installation Procedure1.4 MIDI Connections . . . . . .1.5 Power Supply . . . . . . . . .445556Section 2: Basic MIDI Control From Your Axiom . . . . . . . . . . . . . . . . . . . . . . . . . . . . . . . . . . . . . . . . . . . . . . . . 62.1 The Keyboard. . . . . . . .2.2 MIDI Channel . . . . . . .2.3 Program and Bank Changes2.4 MIDI Controller Messages .8101011Section 3: Advanced Features . . . . . . . . . . . . . . . . . . . . . . . . . . . . . . . . . . . . . . . . . . . . . . . . . . . . . . . . . . . 143.1 MIDI Controllers . . . . . . . . . . . . . . . . . .3.2 Recollection and Storage of Your Control Setups .3.3 How To Avoid Jumping Parameters . . . . . . . .3.4 The Rotary Encoders . . . . . . . . . . . . . . . .3.5 Pressure Pads. . . . . . . . . . . . . . . . . . . .3.6 Controlling Several Devices at the Same Time . .3.7 Group A Controls . . . . . . . . . . . . . . . . .3.8 Example of Control Functionality . . . . . . . . . 14. 15. 18. 18. 20. 24. 28. 29Section 4: Usage Examples. . . . . . . . . . . . . . . . . . . . . . . . . . . . . . . . . . . . . . . . . . . . . . . . . . . . . . . . . . . . . . 324.1 MIDI Out from USB Function . . . . . . . . . . . . . . . . . . . . . . . . . . . . . . . . . . . . . . . . . . . . . . . . . . . . . . . . . . 324.2 Recording Your Performance On A Sequencer . . . . . . . . . . . . . . . . . . . . . . . . . . . . . . . . . . . . . . . . . . . . . . . . . 334.3 Controlling a Sound Module from the Computer . . . . . . . . . . . . . . . . . . . . . . . . . . . . . . . . . . . . . . . . . . . . . . . 34Section 5: MIDI Messages Explained . . . . . . . . . . . . . . . . . . . . . . . . . . . . . . . . . . . . . . . . . . . . . . . . . . . . . . . . 345.1 Program & Bank Changes Explained . . . . . . . . . . . . . . . . . . . . . . . . . . . . . . . . . . . . . . . . . . . . . . . . . . . . . . . 345.2 RPN/NRPNs Explained. . . . . . . . . . . . . . . . . . . . . . . . . . . . . . . . . . . . . . . . . . . . . . . . . . . . . . . . . . . . . . 355.3 SysEx Explained . . . . . . . . . . . . . . . . . . . . . . . . . . . . . . . . . . . . . . . . . . . . . . . . . . . . . . . . . . . . . . . . . 35Section 6: Troubleshooting . . . . . . . . . . .Section 7: Technical Info . . . . . . . . . . . .Section 8: Warranty Terms and RegistrationSection 9: Appendices . . . . . . . . . . . . . . . . . . . . . . . . . . . . . . . . . . . . . . . . . . . . . . . . . . . . . . . . . . . . . . . 36. . . . . . . . . . . . . . . . . . . . . . . . . . . . . . . . . . . . . . . . . . . . . . . . . . . 37. . . . . . . . . . . . . . . . . . . . . . . . . . . . . . . . . . . . . . . . . . . . . . . . . . . 37. . . . . . . . . . . . . . . . . . . . . . .Appendix A - MIDI IMPLEMENTATION CHART . . . . . . . . . . . . . . . . . . . . . .Appendix B – Useful MIDI Data Tables . . . . . . . . . . . . . . . . . . . . . . . . . . .Appendix C - General MIDI Controller Numbers (MIDI CC's) . . . . . . . . . . . . . .Appendix D – Assignable Controller Numbers to Linear Controllers . . . . . . . . . . .Appendix E – Assignable Controller Numbers to Non-Linear ControllersAppendix F – Assignable Controller Numbers to Rotary Encoders . . . . . . . . . . . .Appendix G – Assignable Controller Numbers to Pressure Pads . . . . . . . . . . . . . .Appendix H - Hexadecimal Conversion Chart . . . . . . . . . . . . . . . . . . . . . . .Appendix I – Factory Presets . . . . . . . . . . . . . . . . . . . . . . . . . . . . . . . . 38. 38. 39. 41. 42. 43. 44. 45. 46. 47English
Axiom Line User Guide2English
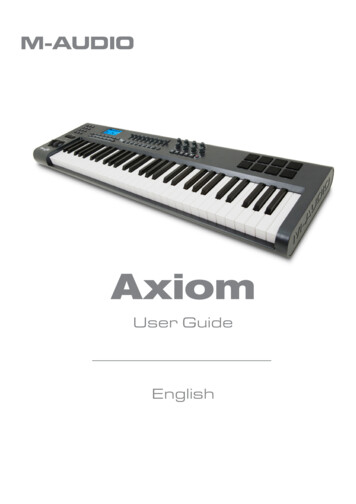
Axiom Line User GuideIntroductionCongratulations on the purchase of your M-Audio Axiom MIDI controller keyboard. Please register your product today to ensure fullwarranty coverage and receive free product updates. Register online at www.m-audio.com/registerYour new keyboard provides extensive control of virtual instruments, DAWs, hardware synthesizers, samplers and any other MIDIcompatible device.The eight fully assignable pads give you the ability to trigger samples and loops separately from the keyboard in real-time. The eightfully assignable endless rotary encoders allow for instant control of your software’s features and can pick up just where you left off.The versatile and easy-to-use Axiom keyboard is a great controller in the studio and live on stage.What’s in the Box?If any of the following items are missing from your package, please contact your retailer. Axiom keyboard Quick Start Guide Keyboard Controller Series CD-ROM Software bundle CD-ROM USB cableAxiom Keyboard OverviewHere is a rundown of some of the great features the Axiom keyboards have to offer: 25-, 49- or 61-note keyboard versions. Eight fully programmable endless rotary encoders. Eight fully programmable sample trigger pads. Nine fully assignable 40mm sliders (Axiom 49 and 61 only). USB 1.1 port to connect the Axiom to a computer. The keyboard can also be powered from the USB port, so no additionalpower supply is required. MIDI IN and MIDI OUT ports for connecting external MIDI gear. Expression pedal socket (expression pedal not included). Sustain pedal socket (sustain pedal not included). Fully programmable monophonic aftertouch. Null mode – for full parameter recall with each preset. Controller Mute – reposition controllers without affecting your software. Easy to program controls can be assigned to a vast range of MIDI messages including MIDI controller messages, GM/GS/XGSysEx messages, NRPN/RPN messages, channel aftertouch, program/bank changes, note messages and more. Rotary encoders can be programmed to use any of six popular increment/decrement methods for compatibility with virtuallyall software with encoder support. The encoders can also function as standard MIDI controllers with a range of 0 to 127. A range of different acceleration curves for the encoders for realistic dial control. Trigger pads respond to velocity or pressure and can be programmed to either send MIDI note data or controller messages,allowing for full control over all your software samplers, for triggering loops and much more.About This ManualThere are five sections to this manual. Section 1 provides an overview of your new Axiom keyboard and gives you details how to setup the keyboard with your computer. Section 2 explains some of your keyboard’s basic control features to get you started right away.In section 3, we delve into more advanced functions and programming, and in section 4 we provide examples of your Axiom keyboardin use. Finally, section 5 explains more about MIDI and some often misunderstood MIDI message types.3English
Axiom Line User GuideSection 1: Getting Started1.1 Axiom Keyboards Overview1.1.1 Top Panel Overview1.1.2 Back Panel Overview1.1.3 Control DefinitionsThese controls are referred by name throughout this manual.1:LCD display9:Octave buttons18:DC power socket2:Sliders (Axiom 49/61 only)10:Pitch Bend wheel19:Power switch3:Encoders11:Modulation wheel20:Kensington Lock Hole4:Transport buttons12:Keyboard with Aftertouch5:Assignable buttons (Axiom49/61 only)13:Expression pedal socket6:Trigger Pads14:Sustain Pedal socket7:Function buttons15:MIDI OUT port8:Numeric Keypad (Axiom49/61 only)16:MIDI IN port17:USB 1.1 port4English
Axiom Line User Guide1.2 SetupIf you intend to connect your Axiom keyboard to a computer, please read sections 1.2 and 1.3 first. If you only intend to use yourAxiom keyboard to control a sound module or synthesizer using the external MIDI OUT you should skip to section 1.4.1.2.1 Minimum System RequirementsIf you are using your Axiom with a computer, the following minimum system requirements apply:WindowsMac OSPentium 3 800 MHz or higherMacintosh G3* 800/G4* 733 MHz or higher(CPU requirement may be higher for laptops)(CPU requirement may be higher for laptops)256 MB RAMOS X 10.3.9 with 256 MB RAM,DirectX 9.0b or higherOS X 10.4.2 or greater with 512 MB RAMWindows XP (SP2) or higher*G3/G4 accelerator cards are not supported.(Windows 98, Me, NT or 2000 not supported)M-Audio suggests you also check the minimum system requirements for your software, as they may be greater than the above.USB hubs are not supported. M-Audio suggests that you connect directly to one of your computer’s built in USB ports.1.3 Driver Installation ProcedureImportant: Do not connect the USB cable to a computer until you have read and understood the instructions in the Quick StartGuide. A printed copy of this is included in the box and you will also find this on the Keyboard Controller Series CD-ROM.1.3.3 Using The Axiom with Your SoftwareWhen installed, the Axiom appears as a simple MIDI device with two input ports and one output port. You should select the firstlisted Axiom input port as the MIDI input device in your software. Once this is set, your software should be able to receive notesand controller data from the Axiom.If you have connected external MIDI gear like a drum machine or another keyboard to your Axiom’s MIDI IN port, this gear canbe interfaced to the computer by selecting the second listed Axiom input port. This way, your Axiom is acting as a MIDI to USBinterface.It is also possible to stream data from your computer to external MIDI gear connected to the MIDI OUT port of your Axiom—effectively a USB to MIDI interface. To do this, you should select the Axiom output device in your software. Note that some othersteps are necessary to make this work that will be fully explained later in this manual.The port names are defined in the table below. Note that the MIDI ports will appear with different names depending on whetheryou are using Mac or PC, and whether you chose to install the Windows multi-client driver (more information on driver installationand configuration can be found in the printed Quick Start Guide).USB Input Port from AxiomInput port from external MIDI INUSB Output port to AxiomMac OS XUSB Axiom Port 1USB Axiom Port 2USB AxiomWindows Class DriverUSB Audio Device*USB Audio Device*USB Audio Device*Windows Multi-Client DriverUSB Axiom InUSB Axiom In (2)USB Axiom Out* These will appear as a single USB Audio Device in the Device Manager.1.4 MIDI ConnectionsThe MIDI Out port accepts a standard 5-pin DIN-type MIDI plug (available from most professional audio retailers).The MIDI Out port can be used to connect the Axiom to a hardware sequencer, an external synthesizer or sound module, forexample.5English
Axiom Line User Guide1.5 Power SupplyIf you are using your Axiom with a computer via its USB port, there is no need for an external power supply.Your Axiom will draw itspower from the computer.However, if you are intending to use your Axiom without connecting to a computer’s USB port, then you will need to use an externalpower supply. No power supply is included in the box, so please select one that meets the following requirements: 12V DC 250mA – 300mA Center positiveSection 2: Basic MIDI Control From Your AxiomYour Axiom controller will not make any sound unless it is connected to a computer or other external MIDI gear. This is because theAxiom sends MIDI data when you play it and does not produce sound on its own. Instead, it is used to control a virtual instrument onyour computer or a MIDI sound module to generate sounds.Programming MIDI data can get complicated at times, so with the Axiom range of keyboards, we have strived to make MIDI programmingas simple as possible. In this section we look at the most common MIDI messages and how to program them on your Axiom.So to begin, you should familiarize yourself with the function button panel.This is a good place to introduce you to the way we approach the differences between the Axiom 61 and 49 and the Axiom 25. Theappearance and functionality of the Axiom 61 and 49 are the same, it’s just the size of the keyboard that is different, thus when wegive instructions for these models, they are always grouped together. The Axiom 25 looks different and a number of its functions areaccessed in a different way, so for this model we will always give you a separate set of instructions.2.0.1 Axiom 49 And 61 FunctionsNumeric KeypadUse the numeric keypad to enter values during programming. The LCD display will show the values as you enter them.2.0.2 Axiom 25 Functions6English
Axiom Line User GuideAdvancedA number of advanced functions on the Axiom 25 are accessed from the keyboard itself. These functions are listed above thekeys on the front panel of the unit.To use any one of these functions, first press the Advanced button. The button will light indicating that the keyboard is nowin Advanced Function mode. The keys can now be used to select the functions shown above them, instead of sending MIDInotes.Here is a list of the advanced functions that are available on your Axiom 25:White Keys:Black Keys:Numeric Data Entry KeysCtrl AssignZone ChanNumbers 0-9 and Enter.Chan AssignCtrl SelectVel LockData 1Bank LSBData 2Bank MSBData 3Mem DumpCurve (Velocity curve, Pad curve, Rotary encoder acceleration curve)MIDI Out (from USB)StoreSome of the functions on the Axiom 25 require you to enter numeric values. These functions are used in the following way: Press the Advanced button. Press the key of the function (for example, Bank LSB). Enter the data value using the Numeric Data Entry keys 0-9 on the keyboard (printed above the keyboard). In thisexample type in a value between 0 and 127. Press the Enter key to confirm the value.Use the -/ buttons to make small single step adjustments. As you enter data from the keyboard numeric keys or use the -/ buttons, the current value is displayed on the LCD.2.0.3 Function IndexFunctionSectionFunctionSectionAdvanced (Axiom 25 only)2.0.2Mem. Dump3.2.2-/ 2.0.2Dev. ID (Axiom 49, 61 only)3.2.3Snapshot3.3.3MIDI Out4.1Zone Range3.6.4Store3.2.2Zone/Group3.6.2Zone Chan.3.6.3Recall*3.2Ctrl Select2.4.2Program*2.4.2 and 3.6.6Data 13.1Mute3.3.1Data 23.1Null3.3.2Data 33.1Glob. Chan*2.2 & 3.6.7.3Drawbar3.1.2Panic2.4.3Curve (Axiom 25 only)2.1.1, 3.4.1 and 3.5.5Ctrl Assign2.4.2Accel Curve (Axiom 49, 61 only)3.4.1Chan. Assign3.6.7Vel Curve (Axiom 49, 61 only)2.1.1Vel. Lock3.5.6Pad Curve (Axiom 49, 61 only)3.5.5Bank LSB2.3 and 3.6.6Numeric Keypad (Axiom 49, 61 only)2.0.1Bank MSB2.3 and 3.6.6Data Entry Keys (Axiom 25 only)2.0.2* The -/ buttons will remember the last function used from these three: Recall, Program and Global Channel. After using one ofthese functions, the same function will be called the next time you press the – or keys. When you press a different one of thesefunction buttons, the -/ keys will then remember this function as the last one used.To type in a value for one of these functions onthe Axiom 25, press Advance.d followed by the function button and then use the number keys on the keyboard followed by ENTER.On the Axiom 49 and Axiom 61, simply press the desired function button then enter a value using the numeric keypad.7English
Axiom Line User Guide2.1 The KeyboardWhen you play the keyboard, MIDI note messages are sent. These messages are read by your computer software or external MIDIgear and used to generate sound accordingly.2.1.1 Velocity 60404040202020000Every time you press a key, a MIDI note message is sent with a velocity value between 0 and 127; this value specifies how hard youpressed the key. A velocity value of 0 specifies that the key has been released. Since different people have different playing styles,your Axiom offers a number of different velocity curves. You should experiment with the different velocity curves to find the curvethat best suits your playing style.It is also possible to send fixed velocities each time you press a key. This is useful when composing drum parts or simple synthesizertracks. The fixed velocities are selected by assigning curve 10 to 12 as follows:CurveFixed Velocity ValueF1064F11100F121278English
Axiom Line User GuideTo change the velocity curve:49- and 61-note versions: Locate the label Vel Curve. Press the two buttons above this label. The LCD will show the currently selected velocity curve, preceded by a ‘C’ if a curve is selected, or ‘F’ if a fixedvelocity is selected. Enter the new curve number using the numeric keypad or use the -/ keys to select a different curve.25-note version: Press the Advanced button. This sets the keyboard to control data entry. Press the Curve key on the keyboard. The LCD will show the currently selected velocity curve preceded by a ‘C’ if a curve is selected, or ‘F’ if a fixedvelocity is selected. Enter the new curve number using the numeric data entry keys or use the -/ keys to select a different curve. Press the ENTER key to confirm the selected curve.The velocity curve is saved whenever you power down your Axiom.2.1.2 OctaveThere are 128 possible notes that can be sent as MIDI messages. If you wish to play a note that is out of your keyboard’s range, itis possible to shift the keyboard’s range up or down using the Octave buttons. The Octave buttons shift the range of the keyboardup or down by 12 notes at a time. All of the 128 notes can be accessed via the Octave button.To access all 11 available octaves from your keyboard: Locate the Octave buttons. Press to shift down one octave at a time.Or Press to shift up one octave at a time.2.1.3 TransposeThe Octave buttons can also be used to transpose your keyboard. Some players like to play in a particular key like C or F, forexample. Transpose lets you change the pitch you are controlling and continue to play in the key that is most comfortable for you.It is possible to transpose up or down by as much as 12 MIDI notes (or semitones). This means if you press one of the transposebuttons 12 times, the tone will sound exactly one octave higher or lower.To transpose the pitch you are playing: Locate the Octave / Transpose buttons and press them both together.The current transpose value will show on the LCDdisplay. Press either to transpose up by one half step, or to transpose down by one half step. The transpose value on theLCD will update accordingly. When you stop pressing the Octave / Transpose buttons, the “Trans” symbol on the LCD display will stop flashing andperformance mode will resume.The maximum transpose value is 12 (up) or -12 (down) semitones.Once you have set the transpose value, the Octave / Transpose buttons will again control the Octave shift.Octave and Transpose settings can be saved to any of the 20 memory locations of your Axiom. This process is explained insection 3.2.9English
Axiom Line User Guide2.2 MIDI ChannelMIDI messages can be sent on any of 16 channels. If you are connected to a computer, the MIDI software will be receiving on allchannels in most cases. However, when you are connected to external MIDI synthesizers, sound modules and some virtual instruments,you need to match the transmit channel of your keyboard with the receiving channel of the MIDI device for the connection to workproperly.To set the channel of your keyboard:49- and 61-note versions: Press the Glob Chan button. The LCD will show the channel on which the keyboard is currently transmitting. Enter a channel between 1-16 on the numeric keypad. The LCD will update to display the new channel selected asyou enter the data. You can also use the -/ buttons to step through the channels.25-note version: Press Recall and Program together to access the Glob Chan setting. The LCD will flash the GLOB CHANsymbol. Use the -/ buttons to select a channel between 1-16. As you press these buttons, you will see the selected channelchange on the LCD display.Or Press the Advanced button. Press Recall and Program together to access the Glob. Chan setting. Enter a channel between 1-16 on the numeric data entry keys. Press the Enter key to confirm the entered value.Controlling Percussion Sounds – Setting the transmit channel of your keyboard to channel 10 will allow you to control percussionsounds on any GM, GM2, GS or XG compatible module or synthesizer.The Global MIDI channel setting can be saved to any of the 20 memory locations of your Axiom. This process is explained in detailin section 3.2.Note: It is possible to assign the controls of your Axiom to channels on an individual basis. This is explained in section 3.6.7.2.3 Program and Bank ChangesProgram messages (commonly referred to as program changes) are used to select different instrument sounds in a MIDI device.Program messages cover a range of 128 instruments. These instruments are accessed by sending program numbers 0 to 127.Some MIDI devices have more than 128 instruments. If this is the case, the instruments tend to be separated into groups of 128, calledbanks. You can send bank MSB and bank LSB messages to access these different banks. Please consult the user manual of your MIDIdevice to see how the bank change numbers relate to the sounds on your device.To send a program change:49- and 61-note versions: Press the Program button. The LCD will flash the program number that was last sent out. Enter the program change in the range 0-127 on the numeric keypad. You can also use the -/ buttons to step through programs.25-note version: Press the Program button. The LCD will flash the PROG symbol. Use the -/ buttons to select a program change in the range 0-127.Or10English
Axiom Line User Guide Press the Advanced button. Press the Program button. Enter the program change in the range of 0-127 on the numeric data entry keys. Press the Enter key to confirm the entered valueTo send a bank change:49- and 61-note versions: Press the Bank LSB or Bank MSB button. The LCD will flash the bank number that was last sent out. Enter the new bank number in the range of 0-127 on the numeric keypad.25-note version: Press the Advanced button. Press either the Bank LSB key or Bank MSB key. The LCD will flash the bank number that was last sent out. Enter the new bank number in the range 0-127 on the numeric data entry keys. Press the Enter key to confirm the entered value.Program and bank settings can be saved to any of the 20 memory locations on your Axiom. This process is explained in detailin section 3.2.2.4 MIDI Controller MessagesThere are 128 MIDI controller messages that are used for controlling the MIDI-adjustable parameters in your software or on yourexternal MIDI gear. Examples of these controllable parameters include volume, pan, expression, reverb, chorus and portamento.Each of the controls on your Axiom keyboard is able to send any of the 128 standard MIDI controller messages to control suchparameters. Please note that in order for these effects to work, the MIDI device you are sending to must be able to receive thesemessages. A full list of these control messages is given in Appendix C.For example, you may want to set the Modulation wheel to control the reverb amount. This is done by assigning controller 91 to theModulation wheel (control A10 on Axiom 25, control A19 on Axiom 49 and Axiom 61). .Examples of other popular effects are listed in the table below. (Please consult Appendix C for the full list.)EffectControl NumberModulation1Volume7Pan10Expression11Reverb depth91Chorus depth93There are many different types of virtual instruments available and most of these respond to MIDI controller messages, allowingyou to control a variety of parameters from your Axiom keyboard. Please review the manual that came with your software orexternal gear to see what these controller numbers are.11English
Axiom Line User Guide2.4.1 Extra Messages – 128 To 131You may have noticed that although we have stated there are 128 MIDI controller messages (0 – 127), Appendix C shows 132assignable controller messages. This is because messages 128 – 131 are a different type of MIDI message, defined in the GeneralMIDI Specification as RPN messages. You can assign these to the controls on your Axiom keyboard in exactly the same way as anyother MIDI controller message. The RPN messages control the following:Controller NumberMIDI MessageUse128Pitch Bend SensitivityAlters the range of a pitch bend message129Master Tune (coarse)Adjusts the tuning of your sound module or synthesizer in large steps130Master Tune (fine)Adjusts the tuning of your sound module or synthesizer in small steps131Monophonic Aftertouch*Adds a vibrato effect*Monophonic aftertouch is not an RPN message. However, it is an additional effect message defined in the General MIDI specificationand this is why we have included it in Appendix C.2.4.2 Programming the Controls on Your AxiomWhen programming a physical controller on your Axiom, the controller that was last used will be the first one selected forprogramming. To select a different physical controller for programming, use one of the following two methods:Method 1:25-, 49- and 61-note versions: Move the physical controller you wish to program, or press the assignable button or pad.Method 2:49- and 61-note versions: Press Chan Assign and Ctrl Assign together to access the Ctrl Select setting. The LCD display will flash the last used control. Use the numeric keypad to enter the number of the physical controller you want to select for programming.25-note version: Press the Advanced button. Press the Ctrl Select key on the keyboard. The LCD display will show the last used control. Use the numeric data entry keys to enter the number of the physicalprogramming. Press the Enter key to confirm and return to performance mode.controller you want to select forThe advantage of method 2 is that you do not have to move a control to select it – so there is no danger of disturbing aparameter on the MIDI device you are controlling.Programming a control:49- and 61-note versions: Select the physical controller for programming using method 1 or 2 above. Press the Ctrl Assign button. The LCD display will show the currently assigned MIDI controller number The physical controller you areprogramming is displayed in the bottom left hand corner of the LCD display for clarity. Use the numeric keypad or the -/ buttons to enter the MIDI controller number 0-131 as defined in Appendix C.12English
Axiom Line User Guide25-note version: Select the physical controller for programming using method 1 or 2 above. Press the Advanced button. Press the Ctrl Assign key on the keyboard. The LCD display will show the currently assigned MIDI controller number The physical controller you areprogramming is displayed in the bottom left hand corner of the LCD display for clarity. Use the numeric data entry keys or the -/ buttons to enter the MIDI controller 0-131 as defined in Appendix C. Press the Enter key to confirm and return to performance mode.The settings for your controllers can be saved to any of the 20 memory locations on your Axiom. This process isexplained in detail in section 3.2.Note: By default, the LCD display shows transmitted real time controller values between 0 and 127 as a physical controllike an encoder or fader is being moved. Alternatively, the LCD can be configured to only show the assigned controllernumber of the currently used physical controller (e.g. controller number 7 for Volume). The LCD display mode can bechanged as follows: Press the Zone Range and Zone/Group buttons together. The LCD will display OFF. Simultaneously press the Zone Range and Zone/Group buttons again to change the LCD back to its default mode.The LCD will display ON.2.4.3 PanicAt times you may find that the sound on your sound module or virtual instrument does not seem correct, or that notes get “stuck”and sound continuously. When this happens, press the button combination for Panic which will send ‘reset all controllers’ and ‘allnotes off’ commands. This will release stuck notes and reset controller values back to normal. The messages are sent on all 16MIDI channels. The LCD will show “Panic” while these messages are transmitted.49- a
The versatile and easy-to-use Axiom keyboard is a great controller in the studio and live on stage. What's in the Box? If any of the following items are missing from your package, please contact your retailer. Axiom keyboard Quick Start Guide Keyboard Controller Series CD-ROM Software bundle CD-ROM USB cable Axiom Keyboard Overview


