Transcription
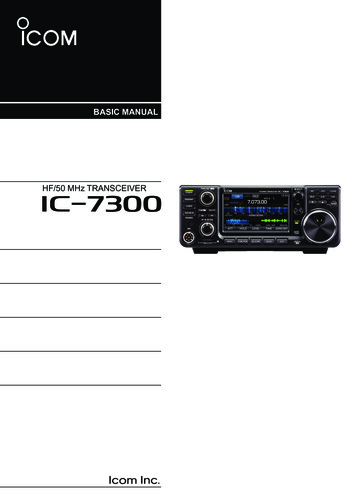
BASIC MANUALHF/50 MHz TRANSCEIVERi7300
Thank you for choosing this Icom product. The IC-7300 HF/50 MHz TRANSCEIVER is designed and built with Icom’sstate of the art technology and craftsmanship. With proper care, this product should provide you with years oftrouble-free operation. We appreciate you making the IC-7300 your transceiver of choice, and hope you agreewith Icom’s philosophy of “technology irst.” Many hours of research and development went into the design ofyour IC-7300.IMPORTANTSUPPLIED ACCESSORIESREAD ALL INSTRUCTIONS carefully completelybefore using the transceiver.SAVE THIS INSTRUCTION MANUAL— Thisinstruction manual contains full operating instructionsfor the IC-7300.Spare fuseSpare fuse(5 A)(25 A)Hand microphone(HM-219)FEATURES RF Direct Sampling SystemACC plugThe IC-7300 employs an RF direct sampling system.RF signals are directly converted to digital data andprocessed in the FPGA. This system is a leadingtechnology marking an epoch in amateur radio.DC power cable*(3 m: 9.8 ft)(13 pin) Real-Time Spectrum ScopeThe spectrum scope is class-leading in resolution,sweep speed and dynamic range. When you touch thescope screen on the intended signal, the touched area ismagniied. The large 4.3 inch color TFT touch LCD offersintuitive operation.CW key plugSpare fuse(6.35 mm: 1/4" Stereo)(30 A)Speaker plug(3.5 mm: 1/8" Stereo) New “IP ” FunctionThe new IP Plus function improves 3rd order interceptpoint (IP3) performance. When a weak signal is receivedadjacent to strong interference, the AD converter isoptimized against signal distortion.*For European versionsCDLDifferent types of accessories may be supplied, or maynot be supplied depending on the transceiver version. Class Leading RMDR and Phase NoiseCharacteristicsThe RMDR is improved to about 97dB (typical value) andPhase Noise characteristics are also improved about15dB (at 1 kHz frequency separation) compared to theIC-7200. A 4.3 inch touch panel color display A built-in automatic antenna tuner Multi-function control for easy settingsThis product includes RTOS “RTX” software, and islicensed according to the software license.EXPLICIT DEFINITIONSWORDR DANGER!R WARNING!CAUTIONNOTEThis product includes “zlib” open source software,and is licensed according to the open sourcesoftware license.DEFINITIONPersonal death, serious injury or anexplosion may occur.Personal injury, fire hazard or electricshock may occur.Equipment damage may occur.Recommended for optimum use. Norisk of personal injury, fire or electricshock.This product includes “libpng” open source software,and is licensed according to the open sourcesoftware license.Refer to the Text iles in the License folder ofincluded CD for information on the open sourcesoftware being used by this product.i
FCC INFORMATION FOR CLASS B UNINTENTIONAL RADIATORS:This equipment has been tested and found to complywith the limits for a Class B digital device, pursuantto part 15 of the FCC Rules. These limits aredesigned to provide reasonable protection againstharmful interference in a residential installation. Thisequipment generates, uses and can radiate radiofrequency energy and, if not installed and used inaccordance with the instructions, may cause harmfulinterference to radio communications. However, thereis no guarantee that interference will not occur in aparticular installation. If this equipment does causeharmful interference to radio or television reception,which can be determined by turning the equipmentoff and on, the user is encouraged to try to correctthe interference by one or more of the followingmeasures:This device complies with Part 15 of the FCC Rules.Operation is subject to the following two conditions:(1) this device may not cause harmful interference,and (2) this device must accept any interferencereceived, including interference that may causeundesired operation.WARNING: MODIFICATION OF THIS DEVICETO RECEIVE CELLULAR RADIOTELEPHONESERVICE SIGNALS IS PROHIBITED UNDER FCCRULES AND FEDERAL LAW.CAUTION: Changes or modiications to this device,not expressly approved by Icom Inc., could voidyour authority to operate this device under FCCregulations. Reorient or relocate the receiving antenna. Increase the separation between the equipmentand receiver. Connect the equipment into an outlet on acircuit different from that to which the receiver isconnected. Consult the dealer or an experienced radio/TVtechnician for help.TRADEMARKSIcom, Icom Inc. and the Icom logo are registered trademarks of Icom Incorporated (Japan) in Japan, the United States, theUnited Kingdom, Germany, France, Spain, Russia, Australia, New Zealand and/or other countries.Microsoft, Windows and Windows Vista are registered trademarks of Microsoft Corporation in the United States and/or othercountries.Adobe and Adobe Reader are registered trademark of Adobe Systems Incorporated.All other products or brands are registered trademarks or trademarks of their respective holders.DISPOSALThe crossed-out wheeled-bin symbol on your product, literature, or packaging reminds you that inthe European Union, all electrical and electronic products, batteries, and accumulators(rechargeable batteries) must be taken to designated collection locations at the end of their working life. Do not dispose of these products as unsorted municipal waste.Dispose of them according to the laws in your area.Icom is not responsible for the destruction or damage to the Icom transceiver, if the malfunction is because of: Force majeure, including, but not limited to, ires, earthquakes, storms, loods, lightnings, or other naturaldisasters, disturbances, riots, war, or radioactive contamination. The use of Icom transceiver with any equipment that is not manufactured or approved by Icom.ii
ABOUT THE TOUCH SCREEND Touch operationD Touch screen precautionsIn the Full manual or Basic manual, the touchoperation is described as shown below. The touch screen may not properly work when theLCD protection ilm or sheet is attached. Touching the screen with your inger nails, sharptopped object and so on, or touching the screenhard may damage it. Tablet PC’s operations such as lick, pinch in andpinch out cannot be performed on this touch screen.TouchIf the display is touched briely, one short beepsounds.D Touch screen maintenanceTouch for 1 secondIf the display is touched for 1 second, oneshort and one long beep sound. If the touch screen becomes dusty or dirty, wipe itclean with a soft, dry cloth. When you wipe the touch screen, be careful not topush it too hard or scratch it with your inger nails.Otherwise you may damage the screen.ABOUT THE SUPPLIED CDThe following items are included on the CD.Starting the CD1. Insert the CD into the CD drive.2. Double click “Menu.exe” on the CD. Full manual (English)Instructions for full operations, the same as themanual on the supplied CD. Depending on the PC setting, the menu screen shownbelow is automatically displayed.3. Click the desired button to open the file. Basic manual (English)Instructions for basic operations, the same as thismanual.LTo close the Menu screen, click [Quit]. Basic manual(German, Spanish, French, Italian, and other)Instructions for basic operations in German,Spanish, French, Italian, and other languages.This manual may not be included, depending on thetransceiver version.Opens the EnglishBasic manual(this manual)Opens the multilanguage Basic manual Schematic diagramIncludes the schematic and block diagrams. HAM radio TermsA glossary of HAM radio terms.Opens theSchematicdiagramOpens theFull manual Adobe Reader InstallerInstaller for Adobe Reader .Opens theGlossaryTo read the manuals or Schematic diagram, Adobe Reader is required. If you have not installed it,please install the Adobe Reader on the CD ordownload it from Adobe Systems Incorporated’swebsite.Installs the Adobe Reader Closes the Menu screenLDifferent types of menu screen may be displayed,depending on the transceiver version.A PC with the following Operating System is required. Microsoft Windows 10 Microsoft Windows 8.1 Microsoft Windows 7 Microsoft Windows Vista iii
ABOUT THE INSTRUCTIONSThe Full and Basic manuals are described in thefollowing manner.Detailed instruction1. Push MENU .“ ” (Quotation marks):Used to indicate icons, setting items, and screen titlesdisplayed on the screen.The screen titles are also indicated in uppercaseletters. (Example: FUNCTION screen)Push[ ] (brackets):Used to indicate keys. Opens the MENU screen.2. Touch [SET].Routes to the set modes and setting screensRoutes to the set mode, setting screen and the settingitems are described in the following manner.MENU» SET Display Display TypeInstruction exampleMENU screen Opens the SET screen.3. Rotate MULTI , and then push“Display.”MULTIto selectRotatePushSET screen4. Rotate MULTI , and then push“Display Type.”MULTIto selectRotatePushDISPLAY screen“Display Type” screeniv
TABLE OF CONTENTSD Entering a Band Edge. 3-6RF gain and SQL level . 3-9Dial Lock function . 3-9Basic transmission . 3-9Adjusting the transmit output power . 3-9D Adjusting the transmit output power . 3-9Meter display . 3-10D Meter display selection . 3-10D Multi-function meter . 3-10Adjusting the microphone gain . 3-10About the 5 MHz frequency band operation(USA version only). 3-11IMPORTANT . iFEATURES. iEXPLICIT DEFINITIONS . iSUPPLIED ACCESSORIES . iFCC INFORMATION .iiTRADEMARKS.iiDISPOSAL.iiABOUT THE TOUCH SCREEN .iiiDTouch operation .iiiDTouch screen precautions .iiiDTouch screen maintenance .iiiABOUT THE SUPPLIED CD .iiiABOUT THE INSTRUCTIONS .ivPRECAUTIONS.vii1PANEL DESCRIPTION . 1-1Front panel . 1-1Rear panel . 1-3Touch panel display . 1-4D Multi-function menus. 1-6D MENU screen . 1-6D FUNCTION screen . 1-6D QUICK MENU . 1-6Keyboard entering and editing . 1-7D Entering and editing characters . 1-7D Keyboard types . 1-7D Entering and editing . 1-7D Entering and editing example . 1-82INSTALLATION AND CONNECTIONS . 2-1Selecting a location . 2-1Front panel connection . 2-1Heat dissipation . 2-1Grounding. 2-1Rear panel connection . 2-2Connecting an external DC power supply . 2-3Connecting the antenna tuner . 2-33BASIC OPERATION . 3-1When irst applying power . 3-1Turning power ON or OFF . 3-1Adjusting the volume level. 3-1About the VFO and Memory modes . 3-1Using the VFO mode . 3-1D Selecting the VFO A or VFO B. 3-1D Equalizing VFO A and VFO B . 3-1Selecting the operating band. 3-2D Using the band stacking registers. 3-2Selecting the operating mode. 3-2Setting the frequency . 3-3D Using the Main Dial. 3-3D About the Tuning Step function. 3-3D Changing the Tuning Step . 3-3D About the 1 Hz step Fine Tuning function . 3-3D About the 1/4 Tuning function . 3-4D About the Auto Tuning Step function . 3-4D Directly entering a frequency . 3-4D Band Edge Beep. 3-54vRECEIVING AND TRANSMITTING . 4-1Preampliiers . 4-1Attenuator . 4-1RIT function . 4-1D RIT monitor function . 4-1AGC function control . 4-2D Selecting the AGC time constantpreset value . 4-2D Setting the AGC time constant. 4-2Using the Twin PBT . 4-3Selecting the IF ilter. 4-4Selecting the IF ilter shape . 4-4IP Plus function . 4-5Noise Blanker . 4-5D Adjusting the NB level and time . 4-5Noise Reduction . 4-6D Adjusting the Noise Reduction level . 4-6Notch Filter . 4-6D Auto Notch function . 4-6D Manual Notch function . 4-6VOX function . 4-7D Adjusting the VOX function . 4-7D Turning ON the VOX function . 4-7 TX function. 4-8D TX monitor function . 4-8Monitor function . 4-8Setting the Speech Compressor . 4-9Split frequency operation. 4-10D Using the Quick Split function . 4-10D Using the receive and transmitfrequencies set to VFO A and VFO B.4-10Split Lock function . 4-11Setting the transmit ilter width . 4-11Operating CW. 4-11D Setting the CW pitch control . 4-11D Setting the key speed . 4-12D About the Break-in function . 4-12D CW Auto Tuning function . 4-13D About the CW Reverse mode . 4-13D Electronic Keyer function . 4-14D Monitoring the CW side tone . 4-14
TABLE OF CONTENTS (Continued)4RECEIVING AND TRANSMITTING (Continued)Operating RTTY (FSK) . 4-15D About the RTTY reverse mode . 4-15D Twin Peak Filter . 4-15D Functions on the RTTY DECODE screen . 4-16D Setting the decoder threshold level . 4-16FM repeater operation . 4-17D Setting the repeater tone frequency . 4-175SCOPE OPERATION . 5-1Spectrum scope screen. 5-1D Using the Spectrum Scope . 5-1D Center mode . 5-2D Fixed mode . 5-2D Marker. 5-2D Touch screen operation . 5-3D Mini scope screen . 5-3Audio scope screen . 5-36USING AN SD CARD. 6-1About the SD card . 6-1Saving data onto the SD card . 6-1Inserting or removing the SD card. 6-1D Inserting . 6-1D Removing. 6-1Unmounting an SD card . 6-2Formatting an SD card . 6-27ANTENNA TUNER OPERATION . 7-1About the internal antenna tuner . 7-1Internal antenna tuner operation . 7-1D Manual tuning . 7-1D PTT Tuner start . 7-18SET MODE. 8-1Set mode description. 8-1D Entering the Set mode . 8-1Tone Control . 8-2Function. 8-3Connectors . 8-5Display. 8-6Time Set . 8-7SD Card. 8-7Others. 8-79MAINTENANCE . 9-1Resetting . 9-1D Partial reset. 9-1D All reset . 9-111 OPTIONS . 11-1Options . 11-1Mounting the MB-118 . 11-212 CONNECTOR INFORMATION . 12-1ACC socket . 12-1D OPC-599 ACC conversion cable pinassignments. 12-2Microphone connector . 12-2D External keypad . 12-2KEY jack . 12-3EXT-SP jack . 12-3REMOTE jack. 12-3ALC jack . 12-3SEND jack . 12-3PHONES jack . 12-3DC power socket . 12-3INDEX. IABOUT CE . IIIINSTALLATION NOTES . III10 SPECIFICATIONS . 10-1D General . 10-1D Transmitter . 10-1D Receiver. 10-2D Antenna tuner . 10-2vi
PRECAUTIONSR DANGER HIGH RF VOLTAGE! NEVER touch anantenna or antenna connector while transmitting. This couldcause an electrical shock or burn.CAUTION: NEVER expose the transceiver to rain, snow orany liquids.CAUTION: NEVER change the internal settings of thetransceiver. This could reduce transceiver performanceand/or damage to the transceiver. The transceiver warrantydoes not cover any problems caused by unauthorizedinternal adjustments.R DANGER! NEVER operate the transceiver nearunshielded electrical blasting caps or in an explosiveatmosphere. This could cause an explosion and death.R WARNING RF EXPOSURE! This device emits RadioFrequency (RF) energy. Extreme caution should beobserved when operating this device. If you have anyquestions regarding RF exposure and safety standardsplease refer to the Federal Communications CommissionOfice of Engineering and Technology’s report onEvaluating Compliance with FCC Guidelines for HumanRadio Frequency Electromagnetic Fields (OET Bulletin 65).CAUTION: NEVER install or place the transceiver in aplace without adequate ventilation, or block any coolingvents on the top, rear, sides or bottom of the transceiver.Heat dissipation may be reduced and damage thetransceiver.CAUTION: NEVER use harsh solvents such as Benzine oralcohol when cleaning, as they will damage the transceiversurfaces.R WARNING! NEVER operate the transceiver with aheadset or other audio accessories at high volume levels. Ifyou experience a ringing in your ears,reduce the volume ordiscontinue use.CAUTION: NEVER leave the transceiver in areas withtemperatures below –10 C ( 14 F) or above 60 C( 140 F) for mobile operations.R WARNING! NEVER apply AC power to the [DC13.8V]socket on the transceiver rear panel. This could cause a ireor damage the transceiver.CAUTION: NEVER place the transceiver in excessivelydusty environments. This could damage the transceiver.R WARNING! NEVER apply more than 16 V DC to the[DC13.8V] socket on the transceiver rear panel. This couldcause a ire or damage the transceiver.DO NOT place the transceiver against walls or puttinganything on top of the transceiver. This may overheat thetransceiver.R WARNING! NEVER reverse the DC power cablepolarity. This could cause a ire or damage the transceiver.BE CAREFUL! The Main unit will become hot whenoperating the transceiver continuously for long periods oftime.R WARNING! NEVER remove the fuse holder on the DCpower cable. Excessive current caused by a short couldcause a ire or damage the transceiver.CAUTION: If you use a linear ampliier, set thetransceiver’s RF output power to less than the linearampliier’s maximum input level, otherwise a high inputcould damage the linear ampliier.R WARNING! NEVER let metal, wire or other objectscontact the inside of the transceiver, or make incorrectcontact with connectors on the rear panel. This could causean electric shock or damage the transceiver.CAUTION: Use only Icom supplied or optionalmicrophones. Other manufacturer’s microphones may havedifferent pin assignments, and could damage the connectorand/or the transceiver.R WARNING! NEVER operate or touch the transceiverwith wet hands. This could cause an electric shock ordamage to the transceiver.NEVER leave the transceiver in an insecure place to avoiduse by unauthorized persons.R WARNING! Immediately turn OFF the transceiver powerand remove the DC power cable from the transceiver if itemits an abnormal odor, sound or smoke. Contact yourIcom dealer or distributor for advice.Turn OFF the transceiver’s power and/or disconnect the ACpower cable when you will not use the transceiver for a longperiod of time.R WARNING! NEVER put the transceiver on an unstableplace where the transceiver may suddenly move or fall.This could cause an injury or damage the transceiver.Turn OFF the transceiver’s power and/or disconnect the DCpower cable when you will not use the transceiver for longperiod of time.R WARNING! NEVER operate the transceiver during alightning storm. It may result in an electric shock, causea ire or damage the transceiver. Always disconnect thepower souce and antenna before a storm.The LCD display may have cosmetic imperfectionsthat appear as small dark or light spots. This is not amalfunction or defect, but a normal characteristic of LCDdisplays.vii
1PANEL DESCRIPTIONFront panelThis section describes the keys, controls and dials that you use to operate the IC-7300.Refer to the pages posted beside each key, control, or dial for details.123q4wer5!96t7y8uio !0!1!2!3!4 !5 !6!79!81011q POWER KEY POWER (p. 3-1)Turns the transceiver ON or OFF.!1 FUNCTION KEY FUNCTION (p. 1-6)Displays the FUNCTION screen.w TRANSMIT KEY TRANSMIT (p. 3-9)Toggles between transmit and receive.!2 MINI SCOPE KEY M.SCOPE (p. 5-1)Displays the Mini Scope or Spectrum Scope.e ANTENNA TUNER KEY TUNER (p. 7-1)Turns the antenna tuner ON or OFF, or activatesthe tuner.!3 QUICK KEY QUICK (p. 1-6)Displays the QUICK MENU.y MICROPHONE CONNECTOR [MIC] (p. 2-1)Connects to the supplied or an optional microphone.u VOLUME CONTROL AF RF/SQL (p. 3-1)Adjusts the audio output level.i SD CARD SLOT [SD CARD] (p. 6-1)Accepts an SD card.!6 SPEECH/LOCK KEY SPEECH (p. 3-9)Announces the operating frequency or receivingmode, or electronically locks MAIN DIAL .19!7 TENSION ADJUSTERAdjusts the friction of MAIN DIAL .21!9 MEMORY CHANNEL UP/DOWN KEYChanges the Memory channel.!0 MENU KEY MENU (p. 1-6)Opens the MENU screen.1-11617!8 MAIN DIAL MAIN DIAL (p. 3-3)Changes the operating frequency.o RF GAIN CONTROL/SQUELCH CONTROLAF RF/SQL (p. 3-9)Adjusts the RF gain and squelch threshold levels.15!5 AUTO TUNE KEY TUNE (p. 4-13)Automatically tunes the operating frequency to areceived CW signal.AUTOt HEADPHONE JACK [PHONES] (p. 2-1)Connects to a standard stereo headphones.1314!4 EXIT KEY EXIT (p. 1-6)Exits a setting screen or returns to the previousscreen.r VOX/BREAK-IN KEY VOX/BK-INTurns the VOX function (p. 4-7) and Break-infunction (p. 4-12) ON or OFF.12 / 1820
1PANEL DESCRIPTIONFront panel (Continued)#4#3 #2#1@9 @8 @7 @6 @5#0@4 @3@2@1@0@0 MEMO PAD KEY MPADSequentially calls up the contents in the MemoPads, or saves the displayed contents into theMemo Pad.@8 TRANSMIT FREQUENCY CHECK KEY XFC(p. 4-8)Enables you to monitor the transmit frequency whileholding it down in the Split mode.@1 VFO/MEMORY KEY V/M (p. 3-1)Switches between the VFO and Memory mode, orcopies the memory channel contents to the VFO.@9 TX/RX INDICATOR (p. 3-9)Lights red while transmitting and lights green whilereceiving.@2 CLEAR KEY CLEARClears the RIT or TX shift frequency.#0 NOISE REDUCTION KEY NR (p. 4-6)Turns the Noise Reduction function ON or OFF.@3 A/B KEY A/B (p. 3-1)Switches between VFO A and VFO B, or sets theselected VFO’s frequency to the other VFO.#1 NOTCH KEY NOTCH (p. 4-6)Turns the Notch ilter ON or OFF.@4#2 TWIN PASSBAND TUNING CONTROL(p. 4-3)Adjusts the IF ilter’s passband width.TX KEY TX (p. 4-8)Turns the TX function ON or OFF.TWIN PBT CLR@5 RIT KEY RIT (p. 4-1)Turns the Receiver Incremental Tuning (RIT)function ON or OFF.#3 PREAMP/ATTENUATOR KEY P.AMP ATT (p. 4-1)Turns ON or OFF, and selects one of two receiveRF preampliiers or turns the Attenuator ON or OFF.@6 SPLIT KEY SPLIT (p. 4-10)Turns the Split function ON or OFF.#4 NOISE BLANKER KEY NB (p. 4-5)Turns the Noise Blanker ON or OFF.@7 MULTI-FUNCTION CONTROL MULTI (p. 1-6)Displays the Multi-function menu for variousadjustments, or selects a desired item.1-2
PANEL DESCRIPTION1Rear panel!2!1!0oi12q3w4e567rq DC POWER SOCKET [DC 13.8 V] (p. 2-2)Accepts 13.8 V DC through the DC power cable.tyui KEY JACK [KEY] (p. 2-2)Connects to a straight key, external electronickeyer, or a paddle with 6.35 mm (1 4") stereo plug.w GROUND TERMINAL [GND] (p. 2-1)Connects to ground to prevent electrical shocks,TVI, BCI and other problems.o SEND CONTROL JACK [SEND] (p. 2-2)Connects to control transmit with non-Icom externalunits.e ANTENNA CONNECTOR [ANT] (p. 2-2)Connects to a 50 Ω PL-259 coax connector.!0 ALC INPUT JACK [ALC] (p. 2-2)Connects to the ALC output jack of a non-Icomlinear ampliier.r SOCKET [ACC] (p. 2-2)Connects to devices to control an external unit or tocontrol the transceiver.t USB PORT (B TYPE) [USB] (p. 2-2)Connects to a PC.y CI-V REMOTE CONTROL JACK [REMOTE](p. 2-2)891011121314!1 TUNER CONTROL SOCKET [TUNER] (p. 2-2)Accepts the control cable from an optionalAH-4 or AH-740 automatic antenna tuner.15!2 COOLING FANCools the PA unit when necessary.171618 Connects to a PC or other transceiver for externalcontrol.19u EXTERNAL SPEAKER JACK [EXT-SP] (p. 2-2)Accepts a 4 8 Ω external speaker.20211-3
1PANEL DESCRIPTIONTouch panel displayThis section describes the icons, screens, dialogs, readouts and so on that are displayed on the IC-7300 screen.Refer to the pages posted beside each item for details.qwert y u i o!0!1!2!3!4!5q TUNE ICON(p. 7-1)Appears while tuning the antenna.o M1 M8/T1 T8/OVF ICONDisplays “M1” “M8” while “External Keypad” onthe CONNECTORS screen is set to ON and usingthe Memory Keyer function (p. 4-14). Displays“T1” “T8” while using the Voice TX memory.Displays “OVF” when an excessively strong signalis received.w MODE INDICATOR(p. 3-2)Displays the selected operating mode.e PASSBAND WIDTH INDICATOR(p. 4-3)Graphically displays the passband width for twinPBT operation and the center frequency for IF shiftoperation.!0 VOICE RECORDER ICONAppears while recording.!1 SD CARD ICON (p. 6-1)Appears when an SD card is inserted, or blinkswhile accessing the SD card.r TONE INDICATOR(p. 4-17)Displays the selected tone type in the toneoperation mode.!2 CLOCK READOUTDisplays the current local time.Touch the readout to display both the current localtime and UTC time.t IF FILTER INDICATOR(p. 4-4)Displays the selected IF ilter.y QUICK TUNING ICONAppears when the Quick Tuning Step function isON.(p. 4-10)!3 SPLIT ICONAppears when the Split function is ON.u IP PLUS ICON (p. 4-5)Appears when the IP Plus function is ON.!4 VFO/MEMORY ICON(p. 3-1)“VFO A” or “VFO B” appears when the VFOmode is selected, and “MEMO” appears when theMemory mode is selected.i MEMORY NAME READOUT (p. 1-8)Displays the memory name if entered.!5 MEMORY CHANNEL READOUTDisplays th
Basic manual (German, Spanish, French, Italian, and other) Instructions for basic operations in German, Spanish, French, Italian, and other languages. This manual may not be included,
