Transcription
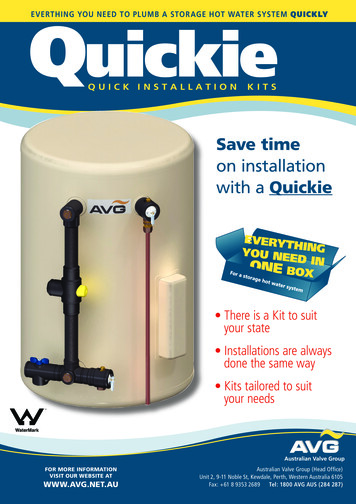
QuickieEVERTHING YOU NEED TO PLUMB A STOR AGE HOT WATER SYSTEM QUICKLYQUICK INSTALLATIONKITSSave timeon installationwith a Quickie There is a Kit to suityour stateTM Installations are alwaysdone the same way Kits tailored to suityour needsWaterMarkTMTMWaterMarkWaterMarkATS S5200.012LIC NO.20042TMWaterMarkATS S5200.012LIC NO.20042FOR MORE INFORMATIONVISIT OUR WEBSITE ATWWW.AVG.NET.AUAustralian Valve Group (Head Office)Unit 2, 9-11 Noble St, Kewdale, Perth, Western Australia 6105Fax: 61 8 9353 2689Tel: 1800 AVG AUS (284 287)
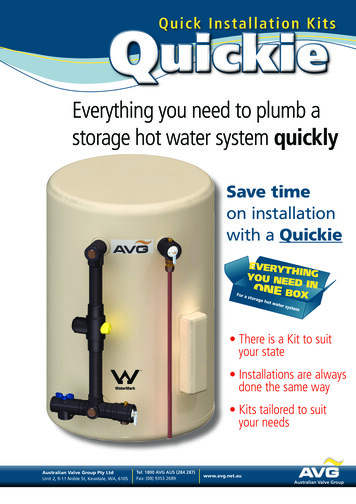
Quickie KitsEVERTHING YOU NEED TO PLUMB A STOR AGE HOT WATER SYSTEM QUICKLYThe R&D team at AVG have developed the Quickie kit for Storage Hot WaterSystems with the best interests of the Plumber in mind.The AVG Storage Quickie Kit is the most comprehensive and versatileinstallation kit for storage hot water systems, on the Australian/New Zealandmarket. Within the Quickie Kit range there are kits to suit , Electric storage, Gasstorage, Solar & Heat Pump systems.The outstanding feature of all these kits is that they come complete with allinsulation to cover not only the AVG Heating Control Valves, but also the brassfittings necessary to complete the installation. Saving the plumber substantialtime and therefore money.10 Reasons to buy a AVG Quickie Kit: Every thing you need in the one box - No missing parts on the job. Quick and Simple There’s a Quickie kit to suit - Gas storage, Electric storage, Solar hot watersystems, and Heat pumps. Reduces the need for thread seal tape Reduces the time on installations. Simple and & Easy to Assemble - All installations are done the same. Flexible - Quickie kits can be modified to meet different installationrequirements in various states and councils, i.e. the expansion control valveor pressure reduction valve can easily be added to the Kit Easily accessible filters Insulation - Insulation provided is UV stabilised and water resistant. Kits available in 15mm and 20mm.
Quickie Kit PartsParts in QUICKIE KITHOTWATER OUTLET x 1HOTWATER OUTLET GLOVE HALVES x 1 SETTEMPERING VALVE x 1QUICKIE 4WAY x 1TEMPERING VALVE GLOVE HALVES x 1 SETFIBRE WASHER x 2QUICKIE 4WAY GLOVE HALVES x 1 SETSTOP TAP NON RETURN x 1STOP TAP NON RETURN GLOVE HALVES x 1 SETEXPANSION CONTROL GLOVE HALVES x 2 SETS(SECOND SET FOR PTR VALVE NOT SUPPLIED)EXPANSION CONTROL x 1OPTIONAL PLUG x 1PTR DRAIN FITTING x 1CABLE TIE x 17Quickie 201200QIK20models availableSOLARSOLARSOLARSOLARwww.avg.net.au
QuickieEVERTHING YOU NEED TO PLUMB A STOR AGE HOT WATER SYSTEM QUICKLYvalveinsulationincludedQUICK INSTALLATION KITSKits available:Large easilyremovable filtersKits available:Kits available:QIK15QIK15QIK15850PTR insulation includedQIK151200QIK15SOLARQuickie KitBase Model - ECVStorage 15mm (1/2”) &20mm (3/2”)ECV drain lineunion includedOptional sealingdisc includedWhat’s in this 15mm kit:AVG Tempering valve TVA15Ct’s in this15mmWhat’sin kit:this 20mm kit:AVG NRIBV-15CemperingAVGvalveTemperingTVA15C valve TVA20C4-way tee c/w filterRIBV-15CAVG NRIBV-20CElbow c/w filtertee c/w filter4-way tee c/w filterPTR drain line unionc/w filterElbow c/w filter3 x fibre washersain line unionPTR drain line unionOptional sealing discre washers3 x fibre washersAVG ECV15/1200nal sealingdiscOptionalsealing discAVG ECV15/850CV15/1200AVG ECV20/1200CV15/850AVG ECV20/850ECV not includedLarge easilyremovable 5SOLARQIK20SOLAR
Quickie RR A I S E D Q U I C K I N S TA L L AT I O N K I T SvalveinsulationincludedQIK15RFor those situations and tanks wherethe expansion control valve needs tobe raised to allow for a drain lineQIK15RHPQIK15RThe NRI-PRV is a valuable additionwhen used in conjunction withAVG Quickie Kit for storage hotwater systemsQIK15RCVQIK15RCVHP
EVERTHING YOU NEED TO PLUMB A STOR AGE HOT WATER SYSTEM QUICKLYHOW TO ASSEMBLE . . . . .Installing the ‘Quickie hot water outletfittingUsing thread seal tape ontheUsingtaperedmalethread,thread sealtapeon thetapered male thread, screw thescrewfittingintooutletthe hotfittingtheinto thehot waterof theoutletwater heaterwithwaterthewaterofthecompression outlet of thefitting facingheaterwith downward.the compressionoutlet of the fitting facingdownward.Fitting the Tempering valve 1Cut a length of copper tube to aminimum of 185mm (to achieveCut a length of copper tube to a minimum of 185mm(to achievea minimum centredistanceof 250mma minimumcentredistancebetween the hot water outlet centreline and theof250mmbetweenthehottempering valve mixed outlet centreline in accordancewith AS3500.4–outlet2003 clause8.4 b Heat Traps).watercentrelineandtheFit the copper tube into the hot water outlet fittingtemperingand tightenthe nut andvalveolive. mixed outletcentreline in accordance withAS3500.4 – 2003 clause 8.4 bHeat Traps). Fit the copper tubeinto the hot water outlet fitting andtighten the nut and olive.Fitting the Tempering valve 3Re-attach the Tempering valve to theRe-attachTemperingvalveto thefixed inlet thefittingfixedtheinletfittingandmeasureand measure the distance between the cold water inlettube stopand the betweenQuickie 4waytheoutlettubewaterstop. inletdistancecoldCut a length of copper tube shorter by 3mm on this length.tubestopofandthe QuickieoutletAlso cuta lengthpipe insulationshorter4wayby 45mmtube stop. Cut a length of copper tubeshorter by 3mm on this length. Alsocut a length of pipe insulationshorter by 45mm1Installing the ‘Quickie 4 way tee’tee’Fit the back half of the 4 way tee insulation glove tothe 4 way tee. Then using thread seal tape on thetapered male thread, screw the 4 way tee into thecold water inlet of the waterheater.The compression fittingof the 4 way tee should faceupward.2Fit the back half of the 4 way tee insulation gloveto the 4 way tee. Then using thread seal tape onthe tapered male thread, screw the 4 way teeinto the cold water inlet of the water heater.The compression fitting of the 4 way teeshould face upward.3Fitting the Tempering valve 2Cut a length of pipe insulation 45mmshorter than the copper tube and slideit onto the copper tube. Remove the hotwater inlet fitting from the Temperingvalve assembly and fit to the hot waterinlet copper tube. Tighten the nut andolive to fix in place.Cut a length of pipe insulation 45mmshorter than the copper tube and slide it ontothe copper tube.Remove the hot water inlet fitting from theTempering valve assembly and fit to the hotwater inlet copper tube.Tighten the nut and olive to fix in place.5Fitting the Tempering valve 4Unscrew the hot water inlet loose nut torelease the Tempering valve body andalso remove the cold water inlet fittingfrom the Tempering valve body. Fit thecopper tube into the Quickie4way outlet and tighten thenut and olive.Unscrew the hot water inlet loose nut to release theTempering valve body and also remove the cold waterinlet fitting from the Tempering valve body.Fit the copper tube into the Quickie 4way outlet andtighten the nut and olive.46
Quickie KitsFitting the Tempering valve 5Slide the cut length of pipe insulationcoppertube andlooselyfit theSlideontothe cutthelengthof pipe insulationontothe coppertube and loosely fit the Tempering valve inlet fitting.Tempering valve inlet fitting.Cold water train attachments1Fit the NRIBVS to the Quickie 4wayloose nut as shown making sure thesealing washer is in place. With theball valve handle to the top tightenN.B.the loose nut to seal. NB: SomeFit the NRIBVS to the Quickie 4way loose nut asshown making sure the sealing washer is in place.With the ball valve handle to the top tighten theloose nut to seal.7Fitting the Tempering valve 69Cold water train attachments 2Slide the tempering valve back intopositionmakingsurethe sealingSlidethe temperingvalve backinto positionmaking sure the sealing washers are in placewashersareinplaceand tighten theand tighten the loose nuts to secure.Nowloosetightennutsthe coldinlet nutand olivetotowatersecure.Nowtightenthecomplete the Tempering valve fitment.coldwaterinletnutandolivetocompleteEnsure that all joints are tightened.the Tempering valve fitment. Ensure thatall joints are tightened.Fit the ECV to the Quickie 4wayloose nutas shown makingsure the sealing washer is inplace.With the drain connection(For installations not requiring an Expansion Controlfacingdown,tighten the loosevalve, fitthe optionalplug).nut to seal.Fit the ECV to the Quickie 4way loose nutas shown making sure the sealing washer is in place.With the drain connection facing down, tighten theloose nut to seal.Some installations use an NRIPRV in place ofinstallationsuse an NRIPRV in placeNRIBVSas shown below.of NRIBVS as shown below.810(For installations not requiring anExpansion Controlvalve, fit theoptional plug).Check for leaks and pipe installIMPORTANT NOTE:FlushIMPORTANTwater linebefore connectingNOTE:Flushwater lineconnectingline tovalvestobeforepreventdamageline to valves to prevent damagedebris.fromfromgritgritorordebris.Connect to insulated pipe at installationsite and check all joints for leaks.Connect to insulated pipe at installation site andcheck all joints for leaks.11Install insulation glovesFit the Insulation gloves as shownusing the cable ties provided toFit the InsulationglovesPositionas shown usingthesecurein place.the cablecable ties provided to secure in place.Positionintheancablelocks in an 2
QuickieEVERTHING YOU NEED TO PLUMB A STOR AGE HOT WATER SYSTEM QUICKLYQUICK INSTALLATIONKITSAVG WA (Head Office)Unit 2, 9-11 Noble St,Kewdale WA 6105Fax: (08) 9353 2689Tel: 1800 AVG AUS (284 287)AVG VICFactory 14/58 Mahoneys Rd,Thomastown, VIC 3074Tel: (03) 9462 2666Fax: (03) 9462 3888FOR MORE INFORMATIONFORMOREINFORMATIONVISITOURWEBSITE AT VISIT OUR WEBSITE ATWWW.AVG.NET.AUWWW.AVG.NET.AUAustralian Valve Group (Head Office)Unit 2, 9-11 Noble St, Kewdale, Perth, Western Australia 6105Fax: 61 8 9353 2689Tel: 1800 AVG AUS (284 287)
Quickie Kits EVERTHING YOU NEED TO PLUMB A STORAGE HOT WATER SYSTEM QUIC KLY The R&D team at AVG have developed the Quickie kit for Storage Hot Water Systems with the best interests of the Plumber in mind. The AVG Storage Qui


