Transcription
PROJECT PLANStorage GaloreThis project originally appeared in The Family Handyman magazine.For subscription information, visit www.familyhandyman.comPlease note that pages that appeared in the magazine as advertisements will not be included with this pdf. Page numbering may beinterrupted if an advertisement ran within the original story. Addresses, phone numbers, prices, part numbers and other information mayhave changed since original publicationCopyright 2005 Home Service Publications, Inc. All rights reserved. Unauthorized reproduction, in any manner, is prohibited. The Family Handyman, Handy Hints and Great Goofs are registeredtrademarks of RD Publications, Inc. Ask Handyman, Handyman Garage, How a House Works, Re.Do, Re.Mod, TFH Reports, The Home Improvement Authority, Using Tools, Woodworks, Wordless Workshop, Workshop Tips, You Can Fix It, You Can Grow It are trademarks of RD Publications, Inc.
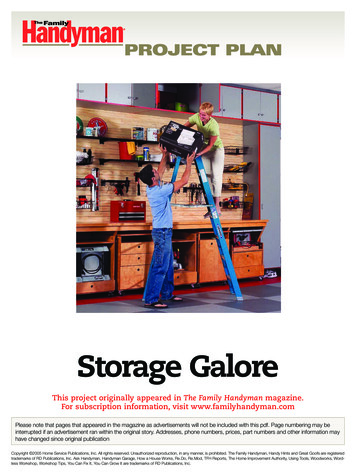
StorageGaloreBuild this simple shelf and cabinetsystem to fit your garageby Gary Wentz44SEPTEMBER 20 05 THE FAMILY HANDYMAN
When you think about garage storage, youprobably think of flimsy metal shelvesor crude plywood cabinets. But take amoment to think outside the box. Better yet, think abouta different kind of box—because that’s really what thisstorage system is: a series of simple boxes screwed to thewall. Open shelves fill the gaps between the boxes andrest on adjustable supports mounted in the box sides.This design maximizes storage space, saves labor andrequires less material than a standard wall of cabinets.This article will cover everything you need to know tobuild this system. You can adapt our design to suit yourown special needs. You can build one cabinet or a dozen,build tall floor-to-ceiling cabinets or shorter ones thatcover only part of the wall. You can even adapt this system for a laundry room, basement or closet.Tools, materials and moneyYou could build this system with just a few hand tools, adrill and a circular saw, but a table saw will save you lotsof time. The skills you’ll need are just as basic as the tools.If you can make long straight cuts and screw partstogether, you can build this system.This whole system is made from just two materials:plastic-coated particleboard, usually called “melamine,”and construction-grade pine 1x4s. (Melamine is the typeof plastic used as the coating.) You could use 3/4-in. plywood or particleboard, but we chose melamine becauseFigure A Upright cabinet construction(B)Parts List16"Overall dimensions of cabinetbox: 96" tall x 25-1/8" wide x 16"deep. All material is 3/4 in. thick.(C)STUD(A)(A)KEYSIZE & DESCRIPTIONA16" x 96" (side)B16" x 23-5/8"(fixed shelf)C3-1/2" x 23-5/8" pine(cleat)D12" x 95-1/4" (door)E16" x 23-5/8"(adjustable E)SHELFSUPPORT(E)(B)1-1/2"FINISHWASHER3" SCREW4"EDGE BAND8"2x4 LEDGER2" SCREWAll dimensions are for the cabinets shown here.45SEPTEMBER 20 05 THE FAMILY HANDYMAN
CUTMELAMINEBANDEDMELAMINEEDGEBANDING1Cut melamine to width and iron on edge banding.Position the banding so it overhangs the ends andsides. Let the banding cool before trimming.2Hold a wood block firmly over the end and carefully slice off the excess banding. Use a sharp newblade in your utility knife.it doesn’t require a finish. The melamine coating istougher than most finishes and easy to clean.The materials for our floor-to-ceiling system costabout 37 per linear foot of wall space. That’s less thanwe would have paid for wimpy “utility” cabinets at ahome center. Our garage walls were 10 ft. tall. If your ceiling is about 8 ft. tall, you can eliminate the deep uppercabinets. That will lower the cost to about 27 per linearfoot. If you opt for completely open shelving and eliminate the cabinet doors, your cost will drop to about 20per linear foot.EDGETRIMMERPlan the system to suit your stuffThis system is easy to adapt to the space available in yourgarage. Start the planning process with a tape measureand notepad. Survey your garage, basement, attic and anyother place that currently holds stuff you’d like to store inthe cabinets. Jot down the measurements of larger items(like luggage or boxes that hold holiday decorations).Then go to the wall where you’ll install the cabinets.Roughly block out the cabinet locations on the wall.Remember to space out the cabinets to leave room forshelves in between. Experiment with different cabinetwidths and spacing until you find a layout that workswell. Follow these guidelines: Each cabinet must have at least one stud behind it soyou can fasten the cabinet securely to the wall. Limit door widths to 24 in. To cover an opening widerthan that, install double doors. We limited most of ourdoors to 12-in. widths so that we could open them evenwhen the car was parked in the garage. Shelves longer than 2 ft. often sag. If you make themlonger, stiffen the melamine by screwing 1x4 cleats tothe undersides.3Slice off the excessbanding with an edgetrimmer. Test the trimmeron a banded scrap first; youmay have to adjust theblades for a perfect cut.EDGETRIMMERIf possible, size and space the cabinets so the shelvesinside and between cabinets are the same length. Thatway, all your shelves will be interchangeable and fasterto cut out. Size your cabinets to make the most of a full sheet ofmelamine. By making our cabinets 16 in. deep, forexample, we were able to cut three cabinet sides fromeach sheet with no wasted material (see Figure A forother dimensions). Don’t forget that your saw blade THE FAMILY HANDYMAN SEPTEMBER 20 0546
STOP BLOCK4"CABINETSIDECROSS-CUTGUIDEBACKER1x4 SUPPORTS4BRADPOINTBITDrill 1/4-in. shelf support holes through cabinetsides using a scrap of pegboard as a guide. Forend panels that won’t support shelves on one side,place a stop collar on the drill bit.STOPCOLLAR5Cut parts to length using a crosscut guide. A stopblock screwed to the guide lets you mass-produceidentical lengths fast. Support the melamine on bothsides of the cut with 2x4 scraps.SQUARINGSTRIPFigure BCrosscut guideSTOPBLOCK1/2" GUIDESTRIPFIXEDSHELF3/4" BASE6Predrill and screw 1x4s to melamine to form thefixed shelves. Screw all the fixed shelves to onecabinet side, then add the other side to complete thecabinet.This guide takes a few minutes to make but savestime when you’re cutting the fixed shelves (Photo5) and even more time later when you’re cuttingshelves (Photo 14). Our system required 30shelves. To make a crosscut guide, screw a guidestrip to the base and run your saw against theguide strip to trim the excess off the base. Add asquaring strip positioned perpendicular to theguide strip. Position the stop block to set thelength of your parts.eats up about 1/8 in. of material with each cut. Most dozen or more colors. Manufacturers produce hundredssheets of melamine are oversized by about 1 in. to of colors, but unusual colors are only available in largeaccount for this.quantities (30 or even 60 sheets).Plastic iron-on edge banding is available at home centers,usually only in white. Cabinet suppliers carry otherBuying melaminecolors, but be sure to get banding that can be ironed on.Most home centers carry melamine in 4 x 8-ft. sheets( 30), usually only in white. For colors other than white,try a lumberyard that serves cabinetmakers (look in the Working with melamineYellow Pages under “Cabinets, Equipment and Supplies” With your cabinet dimensions in hand, begin cutting theor “Hardwoods”). These suppliers often charge more melamine into parts. Cut the material into equal widths(about 40 per sheet) and might sell only to profession- for the sides and the fixed and adjustable shelves, butals, so call before you visit. Some cabinet suppliers stock don’t cut the stretchers and shelves to length until they’rea few colors like gray, black and almond. Others carry a edge banded. Here are some pointers:47SEPTEMBER 20 05 THE FAMILY HANDYMAN
Get help. Melamine is too heavy to handle solo. If youhave a large, stable table saw, you and a helper can cut fullsheets. But it’s usually better to slice a sheet into manageable sections with a circular saw first. Then make finishcuts on the table saw. For more help cutting sheet material, see “Sharpen Your Skills,” p. 35.Wear gloves when handling large pieces. The edges ofmelamine are sharp enough to slice your hands.Avoid scratching the melamine surface. If your workbench has a rough surface, cover it with cardboard or oldcarpet. Pad sawhorses the same way. Run a few strips ofmasking tape across the base of your circular saw so itdoesn’t mar the melamine.Be careful with edges. They’re easy to chip. When youstand parts on edge, set them down gently. Don’t drop ordrag sheets across the floor.Plan for chip-out. Saw blades often leave slightlychipped edges in the melamine coating. A new carbideblade will chip less than a dull one, but you can’t completely prevent chips. Chipping is worse on the sidewhere the saw teeth exit the material. When you runmelamine across a table saw, the underside of the sheet isparticularly prone to chipping. When you’re using a circular or jigsaw, chipping is worse on the face-up side.Plan your cuts so that all the chipped edges are on thesame side of the part. Then you can hide them duringassembly by facing them toward the insides of cabinets.Iron on the edge bandThe first rule of edge banding is to protect your marriageand buy a cheap iron (less than 10). Set the iron to theeditor’s note:Making screws work in melamineScrews are the only fastening method usedin this entire project. They make fast, strongjoints. But screwing into melamine presentsa few complications:Strip-out: Like any particleboardproduct, melamine strips easily ifyou overdrive screws. Go easy onthe drill trigger as you drivescrews home. Use coarse-threadscrews only. Fine-thread screwswill strip every time. Longerscrews also minimize stripping. Ifthis project had been built fromplywood, 1-5/8-in. screws wouldhave worked fine. But we used 2in. screws to assemble the boxes.Splits: Particleboard splits easily.Never drive a screw into particleboard without drilling a pilothole. We drilled 7/64-in. holes andused No. 8 screws. Even with apilot hole, screws will split particleboard if you place them closeto ends. Keep them at least aninch from the ends of parts.Countersinking: Tapered screwheads will sometimes sink intomelamine, but often they’ll stripout before the head is flush withthe melamine surface. Next to anedge, they’ll crush out the particleboard. Always drill countersink holes for screw heads. Youcan drill countersink and pilotholes in one stroke with a countersink bit ( 4).1/4"7Screw hinges tocabinets. Position topand bottom hinges 1/4 in.from each corner and spacethe others equally apart.1/4"OVERLAYHINGE50Appearance: Even with a cleancountersink hole, screw headsare a blemish in melamine’s perfect surface. For a neater look,use finish washers (photo above)with any screws that will be visible. Finish washers also eliminatethe need for pilot holes.SEPTEMBER 20 05 THE FAMILY RUSH-OUTPILOT/COUNTERSINKBIT
8Position thedoors overthe hinges usingshims to maintain a 1/8-in. gap.Use clamps orweights to holdthe doors inplace. A selfcentering drill bit(below) makespositioning screwholes easy.DOORSpoint drill bit for a clean, chip-freehole. To limit blowout where the bitexits the melamine, set a “backer”underneath. You can make a drillingguide from just about any material,but a strip of pegboard is a perfectready-made guide (a 4 x 8-ft. sheetcosts 8). Label the bottom of yourguide and the bottoms of the cabinetsides so all the holes will align.Otherwise you’ll end up with teetertotter shelves.SHIMBuild fixed shelves andassemble the cabinets“cotton” setting and iron the bandingon in two or three passes (Photo 1). Onthe first pass, run the iron quickly overthe banding just to tack it into place.Center the banding so it overhangs onboth sides. Make a second, slower passto fully melt the glue and firmly adherethe banding. Then check the edges forloose spots and make another pass ifneeded.Trim the ends of the banding with autility knife (Photo 2) before you trimthe edges. It’s possible to trim the edgeswith a utility knife if you set the bandededge face down on a flat surface. ButPredrill with a self-centering bit andyou’ll get faster, better results with adrive one screw through each hingetrimmer ( 13) that slices off both sides from inside the cabinet. Add the otherwith one pass (Photo 3). If you damage screws with the doors open.the banding while trimming, just reheatit, pull it off and start over.The fixed shelves that fit between cabinet sides (A) are made frommelamine panels (B) and pine 1x4s(C). We painted our 1x4s to match themelamine. Cabinets less than 4 ft. tallneed only top and bottom fixedshelves. Taller cabinets also need amiddle fixed shelf. To make the fixedshelves, just cut melamine and 1x4s toidentical lengths and screw themtogether (Figure A).Assembling the cabinets is a simplematter of fastening the sides to thefixed shelves (Photo 6). Predrill anddrive a screw near the front of eachfixed shelf first, making sure the banded edges of the fixed shelf and side areflush. Then drill and drive anotherscrew near the backside of the cabinetto hold the fixed shelf in positionbefore you add the other screws.Handle the completed cabinet boxeswith care—they’re not very stronguntil they’re fastened to the wall.Drill shelf support holesHang the doorsThe adjustable shelves rest on shelf supports that fit into holes drilled into theLEDGERcabinet sides (Photo 4). Drill all theway through the sides that will supportshelves inside and outside the cabinet.Drill holes 3/8 in. deep in cabinet sidesthat form the outer ends of your shelfsystem. Tape wrapped around a drill bitmakes a good depth marker whenyou’re drilling just a few holes, but astop collar ( 4) is better for this job.Fasten a 2x4 ledger to the wallCheck your shelf supports beforeframing with 3-in. screws. Choosedrilling. Some require 1/4-in. holes; a straight 2x4 and make sure the ledgerothers require 5mm holes. Use a brad is level.Make the doors after the cabinet boxesare assembled. To hang the doors, firstscrew hinges to the cabinets (Photo7). The type of hinge we chose iscalled a “wrap” hinge because it wrapsaround the corner at the front edge ofthe cabinet. This design has two bigadvantages: It mounts more securelyto the cabinet and it lets you positionthe doors perfectly (Photo 8) beforeyou fasten them (Photo 9). Be sure tobuy 1/4-in. “overlay” hinges (the doorcovers 1/4 in. of the cabinet edge).SELF-CENTERING BIT ( 7)91052SEPTEMBER 20 05 THE FAMILY HANDYMAN
2" SCREWFigure CFINISH WASHERUpper cabinet construction(J)(K)(F)(L)1" SCREW(G)STUDSIZE & DESCRIPTIONF24" x 70-1/2"(top/bottom panel)G3-1/2" x 70-1/2" pine(cleat)H21" x 24" (side panel)J19-1/2" x 23-1/4"(divider)K4" x 23-1/4" (hingespacer)L17-7/16" x 20-1/4"(door)21"(H)Hinges with a larger overlay will protrude beyond theouter edge of the cabinet.We used four hinges for each of our 12-in.-wide double doors. If you opt for a single wide door, use at leastfive hinges. The hinges themselves are strong enough tohold much more weight, but they’re fastened with justtwo screws each. The particleboard core of melaminedoesn’t hold screws very well. So when in doubt, addmore hinges.With the hinges in place, measure between them todetermine the door width (with double doors, allow a1/8-in. gap between them). To determine the length,measure the cabinet opening and add 3/4 in. Cut thedoors and set them in place to check the fit before banding the edges. When the doors are complete and screwedto the hinges, label each door and cabinet. Then unscrewthe doors to make cabinet installation easier.Overall dimensions ofcabinet box: 21" tall x 72"wide x 24" deep. Your dimensions may differ. All materialis 3/4 in. thick.KEY3" SCREW24"Parts ListMount the cabinetsDon’t install the cabinets directly on the garage floor.Water puddles from dripping cars will quickly destroyparticleboard. We mounted our cabinets about 6 in. offthe floor—just enough space to allow for easy floorsweeping. This height also let us level the ledger and fasten it to the wall framing (Photo 10) rather than to theconcrete foundation. We drove screws into the studs andsill plate.You’ll need a helper to install the cabinets (Photo 11).Install the two end cabinets first, then position the othersbetween them, leaving equal spaces for the shelves that fitbetween the cabinets. Watch out for obstructions thatprevent cabinet doors from opening. End cabinets that fitinto corners, for example, should stand about 1/2 in.from the adjacent wall. We mounted one of our end cab-BLANKPANELCORNERCABINETLEDGER11Set the cabinet into place and screw it to theledger. Then level the cabinet and fasten it tothe wall with pairs of 3-in. screws driven through theupper and middle cleats into studs.12Build the upper cabinets with the same techniques and materials used for the uprights.Install a blank panel where cabinets will meet ata corner.THE FAMILY HANDYMAN SEPTEMBER 20 0553
13Set the upper cabinets on top of the lowercabinets and screw the uppers together with1-1/4-in. screws. Then screw them to the wall studsand to the lower cabinets.inets about 1-1/2 in. from the wall to allow for the trimaround the entry door (see Photo 11).Upper cabinetsThe upper cabinets provide deep, enclosed storage spaceand tie the upright cabinets together so they can’t twistaway from the wall. Instead of installing upper cabinets,you could simply run a long shelf across the tops of theupright cabinets.The upper cabinets are simply horizontal versions ofthe upright cabinets; you use the same techniques andmaterials (see Figure C). Here are some building tips: Minimize measuring and math errors: Build the uppercabinets after the upright cabinets are in place. To allow easy installation, leave a 1/2-in. gap betweenthe ceiling and the upper cabinets. You could leave theresulting gap open, but we chose to cover it. Here’show: We ripped 1x4s into 1-in.-wide strips, painted thestrips to match the edge band and screwed the strips tothe tops of the cabinets. After the uppers were installed,we cut trim strips from 1x4, painted them and usedthem to cover the gap. You can build upper cabinet sections up to 8 ft. long.For strength and ease of installation, size the sections sothey meet over the upright cabinets, not over openshelves. Remember to add hinge spacers (K) to dividers (J) soyou can install hinges back to back.Shelves and hardware come lastCut the shelves at the very end of the project (Photo 14).That way, you can take exact measurements inside and5614Measure the spaces inside andbetween cabinets. Subtract 1/4in. and cut shelves using the crosscut jig.between shelves and use up any scraps. Thenumber of shelves is up to you; we made fourfor inside each cabinet and six for eachbetween-cabinet space. We didn’t put any shelves inthe upper cabinets. Install cabinet knobs or pulls afterthe doors are in place to make drilling a hole in thewrong location just about impossible.Art Direction MARCIA WRIGHT ROEPKEPhotography BILL ZUEHLKEIllustrations SUSAN JESSENBuyer’s GuideAll the tools and materials used in this project are available at mosthome centers. Most of the materials can also be ordered fromwww.woodworkershardware.com (800-383-0130). Finish washers, No. SCWCF08, 5 for 100 Shelf supports, No. G111NI, 11 for 100 1/4-in. overlay hinges (burnished brass), No. A07566BB, 1.63 per pair Edge band (white, black, gray and almond), 33 for 250 ft. Double-sided edge band trimmer, No. VIAU93, 13SEPTEMBER 20 05 THE FAMILY HANDYMANSHELFSUPPORTCABINETBUMPER
hen you think about garage storage,you probably think of flimsy metal shelves or crude plywood cabinets. But take a moment to think outside the box. Better yet, think about a different kind of box—because that’s really what this storage system is: a series of simple boxes screwed to t