Transcription
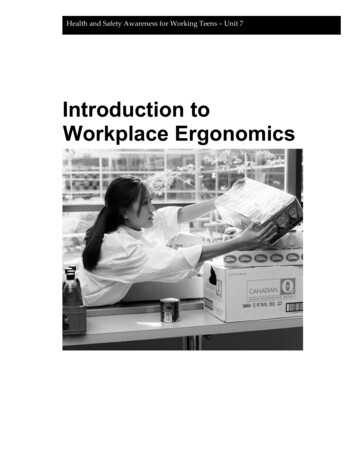
Health and Safety Awareness for Working Teens – Unit 7Introduction toWorkplace Ergonomics
2Health & Safety Awareness for Working Teens
Unit 7 OverviewThis unit introduces your students to basic ergonomics information and conceptsthat are relevant to workers of all ages and to all types of work-places. Studentsare introduced to ergonomic risk factors by watching a video. Students thenparticipate in some simple hands-on activities where they experience and try toapply some of these basic ergonomic concepts.Activity A. Introduction: Why Is This Subject Important?This section gives both the instructor and their students a brief overview of whatergonomics is and why it is important for all workers, including teen workers.Activity B. DVD and DiscussionStudents view the video, Dr. Ergo, which introduces them to different ergonomicrisk factors found in all jobs and workplaces.Activity C. Experiencing Injury Risk FactorsStudents participate in hands-on activities that help to demonstrate someergonomic risk factors. The first activity compares the strength of a power gripverses a pinch grip, and then compares neutral wrist to bent wrist power grip.Activity D. Posture, Force, and Effort: LiftingIn this set of activities, students will lift and hold a weighted box in differentpositions, and evaluate the physical effort required to lift and hold the box usinga rating scale. Next, students will use the boxes to practice safe lifting, while theother students evaluate their technique.Activity E. Analyzing a Task for Ergonomic Hazards (Optional)In this activity, teams of students evaluate the ergonomic risk factors for specificjob tasks using a risk factor checklist.Alternative activity or optional homework assignment. ElectronicDevicesHave the students spend 10 minutes searching the internet for information andsafety tips on computer, laptop, tablet and handheld device risk factors andergonomic recommendations. Have them look at things such as hand, wrist,elbow, thumb strain; neck and back postures; glare and eyestrain. Discuss andsummarize their findings and their own experiences. What changes might theymake in their practices with this information?Unit 7 – Introduction to Workplace Ergonomics3
Washington State Essential Academic LearningRequirements (EALRs)*Health and Fitness1.2Safely participates in a variety of developmentally appropriate physicalactivities. Incorporates safety procedures into activities and individualfitness plans for leisure and employment.2.3Acquire skills to live safely and reduce health risks.3.1Understand how environmental factors affect one’s health (air, water,noise, chemicals). Assess how the environment impacts choosing healthyplaces to live, work, and recreate.3.2Gather and analyze health information. Solve a health and fitness problemor issue: 4.1List alternative courses of action.Choose the course that most fully addresses the needs andrequirements of the situation.Back up the choice with evidence.Evaluate the outcome.Analyze health and safety information. Investigate the health and fitnessrequirements for occupational/career areas of interest.Communication3.2Work cooperatively as a member of a group3.3Seek agreement and solutions through discussionReading3.1Read to learn new information3.3Read to perform a task*See the link of the curriculum page on Education Standards for a completematrix of state and federal educational standards.4Health & Safety Awareness for Working Teens
Introduction to Workplace ErgonomicsLearning ObjectivesBy the end of this lesson students will beable to: Define the terms ergonomics andwork-related musculoskeletaldisorders.Explain the risk factors formusculoskeletal injuries.Give at least three examples ofwork situations where youngworkers may be at risk for injury.Identify two ergonomic solutionsto reduce the risk factors formusculoskeletal injuries.Describe and demonstrate theproper way to lift a load.Preparing to Teach This LessonTime65 minutesMaterials Computer with video playingcapabilities Video: "Dr. Ergo" (link is on theosha.washington.edu HSAWT site) Two to three empty boxes persmall group 2 reams of office paper per box Unsharpened pencilsHandoutsA. Lifting Evaluation Activity FourSteps to ProperB. Proper Lifting EvaluationC. Ergonomic ChecklistBefore you present this lesson:1.Access the video online prior to showing to students.2.Make copies of handouts A, Four Steps to Proper Lifting, and B, ProperLifting Evaluation, and for optional Activity E, copy handout C, ErgonomicChecklist.3.Collect boxes for lifting exercises and two reams of office paper per boxesfor the student small groups.Unit 7 – Introduction to Workplace Ergonomics5
Detailed Instructor’s NotesSlide 1Activity A. Introduction:Why is this subject important? (5 minutes)1.As a warm-up discussion ask students:What does the word “ergonomics” mean?Slide 2Ergonomics is the study of how the human body performs tasks, and how todesign equipment, or organize the task, to best fit our body’s abilities and limits.In the workplace, this means fitting the job to the worker.A good example of the early use of ergonomics was in designing thecockpits of airplanes. When you’re flying miles above the earth at very highspeeds, you want to make sure the controls, visibility, and comfort are as good asthey can be so pilots can do their work safely and make the right decisions.In more typical workplaces, it means setting up the worksite to meet the needs ofthe workers. In ergonomics, the worker is the central figure. When worksites aredesigned to suit the needs of the worker there are fewer cases of work-relatedmusculoskeletal disorders (WMSDs), fewer days absent, higher productivity,and more comfortable workers.2.Why is ergonomics important?Injuries that result from poor ergonomics are some of the most common andfrequent kinds of injuries, and they are found in all kinds of work-places andoccupations. Many of these are musculoskeletal injuries, which we commonlyrefer to as strains and sprains. These often affect the back but other body partsare also involved such as hands and wrists, shoulder, neck, and knee.The rise in the use of computers has contributed to a dramatic increase in injuriesdue to ergonomic factors. We don’t yet know what a lifetime of working on apersonal computer does to the body, because we only have about 25 years ofexperience. Ergonomic-related injuries can be serious and disabling.Young people who get back injuries are more likely to have lifelong backproblems, which can limit both work and recreational activities.Using the principles of ergonomics, it is possible to reduce the risk of injury.6Health & Safety Awareness for Working Teens
Activity B.Video and Discussion (25 minutes)1.Explain that the class will now watch a 14-minute video, ErgonomicsAwareness, created by the WA State Department of Labor and Industries.The link can be accessed on the osha.washington.edu HSAWT website,under the General Curriculum, Unit 7.Ask students to keep in mind these questions while they watch the DVD:a.What are the key ergonomic risk factors?b.What kinds of jobs have you done that involve these risk factors?c.What kinds of changes can be made to protect workers from theserisks?2.Show the video.3.After showing the video, discuss the following questions with the class:What are the key ergonomic risk factors? Working in awkward positions Using high hand force Performing repetitive motions Using the hand or knee to make repeated impacts Heavy, frequent or awkward lifting Exposure to moderate to high levels of vibration Standing too long in one position Mechanical pressure (leaning against a hard edge)What kinds of jobs or activities have you done that involve these risk factors? Construction: lifting, vibrating tools, awkward positions, pinchgrips Office work: repetitive keyboarding, lifting, sitting in one positionfor a long time Restaurant work: lifting, standing for long periods, repetitivekitchen work Other: e.g., the use of handheld devices and head, neck, thumbpostures4.Explain that the class will discuss these jobs and risks in more detail,along with possible solutions, in a later activity.Unit 7 – Introduction to Workplace Ergonomics7
Activity C.Slide 3Experiencing Injury Risk Factors (15 minutes)Certain body positions and postures are naturally stronger than others. Twoexercises will demonstrate this for the hands/wrists and the lower back.Strong and Weak GripsGrip Strength Tug-o-WarStudents pair off and compete in a tug-o-war competition using pencils. Twoseparate comparisons will illustrate the difference between a pinch grip (Fig. A)competing with a power grip (Fig. 2), and a neutral wrist competing with a bentwrist posture (Figure 3). Students compare their strength using both techniques.1.The first student holds the pencil in a pinch grip as in figure A. The otherstudent tries to pull the pencil out of the grip. Then the first student holds thepencil in a power grip, figure B. The other student again tries to pull the pencilout of the first student’s hand.Ask students:Which was easier to pull out, the pinch grip or the power grip? Why?What does that tell you about doing a task with the hand in a pinch grip rather than apower grip?The power grip is the stronger grip since all of the fingers and palm aresupporting the pencil.2.8Slide 4Reverse roles and have the second student hold the pencil as in B (powergrip with a straight wrist). Now the first student tries to pull it out. Nowhold the pencil the same way but bend the wrist forward (down) as far asyou can. Student 2 now tries to pull it out again.Health & Safety Awareness for Working Teens
Ask students:Which was easier to pull out this time, straight wrist or bent wrist?For the student holding the pencil what did it feel like trying to hold it with the wrist bentso far?The straight wrist is stronger, which is the neutral posture for the wrist. Holdingthe wrist bent and trying to grip is uncomfortable.Activity D.Posture, Force, and Effort: Lifting (20 minutes)In Activity D, Students will experience some different lifting and load-holdingpostures, and then practice proper lifting technique. Following the direction onHandout A, Lifting Evaluation Activity, students will assess posture, discomfort,and fatigue using a 1-10 scale. Next, following Handout B, Four Steps to ProperLifting, students will practice proper lifting technique.To set up for this activity, you will need 1 box per small group of students with 2reams of office paper (total 10 lb load) in each box. Safety note: If any studentsneed to reduce the load due to back or shoulder injuries, remove a ream for atotal load of 5 lb.Safety Note: Students with back or shoulder injuries should either notparticipate actively or lift only one ream of paper.Unit 7 – Introduction to Workplace Ergonomics9
1.Divide students into groups of 2–4. Present them with this scenario:You have a new job working in the kitchen of a pizzeria. Every morningboxes of ingredients are delivered to the back door of the kitchen. One ofyour job duties is to move these boxes into the kitchen. At the end of yourshift, you also have to empty all the trash cans and carry the garbage tothe dumpster behind the shop. After three weeks on the job, you havenoticed that your back has started to feel sore and tired by the end of yourshift.Give students copies of Handout A, Lifting Evaluation Activity, andHandout B, Four Steps to Proper Lifting2.3.Give each group 2-3 boxes with the reams of paper inside. Tell them theirtasks are: Following the guide in Handout A, they each take turns holding aload in the described posture, and then evaluate how they feelusing 1-10 Physical Effort Rating Scale. Record the evaluations onthe handout. Following the steps in Handout B, practice safe and proper liftingtechniques. Each student should take turns going through the 4steps—sizing up, lifting, moving and lowering a box from one sizeof the room to the other. Have the students watching evaluate thelifting technique using the back page of Handout B.After everyone is done with the 2 activities and everyone is together asone group, discuss how it felt to hold the load in the various postures, andhow it felt to use the “proper” lifting techniques. The students may find itfeels funny bending the knees and lifting with their legs. Emphasize thatmany lifting tasks are not as straightforward as lifting compact boxes.Materials are often bulky, odd-shaped, and too heavy for any one personto lift safely. Sometimes what you’re lifting is a person, as in a hospital,nursing home, and when babysitting. Here, lifting with the knees may beimpossible. Therefore, it’s very important to look for solutions that gobeyond proper body movement to protect the health of your back. Thereare ways to change the workplace or the task to make lifting easier. Askthe students to think of these types of changes.Some examples: 10Store boxes off the ground so they are at a height between the kneesand the shoulders, in order to avoid high or low lifts.Health & Safety Awareness for Working TeensSlide 5
Have orders delivered in smaller (lighter) boxes. Use two people to lift. Use cranes, dollies, or other lifting devices.Leave students with the message that good back care is important on and off thejob, but it’s always important to look at the job and equipment as well as whatyou can do yourself to protect your back.Note: If students suggest wearing back belts, tell them that NIOSH (the NationalInstitute for Occupational Safety and Health) does not recommend them. Backbelts do not specifically protect the back and may even be hazardous themselves.They may give people the false impression that they can lift more than theyshould. Following safe lifting techniques is always essential.Unit 7 – Introduction to Workplace Ergonomics11
Activity E (Optional). Analyzing a Task for Ergonomic Hazards(15 minutes)1.Divide the class into groups of three or four. Assign each group one of thejobs mentioned in the previous discussion or a job shown below. Givestudents Handout C, the Ergonomics Checklist.2.Ask each group to identify all the possible ergonomic risks involved inthat job, using the checklist. Suggest that one person in the group mimedifferent aspects of the job, so that the others can observe and identifypossible risks. Ask each group to report back the following information: All ergonomic risk factors At least three possible changes that could be made to address thoserisks.Bring the class back together. Ask each group to report back on theirfindings.Slide 6Review key points, summary, discussion.3.4.ORElectronic Devices (15-20 minutes)Use this optional activity on electronic device ergonomics here or assign ashomework. There are supplemental handouts for this topic on the HSAWTGeneral Curriculum page1.Direct the student to spend 10-15 minutes searching the internet forinformation and safety tips on computer, laptop, tablet and handhelddevice risk factors, and ergonomic solutions and recommendations.2.Have them look at things such as 3.hand, wrist, elbow, thumb strainneck and back posturesglare and eyestrain.Discuss and summarize their findings and their own experiences.4.What changes might they make in their practices with this newinformation?12Health & Safety Awareness for Working Teens
Handout B Proper Lifting EvaluationHandout AProper Lifting Evaluation ActivityPosture, Force, and EffortEach partner will take turns lifting and holding the box in different positions asdemonstrated in the photos on the back side of this handout.Use the Physical Force Rating Scale to fill out the table. For each position, providethe Physical Effort Rating and write down where in your body you felt discomfort orfatigue after holding the position for 15 seconds.Physical Effort Rating Scale10 Extremely difficult/fatiguing9 Very, very difficult/fatiguing8 Very difficult/fatiguing7 Difficult/fatiguing6 Somewhat difficult/fatiguing5 Moderate effort/moderate fatigue4 Some effort/some fatigue3 A little effort/a little fatigue2 Barely any effort or fatigue1 No effort/no fatigueSafety Note: If lifting and holding the box with two reamsof paper is too heavy for you, feel free to remove one reamof paper from the boxUnit 7 – Introduction to Workplace Ergonomics13
Handout AProper Lifting Evaluation ActivityPhysical Effort ObservationsPositionPartner 1Partner 21-10 Rating:Discomfort/Fatigue1-10 Rating:Discomfort/FatigueInstructions:Lift the box and follow thedirected posture—holding for 15seconds before loweringNo BoxStand in an upright positionBox held closeLift and then hold the box close,about 1-2” in front of your bodyat waist level. Do not allow thebox to touch or rest on yourbody. Hold 15s, then lower.Box held at mid-distanceLift and hold the box 8-10” infront of you with elbowsslightly bent. Hold 15s.Box held far awayLift and hold the box straightout in front of you at waistheight, no bend in your elbows.Hold 15 s.Box held low & far awayBend over, lift and hold the boxin front of you, about 10-12” offthe ground. Hold 15 s14Health & Safety Awareness for Working Teens
Handout BUnit 7 – Introduction to Workplace ErgonomicsFour Steps to Proper Lifting15
Handout BFour Steps to Proper LiftingSafe Lifting ChecklistWatch your fellow students lift the boxes. See if they follow the safe liftingmethod. Help them if they miss a step.Did they.YesNoKnow where the boxes will be placed?Check for obstacles and clear a path before moving thematerial?Check the weight of the load before lifting it?Have two or more people lift (or use a lift device) ifnecessary?Avoid twisting while carrying?Keep the load as close as possible to the body?Lift with the legs and not with the back?Lift the load slowly, avoiding fast jerky movements?Use their leg and back muscles by bending their knees whensetting the load down?Comments16Health & Safety Awareness for Working Teens
Handout CErgonomics ChecklistErgonomics ChecklistDoes the job include any of thefollowing?YesNoNotsureRepetitive bending or turningthe wrist in any directionFrequent reaching forward,behind, or out to the side with oneor both arms stretched outRepeating the same motionover and overFrequent pinching, pulling orusing forceLifting above shoulder heightWearing gloves that are too big ortoo smallLifting with forceful throwingUnit 7 – Introduction to Workplace Ergonomics17
Ergonomics Checklist, cont.Does the job include any of thefollowing?YesNoNotsureExertion of force in awkwardpostures (to the side, overhead,extended reaches)Lifting objects off the floorHandling or hard-to-grasptools or equipment (Poorhandhold? Items difficult toreach?)Regularly pressing hands orarms on sharp edgesHand tool vibrationCold temperaturesPace of work set by machinesAdapted from Massachusetts Department of Public Health18Health & Safety Awareness for Working Teens
The first activity compares the strength of a power grip verses a pinch grip, and then compares neutral wrist to bent wrist power grip. Activity D. Posture, Force, and Effort: Lifting . Health and Fitness 1.2 Safely participates in a variety of developmentally appropriate physical . (total