Transcription
Partner Integration Portal (PIP)Installation GuideRevised: 08/11/2015 2015 EC Software Solutions, Inc. – All rights reservedConfidential and ProprietaryPage 1
TABLE OF CONTENTSOVERVIEW . 3DOWNLOADING PIP . 3INSTALLING THE PARTNER INTEGRATION PORTAL (PIP). 6CHECKING THE INSTALLATION . 14FOR WINDOWS XP OPERATING SYSTEM . 14FOR WINDOWS 7 ENTERPRISE OPERATING SYSTEM . 14SETTING THE TIMEOUT LENGTH . 15INSTALLING INTERNET INFORMATION SERVICES (IIS) . 17TROUBLESHOOTING. 18INTERFACE TEST . 18PUBLIC API ERROR . 18404 ERRROR . 19API VERSION. 19PERFORMANCE ISSUES WITH PIP . 19SETTING UP E-AUTOMATE PERMISSIONS . 20Revised: 08/11/2015 2015 EC Software Solutions, Inc. – All rights reservedConfidential and ProprietaryPage 2
OverviewECi Software Solutions partner applications outside of e-automate can access the e-automate database toquery or insert data using special software called the Partner Integration Portal (PIP). If you want your eautomate database to interact with ECi Software Solutions partner companies, you use the PIP software. ECiSoftware Solutions recommends installing this software on a computer located in your DMZ, allowing accessto external applications. The server must also be running Internet Information Services (IIS). For instructionson how to install IIS, see Installing Internet Information Services below.Downloading PIPECi Software Solutions distributes all software through web site download. Customers on currentmaintenance agreements can access the Product Releases section of ECi Software Solution’s web site todownload software as needed. ECi Software Solutions does not create or distribute CD/DVD for theirsoftware; in order to acquire the PIP installation files, use the following instructions to acquire your PIPsoftware:1. Navigate to the ECi Software Solutions login.aspx.Note: If you access the main ECi Software Solutions website, click the Customer Login link displayednear the top of the web page to access the login page.Revised: 08/11/2015 2015 EC Software Solutions, Inc. – All rights reservedConfidential and ProprietaryPage 3
2. Log into the ECi Software Solutions website with appropriate login credentials. In order todownload software, the user logging in must be logged in as the Administrator. ECi SoftwareSolutions provided two users and two passwords you can use when logging into the CustomerResource Center. To download software you must log in as the Administrator. In the User Name field, enter the administrator username. In the Password field, enter the appropriate password for the entered Username.Note: If you do not have your Username and Password, contact e-automate Customer Care toacquire the appropriate login credentials. If you are authorized to receive administrativeinformation, the information is sent to you. If you are not authorized, e-automate CustomerCare sends the login information to the authorized person at your company.3. Once you have successfully logged in to the Customer Resource Center, on the left-hand side, locateand click on the Software Downloads link displayed under Downloads.Revised: 08/11/2015 2015 EC Software Solutions, Inc. – All rights reservedConfidential and ProprietaryPage 4
4. On the Downloads page locate and click on the Click here link to be redirected to the customersupport portal.5. On the page that displays page, locate the PIP and POP Updates section.Revised: 08/11/2015 2015 EC Software Solutions, Inc. – All rights reservedConfidential and ProprietaryPage 5
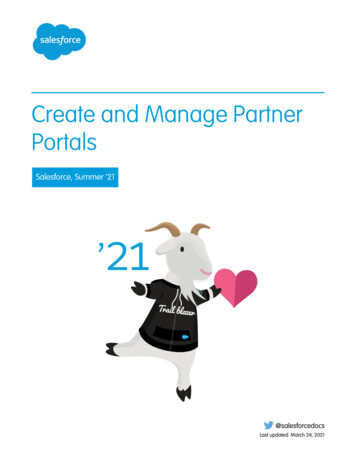
6. Click [8.5 Compatible]. You are taken to the following page where the PIP download can beaccessed.7. Click [Download] to begin the download process.Optional: If you want to view the System Requirements, click [System Requirements].8. Follow your browser’s prompts in downloading and saving the installation file.Installing the Partner Integration Portal (PIP)Most of ECi Software Solutions’ third-party applications use PIP to connect to the e-automate database. PIPis the primary method for communication. In order for you to allow communication between third-partysoftware packages that connect to e-automate, you must install PIP.1. Place the downloaded PIP installation files on the intended installation computer on your network.Note: ECi Software Solutions recommends the computer on which you install PIP be exposed to theInternet via Port 80 and be running IIS.2. Extract the zipped files to a directory on the computer. A convenient way to extract the zippedinstallation files is to right-click on the zipped file and select Extract All. Follow the wizardinstructions to extract all the files stored in the downloaded file. Be sure you make a note of thelocation to which you unzipped the files.3. From the computer on which you want to install PIP, navigate to the extracted PIP installation filesand locate the file named PIP WebSetup.exe.Revised: 08/11/2015 2015 EC Software Solutions, Inc. – All rights reservedConfidential and ProprietaryPage 6
Note: The computer must have Internet Information Services (IIS) installed and functioning. For IISinstallation information, see the Installing Internet Information Services section of this installationguide.Right-click on the file, PIP WebSetup.exe, and select Run as administrator to launch the PIPinstaller.Note: You can right-click on the Start menu and select Explore to access Microsoft WindowsExplorer. Also note that some computer configurations do not display file extensions (.exe).4. The server installation begins and displays the Welcome screen.Click [Next ] to continue the installation.5. If the Choose the filesystem install location below window displays, proceed to Step 7. If theExisting install has been detected window displays, select one of the following: Remove and Reinstall: Removes the previous version and installs the latest version. If youselect this option, click [Next ] and proceed to Step 6. Uninstall/Cleanup: Uninstalls the previous version without installing the latest version. If youselect this option, click [Next ]. In the window that displays, click [Finish] to uninstall theprevious version and proceed to Step 6.Revised: 08/11/2015 2015 EC Software Solutions, Inc. – All rights reservedConfidential and ProprietaryPage 7
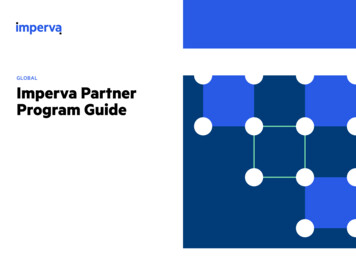
6. In the Choose the component install options below window, check the pip web services checkbox.Note: If you want the installer to list every single file that copies to your computer with the PIPinstallation and provide a more detailed account of the installation, also check the Verbose installcheckbox (not recommended). You must have both the pip web services and the Verbose install(not recommended) checkboxes checked in order to execute the verbose installation. The verboseinstallation takes significantly more time to execute than the regular installation. This is due to theamount of extra information the verbose installation provides.Click [Next ] to continue the installation.Revised: 08/11/2015 2015 EC Software Solutions, Inc. – All rights reservedConfidential and ProprietaryPage 8
7. The installer displays the installation folder selection window. The PIP installer allows you to selectthe installation folder for ECi Software Solutions’ PIP software.8. We recommend you use the suggested installation directory, Digital Gateway. You can change thevirtual directory as necessary. Click [Next ] to continue the installation.9. The Click Finish to perform the listed actions window displays.Review the summary information for accuracy. To proceed with the installation, click [Finish]. Tomodify the summary information, click [ Back] and repeat previous steps as necessary.Revised: 08/11/2015 2015 EC Software Solutions, Inc. – All rights reservedConfidential and ProprietaryPage 9
10. The End user license agreement window displays.Click [Accept] to agree to the license terms.11. In order for partner applications to connect through PIP, you must identify the connectioninformation. Once you identify these components, the installer runs a script on the database toallow e-automate to interact with external applications.Revised: 08/11/2015 2015 EC Software Solutions, Inc. – All rights reservedConfidential and ProprietaryPage 10
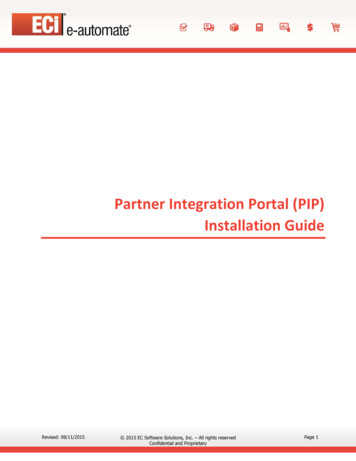
In the Enter a valid name for the database server field, enter the name of your SQL server. In the Specify the e-automate company (excluding the preceding “co”) field, enter thecompany to which you want to connect third-party applications.Note: This tells the PIP installer on which company database to automatically run the databasecreation script. This script allows the chosen database to interact with external applications. Ifyou want to allow other databases to interact with external applications you will need to runthe database creation script on those databases using e-admin. The script is located in theServer directory to which you downloaded PIP. In the Enter the system full access password (specified in e-admin) field, enter your full-accesspassword.Note: This password was added when setting up e-admin. You can change this password in eadmin as necessary. Keep in mind that this same password allows other applications access tothe e-automate database. Changing a password could prevent other applications fromaccessing the database. If you decide to change the full-access password, be sure you change itfor all applications accessing the e-automate database. Click [OK] to save your settings.12. When the installation is complete, the installer displays the Website Installation window.Select one of the following options:Revised: 08/11/2015 2015 EC Software Solutions, Inc. – All rights reservedConfidential and ProprietaryPage 11
Add Virtual Directory to existing Website (Recommended): When selected, the system installsthe website as a virtual subdirectory of an existing web site.a. In the Website field, select the desired website. The default is Default Web Site.b. Click [Next ]. The following window displays:c. In the Name field, enter a name for the virtual directory.d. Click [Next]. The following window displays:Prior to installing and creating the directory on the specified web server, the installer givesyou the opportunity to change your settings. To change your settings, click [ Previous] asappropriate to change settings. If your settings are correct, click [Next ] to continue.Revised: 08/11/2015 2015 EC Software Solutions, Inc. – All rights reservedConfidential and ProprietaryPage 12
Create New Website: When selected, the system installs a new website.a. Click [Next]. The following window displays.b. In the Name field, enter a name for the virtual directory.c. If you want to customize the site parameters, check the Customize Site Parameterscheckbox and enter the appropriate information in the following fields:Hostname: Host name for the web site.IP Address: IP address for the web site.Port: Port the web site uses.d. Click [Next ] to continue the installation. The following page displays:Prior to installing and creating the directory on the specified web server, the installer givesRevised: 08/11/2015 2015 EC Software Solutions, Inc. – All rights reservedConfidential and ProprietaryPage 13
you the opportunity to change your settings. To change your settings, click [ Previous] asappropriate to change any desired setting. If your settings are correct, click [Next ] tocontinue the installation.13. The PIP installation proceeds and displays the Installation. window with "Background processcompleted" when finished. Click [Close] to exit out of the installation.Checking the InstallationOne you have completed the installation, you can check to assure that the web installation installedsuccessfully. Use the following instructions to assure that the web site installed correctly.For Windows XP Operating System1. Locate the icon, Computer, either on your Desktop or in your Start menu.Once located, right-click on the Computer icon and select Manage.2. In the Computer Management window, in the left pane, expand Services and Applications.Once expanded locate and expand Internet Information Services and then locate and expandWeb Sites. Inside the Web Sites locate and expand what you called the web directory duringthe installation, Step 12. In the example it was named PIP.3. In the left-pane, click on the named directory (PIP in the example) and the contents aredisplayed in the right-pane.4. If in the right-pane you see directories and files, the web installation was successful.5. In the right-pane locate the file, PublicAPIService.asmx. Right-click on the file and selectBrowse to open the file in your Internet browser. If you are able to view the file in yourbrowser, your PIP installation completed successfully.For Windows 7 Enterprise Operating System1. Locate the icon, Computer, either on your Desktop or in your Start menu.Once located, right-click on the Computer icon and select Manage.2. In the Computer Management window, in the left pane, expand Services and Applications.Once expanded locate and click on Internet Information Services. Change the view at thebottom of the window to Content View. Double-click on Sites and then on Default Web Site.Locate and double-click on the web icon you created during the installation, Step 12. In theRevised: 08/11/2015 2015 EC Software Solutions, Inc. – All rights reservedConfidential and ProprietaryPage 14
example it was named PIP.Note: Be sure to select the web icon and not the directory.3. Click on the named directory (PIP in the example) to display the contents in the right-pane.4. If you see directories and files in the right-pane, the web installation was successful.5. In the right-pane locate the file, PublicAPIService.asmx. Right-click on the file and selectBrowse to open the file in your Internet browser. If you are able to view the file in yourbrowser, your PIP installation completed successfully.Setting the Timeout LengthWhen you are performing tasks that require accessing a large amount of data, the system may time outbefore you have all the data. If the system frequently times out before you have gotten all of your data, youmay configure PIP to give you a longer period of time before the system times out.To configure a longer time out setting, do the following:Revised: 08/11/2015 2015 EC Software Solutions, Inc. – All rights reservedConfidential and ProprietaryPage 15
1. From the webserver locate the PIP Web.config file. The default location for the config file isc:\program files\digital gateway\pip.2. Right-click on Web.config and select Open with 3. Open the Web.config file with Notepad.Revised: 08/11/2015 2015 EC Software Solutions, Inc. – All rights reservedConfidential and ProprietaryPage 16
4. Locate the line: !-- add key "CommandTimeout" value "240"/ -- and change it to: add key "CommandTimeout" value "240"/ This change sets the time-out to 240 seconds (4 minutes). To increase this time-out, change the 240in this line to a larger number of seconds that the system should allow before timing out.Installing Internet Information Services (IIS)If the server you have selected is not running Internet Information services (IIS), you must install it for yourPIP product to function and to communicate with e-automate via PIP. Below are basic instructions on howto install IIS. If you need more specific direction, contact a qualified network professional.The following instructions are based on Windows 7:1. From the Start menu, select the Control Panel.2. From the Control Panel, double-click on [Programs and Features].3. From the Programs and Features windows, double-click on [Turn Windows features on or off].4. In the Windows Features window, check the Internet Information Services (IIS) box.Note: Features are listed alphabetically, and you may need to scroll.Revised: 08/11/2015 2015 EC Software Solutions, Inc. – All rights reservedConfidential and ProprietaryPage 17
If necessary, insert your Microsoft Windows server operating system CD and follow the prompts.5. Once IIS has been installed, Windows displays the Windows Components Wizard window.Click [Finish] to complete the installation.TroubleshootingInterface TestIf you run the InterfaceTest.exe for the PIP over the network, authentication will fail. Simply copyInterfaceTest.exe locally to your machine to run a successful test.Public API ErrorProblem: If you see the following error message:Solution: Attached are CoexecutiveUserReset.sql and ServerDatabaseCreationScript.sql that have tobe run on the database in the following order:1. Backup2. Run CoexecutiveUserReset .sql3. Backup4. Restore5. Run ServerDatabaseCreationScript .sqlBe sure to back up your database and ensure that no one is on it when you run these scripts. This isa tricky fix since it fixes an issue with some procedures that were not created with the DBO. Stepsthree and four are intended to test whether the fix worked, so it is important that you do notoverwrite old backups during this process, as you may be forced to restore back to step 1. When thedirections are successful, you can go ahead and install PIP.Revised: 08/11/2015 2015 EC Software Solutions, Inc. – All rights reservedConfidential and ProprietaryPage 18
404 ErrrorProblem: 404 error from PIP on a 64 bit Server. Typically this is due to Web Services Extensions notbeing enabled.Solution: In this case, however, the extensions were enabled and seemed fine for other applicationsrunning on the same web site, but the new PIP install continued to return the 404 (file not found)error. Go to the settings screen by right-clicking the application (so PIP, RTS, RAP, etc.) and choosingProperties. The tab ASP.NET has the relevant field, ASP.NET version. Click on the dropdown, and setit to 2.0.50727 (or other available 2.x version) to correct this issue.API VersionFollow these instructions to get to the API Version. This works only on the server it is running on.On the Server that the API is installed on go to: http://mywbsite.com/pip/publicapiservice.asmxClick getAPIVersion.Click Invoke.Performance Issues with PIPIssue: After updating PIP the performance for Remote Tech (hosted on the same web server) slowsdown.Solution: Reboot the web server.Issue: After installing PIP you try to connect through the interface test tool and you get a notificationthat says "Account is not valid".Solution: Use the APIConnectionInfo? .exe (available on Athena at\\Athena\customercare\ ProductReleases\PIP\Public API (Product Integration Platform (PIP)) andset the Full Access Password again.Problem: Can't browse to PublicAPIService? .asmx or you see config errors when browsing.Solution: Check to see if they have multiple web sites attempting to bind to port 80. IIS will onlyallow you to bind one port to 80. Take the default (or other) website, right-click and chooseproperties, and change it to port 81. Point the third party application to that new URL.Revised: 08/11/2015 2015 EC Software Solutions, Inc. – All rights reservedConfidential and ProprietaryPage 19
Setting Up e-automate PermissionsUse the security functionality of e-admin to determine what a specific user can and cannot do via PIP. If youneed more information on how to grant rights in e-admin, see the Security topic in the e-admin help.The BEI APIs interact with data from the following e-automate tables:TableMTMeterTypesDescriptionMeter TypesSCEquipmentsService EquipmentViewEditCreateDeleteDeletevvThe DeskTech APIs interact with data from the following e-automate tables:TableCMContactsDescriptionC/M ContactsICItemsI/C ItemsSASystem AdminSCCallFileAttachmentsService Call File AttachmentsSCCallsService CallsSCContractDetailNotesContract Equipment NotesSCWorkOrderNotesWork Order eteecddThe etactics APIs interact with data from the following e-automate tables:TableAPVendorsDescriptionA/P VendorsARCustomersA/R CustomersARInvoicesA/R InvoicesARReceiptsA/R ReceiptsMTMeterTypesMeter TypesICBinsI/C BinsICItemsI/C ItemsICWarehousesI/C WarehousesSCEquipmentsService EquipmentShAgentsShared AgentsRevised: 08/11/2015Viewvvvvvvvvvv 2015 EC Software Solutions, Inc. – All rights reservedConfidential and ProprietaryPage 20
The leasing (lessor) APIs interact with data from the following e-automate tables:TableAPVendorsDescriptionA/P VendorsARInvoicesA/R InvoicesARReceiptsA/R ReceiptsICBinsI/C BinsICItemsI/C ItemsICWharehousesI/C WarehousesMTMeterTypesMeter TypesSCEquipmentsService EquipmentShAgentsShared wEditCreatevvvvvevvvvvvvvvDeleteThe meter APIs interact with data from the following e-automate tables:TableMTMeterReadingsDescriptionMeter ReadingsMTMeterTypesMeter TypesSCEquipmentsService EquipmentSOOrdersSales OrdersSOQuotesSales QuotesDeleteThe ScanIt APIs interact with data from the following e-automate tables:TableDescriptionICBinsI/C BinsICItemsI/C ItemsICPhysInvI/C Physical InvICSerialNumbersI/C Serial NumbersICWharehousesI/C WarehousesRevised: 08/11/2015 2015 EC Software Solutions, Inc. – All rights reservedConfidential and ProprietaryDeletePage 21
The Sharp License Manager APIs interact with data from the following e-automate tables:TableAPVendorsDescriptionA/P VendorsSOOrdersSales OrdersSOQuotesSales QuotesRevised: 08/11/2015ViewEditCreatevvveecc 2015 EC Software Solutions, Inc. – All rights reservedConfidential and ProprietaryDeletePage 22
Installing Internet Information Services section of this installation guide. Right-click on the file, PIP_WebSetup.exe, and select . Run as administrator. to launch the PIP installer. Note: You can right-click on the . Start. menu and select . Explore. to access Microsoft Windows Explore