Transcription
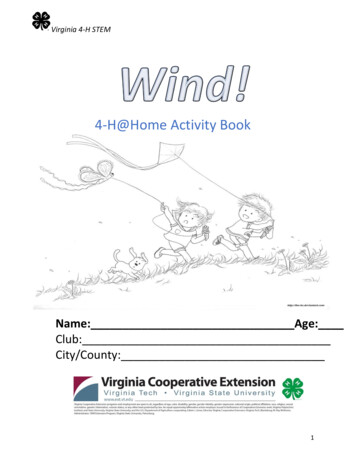
Virginia 4-H STEM4-H@Home Activity BookName: Age:Club:City/County:1
Virginia 4-H STEMWhat is wind?Wind is air in motion. When the sun heats the earth, it doesn’t heat it evenly.Warm air, which weighs less than cold air, rises. Then cool air moves in andreplaces the rising warm air. This movement of air is what makes the wind blow.The Beaufort Scale— In 1805, Sir Francis Beaufort of the British Royal Navy devised an easy wayof estimating (guessing how much) wind power without any instruments. Look at the picturesbelow, then go outside and look around you. How fast do you think the wind is rt-scale/Activity 1: Make a Windsock2
Virginia 4-H STEMAdapted from r-socks.htmlMaterials 1 piece of cardstock, 7 cm X 28 cm1 piece of tissue paper, 30 cm x 45 cmMarkerMetric rulerCellophane tapeHole punchScissorsKite string or dental floss½ inch rubber band or rubber washer1. Using transparent tape, form a ring using the strip of card stock. (figure 1)2. Using a hole punch place three holes equal distance around the paper ring at the top Figure 1edge of the ring.3. Place the tissue paper on a flat surface, as shown. (figure 2)4. Using a marker, draw a line 6 cm down from the top of the tissue paper.5. Starting at the bottom, cut the tissue paper into strips, approximately 4 cmwide. (figure 3)6. Using transparent tape, attach the tissue paper to the card stock ring. CutFigure 2three pieces of string, 30 cm long. Tie one end of each string to the windsock at each of the 3 holes. (figure 4)7. Tie the free end of each string to the rubber band, then tie an additional 30cm long string to the rubber band.8. Hang your windsock from a stick or pole.Reflect and ApplyWhat does the wind sock do in the wind?What are some ways wind socks can be used?Have you ever seen a windsock near an airport? Why do you think it would be useful?Figure 3Going further: Find the wind direction by using a compass to mark north, south, east, and west below thewindsock (with the dowel in the center).Make a windsock out of “weather proof materials ( nylon fabric,plastic bags, etc.) Experiment with other designs.Notes for parents: For younger children, you may wish to draw lines for each of the strips of tissue paper.3
Virginia 4-H STEMActivity 2: Build and Fly a Sled Kite!Adapted fromhttps://www.nasa.gov/pdf/205712main Sled Kite.pdfMaterialsSled Kite TemplateTwo drinking strawsCellophane tapeScissorsTwo 45 cm lengths of stringOne 1 m length of string1 wooden popsicle stickMetric rulerSingle-hole paper puncherAdhesive hole reinforcementsOne ½ inch rubber band or rubber washerMarkers, crayons, pencilsSelection of paper (crepe, tissue, newspaper)1. Make a copy of the Sled Kite Template. (This template canbe enlarged if you want a larger kite.) Carefully cut out thesled kite.2. Decorate the top of the sled kite using crayons, markers,stickers, etc.Figure 13. Trim the length of the two drinking straws so they will fit inthe area marked for the straws. Tape them in place. (figure 1)4. Place two or three pieces of tape in the marked areas covering the black circles, or use adhesive holereinforcements.5. Using a single-hole paper puncher, carefully punch the two holes marked by the black circles.6. Cut two pieces of kite string 45 cm each. Tie a string through each hole, taking care not to tear thepaper.7. Tie the opposite end of both strings to small rubber band or rubber washer.8. Tie the remaining (1-meter-long) string to the rubber band.9. Tie the unattached end to a wooden popsicle stick for a handle. Your kite is ready to fly!10. Outside in a clear area, hold the popsicle stick in your hand and run with the kite to make it fly.11. Try walking, running slow and fast, and observe how the kite flies at different speeds.4
Virginia 4-H STEMReflect and Apply:Can kites be used to lift objects or people?Why are kites made of lightweight material?What other kite designs have you seen?Why do you think some kites need tails?What kinds of materials do people use to build kites?Try building a kite out of other lightweight materials or choose a different design!Kite Safety Never fly a kite near electric lines or poles. Never fly a kite with metal parts or lines that will attract electricity. Never fly a kite in the rain or when there is a risk of thunderstorms because the kite's stringcan carry electricity. Never fly a kite near the edge of a steep hill or slope. Never fly a kite near ditches, stones, trees, and traffic. Do not use wire or fishing line as kite flying line. Be aware of other safety hazards when you set up your kite. If your kite does get caught up in a tree or pole, leave it alone! Climbing high places to rescue akite can be deadly.5
Virginia 4-H STEM6
Virginia 4-H STEMActivity 3: Read Feel the Wind by Arthur Dorros (Author, Illustrator)ISBN-10 : 9780064450959 or watch https://www.youtube.com/watch?v LBIbg3ZAWXMActivity 4: Build a WindmillSupplies:Card stockScissorsSharp pencil or push pinPipe cleaner (chenille stem) or wooden skewerPlastic strawTapeSmall cupString or Dental FlossPennies or other small objectsCrayons or markers to decorate your turbine (optional)Blow dryer or box fanBackground: A windmill (used for water) or wind turbine (used for electricity) is a machine that can providea source of power. For over 3000 years, windmills have been used to pump water and grind grain. Today,wind turbines have been used to generate electricity. Today, wind farms using turbines are used togenerate electricity on a larger scale and are a cleaner alternative to engines and generators using fossilfuels. A windmill/wind turbine is made up of the simple machines, wheel and axle. Attached to the rotatingshaft are panels or sails that are angled to catch the wind and turn the shaft. As the shaft turns, it can beused to turn gears and grinding stones, move a pump rod up and down to pump water, or spin a generatorto turn kinetic energy into electrical energyWhat to Do:1. Use the attached pinwheel pattern or cut out a 6.5” by 6.5” square. Mark the center of your square and cutfrom the corners diagonally towards the center of the square, stopping about 1.5” from the center point.2. Use a sharp pencil or a push pin to make a hole in the center and at the end of every other one of your 8corners. The hole should be large enough for the pipe cleaner or skewer to fit through.3. Push the pipe cleaner through the center of your square and then bend (don’t fold) each of the corners ontothe pipe cleaner or skewer. If using a pipe cleaner, try to avoid bending or kinking the wire. Leave about 27
Virginia 4-H STEMinches of the pipe cleaner sticking out of the front of the windmill and bend it to form a loop. If using a skewer4.5.6.7.8.9.10.leave about 1 ½ inches sticking out of the front of the turbine.Secure the front and back of the pinwheel with tape to keep the pinwheel together. There should be about aninch of space between the front and back of the pinwheel.Tape the straw to the edge of a table.Thread the long end of the pipe cleaner through the straw.Take the small cup and cut two holes in opposite sides and tie a small piece of string between the two holes,creating a sort of bucket handle.Secure one end of your string to the loop of pipe cleaner or to the skewer. If using a skewer, you may use tapeto keep the string in place.Now blow on your pinwheel with your mouth, then with a blow dryer or fan. Watch the turbine lift the cup.Experiment with different wind speeds, using high and low settings.Try different “payloads” such as pennies, small plastic to see how many you can lift—but be careful---they canfly out! Consider using a lid, plastic wrap to restrain them.This activity was adapted H-STEM-Lab-Wind-to-Lift-a-Load-Activity.pdf8
Virginia 4-H STEM9
Virginia 4-H STEMAdditional Activities:1. Read The Boy Who Harnessed the Wind: Picture Book Edition by William Kamkwamba , Bryan Mealer ISBN-10: 08037351112. For older children, give them the materials and allow them to build design and build their own turbine. Coveringthe “ bucket” with a lid or tape will prevent losing their payload, but may throw the “bucket” off balance. Allowchildren to experiment and adjust their designs.3. Learn more about how wind turbines work at nes-workand ps://www.nasa.gov/pdf/205715main Wind in Your Socks.pdfhttps://www.nasa.gov/pdf/205712main Sled Kite.pdfhttps://ext.vt.edu/content/dam/ext vt ild%20a%20Windmill.pdfFor ages 5-11SOL’s: Math K 1, 3, 5, 12; 1.4, 2.4Life skills: Critical Thinking, Problem Solving, Learning to Learn, Communication5 C’s: Critical Thinking Skills, Communication Skills, Creative Thinking SkillsCompiled by Kathryn Alstat, Senior 4-H Extension Agent, Greene County VAEdited by Erika Bonnet10
Scissors Kite string or dental floss ½ inch rubber band or rubber washer 1. Using transparent tape, form a ring using the strip of card stock. (figure 1) 2. Using a hole punch place three holes equal distance around the paper ring at the top edge of the ring. 3. Place th