
Transcription
eSi-RISC Development Suite Getting Started Guide
eSi-RISC Development Suite Getting Started Guide11234567ContentsContents 2Overview 3Starting the Integrated Development Environment 4Hello World Tutorial 5Next Steps 8Help 11Support 13Version 7.0.02 of 14 2019 eSi-RISC, All Rights Reserved
eSi-RISC Development Suite Getting Started Guide2OverviewThis guide describes how to create and run your first program using the eSi-RISCDevelopment Suite. It assumes that you already have the software installed on yourcomputer. For details of how to do this, please refer to the eSi-RISC Development SuiteInstallation Guide.The eSi-RISC Development Suite contains all you need to develop software for an eSi-RISCCPU. It features: C/C orIDEC and C librariesFreeRTOSlwIP TCP/IP stackVerilog PLIs for connecting the debugger to Verilog RTL simulationsMany of these components are based upon ports of tools that most developers will already befamiliar with, such as the Eclipse IDE and GNU tools, allowing you to start developing youreSi-RISC applications straight away.Version 7.0.03 of 14 2019 eSi-RISC, All Rights Reserved
eSi-RISC Development Suite Getting Started Guide3Starting the Integrated Development EnvironmentAfter the eSi-RISC Development Suite has been installed, the Eclipse Integrated DevelopmentEnvironment can be started on Windows, by selecting: Start / All Programs / eSi-RISCDevelopment Suite / Eclipse.Figure 1: Start the Eclipse IDEOn Linux, run: esirisc-eclipseEclipse will request you to enter a folder to use for its workspace, which is where it will storeits configuration files and use as a default location for new projects. It is recommended thatyou select a new folder for this and do not try to share this workspace folder with other Eclipsebased programs you may have. Also, if you intend to use the command line tools from a shell,it is recommended that you chose a folder that does not have spaces in the path.Figure 2: Select a workspaceVersion 7.0.04 of 14 2019 eSi-RISC, All Rights Reserved
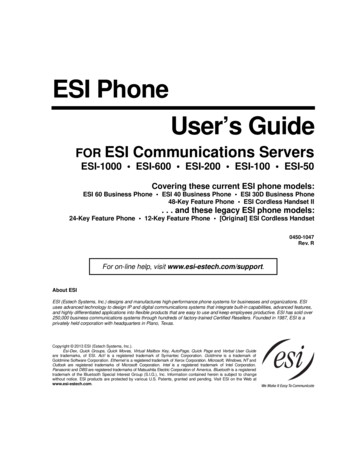
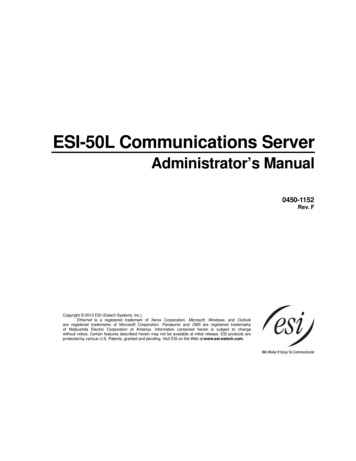
eSi-RISC Development Suite Getting Started Guide4Hello World TutorialWhen Eclipse finishes loading, you will be presented with the Welcome page. From here youcan select: Overview - Get an overview of the features of Eclipse and its installed plugins.Tutorials - See a list of tutorials for Eclipse features and the eSi-RISC DevelopmentSuite.Samples - See a list of sample eSi-RISC applications.What's New - Find out what is new in this release of the eSi-RISC Development Suite.Workbench (top right) - Go straight to the workbench.For now select Tutorials, then on the next page under the list of eSi-RISC tutorials, selectCreate a Hello World Application for eSi-RISC.Figure 3: Eclipse Welcome ScreenAfter selecting the tutorial, Eclipse will switch to the workbench, with step-by-step instructionsfor walking through the tutorial appearing in a window to the right of the workbench, asillustrated in Figure 4: Eclipse Workbench.Each of the instructions will have one of the following icons next to it, which should be clickedto move on to the next step of the tutorial:Click to indicate you have completed the instructionClick to have the instruction performed for youClick to skip the instructionVersion 7.0.05 of 14 2019 eSi-RISC, All Rights Reserved
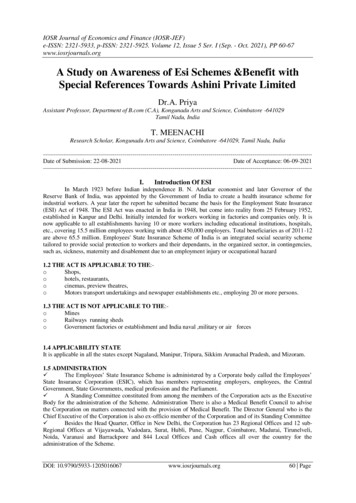
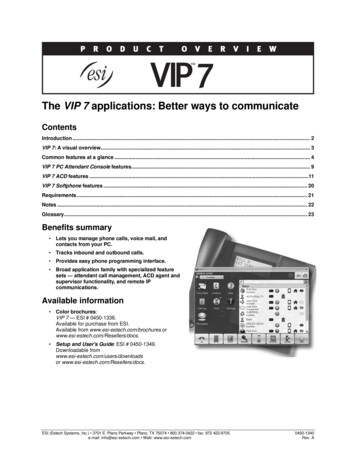
eSi-RISC Development Suite Getting Started GuideFigure 4: Eclipse WorkbenchThe tutorial will guide you through: Creating a C Project, specifying the target CPU and build configurationsCompiling the programRunning the program on the simulatorDebugging the program on the simulatorRunning the program on hardwareDebugging the program on hardwareThe C project that is created contains the classic Hello World C program, which simply printsthe string "Hello World" to the standard output stream. The source code for the program is asfollows:#include stdio.h int main() {printf("Hello world\n");return 0;}Even a program as simple as this will raise a few questions for the seasoned embeddeddeveloper: Where does the standard output stream (stdout) go to on an embedded target?Why use a return type of int for main rather than void on an embedded target?Where the standard output stream will be output to will depend upon the configuration of thetarget SoC (System-on-a-Chip) and the way in which the program is run. If you are targetingon of the FPGA Demo SoCs that are assumed for this tutorial, then it can go to one of twoplaces:Version 7.0.06 of 14 2019 eSi-RISC, All Rights Reserved
eSi-RISC Development Suite Getting Started Guide If the program is run with a debugging connection to a host computer (via a JTAG orUSB cable or if the program is being run on the simulator), then you can choose tohave the output directed to the console window in Eclipse.If no connection to a host computer is available, then it will be output via a UART.The return type of main is specified as int rather than void, as is often seen in manyembedded programs, in order to be fully compliant with language standards. Also, the eSiRISC debugger is able to report the value returned by your program (or passed via a call toexit()), which can be useful when debugging your programs or for programs that run in ahosted environment. You can also use argc/argv for program arguments.Figure 5: Debugging the Hello World ProgramVersion 7.0.07 of 14 2019 eSi-RISC, All Rights Reserved
eSi-RISC Development Suite Getting Started Guide5Next StepsAfter you have finished the Hello World tutorial, there are a number of other tutorials andsample applications you can try out to become more familiar with the eSi-RISC DevelopmentSuite. All of these tutorials can be accessed from the Welcome page, which can be accessed atany time by selecting the Help Welcome menu.Tutorials: Profile and optimize and eSi-RISC application.This tutorial shows how to program an application using the eSi-RISC simulator. It alsoshows how you can optimize the code and target different eSi-RISC CPUs to see thedifference in performance.Samples: AESDemonstrates how to use the AES peripheral for encryption and decryption. c Demonstrates several c language features, including classes, constructors &destructors (static and dynamic), iostream, operator overloading, exceptions andruntime-type information. CFI FLASH ProgrammerDemonstrates how to program a CFI FLASH. CRCDemonstrates how to use the CRC peripheral to compute Cyclic Redundancy Checks. Cycle CounterDemonstrates how to use the cycle counter to count how many cycles a function takesto execute. ECC MicroDemonstrates how to use the ECC (Elliptic Curve Cryptography) Micro peripheral. FFTDemonstrates how to use SIMD instructions to accelerate FFT (Fast Fourier Transform). FreeRTOSDemonstrates the eSi-RISC port of FreeRTOS, a small, open-source RTOS. FreeRTOS lwIPDemonstrates the eSi-RISC port of the lwIP TCP/IP stack with FreeRTOS. The democonsists of a small web-server that dynamically generates a web page showing thetasks being scheduled by FreeRTOS.Version 7.0.08 of 14 2019 eSi-RISC, All Rights Reserved
eSi-RISC Development Suite Getting Started Guide Hosted I/ODemonstrates how to use hosted I/O, which provides a way to access the file system ofa host computer, using the standard C library file functions. GPIODemonstrates how to use the GPIO peripheral to drive LEDs and read the state ofbuttons. It also shows how you can write an interrupt handler without writing anyassembly code. I2C EEPROM ProgrammerDemonstrates how to use the I2C peripheral to program an EEPROM. I2C Master and SlaveDemonstrates how to use the I2C peripheral as both a master and slave. LCDDemonstrates how to use the LCD peripheral by displaying an image on it. MakefileDemonstrates how to build an eSi-RISC application using a handwritten Makefile. MMU ProtectionDemonstrates how to use the MMU to protect areas of memory and how to implementa system call. Multiprocessor BootDemonstrates how synchronize start up in a multiprocessor SoC. PS2Demonstrates how to use the PS/2 peripheral to interface to a keyboard. PWMDemonstrates how to use the PWM (Pulse Width Modulation) peripheral. RTCDemonstrates how to use the RTC (Real-Time Clock) peripheral. Smart CardDemonstrates how to use the UART peripheral in ISO 7816 mode to access a smartcard. SPI FLASH ProgrammerDemonstrates how to use the SPI FLASH peripheral to program a SPI FLASH device.Version 7.0.09 of 14 2019 eSi-RISC, All Rights Reserved
eSi-RISC Development Suite Getting Started Guide SPI SD CardDemonstrates how to use the SPI peripheral to read the master boot record of a SDCard. SHA-256Demonstrates how to use the SHA-256 to calculate hashes. SHA-512Demonstrates how to use the SHA-512 to calculate hashes. TRNGDemonstrates how to the TRNG (True Random Number Generator) peripheral togenerate random numbers. User-defined InstructionsDemonstrates how to use user-defined instructions in your eSi-RISC programs and howto create a shared library so that they can be used in the eSi-RISC simulator. User-defined DevicesDemonstrates how to create and use user-defined devices (peripherals) for use in thesimulator. UARTDemonstrates how to use the UART peripheral. VISADemonstrates how to use the VISA interface to control test equipment from an eSiRISC CPU. WatchdogDemonstrates how to use the watchdog peripheral.For more information on each of these tutorials and sample applications, please refer to theon-line help, by selecting the Help Help Contents menu and selecting eSi-RISC Samples.Version 7.0.010 of 14 2019 eSi-RISC, All Rights Reserved
eSi-RISC Development Suite Getting Started Guide6HelpThe Eclipse IDE online help can be accessed by selecting the Help Help Contents menu.Figure 6: Eclipse HelpThe contents area is divided in to a number of different sections, describing differentcomponents of Eclipse, such as the Workbench, source code revision control systems (CVS,SVN and GIT are supported by default), Mylyn (a task and application lifecycle managementtool), as well as a section on eSi-RISC.The eSi-RISC Reference section contains the most important information. Here you will find: eSi CPUs - Documentation for the eSi-RISC architecture eSi-xxxx CPUs.eSi Cores - Documentation for the eSi-Connect peripherals (UART, I2C, SPI etc.).eSi SoCs - Documentation describing the demonstration SoCs.Tools – Documentation for the command line tools (compiler, debugger, simulator).Libraries - Documentation for the c, c , math and eSi-RISC support libraries.The Eclipse editor supports function and variable name auto-completion. Pressing CTRL space will list possible completions along with any corresponding documentation for thefunction. It is also possible to view the documentation for a function, simply by hovering thecursor over a function name.Version 7.0.011 of 14 2019 eSi-RISC, All Rights Reserved
eSi-RISC Development Suite Getting Started GuideFigure 7: Auto-complete Suggestions and DocumentationVersion 7.0.012 of 14 2019 eSi-RISC, All Rights Reserved
eSi-RISC Development Suite Getting Started Guide7Command Line ToolsAll tools used by the Eclipse IDE can also be run from the command-line in order to integratewith other development flows. The main tools are:ToolC/C rSimulatorRemote H/W executionJTAG Debug ServerProgramesirisc-elf-gccesirisc-elf-gcc (driver for esirisc-elf-as)esirisc-elf-gcc (driver for isc-debug-serverTable 1: Command Line ToolsAs a configurable processor, tools such as the compiler and simulator need a description of theimplemented options, to know which instructions can be used and which peripherals should besimulated. These are specified in a .soc file, which is passed to the tools with the -msoc option. The Development Suite includes a number of demonstration .soc files. Customerspecific .soc files are delivered as add-on packages for the Development Suite.The following example shows how a program can be compiled targeting a specific SoC.esirisc-elf-gcc -msoc esi3200 spartan6demo -mcpu cpu 0 -mram -O2 -g test.c -o test.exeThe -mcpu option specifies the name of the CPU in the .soc file to compile for. This is typicallycpu 0, but may vary in multiprocessor SoCs.The -mram option specifies that the RAM-based link script should be used. Flash (-mflash) orROM (-mrom) based link scripts may also be available, depending upon the memory availablein the SoC. Custom link scripts can be used with the -T option.-O2 optimises for performance (-Os optimised for size) and –g includes debugging information.To run the program in the simulator:esirisc-elf-run -msoc esi3200 spartan6demo -mcpu cpu 0 test.exeTo debug on the simulator with GDB:esirisc-elf-gdb test.exetarget sim -msoc esi3200 spartan6demo -mcpu cpu 0loadrunTo debug on hardware via JTAG with GDB:esirisc-debug-server -connection jtag -msoc esi3200 spartan6demo -mcpu cpu 0 &esirisc-elf-gdb test.exetarget remote :1025loadcontinueFurther information can be found in the individual tool documentation.Version 7.0.013 of 14 2019 eSi-RISC, All Rights Reserved
eSi-RISC Development Suite Getting Started Guide8SupportFor support issues regarding the eSi-RISC Development Suite, please contact m 44 (0)7814 729 609Table 2: Support Contact DetailsVersion 7.0.014 of 14 2019 eSi-RISC, All Rights Reserved
eSi-RISC Development Suite Getting Started Guide . (System-on-a-Chip) and the way in which the program is run. If you are targeting . I2C EEPROM Programmer Demonstrates how to use the I2


![Bosch ESI[truck] Heavy Duty Truck Software Update – Q2 .](/img/22/bosch-esitruck-heavy-duty-truck-release-notes-details-2019-2-0-0-0.jpg)
