Transcription
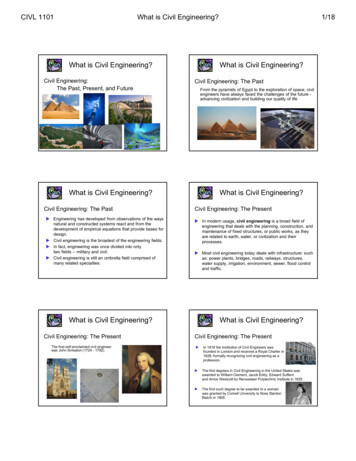
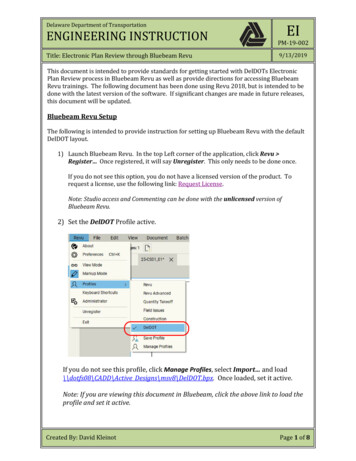
Delaware Department of TransportationENGINEERING INSTRUCTIONTitle: Electronic Plan Review through Bluebeam RevuEIPM-19-0029/13/2019This document is intended to provide standards for getting started with DelDOTs ElectronicPlan Review process in Bluebeam Revu as well as provide directions for accessing BluebeamRevu trainings. The following document has been done using Revu 2018, but is intended to bedone with the latest version of the software. If significant changes are made in future releases,this document will be updated.Bluebeam Revu SetupThe following is intended to provide instruction for setting up Bluebeam Revu with the defaultDelDOT layout.1) Launch Bluebeam Revu. In the top Left corner of the application, click Revu Register Once registered, it will say Unregister. This only needs to be done once.If you do not see this option, you do not have a licensed version of the product. Torequest a license, use the following link: Request License.Note: Studio access and Commenting can be done with the unlicensed version ofBluebeam Revu.2) Set the DelDOT Profile active.If you do not see this profile, click Manage Profiles, select Import and load\\dotfs08\CADD\Active Designs\msv8\DelDOT.bpx. Once loaded, set it active.Note: If you are viewing this document in Bluebeam, click the above link to load theprofile and set it active.Created By: David KleinotPage 1 of 8
Delaware Department of TransportationENGINEERING INSTRUCTIONTitle: Electronic Plan Review through Bluebeam RevuDelDOT Profile Overview and User InterfaceEIPM-19-0029/13/2019A custom profile for DelDOT has been created and instructions for accessing it are available atthe beginning of this document. This section will provide an overview of the differences fromthe default User Interface (UI) and tips on working with Bluebeam Revu on plan reviews.Please reference the Bluebeam Revu Additional Training at the end of this document for moreinformation.Created By: David KleinotPage 2 of 8
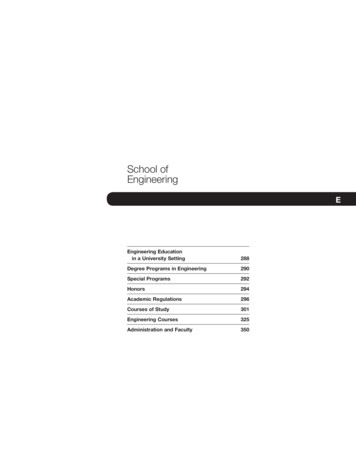
Delaware Department of TransportationENGINEERING INSTRUCTIONTitle: Electronic Plan Review through Bluebeam RevuEIPM-19-0029/13/2019As part of a plan review, you may want to see multiple pages within a plan set at the sametime. This can be accomplished by splitting Tabs. Once a Tab is split, it can be moved todifferent monitors. You will be accessing documents primarily through the Studio Panel.1) Right click on the Tab you want to split and choose Split Horizontal or Split Vertical.2) Once the Tab is split, you can right click on the newly split Tab and hit Detach. This willpop it out into another window. Move this Window to another screen.Note: These windows do not have the normal controls but do follow the normal windowcontrols native to Windows 10. Drag the window via the top to an edge of the screen. Ifyou drag to the top, it will fill the screen (you can also double click to accomplish this). Ifyou drag to the left or right, it will split the screen. See here for more information.3) The Tabs that you split can be synchronized. Synchronizing will cause all pan and zoomcontrols to affect each Tab that has been split, effectively mirroring them. This can bedone at two different levels:Synchronize Document will synchronize all open Tabs to the same page within thedocument. For example, if you have three tabs open showing the Title sheet, they willall show the Title sheet and pan and zoom controls will be mirrored across each tab.Synchronize Page will synchronize all open Tabs to different pages within thedocument. For example, if you have three tabs open, CP01, GG01 and SS01, pan andzoom controls will be mirrored across each of these pages.Note: The Thumbnails Panel is independent of the Tabs and will control the current Tabselected. For example, if you have two Tabs open, click Tab 1 and navigate to the pageyou want via the Thumbnail Panel. Then click Tab 2 and repeat.Created By: David KleinotPage 3 of 8
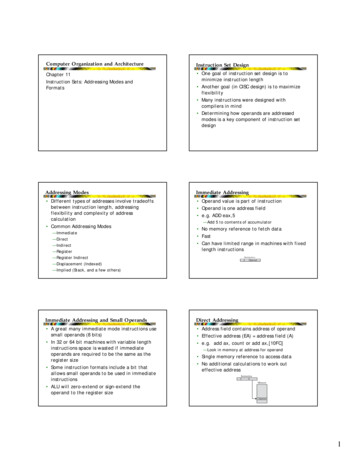
Delaware Department of TransportationENGINEERING INSTRUCTIONTitle: Electronic Plan Review through Bluebeam RevuBluebeam Studio Account CreationEIPM-19-0029/13/20191) Click the Studio icon.2) Click the Sign In button and select CREATE ACCOUNT.Created By: David KleinotPage 4 of 8
Delaware Department of TransportationENGINEERING INSTRUCTIONTitle: Electronic Plan Review through Bluebeam RevuEIPM-19-0029/13/2019Fill out all of the fields. Your Bluebeam Display Name should be the same as youremail address.Created By: David KleinotPage 5 of 8
Delaware Department of TransportationENGINEERING INSTRUCTIONTitle: Electronic Plan Review through Bluebeam RevuEIPM-19-0029/13/20193) Once signed in, you should see all currently active Sessions you have been invited to.To access a Session you have been invited to, click the link in the email you received.Note: This email will come from Bluebeam. Please confirm it is not getting blocked byyour spam filter.To join a session by the Session ID, click the “ ” icon, click “Join” and enter the 9 digitSession ID.Created By: David KleinotPage 6 of 8
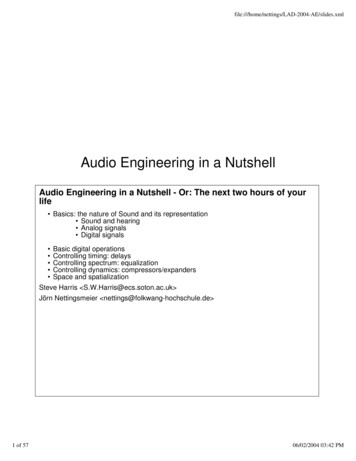
Delaware Department of TransportationENGINEERING INSTRUCTIONTitle: Electronic Plan Review through Bluebeam RevuBluebeam Studio Finishing SessionsEIPM-19-0029/13/20191) Once the Review period has expired, the Session will need to be Finished by theDesigner or Project Manager. To do this, click the Finish Session icon.2) In the Finish Session dialog:a. Confirm all commenters are checked.b. Select Save In Folder and choose the appropriate folder within your project.c. Under the Report Options, choose an appropriate location and hit Settings d. Under Type, select PDF Package Report.e. Under Options, confirm all options are selected and fill out any additionalinformation as appropriate.Created By: David KleinotPage 7 of 8
Delaware Department of TransportationENGINEERING INSTRUCTIONTitle: Electronic Plan Review through Bluebeam RevuBluebeam Revu Additional Training EIPM-19-0029/13/2019Bluebeam has a full walk through of all features on their YouTube Channel.oooooooooooGetting Started: Revu User Interface (UI) Tour (3:24) Covers and overview of the user interface.Getting Started: Introduction to Studio (3:51) Covers Studio Sessions and different access methods.Getting Started: Drawing Management (6:07) Covers Document Navigation, splitting views, Compare Documents,Bookmarks, etc Getting Started: Takeoffs - Steel (4:24) Covers measurement calibration, measurements, estimates, customtools, create a legend, etc Getting Started: Takeoffs - Concrete (3:21) Covers measuring volumes, materials and custom properties, etc Getting Started: Design Review (3:08) Covers reviewing in sessions, markup status, real-time collaboration,alert and reply, 3D PDFs, etc Getting Started: Takeoffs - MEP (4:02) Covers measuring utilities, text search, visual search,Getting Started with Revu: QA/QC (3:40) Covers alerting specific people of comments, chat window, etc Getting Started: Site Logistics (5:14) Covers dynamic fill, sketch to scale, etc Getting Started: Submittal Review (4:31) Covers Auto Form creation, setting status of review, etc Getting Started: Punch (5:52) Covers “As-Builts”, Spaces, custom statuses, custom symbols, iPadmobile app, attach photos or videosFor any questions, requests or issues, please use the following links: Training requestsBluebeam Studio IssuesBluebeam Revu IssuesLicensingCreated By: David KleinotPage 8 of 8
1) Right click on the Tab you want to split and choose Split Horizontal or Split Vertical. 2) Once the Tab is split, you can right click on the newly split T ab and hit Detach.This will pop it out into another window. Move this Window to another screen. Note: These windows do not