Transcription
Apps4.Pro Migration ManagerUser ManualAll Right Reserved JiJi Technologies Private Limited1 Page
Apps4.Pro Migration Manager is a desktop app that can be installed and used in Windows operatingsystem. This app helps you to successfully migrate the following components between two Office365 tenants. You can also use this app to migrate within a single tenant.Teams: Teams and their associated Office 365 group and group-specific settingsTeams Users (Members and Owners)Team specific settings (ex: Member Settings, Message Settings, Guest Settings, etc.)Channels: General & Private Channels Channel specific settings Channel Conversations (with actual posted username and timestamp) Files tab - folders, sub-folders, and files with their permissionsTabs (Apps): Conversations tab Files tab Planner tab OneNote Wiki tab Word, Excel, PowerPoint, PDF, and Website tabPlanner: Plans & Buckets. Task titles, Assignment, Labels, Progress and Dates Description, Checklists Attachments Comments (with actual posted username and timestamp)OneDrive: My Files Shared by me. Shared by you. Shared libraries Folder Structure PermissionStream: Channels Channel permissions Video permissions Meeting recordings Group videosPrivate Chat: One To One ChatGroup ChatSource Username, Message Original Posted Date Time.Files UploadAll Right Reserved JiJi Technologies Private Limited2 Page
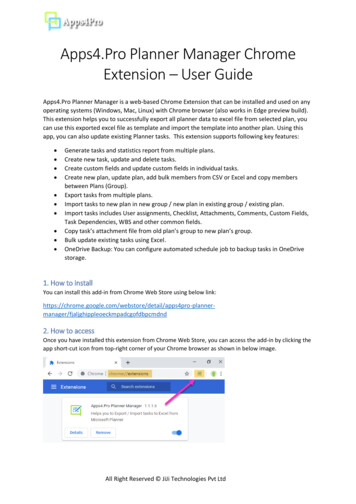
Chat TopicReactionsEmoji, GIF, StickersMembers with Share Chat History TimeYouTube, Weather, Places, News, Praise and WikipediaYammer: Network Users Groups and its members Message and its replies Likes and Best reply Topics Tags Mentions1.How to installYou can download the latest from Apps4.Pro site and install the setup.2.How to accessOnce you have installed this app, you can start and open the app by clicking desktop short-cut icon asshown in below image:3. Permissions required Teams Migration: Team Owner (and Member) permission is recommended. But TeamMembers, Owner, and Admin can use this app based on the permissions they have in Teams.Planner Migration: No special permissions required. As per current Planner design only Planmembers can be able to read and update planner data, so the account which you are going touse with this tool should be a member the plans those you want to migrate.Stream Migration: Both Source and Target Connector accounts should have Stream Admin (orGlobal Admin) role.OneDrive Migration: Both Source and Target Connector accounts should have SecondaryAdmin privilege in the required OneDrive.Private Chat Migration (One-To-One): The Source Connector account should have GlobalAdmin role and Target Connector account should have user role.Yammer Migration: Both Source and Target Connector accounts should have YammerNetwork Admin (or Global Admin) role.Mailbox Migration: Group Owner or Member permission is recommended.All Right Reserved JiJi Technologies Private Limited3 Page
4. Microsoft Office 365 License requirements Teams Migration: Microsoft Teams license required for both Source and Target Connector.Planner Migration: Exchange Online license required for Target Connector.Stream Migration: Microsoft Stream for O365 license required for both Source and TargetConnector.OneDrive Migration: SharePoint LicensePrivate Chat Migration (One-To-One): Microsoft Teams License for both selected SourcePrivate Chat Users and mapped Target Private Chat Users.Yammer Migration: Yammer Enterprise license required for both Source and TargetConnector.Mailbox Migration: Exchange Online license required for both Source and Target Connector.5. Steps to get startedBefore proceeding to work with this app features, go to the Setup tab and complete the sign-in processunder Source & Target Connection sections.Note: If you are going to migrate within a single-tenant, then you can sign-in with the same useraccount in both Source & Target Connection sections.5.1 Source ConnectionSign-in with source tenant user account which has required permissions (Refer sec 3) for yourmigration. Click on Copy & Open button. It will copy the code shown in the console and opens a newwindow. Paste the copied code in the new window and click the Next button.All Right Reserved JiJi Technologies Private Limited4 Page
5.2 Target ConnectionYou can sign-in with the required target tenant user account under the Target Connection section.5.3 Request Trial LicenseIf signed-in Source Connection user does not have license, then you can request Trial licensefrom Plan tab to perform migration.All Right Reserved JiJi Technologies Private Limited5 Page
5.4 ConnectionsIf you want to migrate OneNote, OneDrive, Private chat, Mailbox, Streams or Yammer between thetenants, then you must be configured under Connections section in both Source and TargetConnection.In Connections under Source Connection, you can sign-in with the user account which you havealready signed-in Source Connection section (5.1)In Connections under Target Connection, you can sign-in with the user account which you have alreadysigned-in Target Connection section (5.2)All Right Reserved JiJi Technologies Private Limited6 Page
5.5 Application Users MappingYou can map the users between Source and Target tenant. Instead of map the users in each job, youcan use this Application Users Mapping to map the group users automatically.6. Create a New Migration JobIn Migrate tab, you can create a new migration job for different job types. The supported jobtypes are: Teams MigrationPlanner MigrationStream MigrationOneDrive MigrationYammer MigrationGroup Mailbox Migration6.1 Create Teams Migration JobFor Teams Migration, you can select Teams or Channels as a source.6.1.1: Job SettingFirst, you must provide the name of the current Job. In this step, you can choose the required sourcetenant team(s) or channel(s) to migrate. You can also choose the options whether the team migrationprocess includes Conversations, Files, Private Channels, OneNote tab, Wiki tab, Planner tab, Office taband Website tab.All Right Reserved JiJi Technologies Private Limited7 Page
6.1.2: Target SettingsTeam SettingsIn this step, you can provide the target team(s) to migrate data. You will have following three optionsto choose target team. Migrate into a new team.Enable the team for an existing group.Copy all team data into an existing Team.Channel SettingsUnder Channel Settings tab, you can choose required channels to migrate and you can choose therequired components to be migrated along with channels. For existing target team, you can migratechannel details to the already existing target channel.All Right Reserved JiJi Technologies Private Limited8 Page
Tab SettingsUnder Tab Settings tab, you can choose required tabs to migrate and map the tab with existing tab ifyou have selected existing target team/channel.User MappingUnder User Mapping tab, you can map the source tenant users with required target tenant users, andyou can also map the users from CSV file.6.1.3: Job SummaryIn this step, you can view the summary of job. After checking the summary, you can select one of thefollowing two options. Save Job - It saves the current job, then you can run later by clicking Start button fromMigration Jobs grid (Refer below section: 7)Save & Migrate Job - It saves the current job and starts the migration process immediately.All Right Reserved JiJi Technologies Private Limited9 Page
6.2: Create Planner Migration JobFor Planner Migration, you can choose Plans or Groups as a source.6.2.1: Job SettingsFirst, you must provide the name of the current job. Then, you can select the required sourcetenant plan(s) or group(s) to migrate. If you select groups as source, then you must selectMigrate Plans option to migrate plans. You can also choose whether the planner migrationincludes task attachments and comments.6.2.2: Target SettingsGroup SettingsIn this step, you can provide the target group(s) to migrate plans. You have following optionsto select target groups. Migrate into the new group/team.Migrate data to the existing group/team.If you select ‘New Group’ or ‘Existing Group’ option, then you can enable the team for thatgroup.Plan SettingUnder this settings tab, you can select the required plans to migrate and format of the plannertask attachments and comments. You can also add the selected plan as a tab in target team(s)by select ‘Teams Tab’ option.All Right Reserved JiJi Technologies Private Limited10 P a g e
User MappingUnder User Mapping tab, you can map the source tenant users with required target tenant users, andyou can also map the users from CSV file.6.2.3: Job SummaryIn this step, you can view the summary of job. After checking the summary, you can select one of thefollowing two options. Save Job - It saves the current job, then you can run later by clicking Start button fromMigration Jobs grid (Refer below section: 7)Save & Migrate Job - It saves the current job and starts the migration process immediately.All Right Reserved JiJi Technologies Private Limited11 P a g e
6.3: Create Stream Migration Job6.3.1: Job SettingFirst, you must provide the name of the current Job. In this step, you can choose the required sourcetenant group(s) and company-wide channel(s) to migrate.6.3.2: Target SettingsGroup SettingsIn this step, you can provide the target group(s) to migrate data. You have following thefollowing options to choose target group. Migrate videos and channels into a new group.Migrate all videos and channels into an existing Office 365 group.Channel SettingsUnder Channel Settings tab, you can choose required channels to migrate. To migrate videos in thegroup itself, you can select Group Videos. If you want to migrate videos in a new channel, you canselect new channel and give a channel name to proceed with it. When you already have channels inthe selected target group, you can pick that channel by selecting existing channel from the dropdown.All Right Reserved JiJi Technologies Private Limited12 P a g e
User MappingUnder User Mapping tab, you can map the source tenant users with required target tenant users, andyou can map the users from CSV file, which is used to assign the same video permissions to the targetuser and also add the users to the office 365 Group.6.3.3: Job SummaryIn this step, you can view the summary of job. After checking the summary, you can select one of thefollowing two options. Save Job - It saves the current job, then you can run later by clicking Start button fromMigration Jobs grid (Refer below section: 7)Save & Migrate Job - It saves the current job and starts the migration process immediately.All Right Reserved JiJi Technologies Private Limited13 P a g e
6.4: Create OneDrive Migration Job6.4.1: What is migrated.EntitySupported for MigrationDocumentPermissionsYesVersion & Version historyNoMeta-dataNoFolderFolder StructureYesPermissionYesLink Sharing PermissionsNo6.4.2: Prerequisites- All the users in the target tenant, should be assigned with valid license and enabled OneDrivefeature.- Add the connector account as secondary admin in all the OneDrive for the required users’ needs tobe migrated. This can be performed automatically from Apps4.Pro Migration Manager pre-checkstep.6.4.2: Migration flow1. Map the users in the source tenant with the target tenant2. Add the connector account as secondary admin in all the OneDrive for the required users3. Create migration job [Explained in the below sections]4. Run the migration job [Explained in the below sections]6.4.3: Job SettingFirst, you must provide the name of the current Job. In this step, you can choose the required sourceOneDrive users to migrate the files.All Right Reserved JiJi Technologies Private Limited14 P a g e
To migrate the selected user's files, we require Secondary Admin permission for the connectoraccount. Upon clicking the Next button in step 1, if the source connector account does not havepermission in the selected user’s OneDrive, then our tool helps you to add Secondary Adminpermission. Please refer below image to download the required PowerShell script to set requiredpermissions.6.4.4: Target SettingsIn this step, you can map the target tenant OneDrive user to migrate OneDrive files.You can also migrate shared permissions of the files. For that, you have to enable the option MigratePermissions.Upon clicking the Next button in step 2, if the target connector account does not have SecondaryAdmin permission in the mapped target user’s OneDrive, then our tool helps you to set requiredpermissions. Please refer below image to download the required PowerShell script to set requiredpermissions.All Right Reserved JiJi Technologies Private Limited15 P a g e
User MappingIf you have selected the option “Migrate Permissions” under OneDrive Settings, then in User Mappingtab, you have to map the source tenant users with required target tenant users to migrate sharedfile’s permissions, and you can also map the users from CSV file.6.4.5: Job SummaryIn this step, you can view the summary of job. After checking the summary, you can select one of thefollowing two options. Save Job - It saves the current job, then you can run later by clicking Start button fromMigration Jobs grid (Refer below section: 7)Save & Migrate Job - It saves the current job and starts the migration process immediately.All Right Reserved JiJi Technologies Private Limited16 P a g e
6.5 Create Private Chat Migration JobPlease make sure to configure the Source and Target Private Chat connections in Setup tab.Note: Private chats (1:1 and 1:N) chats gets migrated as Archived chats in the target tenant. In orderto achieve this, the app adds the service account logged in to the migration app as the member of allthe chats (1:1 or 1:N) and migrates the chats as archived chats in target tenant. Please ensure youhave used the appropriate account to sign in to the migration app Target connection before runningthe migration job.6.5.1: Job SettingFirst, you must provide the name of the current Job. In this step, you can choose the required sourcePrivate Chat users to migrate their chats.In order to move next step, you must configure private chat connections in setup tab and make sureto add user mapping for all the required users to migrate private chat messages in Application UsersMappings which is located in Settings tab - User Mappings.If you have not already configured users mappings, the following Application Users Mapping dialogwill popup.All Right Reserved JiJi Technologies Private Limited17 P a g e
Here, you can click on the “Download Sample CSV” which gives you the sample users mapping file, &you can add the users mapping with the help of “Import Mapping from CSV” (or) “Add User Mapping”button.6.5.2: Target SettingsIn this step, we’re having a single tab called Users Mapping. we’ve listed users which you alreadyprovided in the Application Users Mappings. Here, you must ensure all the required users are mappedto migrate private chats.After done with the Users mapping & configuration, you can move to the next step by clicking “Next”button.All Right Reserved JiJi Technologies Private Limited18 P a g e
6.5.3: Job SummaryIn this step, we summarize the settings. After checking the summary, you can select one of thefollowing two options. Save Job - It saves the current job, then you can run later by clicking Start button fromMigration Jobs grid (Refer below section: 7)Save & Migrate Job - It saves the current job and starts the migration process immediately.6.6: Create Yammer Migration JobYou can create external networks from Yammer portal and map it in the migration. You can refer thelink k to create external network(s).6.6.1: Job Setting:First, you must provide the name of the current Job. In this step, you can choose the network(s) tomigrate.When you proceed with the next step, you must be configured the Consumer key to proceed withYammer Migration.6.6.2: Steps to get Consumer Key (Client ID) from Target Tenant Yammer portal-Sign-in to the Yammer Client Applications page(https://www.yammer.com/client applications) with your Target Connector account.-Click Register New App, fill all the required fields and then click Continue.All Right Reserved JiJi Technologies Private Limited19 P a g e
-FieldsValue/DescriptionApplication NameYour company name - Yammer MigrationOrganizationYour organization nameSupport e-mailsupport@jijitechnologies.comWebsiteYour organization's websiteRedirect URIhttps://www.yammer.com/Now copy the Client ID of the app and paste it to the below text box.6.6.3: Target SettingsNetwork SettingsIn this step, you can provide the target network(s) to migrate data. You can map the Internal andcreated External network(s).All Right Reserved JiJi Technologies Private Limited20 P a g e
Group SettingsIn this step, you can provide the target group(s). You have following options to select targetgroups. Migrate into the new group.Migrate data to the existing group.User MappingUnder User Mapping tab, you can map the source tenant users with required target tenant users whoare all having Yammer identity and you can also modify and map the users by downloading CSVfile.All Right Reserved JiJi Technologies Private Limited21 P a g e
6.3.3: Job SummaryIn this step, you can view the summary of job. After checking the summary, you can select one of thefollowing two options. Save Job - It saves the current job, then you can run later by clicking Start button fromMigration Jobs grid (Refer below section: 7)Save & Migrate Job - It saves the current job and starts the migration process immediately.6.7: Create Group Mailbox Migration JobFor Group Mailbox Migration, you can choose Groups as a source.6.7.1: Job SettingsFirst, you must provide the name of the current job. Then, you can select the required sourcetenant group(s) to migrate. If you select groups as source, then you must select MigrateMailbox option to migrate mailbox.6.7.2: Target SettingsGroup SettingsIn this step, you can provide the target group(s) to migrate mailbox. You have followingoptions to select target groups. Migrate into the new group/team. Migrate data to the existing group/team.If you select ‘New Group’ or ‘Existing Group’ option, then you can enable the team for thatgroup.All Right Reserved JiJi Technologies Private Limited22 P a g e
User MappingUnder User Mapping tab, you can map the source tenant users with required target tenant users, andyou can also map the users from CSV file.6.7.3: Job SummaryIn this step, you can view the summary of job. After checking the summary, you can select one of thefollowing two options. Save Job - It saves the current job, then you can run later by clicking Start button fromMigration Jobs grid (Refer below section: 7)Save & Migrate Job - It saves the current job and starts the migration process immediately.All Right Reserved JiJi Technologies Private Limited23 P a g e
7. Migration JobsIn this section, you can view all the migration jobs and their status in report view. You can start a jobfrom this grid and you can also view the summary of the completed job.7.1: Incremental Migration:If any source data added or modified after creation/completion of job, then you can migrate thatdata alone by ‘Re-Run’ that job. Incremental migration supported for Conversation, Wiki, OneNoteand Planner task (New tasks only).7.2: Job Summary:Once the migrated process completed, you can view the summary of the job by clicking ViewSummary in the Migration Jobs report. The job summary reports the complete overview info for themigrated items. This report also includes the successfully migrated items and failed items for individualitems (ex: Conversation Messages, Files, Planner tasks, etc). Using this report, you can easily crosscheck the migrated team with your source team and ensure all the required details are successfullymigrated or not.All Right Reserved JiJi Technologies Private Limited24 P a g e
8. ReportsIn Plan tab, you can generate the following reports.Teams : My Source TeamsAll Source TeamsMy Target TeamsAll Target TeamsMigrated TeamsTeams Not MigratedUsers: Source Group UsersTarget Group UsersSource Team UsersTarget Team UsersSource Private Channel UsersTarget Private Channel UsersGroups & Plans: My Source GroupsAll Source GroupsMy Target GroupsAll Target GroupsAll PlansTeams Associated PlansMy PlansAll Right Reserved JiJi Technologies Private Limited25 P a g e
Channels: All Source ChannelsAll Target ChannelsMy Source Private ChannelsAll Source Private ChannelsMy Target Private ChannelsAll Target Private ChannelsSource Team TabsTarget Team TabsStream Source M365 Groups with StreamTarget M365 Groups with StreamSource Stream Channels ReportTarget Stream Channels ReportSource Stream Group VideosTarget Stream Group VideosSource User VideosTarget User VideosSource Companywide Channel VideosTarget Companywide Channel VideosYammer Source Network UsersTarget Network UsersSource Network GroupsTarget Network GroupsSource NetworksTarget NetworksAll Right Reserved JiJi Technologies Private Limited26 P a g e
All Right Reserved JiJi Technologies Private Limited27 P a g e
9. Settings:From Settings tab you can customize the following settings:9.1: Tracer Logs:For troubleshooting and analyse, the tool logs the required details in the locally created log file. Ifyou face any problem, you can Export Logs from Settings tab and send tosupport@jijitechnologies.com to get more help for your problem.9.2: Users Mapping:In which you can map all the required users to migrate.9.3: API Settings:In which you can select the API type to post the planner task comments and teams listed in JobSettings. It has following options: My Teams (default) - based on member groups.All Right Reserved JiJi Technologies Private Limited28 P a g e
Joined Teams - all joined teams.All Teams - it includes member & non-member groups.My PlansAll Plans9.4: Storage Settings:From here, you can select the storage where the Job Settings, Application Users Mapping and OtherSettings will be stored. The options are. DatabaseOneDriveOffice 365 Groups – You can select the group.By default, it will be stored in Database.9.5: Other Settings:From this section, you can set the batch request limit, yammer data fetch interval, throttling waittime etc.,9.5.1: Date & Time FormatYou can set your own Date & Time display format as shown in below image. Based on this setting,the datetime value will be displayed in Migration Jobs grid, summary and migrated conversation intarget tenant teams.9.6: Custom Settings:You can edit or remove the default prefix in conversation migration.If you have already migrated group mailbox and enable the Scan Existing Group Mailbox option, thenwe are fetching the planner task conversation details from the mailbox.All Right Reserved JiJi Technologies Private Limited29 P a g e
If you enable the Fetch Teams Details in Report option, you can view the team details in teamreports.All Right Reserved JiJi Technologies Private Limited30 P a g e
be migrated. This can be performed automatically from Apps4.Pro Migration Manager pre-check step. 6.4.2: Migration flow 1. Map the users in the source tenant with the target tenant 2. Add the connector account as secondary admin in all the OneDrive for the required users 3. Create migration job [Explained in the below sections]
