Transcription
1
5/3/1: The Simplest and Most Effective TrainingSystem to Increase Raw StrengthBy Jim Wendler2
Before you embark on any physical fitness program,please consult a doctor.This book may not be reproduced or recorded in anyform without permission from the author.Copyright 2009 by Jim Wendler. All rights reserved.3
Table of ContentsThe Origin of 5/3/1 – 6The Great Debate - 45The 5/3/1 Philosophy - 8Boring but Big - 465/3/1/ Program - 10Triumvirate - 47Squat - 11I’m Not Doing Shit Today - 48Military Press - 13Periodization Bible - 50Bench Press - 14Bodyweight - 51Deadlift - 17Moving North of Vag - 52Training Fashion - 19Training 3 Days a Week - 61Beginning the Program - 20Training 2 Days a Week - 62The Last Set - 23Training 1 Day a Week - 64How to Progress – 24Using Excel - 65Even Smaller Increments? - 285/3/1 FAQ - 67Stalling in 5/3/1 - 295/3/1 Comments and Success Stories - 77How to Warm Up - 305/3/1 Percentage Charts - 85Comparing Rep Maxes - 305/3/1 Training Log - 89Having a Less than Stellar Day - 31About the Author - 97Assistance Exercises - 314
This book is dedicated to Mason.Special thanks to Leigh An, Phil Wylie and Tyler O’Banion for believing in me andthis program.5
The Origin of 5/3/1In the summer of 2005, I was burned out from competitive powerlifting. I was tired of benchshirts, box squats, bands and being fat. Two years earlier, I’d written down three goals I wantedto accomplish. In my last meet, I’d done all three. Satisfied with reaching my goals, anddissatisfied with how I felt, I needed a change – but I didn’t know exactly what I wanted or how Iwas going to get there.My first order of business was losing weight. I was about 280 pounds, and I wanted to be able totie my shoes without turning red. I wanted to be able to walk down the street without losing mybreath. Like many people, I played football in high school and college. I was in shape then, andcould do just about anything. Fast forward five years, and I was at the bottom of the food chain.That feeling of being a fat-ass was awful. I was exactly what I despised.I remember once watching a young woman walk for exercise when I was in college. She wasn’toverweight, and she didn’t look like she was suffering from any kind of physical ailment. I wasmystified as to why this seemingly fit woman was simply walking. Why wasn’t she running? Whywasn’t she running with a sled? Why wasn’t she pushing a car, or pushing an SUV up and downthe street?Walking?I remember thinking to myself that if I ever reached a point in my life where I had to walk to getexercise, it might be time to clean out my ears with a gun.Fortunately, I didn’t follow through with my plans. The point, however, is this: I was fat and out ofshape. And even though I’d recently squatted 1000 pounds, I really wasn’t strong. I couldn’tmove, and I couldn’t use this strength for anything other than waddling up to a monolift andsquatting.A few months later, I’d managed to lose about 25 pounds. Simply walking and not eating asmuch helped me out immensely. I was able to move again. I could run, sprint, jog, jump rope ordo just about anything.But damn was I weak.6
I knew where I wanted to go. I simply wanted to deadlift and squat over 600 pounds again, and Iwanted to bench press 405. That was it. And I wanted to do it without the aid of powerlifting gearlike bench shirts and squat suits. I also wanted an easy plan to get there. I didn’t want to have todo a million different exercises. The bench press, parallel squat, deadlift and standing presshave always been staples of any strong person’s repertoire, so I knew what exercises I wantedto do.I needed a plan for all of this. I needed something very simple, and I didn’t want to have to thinkabout it. I had recently become a father, and my priorities had changed. I still wanted to bestrong, but I didn’t want to have to spend all my time thinking about it. I wanted to go in theweight room, have my work planned for me, and get out. No bullshit, no problem.I’d started playing around with the concept of 5/3/1 months earlier, so I knew I was on tosomething, but I wasn’t sure how it would work. Because my bench, squat and deadlift goalswere so straightforward, I gave myself 12 months to accomplish them. I worked backward fromthese numbers and ended up with beginning weights that were really light. I mean ridiculouslylight.I had a plan, though, and I followed through. I figured once I finished each month of training, I’dbe ready to move on to the next – and the next, and the next, until I finally reached my goal. Ofcourse, this was wishful thinking – it doesn’t always work like this – but I needed a simple plan,and this was the best one I could come up with. Or the simplest, at least.Sometimes, however, the simplest is the best. In my case, this proved to be true. I was breezingthrough my workouts, putting on some muscle, and having fun again. I began pushing my lastset for as many reps as I could, setting personal records in the process.Training was fun again. Gone were the three hour marathons of bench shirt training andsweating my ass off wearing tight polyester gear. I was in and out of the weight room in 30-45minutes, and I was still getting stronger. After about three months of training, I got a wild hair upmy ass and tried to pull a max deadlift. After my sets were over, I loaded up the bar and pulledfor 3 reps what I thought I might be able to pull once. 610 x 3.Now, this isn’t any kind of world – or even personal – record, but it was really, really good for meat the time, especially when you consider the fact that I was used to wearing a deadlift suit andbriefs and had lost so much weight. Plus, the deadlift was always my worst lift. I can blame this7
on any number of things, but the bottom line is that I just wasn’t strong. Now, with this program,I could feel myself inching toward “strong” without having to be a blob of disgusting lard.I began playing more and more with this program. I switched things up, experimented on friendsand training partners and read some old books on training, and this is what I came up with. Hell,it may change even more with time, but the basics will always remain the same.The 5/3/1 PhilosophyThe 5/3/1 philosophy is more important than the sets and reps. Whenever I feel like I’m gettingsidetracked or want to try something different, I revisit these rules to make sure I’m doing thingsthe right way. Even if you decide this program isn’t for you, these basic tenets have stood thetest of time. Take these things to heart, and you’ll be greatly rewarded.Emphasize Big, Multi-Joint MovementsThis really isn’t any secret. Beginners have been told to do this for years, and advanced liftersswear by these movements. Multi-joint lifts are lifts that involve more than one muscle – i.e., notan isolation exercise like leg extensions – and allow you to build the most muscle. These liftsare the most efficient for building muscle and strength. Examples are the squat, deadlift, benchpress and power clean.Start Too LightMy coaches emphasized this to me when I was in high school, but unfortunately, I didn’t listen.Hopefully you will. Starting too light allows for more time for you to progress forward. It’s easyfor anyone – beginner or advanced – to want to get ahead of themselves. Your lifts will go up fora few months, but then they’ll stall – and stall, and stall some more. Lifters get frustrated anddon’t understand that the way around this is to prolong the time it takes to get to the goal. Youhave to keep inching forward. This is a very hard pill to swallow for most lifters. They want tostart heavy, and they want to start now. This is nothing more than ego, and nothing will destroya lifter faster, or for longer, than ego.Progress SlowlyThis goes hand in hand with starting light. Slow progress might not get you the best rewardstoday, but it will tomorrow. The longer you can progress, even if it’s by one rep or 2.5 pounds,8
the more it means that you’re actually making progress. People always scoff when I want theirbench to go up by 20-25 pounds their first year. They want the program that will put 40 poundson their bench in 8 weeks. When they say this, I ask them how much their bench went up in thelast year, and they hang their heads in shame. I can’t understand why someone wouldn’t wantprogress – even it’s just 5 pounds. It’s better than nothing. It’s progress.The game of lifting isn’t an 8-week pursuit. It doesn’t last as long as your latest program does.Rather, it’s a lifetime pursuit. If you understand this, then progressing slowly isn’t a big deal. Infact, this can be a huge weight lifted off your back. Now you can focus on getting those 5 extrapounds rather than 50.It’s always been one of my goals to standing press 300 pounds. In the summer of 2008, I didjust that. When someone asked me what my next goal was, my response was simple: “305pounds.” If you bench press 225 pounds and want to get 275, you have to bench 230 first.Break Personal Records (PR’s)This is where the fun of this – and any – program begins and ends. This program allows you tobreak a wide variety of rep records throughout the entire year. Most people live and die by their1-rep max. To me, this is foolish and shortsighted. If your squat goes from 225x6 to 225x9,you’ve gotten stronger. If you keep setting and breaking rep records, you’ll get stronger. Don’tget stuck just trying to increase your one rep max. If you keep breaking your rep records, it’ll goup. There’s also a simple way of comparing rep maxes that I’ll explain later.Breaking personal records is a great motivator, and it’s also a great way to add someexcitement into your training. When you do this, the sets and reps carry much more meaning.There’s something on the line. You’ll have greater focus and purpose in your training. You’ll nolonger have to just do a set of 5 reps. You’ll focus on beating the number and beating theweight.All of the above concerns are addressed in this program. Even if you don’t follow this particularprogram, I believe these things should be emphasized no matter what you’re doing or whyyou’re training.9
The 5/3/1 ProgramThis is a very easy program to work with. The following is a general outline of the training Isuggest. I’ll go into detail on each point in the chapters to follow. You will train 3-4 days per week (this will be up to you). One day will be devoted to the standing military press, one day to the parallel squat, oneday to the deadlift and one day to the bench press. Each training cycle lasts 4 weeks. The first week you will do 3 sets of 5 reps (3x5). The second week you will do 3 sets of 3 reps (3x3). The third week you will do 1 set of 5 reps, 1 set of 3 reps and 1 set of 1 rep (5/3/1). The fourth week you will do 3 sets of 5 reps (3x5). This is an easy deload week. After the fourth week, you begin again with 3 sets of 5 reps. Each week and each set has a percentage to follow, so you won’t be guessing what todo anymore.As you can see, there’s nothing fancy to this program. I believe in big compound lifts, keepingthe set and rep schemes simple, and deloading every fourth week. These concepts are nothingnew, and I admit that. The beauty of this program, however, is how you begin. If you begincorrectly, you’ll end correctly. Here’s what the basic week looks like:Day 1Day 2Day 3Day 4Warm-upWarm-upWarm-upWarm-upStanding MilitaryDeadliftBench PressSquatAssistance ExercisesAssistance ExercisesAssistance ExercisesPressAssistance Exercises10
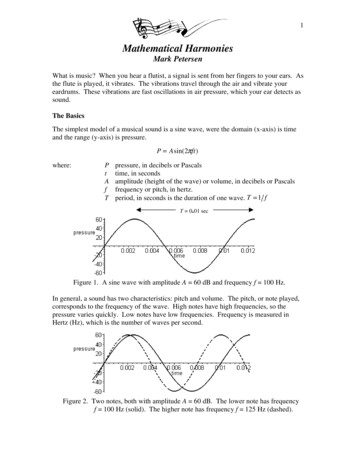
Possible Training Days: Monday/Tuesday/Thursday/Friday Sunday/Monday/Wednesday/Friday Sunday/Monday/Wednesday/ThursdayYou can train on any days you’d like, obviously, and there are many possibilities. Just be sure togive yourself appropriate rest between training days. If you don’t know what “appropriate rest”is, ask yourself this question:Did I get enough rest after my last session to have an optimal training session today?The SquatWe’ve heard the refrain a thousand times before that the squat is the “King of All Exercises.”This gets redundant after a while, but there are myriad reasons why it’s stayed on top for so11
long. The squat really does reign supreme. With that said, here are some helpful hints onsquatting: Your eyes should be focused. Some people believe you should look straight up whenyou squat. These people aren’t good to listen to. Your eyes should be directed straightahead or just slightly downward. Don’t take your eyes off the point you choose. Picksomething, and stare at it intently. Even if there’s movement and distractions around thispoint, they shouldn’t stop your stare. This is how focused you have to be. Proper bar placement depends on your body type and what’s most comfortable to you.Some people have shoulder problems and can’t carry the bar very low. Others just plainsuck at high bar squatting. Place the bar where it allows you to reach depth with goodform. It’s just that easy. I like taking a full grip on the bar, but I used a “thumbs-around” grip for the first half of mysquatting life. I don’t see this as a deal-breaker. Keep your elbows down and try to force them under the bar. This will cause your hips todrive first out of the bottom of the squat. It’ll also keep your chest high and prevent youfrom squatting with your legs first instead of your back. The first thing to shoot up withmany people is their ass. Remedy this by pushing with your hips and keeping yourelbows under the bar – or at least trying to. Descend until the tops of your thighs are parallel to the ground. Go deeper if you’d like,but this is the minimum depth you should shoot for. When you begin your descent, push your knees out to the sides and your glutes back. Arch your upper back hard for the entire lift. This will cause your lower back to arch, too. Grip the bar with the narrowest grip you can manage without hurting your shoulders.This will ensure that you remain tight throughout the lift. Once you hit parallel, drive your elbows under the bar and explode up. Before you take the bar out of the rack, fill your diaphragm with air, place the bar on yourback, then confidently push it out of the rack with your back and legs. Don’t “wimp” thebar out. I like to do this with a large breath, which I won’t let out until I’m in my stance.12
Any more than two or three steps back is a waste of time and energy. Be efficient. Imentally count, “One, Two” when taking the bar out to make sure that I take only twosteps out of the rack. Squeeze the bar hard during the lift. This will keep your entire body tight. Before the descent, take another breath and go. Keep this air in until you’re about 2/3 ofthe way back up. Then you can let it out. I’ve taught myself to hold my breath for 3 reps,but this is very difficult and I wouldn’t recommend it for everyone. Bouncing out of the bottom position (the “hole”) is not a bad thing. Losing your air andtightness when you do so is. Don’t do that. Your descent should be slow enough to permit you to maintain good form, but it shouldbe fast enough to not waste energy or kill the stretch reflex at the bottom. Many lifterswill “dive bomb” their squats. This is a fancy term for dropping very quickly and almostcatching the bar in the bottom position before squatting back up. This is okay foradvanced lifters who know their bodies and have great technique, but it’s probablyunacceptable for about 99% of the rest of the population. Your toes should be pointed out at about a 30-45 degree angle. This will allow yourknees to track correctly.The Military Press Most lifters like taking a grip just outside the shoulders. I grip about an inch and a halfoutside the knurling of a power bar – which puts my grip about thumb’s length from thesmooth part of the bar. This will ensure shoulder safety and stability. I always use a false grip where my thumbs aren’t wrapped around the bar. This ispersonal preference, but it seems like the bar path tracks better overhead when I do this.This grip can be dangerous, however, so use caution. I begin the press by lifting my chin up, and I try to just miss it when the bar goes up. Idon’t want the bar bowing out any more than it has to.13
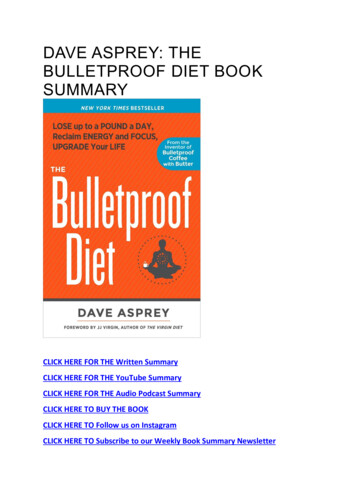
As the bar is pressed overhead, bring your head and chest through. Don’t push the barback. Bring the bar back down in the same motion. Each rep should start with the bar on your shoulders. Don’t perform half reps. Your bodywas designed to move through a full range of motion, so do it. Keep your lower back arched and your chest up throughout the entire lift. The positioning of your feet is determined by your comfort level. I take a narrow (lessthan shoulder width) stance, but this isn’t a requirement. You don’t use leg drive to push the bar overhead, but try to keep your legs strong andtaut through the entire movement.The Bench Press14
Your shoulder blades must be pushed back, and your chest must be spread throughoutthe bench press. If you’re benching without the aid of a bench shirt, most of the barweight (and your bodyweight) should be supported by your upper back. This will helpkeep the bar from touching too low. It will ensure that you don’t lose your tightness, andthat you’ll be pressing from a strong bottom position. Your lower back should be arched and kept that way. This does not mean you lift yourbutt off the bench. Again, do NOT lift your butt off the bench. This bears repeating. Foot placement is up to you, but make sure they’re in a solid and strong position. I like toplace my feet back slightly toward the head of the bench, and I assume a stance that’snarrow enough to allow my legs to squeeze the bench. As I press up, I drive my heelsinto the ground and squeeze my legs, picturing all the energy from my legs and hipsdriving into the bar. This is “leg drive.” Think about squatting the weight up. Grip width is also up to you. Over the years, I’ve found that a narrow grip is a littlehealthier in the long run than a wider grip. My grip is around 18” between index fingers.This may limit my weights in the short term, but it’ll ensure that I won’t have any pec orshoulder problems in the long run. It’s better to press today and tomorrow than just topress today. As soon as the bar is in your hands, make sure your lower and upper back are arched,your feet are firmly on the floor, and your hands are wrapped tightly around the bar. I like to take a large breath and force it into my diaphragm before lifting the bar off. Thishelps me feel stronger and more stable when I get the bar. A strong and easy lift-off is agreat way to improve your lift and your mental state. Again, don’t “wimp” the bar off therack. Don’t use a lift-off partner when you train. Use this only for maximal attempts. I usually hold my breath for the first 2-3 reps of every set. This is hard to do, but itensures good technique and you won’t lose tightness.15
If you’re using a closer grip like I do, the bar will touch higher on the body than it will witha wider grip – usually hitting just below my nipples. If you use a wider grip, the bar will hitslightly lower. Because you’ll be hitting higher on the chest with a closer grip, the bar will travel onlyslightly back toward your face. This is because you’ve already started the press closer toyour head than you would have with a wider grip. With a wider grip, this path will be more pronounced because you’re hitting your chestlower. This will trace a “C” motion. Keep your elbows tucked on the way down. This doesn’t mean they should be tuckedinto your sides. A slight tuck will suffice. If you tuck too hard, you’ll lose power off thebottom of the lift. This is where most people get stuck. Once you touch your chest, keep your elbows tucked and drive the bar back slightly.About halfway up, allow your elbows to flare out, and keep pushing up and back.16
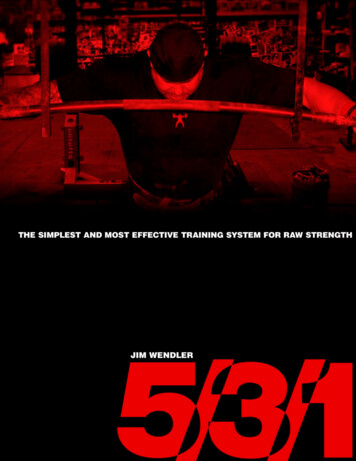
The Deadlift To figure out the best stance for your deadlift, pretend you’re about to perform a verticaljump. Get your feet and body into position. Now, look down and move your feet inslightly. This is your starting position. This varies from lifter to lifter, but I’ve found this tobe an optimal starting point. Your toes should be pointed slightly outward. Don’t deadlift with your weight on the balls of your feet. This is an injury waiting tohappen. Your weight should be on the middle of your foot or toward the rear. Start with the bar just in front of your shins, but not touching them. Once you reach downand grab the bar, your shins will meet it. Your upper back should be pulled together with your shoulders over the bar.17
Your lower back should be arched or held static in whatever position you’re in. I don’tdeadlift with a perfectly arched back, but it’s not rounded either, and it won’t round duringthe lift. Your hands should be placed just outside your feet – wide enough to allow you to getyour hips through at the top of the lift. You’ll have to experiment with this. Most people deadlift with a mixed grip. One hand is supinated (like you’re doing curls),and the other is pronated (palm facing toward you). Using a double overhand grip (bothhands pronated) is fine, but using straps is not. Choosing which hand to supinate is amatter of personal preference. Before lifting the bar, fill your diaphragm (not your chest) with air. Begin the ascent by easing pressure into the bar. Do not jerk the bar off the ground. Thisis how you tear a bicep or hurt your back. The best way to do this is to squeeze the barhard with your hands and squeeze your butt. I try to keep my eyes focused on a point on the ground about 15 feet in front of me. Before the bar is lifted, I always think, “Butt down, chest up.” The first movement of the deadlift should be initiated with the legs, not the back. This iswhy it’s imperative to have strong quads to deadlift. Once the bar begins moving up your shins, start pulling back and onto your heels. Don’tlet the bar come out in front of you. Keep it close to your body at all times. It shouldtouch your thighs on the way up. Once the bar passes your knees, push your hips through to complete the lift. At thispoint you should be standing erect (not back), and your knees should be locked. You can either lower the bar slowly to the starting position or drop it. This depends onhow quickly you want to get yourself kicked out of a public gym. There are two options for doing multiple reps with the deadlift. You can either touch-andgo the reps (slight bounce off the floor), or you can do dead stop deadlifts. For these,you’ll reset for each rep. I’ve done both, and both work. The downside to touch-and-go is18
that when you build up momentum, you can bounce too hard and lose your tightness. Ifyou’re strong enough to hold your position and you have the control to do it, this optionwill work for you. The dead stop option is good for most people, but make sure you resetperfectly each time. The beginning portion of the lift is where most back injuries willoccur. In this regard, the touch-and-go style is a little safer.Training FashionI’m not talking about the shirts, shorts or socks you wear, although from what I’ve seen in gyms,maybe I should. Should you wear knee wraps, wrist wraps and belts when you train? To answerthis question, here’s a list of things I think can be useful in your training program:Belt: This is the telltale sign that you’re a lifter, as least as far as the general public isconcerned. The general public, however, should never see this because you should never wearit in public. If you’re in a gym, people already know you’re a lifter. If you actually have somemuscle mass, that might be a dead giveaway, too. Some anti-belt lobbyists believe your absand lower back will get weaker if you use a belt, but if you train these areas you’ll be fine.There are generally two kinds of lifting belts. Both are made from either leather or suede. One isa 2” wide Olympic lifting belt, and the other is a 4” wide powerlifting belt. Both are fine. Thetype you’ll use is going to be up to you and your comfort level. Many people like squatting in thewider power belt, while deadlifting and bench pressing in the Olympic belt.Don’t buy a cheap belt. A good belt will last you a lifetime, and once you have it broken in, you’llconsider it the best training partner you’ve ever had. I recommend wearing a belt for your worksets in this program, but if you need to wear it during your warm-ups, that’s fine too.Shoes: A good pair of shoes is essential, especially for squatting and deadlifting. I own twopairs of shoes for squatting: a Metal squat shoe and an Olympic squatting shoe. The Metalsquat shoe has a hard sole, but it’s flat. The Olympic shoe has a raised heel. I like them both,and I haven’t found much difference between the two. The heels are different in these shoes,but the soles are the same – they’re hard. They’re not soft like a running shoe or a cross trainer– two of the worst shoes in which to squat or deadlift.19
I’d rather squat or pull barefoot than in a “regular” shoe, and I’ve done this in a pinch. Thecushion of these shoes allows too much foot movement, and it doesn’t give your legs a strong,steady base to pull or push from. Picture squatting on a bed versus doing it on a concrete floor.I’m not sure whether Metal makes their shoes anymore, but you can find good Olympic shoeson the internet. I have a pair made by Adidas. They’re expensive, but you’ll have them for life sodon’t skimp.The second option is a shoe like a Chuck Taylor. The sole is cushioned but very thin and flat.This is probably the cheapest and easiest option for most lifters.Chalk: Use it. If your gym doesn’t allow it, sneak it in. This is one of the most important thingsfor your strength and safety, so be wary of gyms that don’t allow it. They don’t want you to besafe or strong.Wraps: I like using wrist wraps (not straps) for bench pressing and military pressing. I use a 24”wrist wrap, applied fairly tight to give my wrists some support. Knee wraps are a good idea, butonly when working to a true 1RM. Leave them off otherwise. Knee sleeves can be worn if youfeel they offer enough warmth to the area and allow you to squat without pain.Beginning the ProgramFirst, know your maxes for the four lifts (squat, bench, deadlift and standing military press).These are not maxes you think you can do, maxes you’ve done, or maxes you think you mightbe able to do. These are maxes you can do RIGHT NOW. This is not the time to be a braggartlifter. If you overestimate your maxes, you’ll be in for a rude awakening.If you don’t know your maxes for any of the lifts, you can take a few days and see where you’reat, or you can take a rep max. This is a good way to get an idea of your strength without loadingthe bar for a maximal attempt. Here’s how to do it: Estimate your 1RM for the lift. If you can’t even do this, you probably shouldn’t be doingthis program. Take 80% or 85% of your supposed max and perform as many reps as possible. Plug the reps and the weight into this formula to get your estimated 1RM:20
Weight x Reps x .0333 Weight Estimated 1RMOnce you have your maxes for each lift (bench, squat, deadlift and standing military press), Iwant you to take 90% of this number and use this as your “max” for the first 4 weeks of thetraining cycle. The easiest way to do this is to take your max and multiply it by .9 (that’s “point”9). For example, let’s say you have a 400 deadlift, 385 squat, 190 military press, and a 295bench press. Your numbers would look like this: Deadlift: 400 x .9 360 Squat: 385 x .9 345 Military: 190 x .9 170 Bench Press: 295 x .9 265You would then begin the 5/3/1 program using the above numbers (360, 345, 170, 265) as yourstarting “maxes.”This will allow you to use sub-maximal weights to get stronger, and since you won’t be handlingheavy weights all the time, it’ll keep your body fresh and you won’t plateau or regress. If youdecide you don’t want to do this, don’t do this program. I’ve gotten a lot of questions about whythis must be done, and the answer is simple: by starting out at 10% less than your max, youwon’t burn out, and you won’t plateau. So, leave your ego at the door and do it correctly. Youdon’t need to operate at your real max to make gains with this program. Here are someexamples: Monte Sparkman – benched 440 at a meet using a 405 training max. Jim Wendler – deadlifted 710 using nothing higher than a 650 training max. Leigh An Jaskiewicz – benched 135x10 and 175x1 using nothing higher than a 140training max. Phil Wylie – deadlifted 677 at a meet with a highest training pull of 550x9.These are extreme examples, but the point is this: you don’t have to train maximally to getstrong. You just have to train optimally. This is the greatest lesson I learned from LouieSimmons. So, the first part of this program entails finding your maxes for the squat, bench,21
deadlift and standing military press. Once you have these maxes, make the commitment tostarting your training program at 90% of your max.There are two options you can use with the 5/3/1 method. The sets and reps are the same. Onlythe percentages differ. Here is option one:Week 1Week 2Week 3Week 465% x 5 reps70% x 3 reps75% x 5 reps40% x 5 reps75% x 5 reps80% x 3 reps85% x 3 reps50% x 5 reps85% x 5 or more reps90% x 3 or more reps95% x 1 or more reps60% x 5 repsWeek 1Week 2Week 3Week 475% x 5 reps80% x 3 reps75% x 5 reps40% x 5 reps80% x 5 reps85% x 3 reps85% x 3 reps50% x 5 reps85% x 5 or more reps90% x 3 or more reps95% x 1 or more reps60% x 5 repsHere is option two:I’ve used both options, and both have worked very well for me. Right now, I use option oneexclusively and would recommend this for just about everyone. Most people prefer doing it thisway because it allows you to be fresher for the last big set of the day. The second option is verytiring, especially on squat and deadlift days.Which one is right for you? I don’t know. Both are effective simply because there’s a logicalprogression in
and this was the best one I could come up with. Or the simplest, at least. Sometimes, however, the simplest is the best. In my case, this proved to be true. I was breezing through my workouts, putting on some muscle, and having fun again. I began pushing my last set for as many