Transcription
Apple Pro Training SeriesLogic Pro X 10.5David Nahmani
Logic Pro X 10.5 – Apple Pro Training Series: Professional Music ProductionDavid NahmaniCopyright 2021 by David Nahmani. All Rights Reserved.Peachpit Presswww.peachpit.comPeachpit Press is an imprint of Pearson Education, Inc.To report errors, please send a note to errata@peachpit.com.Apple Series Editor: Laura NormanEditor: Robyn G. ThomasSenior Production Editor: Tracey CroomProduction Coordinator: Maureen Forys, Happenstance Type-O-RamaTechnical Editor: John MooresCopy Editor: Elizabeth WelchProofreader: Scout FestaCompositor: Cody Gates, Happenstance Type-O-RamaIndexer: Valerie PerryCover Illustration: Von GlitschkaCover Production: Cody Gates, Happenstance Type-O-RamaFast Jam 2020, composed and produced by David Nahmani. All rights reserved.Sampler Feast 2020, composed and produced by David Nahmani. All rights reserved.Future Nostalgia 2020, composed and produced by David Nahmani. All rights reserved.Drum Samples, performed and recorded by Jon Mattox. All rights reserved. For more on Jon Mattox,visit https://jonmattox.com.Moments (Pop Mix) (by Darude featuring Sebastian Rejman) 2016, music and lyrics by V. Virtanen, S. Rejman, and J. Ehnqvist.All rights reserved. For more on Darude, visit www.darude.com, www.facebook.com/Darude, , www.youtube.com/Darude, and www.twitch.tv/Darude.Lights On 2018, composed and produced by Distant Cousins. All rights reserved. For more on Distant Cousins,visit www.distantcousinsofficial.com, www.facebook.com/DistantCousinsOfficial, www.instagram.com/distantcousinsofficial, andwww.cousinsintheclassroom.com.Drum samples in this book were used with permission of the three artists who contributed: Jon Mattox, Distant Cousins, and Darude.The projects and footage supplied with this book may only be used for educational purposes in association with the lessons included.Any other use, including but not limited to incorporating footage into another project, duplicating or distributing footage, is expresslyforbidden and requires explicit permission from the copyright holders listed above.Notice of RightsPrinted in the United States of America. This publication is protected by copyright, and permission should be obtained from thepublisher prior to any prohibited reproduction, storage in a retrieval system, or transmission in any form or by any means, electronic, mechanical, photocopying, recording, or otherwise. For information regarding permissions, request forms and the appropriate contacts within the Pearson Education Global Rights & Permissions department, please visit www.pearson.com/permissions.Notice of LiabilityThe information in this book is distributed on an “As Is” basis, without warranty. While every precaution has been taken in thepreparation of the book, neither the author nor Peachpit shall have any liability to any person or entity with respect to any loss ordamage caused or alleged to be caused directly or indirectly by the instructions contained in this book or by the computer softwareand hardware products described in it.TrademarksUnless otherwise indicated herein, any third party trademarks that may appear in this work are the property of their respective owners and any references to third party trademarks, logos or other trade dress are for demonstrative or descriptive purposes only. Suchreferences are not intended to imply any sponsorship, endorsement, authorization, or promotion of Pearson Education, Inc. productsby the owners of such marks, or any relationship between the owner and Pearson Education, Inc., or its affiliates, authors, licenseesor distributors.ISBN 13: 978-0-13-688662-4ISBN 10: 0-13-688662-0ScoutAutomatedPrintCode
Acknowledgments I would like to express my thanks to my wife Nathalieand to my sons, Liam and Dylan, for their support and encouragement; and tomy editors, Robyn Thomas, John Moores, and Laura Norman, for being by myside and enabling me to write the best book I could write.My deepest gratitude to the artists and producers who agreed to provide theirmedia, songs, and Logic projects for this book: Distant Cousins, for their song“Lights On”; Darude, for his song “Moments”; and Jon Mattox, for providingdrum samples.
Contents at a GlanceGetting Started. . . . . . . . . . . . . . . . . . . . . . . . . . . . . . . . . . . . . . . . . xiLesson 1Producing Music with Logic Now! . . . . . . . . . . . . . . . . . . . . . . . . . 1Lesson 2Producing a Virtual Drum Track . . . . . . . . . . . . . . . . . . . . . . . . 81Lesson 3Using Effect and Instrument Plug-ins. . . . . . . . . . . . . . . . . . . . . 129Lesson 4Recording Audio and MIDI. . . . . . . . . . . . . . . . . . . . . . . . . . . . . 171Lesson 5Sampling Audio . . . . . . . . . . . . . . . . . . . . . . . . . . . . . . . . . . . . . . . 237Lesson 6Performing with MIDI Controllers and Logic Remote. . . . . . 297Lesson 7Creating Content . . . . . . . . . . . . . . . . . . . . . . . . . . . . . . . . . . . . . . 335Lesson 8Integrating Your Workflow. . . . . . . . . . . . . . . . . . . . . . . . . . . . . . 379Lesson 9Editing Pitch and Time. . . . . . . . . . . . . . . . . . . . . . . . . . . . . . . . . 393Lesson 10Mixing . . . . . . . . . . . . . . . . . . . . . . . . . . . . . . . . . . . . . . . . . . . . . . . 431AppendixKeyboard Shortcuts (Default for U.S. Keyboard). . . . . . . . . . . 489Index. . . . . . . . . . . . . . . . . . . . . . . . . . . . . . . . . . . . . . . . . . . . . . . . . 497v
Table of ContentsGetting Started. . . . . . . . . . . . . . . . . . . . . . . . . . . . . . . xiLesson 1Producing Music with Logic Now!. . . . . . . . . . . . . . . 1Creating a Logic Pro X Project. . . . . . . . . . . . . . . . . . . . . . . . . . . . . 1Perform in Real Time with Live Loops. . . . . . . . . . . . . . . . . . . . . . 7Exploring the Interface. . . . . . . . . . . . . . . . . . . . . . . . . . . . . . . . . . . 27Navigating and Building the Project . . . . . . . . . . . . . . . . . . . . . . . 33Editing Regions in the Workspace. . . . . . . . . . . . . . . . . . . . . . . . . 53Mixing the Song . . . . . . . . . . . . . . . . . . . . . . . . . . . . . . . . . . . . . . . . 67Mixing Down to a Stereo File. . . . . . . . . . . . . . . . . . . . . . . . . . . . . 75Key Commands. . . . . . . . . . . . . . . . . . . . . . . . . . . . . . . . . . . . . . . . . 77Lesson 2Producing a Virtual Drum Track. . . . . . . . . . . . . . . 81Creating a Drummer Track. . . . . . . . . . . . . . . . . . . . . . . . . . . . . . . 82Arranging the Drum Track. . . . . . . . . . . . . . . . . . . . . . . . . . . . . . . 95Customizing the Drum Kit. . . . . . . . . . . . . . . . . . . . . . . . . . . . . . 106Working with an Electronic Drummer. . . . . . . . . . . . . . . . . . . . 114Key Commands. . . . . . . . . . . . . . . . . . . . . . . . . . . . . . . . . . . . . . . . 127Lesson 3Using Effect and Instrument Plug-ins . . . . . . . . . . 129Inserting Plug-ins. . . . . . . . . . . . . . . . . . . . . . . . . . . . . . . . . . . . . .Loading and Editing Patches. . . . . . . . . . . . . . . . . . . . . . . . . . . . .Setting Up Parallel Processing. . . . . . . . . . . . . . . . . . . . . . . . . . . .Moving and Copying Plug-ins . . . . . . . . . . . . . . . . . . . . . . . . . . .Saving User Patches and Plug-in Settings. . . . . . . . . . . . . . . . . .Key Commands. . . . . . . . . . . . . . . . . . . . . . . . . . . . . . . . . . . . . . . .vi129145150161166169
Contents viiLesson 4Recording Audio and MIDI. . . . . . . . . . . . . . . . . . . 171Setting Up Digital Audio Recording . . . . . . . . . . . . . . . . . . . . . .Recording Audio. . . . . . . . . . . . . . . . . . . . . . . . . . . . . . . . . . . . . . .Recording Additional Takes . . . . . . . . . . . . . . . . . . . . . . . . . . . . .Punching In and Out. . . . . . . . . . . . . . . . . . . . . . . . . . . . . . . . . . .Deleting Unused Audio Files . . . . . . . . . . . . . . . . . . . . . . . . . . . .Recording MIDI . . . . . . . . . . . . . . . . . . . . . . . . . . . . . . . . . . . . . . .Correcting the Timing of a MIDI Recording. . . . . . . . . . . . . . .Recording Over a MIDI Region. . . . . . . . . . . . . . . . . . . . . . . . . .Recording Into Live Loop Cells . . . . . . . . . . . . . . . . . . . . . . . . . .Recording Without a Metronome . . . . . . . . . . . . . . . . . . . . . . . .Key Commands. . . . . . . . . . . . . . . . . . . . . . . . . . . . . . . . . . . . . . . .Lesson 5Sampling Audio. . . . . . . . . . . . . . . . . . . . . . . . . . . . . 237Sampling Single Notes. . . . . . . . . . . . . . . . . . . . . . . . . . . . . . . . . .Sampling and Slicing Drums. . . . . . . . . . . . . . . . . . . . . . . . . . . . .Transposing a Sample WhileKeeping It Synced to the Project Tempo. . . . . . . . . . . . . . . . . . .Chopping Loops in a Take Folder . . . . . . . . . . . . . . . . . . . . . . . .Creating Vocal Chops. . . . . . . . . . . . . . . . . . . . . . . . . . . . . . . . . . .Key Commands. . . . . . . . . . . . . . . . . . . . . . . . . . . . . . . . . . . . . . . .Lesson 6238263270273286295 erforming with MIDIPControllers and Logic Remote. . . . . . . . . . . . . . . . . 297Assigning Hardware Controllers . . . . . . . . . . . . . . . . . . . . . . . . .Mapping Smart Controls to Plug-ins. . . . . . . . . . . . . . . . . . . . . .Controlling Logic from an iPad Using Logic Remote. . . . . . . .Performing Live DJ Effects with Remix FX . . . . . . . . . . . . . . . .Key Commands. . . . . . . . . . . . . . . . . . . . . . . . . . . . . . . . . . . . . . . .Lesson reating Content. . . . . . . . . . . . . . . . . . . . . . . . . . . . 335Step Sequencing. . . . . . . . . . . . . . . . . . . . . . . . . . . . . . . . . . . . . . .Programming MIDI in the Piano Roll. . . . . . . . . . . . . . . . . . . . .Editing Audio Regions and Adding Fades . . . . . . . . . . . . . . . . .Key Commands. . . . . . . . . . . . . . . . . . . . . . . . . . . . . . . . . . . . . . . .336351364376
viii ContentsLesson 8Integrating Your Workflow. . . . . . . . . . . . . . . . . . . 379Importing Audio into Drum Machine Designer. . . . . . . . . . . .Populating Scenes in the Live Loops Grid . . . . . . . . . . . . . . . . .Copying or Recording Scenes in the Tracks View. . . . . . . . . . .Key Commands. . . . . . . . . . . . . . . . . . . . . . . . . . . . . . . . . . . . . . . .Lesson 9Editing Pitch and Time. . . . . . . . . . . . . . . . . . . . . . . 393Setting a Project Tempo byDetecting the Tempo of a Recording. . . . . . . . . . . . . . . . . . . . . .Matching an Audio File to the Project Key and Tempo. . . . . .Creating Tempo Changes and Tempo Curves . . . . . . . . . . . . . .Making One Track Follow the Groove of Another Track. . . . .Changing the Playback Pitch and Speed with Varispeed. . . . .Editing the Timing of an Audio Region . . . . . . . . . . . . . . . . . . .Tuning Vocal Recordings. . . . . . . . . . . . . . . . . . . . . . . . . . . . . . . .Key Commands. . . . . . . . . . . . . . . . . . . . . . . . . . . . . . . . . . . . . . . .Lesson 10394399402407410413423429Mixing. . . . . . . . . . . . . . . . . . . . . . . . . . . . . . . . . . . . . 431Organizing Windows and Tracks. . . . . . . . . . . . . . . . . . . . . . . . .Adjusting Volume, Pan, EQ, and Reverb. . . . . . . . . . . . . . . . . . .Processing Lead Vocals . . . . . . . . . . . . . . . . . . . . . . . . . . . . . . . . .Automating Mixer Parameters. . . . . . . . . . . . . . . . . . . . . . . . . . .Quick Mastering. . . . . . . . . . . . . . . . . . . . . . . . . . . . . . . . . . . . . . .Exporting the Mix to a Stereo Audio File. . . . . . . . . . . . . . . . . .Using a Few Tips and Tricks. . . . . . . . . . . . . . . . . . . . . . . . . . . . .Key Commands. . . . . . . . . . . . . . . . . . . . . . . . . . . . . . . . . . . . . . . .Appendix380383387391432441453468478483485487K eyboard Shortcuts(Default for U.S. Keyboard). . . . . . . . . . . . . . . . . . 489Panes and Windows. . . . . . . . . . . . . . . . . . . . . . . . . . . . . . . . . . . .General. . . . . . . . . . . . . . . . . . . . . . . . . . . . . . . . . . . . . . . . . . . . . . .Navigation and Playback. . . . . . . . . . . . . . . . . . . . . . . . . . . . . . . .Zooming. . . . . . . . . . . . . . . . . . . . . . . . . . . . . . . . . . . . . . . . . . . . . .Channel Strip, Track, and Region Operations. . . . . . . . . . . . . .489490490491492
Contents ixLive Loops . . . . . . . . . . . . . . . . . . . . . . . . . . . . . . . . . . . . . . . . . . . .Library . . . . . . . . . . . . . . . . . . . . . . . . . . . . . . . . . . . . . . . . . . . . . . .Project Audio Browser. . . . . . . . . . . . . . . . . . . . . . . . . . . . . . . . . .Step Sequencer. . . . . . . . . . . . . . . . . . . . . . . . . . . . . . . . . . . . . . . . .Piano Roll Editor. . . . . . . . . . . . . . . . . . . . . . . . . . . . . . . . . . . . . . .macOS. . . . . . . . . . . . . . . . . . . . . . . . . . . . . . . . . . . . . . . . . . . . . . . .493494494494494495Index . . . . . . . . . . . . . . . . . . . . . . . . . . . . . . . . . . . . . . 497
Getting StartedWelcome to the official Apple Pro Training Series course forLogic Pro X 10.5. This book is a comprehensive introduction to professional music production with Logic Pro X 10.5. It uses real-world musicand hands-on exercises to teach you how to record, edit, arrange, mix,produce, and polish audio and MIDI files in a professional workflow. Solet’s get started!The MethodologyThis book takes a hands-on approach to learning the software, so you’llbe working through the project files and media you download after registering the book at www.peachpit.com/apts.logicprox10.5. It’s divided intolessons that introduce the interface elements and ways of working withthem, building progressively until you can comfortably grasp the entireapplication and its standard workflows.Each lesson in this book is designed to support the concepts learned in thepreceding lesson, and first-time readers should go through the book from startto finish. However, each lesson is self-contained, so when you need to review atopic, you can quickly jump to any lesson.The book is designed to guide you through the music production process as itteaches Logic, and it is organized in 10 lessons.Lesson 1 starts you with an overview of the entire process. You’ll becomefamiliar with the interface and the various ways to navigate a project; useApple Loops to build a song from scratch; and then arrange, mix, and exportthe song to an MP3 file.xi
xii Getting StartedLesson 2 focuses on drum tracks, the foundation of your song. You’ll use Drummerto generate virtual drumbeat performances triggering acoustic and electronic druminstruments.In Lesson 3 you will explore effect and instrument plug-ins, use the Library to loadpatches and presets, and save your own plug-in settings.Lesson 4 dives deeper into typical situations that you may encounter when recordingaudio sources, such as microphones, guitars, and MIDI controllers. You’ll record both inthe linear Tracks view editor and in the Live Loops grid.You will use the new Quick Sampler instrument plug-in in Lesson 5 to turn a voice into asynthesizer pad, record your own handclap sample, create vocal chop effects, and sample abass sound from a loop to create your own bass line.Lesson 6 shows you how to connect MIDI controllers to Logic to trigger loops, navigatethe project, or adjust plug-in parameters. You will explore the free Logic Remote app (foriPad and iPhone) to control Logic from your multi-touch screen and use the iPad’s builtin gyroscope to modulate effects.To create content in Lesson 7, you’ll program MIDI in the Piano Roll, create drumbeatsand step automation in Logic’s new Step Sequencer, edit Audio regions, and add fades andturntable start and stop effects.Lesson 8 is a brief overview of workflow that integrates multiple features—learned in theprevious lessons—into a complete music production process. You’ll start by building yourown drum instrument with samples, program a drumbeat in Step Sequencer, combine itwith recordings and Apple Loops in the Live Loops grid, and record your Live Loops performance into the Tracks view to build an arrangement.Lesson 9 explores various ways to edit the pitch and time of your recordings, using SmartTempo to ensure that all your audio files play at the same tempo; creating custom tempocurves; using groove tracks and Varispeed; time-stretching audio; and tuning vocals.You’ll study the end processes of music production in Lesson 10: mixing, automating, andmastering using track stacks, EQ, compressor, limiter, and delay and reverb plug-ins. Youwill export your final mix as a stereo audio file.Appendix A lists a wealth of useful keyboard shortcuts to help speed up your workflow.
System Requirements xiiiSystem RequirementsBefore using Apple Pro Training Series: Logic Pro X 10.5, you should have a workingknowledge of your Mac and the macOS operating system. Make sure that you know howto use the mouse or trackpad and standard menus and commands, and how to open, save,and close files. If you need to review these techniques, see the printed or online documentation included with your system.Logic Pro X and the lessons in this book require the following system resources: macOS 10.14.6 or later Minimum 6 GB of disk space (up to 72 GB of disk space for the full Sound Libraryinstallation) High-speed internet connection for installation MIDI keyboard (optional but recommended to play and record software instruments)connected via USB or via a compatible MIDI interface (optional) iPhone or iPad with iOS 13.1 or later for controlling Logic using theLogic Remote iPad app as shown in Lesson 6Preparing Your Logic WorkstationThe exercises in this book require that you install Logic Pro X along with the entire AppleSound Library (including the Legacy and Compatibility content). If you have not yetinstalled Logic, you may purchase it from the App Store. When your purchase is completed, Logic Pro X will automatically be installed on your hard drive, and you will beprompted to install the Apple Sound Library.Some of the instructions and descriptions in this book may vary slightly, depending onthe sounds you have installed.When you first open Logic Pro X, the app will automatically download and install theessential content. If you get an alert offering to download more sounds, continue to download and install all the sounds.To make sure the complete Apple Sound Library is installed on your Mac, choose LogicPro X Sound Library Open Sound Library Manager, and click Select All Uninstalled.Make sure the Legacy and Compatibility content is selected. Then, click Install.
xiv Getting StartedIf you choose not to download the entire Logic sound library, you may beunable to find some of the media needed in the exercises. Missing media will appeardimmed with a down arrow icon. Click the down arrow icon to download that media.NOTE Online ContentYour purchase of Apple Pro Training Series: Logic Pro X 10.5 includes online materials provided by way of your Account page at www.peachpit.com. These include the following.Lesson filesThe downloadable content for Apple Pro Training Series: Logic Pro X 10.5 includes theproject files you will use for each lesson, as well as media files that contain the audio andMIDI content you will need for each exercise. After you save the files to your hard disk,each lesson will instruct you in their use. To download the lesson files, you will need tofollow the instructions below.Free Web EditionThe Web Edition is a free online version of the book that is included with your purchase.Your Web Edition can be accessed on our site from any device with a connection to theInternet.
Online Content xvAccessing the lesson files and Web Edition from www.peachpit.com1Go to www.peachpit.com/apts.logicprox10.5.2Sign in or create a new account.3Click Register.4Answer the question as proof of purchase.The lesson files can be accessed from the Registered Products tab on your Account page.5Click the Access Bonus Content link below the title of your product to proceed to thedownload page.6Click the lesson file link(s) to download them to your computer.The Web Edition can be accessed from the Digital Purchases tab on your Account page.7Click the Launch link to access the product.If you’ve enabled the Desktop and your Document folder to sync to iCloud,you are strongly advised not to copy your lesson files to your Desktop. Chooseanother location, such as the Logic folder within your Music folder.NOTE 8After downloading the file to your Mac desktop, you’ll need to unzip the file ormount the disk image to access a folder titled Logic Book Projects, which you willsave or move to your Mac desktop. Each lesson explains which files to open for thatlesson’s exercises.If you purchased a digital product directly from www.peachpit.com, yourproduct will already be registered. However, you still need to follow the registrationsteps and answer the proof-of-purchase question before the Access Bonus Contentlink will appear under the product on your Registered Products tab.NOTE Using Default Preferences and Key Commands, and Selecting theAdvanced ToolsAll the instructions and descriptions in this book assume that you are using the defaultpreferences (unless instructed to change them). At the beginning of Lesson 1, you will beinstructed how to show advanced tools and select all additional options.
xvi Getting StartedIf you have changed some of your Logic Pro X preferences, you may not see the sameresults as described in the exercises. To make sure that you can follow along with thisbook, it’s best to revert to the initial set of Logic preferences before you start the lessons.Keep in mind, however, that when you initialize preferences, you lose your custom settings, and later you may want to reset your favorite preferences manually.1Choose Logic Pro X Preferences Advanced Tools.2Select Show Advanced Tools.3Click the Enable All button to select all additional options, and then close the preferences window.4Choose Logic Pro X Preferences Reset All Preferences Except Key Commands.A confirmation message appears.5Click Initialize.Your preferences are initialized to their default states.After initializing Preferences, you may need to re-select the desired audiointerface: choose Logic Pro X Preferences Audio, choose your audio interfacefrom the Output Device and Input Device pop-up menus, and make sure Core Audiois enabled. The first time you create a new audio track, in the New Track dialog, makesure Output is set to Output 1 2.NOTE Using the U.S. Key Command PresetThis book assumes that you are using the default initialized key command preset for aU.S. keyboard. If you have customized your key commands, you may find that some ofthe key commands in your Logic installation do not function as they are described in thisbook.If at any point you find that the key commands don’t respond as described in this book,make sure the U.S. key command preset is selected on your Mac by choosing Logic Pro X Key Commands Presets U.S.
About the Apple Pro Training Series xviiScreen ResolutionDepending on your display resolution, some of the project files may appear different onyour screen than they do in the book. When you open a project, if you can’t see the wholemain window, move the window until you can see the three window controls at the left ofthe title bar and Option-click the Zoom button (the green button, third from the left) tofit the window to the screen.When using a small display, you may also have to zoom or scroll more often thaninstructed in the book when performing some of the exercise steps. In some cases, youmay have to temporarily resize or close an area of the main window to complete an actionin another area.About the Apple Pro Training SeriesApple Pro Training Series: Logic Pro X 10.5 is a self-paced learning tool and Apple’s officialguide for Logic Pro X. Books in this series also include downloadable lesson files and anonline version of the book. The lessons are designed to let you learn at your own pace.For a complete list of Apple Pro Training Series books, visit www.peachpit.com/apple.ResourcesApple Pro Training Series: Logic Pro X 10.5 is not intended as a comprehensive referencemanual, nor does it replace the documentation that comes with the application. For comprehensive information about program features, refer to the following resources: Logic Pro Help, accessed through the Logic Pro X Help menu, contains a descriptionof most features. Other documents available in the Help menu can also be valuableresources. The Apple websites www.apple.com/logic-pro/ and www.apple.com/support/logicpro/. The official Logic Pro release notes: https://support.apple.com/en-us/HT203718/. The Logic Pro Help website, an online community of Logic users moderated by theauthor of this book, David Nahmani: www.logicprohelp.com/forum. For additional help with accessing the lesson files, you may send email queries toask@peachpit.com.
1Lesson FilesTimeGoalsNoneThis lesson takes approximately 150 minutes to complete.Perform scene triggering in the Live Loops gridProduce a one-minute instrumental piece using prerecorded mediaExplore the Logic Pro X main window interfaceNavigate and zoom the workspaceMove, copy, loop, trim, and transpose regions in the workspaceMix down and export the project
Lesso n 5Sampling AudioShortly after the first analog tape recorders appeared around 1935,composers started using the recording medium as a compositionaltool—manipulating the audio playback using reverberation and echo;using voltage control devices that changed the tape speed and thusaltered playback speed and pitch; and using punch recording to splicedifferent sounds together. Throughout the following decades, electroacoustic composers—and later pioneering electronic musicians—fascinated by the new unique sounds they could come up with, continuedexploring audio transformation techniques involving recording devicesto stray away from the classic acoustic instrument sounds of composers from past centuries.In 1988, Roger Linn designed the AKAI MPC60, which quickly became themost legendary sampler and had a major impact on hip-hop music. The iconicMIDI sampler made it easy to trigger patches by finger drumming on its built-insquare pads, while recording the performance onto its built-in sequencer. Today,you would be hard-pressed to find a music genre where sampling isn’t used.In this lesson, you will explore Quick Sampler, a new Logic Pro X softwareinstrument plug-in. You will import a finger snap and record a hand clap, andthen turn a sustained vocal note into a pad synthesizer sound. You will slicea drum loop, shortening the volume envelope of the individual slices, andadd a gritty filter to give it a low-fidelity sound. You’ll splice loops together tocombine notes from different instruments into a composite melody, creatingan exhilarating rhythmic sound collage. Finally, you will edit samples into aneffect called vocal chops.237
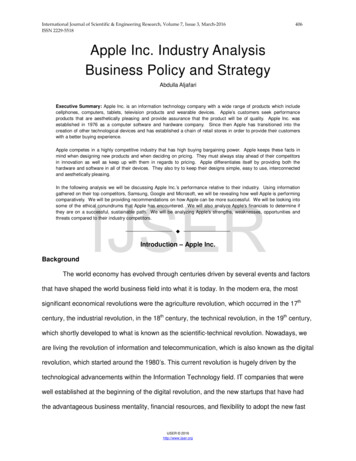
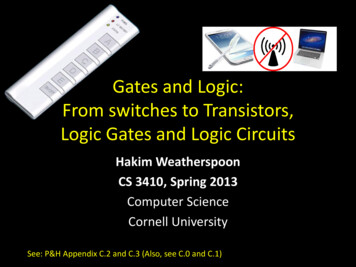
238 Sampling AudioAlways consider the source of your sampling, and if any of that material is copyrighted,make sure you thoroughly research sample clearance. Two easy ways to avoid worryingabout potential legal issues are to sample your own instruments or noises around you, orto sample the royalty-free Apple Sound Library content that you downloaded along withLogic Pro X (such as software instruments or Apple Loops).Sampling Single NotesThe easiest way to use samples in your productions is to import or record a single noteinto Quick Sampler and then trigger that single note from your MIDI keyboard. In QuickSampler, you can modulate the sample’s pitch to give it a vibrato effect, adjust the volumeenvelope, and loop a section of the sample so that you can sustain its sound.Importing Audio in Quick Sampler and Selecting a ModeIn this exercise, you will use an Apple Loop of finger snaps to create a Quick Samplerinstrument so that you can trigger the audio file using your MIDI controller keyboard. Toget started with a rhythmic reference, you’ll first import a loop to create a drum track.1Choose File New (or press Command-N).An empty project is created, and the New Track dialog opens.2In the New Track dialog, select Audio, and click Create (or press Return).3Open the Loop Browser, find Throwback Funk Beat 01, and drag it to the audio trackat bar 1.4In the Region inspector, click the Loop checkbox (or press L).In the workspace, the audio region is looped throughout the project. Now let’s create anew track for Quick Sampler.5At the top of the track headers, click the button (or press Command-Option-N).
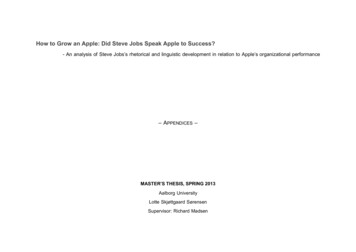
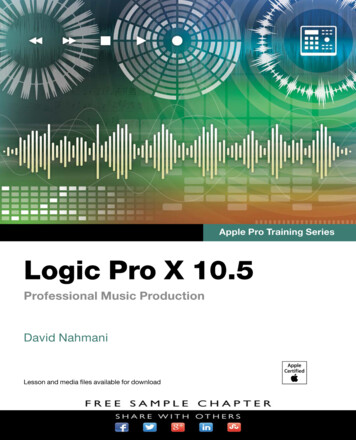
Sampling Single Notes 2396In the New Track dialog, choose Software Instrument, make sure the Instrument pop-upmenu is set to Empty Channel Strip, and click Create (or press Return).7Click the Instrument slot, and choose Quick Sampler (Single Sample).8In the Loop Browser, search for bounce snap.9Drag Lets Bounce Snaps to the waveform display in Quick Sampler.In the waveform display, two areas appear (Original and Optimized).10 Drop the file onto Original.The audio file is imported into Quick Sampler, and its waveform is displayed. Belowthe waveform display on the left, the root key is C3.
240 Sampling AudioYou will trigger samples using specific note pitches throughout this lesson. Ifyou need to see incoming MIDI note pitches in the MIDI input activity monitor, clickthe small arrow to the right in the LCD display and choose Custom.11 Play a C3 on your keyboard.In Classic mode, the sample plays back while you hold down the key on your keyboard and stops playing when you release the key. Play a C3, and
sional music production with Logic Pro X 10.5. It uses real-world music and hands-on exercises to teach you how to record, edit, arrange, mix, produce, and polish audio and MIDI files in a professional workflow. So let’s get started! The Methodology This book take