Transcription
7 Simple DIY Steps To Turn YourAR-15 From Ordinary to Complete Bad Ass
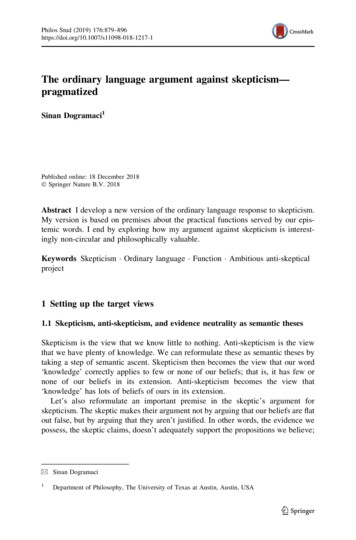
7 Simple DIY Steps To Turn Your AR-15 From Ordinary to Complete Bad AssY7 Simple DIY Steps To Turn Your AR-15 FromOrdinary to Complete Bad AssCongrats on your purchase today.I’m Ehrich, your teacher through this guide.And you’re about to discover a simple, super-cheap DIY way to turn your ordinaryAR into a bad-ass, custom version.With the info in this report you’ll be able to do custom paint jobs like this This Or my personal favorite paint job, like this
7 Simple DIY Steps To Turn Your AR-15 From Ordinary to Complete Bad AssYAnd best of all, you can do this WITHOUT spending 100s (even 1000s!) taking your gun to a custom paintshop WITHOUT a blast chamber WITHOUT any special painting knowledge And WITHOUT worrying about you rifle ever chipping, scratching or flaking Know that this isn’t just an AR thing, either The same strategy works for painting your AK your shotgun your 22 or anythingin-between (the only difference you’ll see is in the deconstruction of the firearm.)Now, everything you’re going to see here are the basics – things like one to two colorpaint and camo jobs.If you’re looking to do something VERY custom (like the flag painted AR above),you’re going to want to make sure you work with a true artist for design and taping.In total, you’re going to follow seven steps:STEP #1: PlanningSTEP #2: Purchasing
7 Simple DIY Steps To Turn Your AR-15 From Ordinary to Complete Bad AssYSTEP #3: DeconstructionSTEP #4: PreparationSTEP #5: ActionSTEP #6: DryingSTEP #7: ReconstructionFor the best outcome please follow each of these steps as they’re listed. Althoughthey’re extremely easy to follow, they’re also extremely important to follow.Let’s get started STEP #1: PlanningThe most important step in painting your AR is planning.Like a good carpenter says “measure twice, cut once.”It’s important to know exactly what you want to do when painting your AR. They don’tmake “white out” to fix mistakes you’ve made in painting firearms.So, before you get started, ask yourself these questions:What’s your goal in painting your AR?Do you want to paint the whole thing, or just a few parts?Do you want to do one color, or multiple colors?Do you want to camo it out?Am I sure I want to paint this pattern? (remember, it’s not easy to go back!)What design and stencils do I need to make this happen?
7 Simple DIY Steps To Turn Your AR-15 From Ordinary to Complete Bad AssYPRO TIP: If you are doing this for "Tactical" reasons (i.e. you don't want to be seen)then you should take into account that painting your weapon is ONLY to break up theoutline of the rifle and match it up to your operating environment.The truth is, nothing in nature is completely black -- nor is anything completely"straight.” So a 36" piece of totally black metal (your rifle) in nature is easy todistinguish.It's not complicated to camo your rifle if you actually are painting it to use it "in thefield" (not to just look cool). You only need to do two things:One, have a base coat to cover the solid black outline and one other color tomatch your terrain.Two, break up the outline of the rifle.In other words, you don't actually need to paint an intricate "camo" pattern on your rifleto hide it in nature.Depending on your environment, something as simple as a complete tan base coat allover the rifle, with a few strips of green at an angle over the whole rifle will do the trick.Any pattern or images smaller than 1-inch on a rifle will just merge into a single imageto the human eye anyway at distances past Close-Quarters-Combat (where you would beusing camo to hopefully hide yourself anyway).And the beauty is, if you find yourself "operating" in another environment (like say thedesert instead of the woods) you can easily re-paint your rifle to match yourenvironment.That said, this report will focus on doing an excellent paint job the right way. That wayyou can decide the level of detail you need for your needs.The bottom line is.Having a proper plan will save you tons of time and frustration.When you’re happy with your plan, here’s what to do next
7 Simple DIY Steps To Turn Your AR-15 From Ordinary to Complete Bad AssYSTEP #2: PurchasingThe next thing you’re going to have to do is to go shopping to purchase your paint, tapeand tools.For tape, I recommend green FROG tape. It’s super durable and produces wicked cleanlines.You’ll be able to find it at any local home improvement store. Or you can get it off ofAmazon for just a few bucks, right ef as li tl?ie UTF8&camp 1789&creative 390957&creativeASIN B002Z8HB2A&linkCode as2&tag httpugarcom20&linkId OT6IBMOA4JE5GIAZNext up on the list is a good primer. Don’t skip on this step, thinking you don’t needprimer. A good primer is essential in getting good paint adhesion.When I painted my AR, I used Rust-oleum Professional Primer. Just like the frog tape,you should be able to find this at your local store. It runs about 13 / can.PRO TIP: you should only need one f as li tl?ie UTF8&camp 1789&creative 390957&creativeASIN B00106IZLO&linkCode as2&tag httpugarcom20&linkId KB3ASS37ZPG4Z2XO
7 Simple DIY Steps To Turn Your AR-15 From Ordinary to Complete Bad AssYIf you can’t find it at your local store, you can use any good primer from a brand namespray-paint company.Just remember, if you find a primer in the discount bin for 50 cents there’s probably agood reason it’s in the clearance bin. Again, don’t skimp when it comes to a goodprimer.Next, you’ll need the paint itself. Any type of brand name spray paint should do. Justpay attention to the finish you’re choosing. You don’t want high gloss on your ARunless you want to draw serious attention at the range.For hunting and military paint jobs, Rust-oleum makes a fantastic line of matte finishcamo spray paints. They come in forest green, khaki, earth brown and army green.You can find the whole line of camo products right ef as li tl?ie UTF8&camp 1789&creative 390957&creativeASIN B009ROI59I&linkCode as2&tag httpugarcom20&linkId MVFXQTNIUEUUXXB4In the examples you’ll see from my own AR paint job (below), I used the Camo Khakicolor and it looks fantastic.
7 Simple DIY Steps To Turn Your AR-15 From Ordinary to Complete Bad AssYAfter that, if you’re planning on taking your AR apart to paint specific pieces, you’llneed a multi-head screwdriver with different allen and hex keys like ef as li tl?ie UTF8&camp 1789&creative 390957&creativeASIN B005O1RGY8&linkCode as2&tag httpugarcom20&linkId THDU5T3RNPOFWDMAFinally, you’ll need a good degreaser. I used Simple Green, found ef as li tl?ie UTF8&camp 1789&creative 390957&creativeASIN B000ULLGRU&linkCode as2&tag httpugarcom20&linkId QK3ZPMU6MYIFFVWTOnce you have your tape, primer, paint, and tools you’re ready to move on to the nextstep.STEP #3: DeconstructionIf you’re going to paint your entire AR, you can obviously skip this step. But if you’regoing to paint only certain parts of your AR, you have two choices:
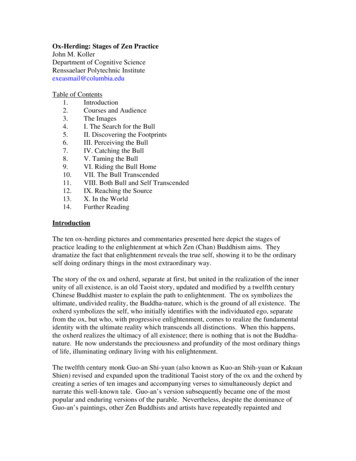
7 Simple DIY Steps To Turn Your AR-15 From Ordinary to Complete Bad AssY1. You can tape off everything (not recommended)or 2. You can remove as many of the parts you want to paint as possible(recommended.)When I painted my AR, I chose to paint the rail, the adjustable stock, the magazine, thevertical grip and the grip.The trickiest thing to remove in the entire process is the grip. That’s because it housesthe (very tiny!) spring that holds the safety pin in place.To get started dismantling everything you’ll want to start with your AR in a place that’snot cluttered. That way if you drop any parts they’ll be easy to find.Here’s how mine first looked:Next, to remove the grip there’s a single screw in the bottom of the grip. You can see ithere.
7 Simple DIY Steps To Turn Your AR-15 From Ordinary to Complete Bad AssYAnd here When you remove this screw, simply wiggle the grip back and forth until it detachesfrom the lower receiver. You’ll notice a tiny little spring that sits beneath the grip.Make sure NOT to lose that spring.Beneath the spring will be a tiny little pin that holds the safety pin in place. Remove thattime pin and the screw, the pin and the spring in a plastic bag for reassembly later.
7 Simple DIY Steps To Turn Your AR-15 From Ordinary to Complete Bad AssYNext, remove your rail if you’re painting that piece separately. You should havemultiple screws that hold your rail in place.Here’s how my AR parts looked with everything removed.The stock comes next. For the purposes of showing you how to tape things off, I left mystock on and simply taped around everything as shown below:
7 Simple DIY Steps To Turn Your AR-15 From Ordinary to Complete Bad AssYFor my stock (Magpull) I planned NOT to paint the rubber shoulder grip. Removing thatwas easy with two screws and a little tug, the rubber piece separated from the plasticstock, like this:Again, you can remove as many pieces as you like from your AR. The big trick is tokeep everything in a non-cluttered space and to remember how it all goes backtogether.Once you’ve got all your pieces together, it’s time to move on to the next step.PRO TIP: If you’re looking to do stars and stripes, you’ll need to create stickers for thestars. A great way to do that is to download the star image below resize it trace iton the FROG TAPE cut it out and stick it on where you want it.
7 Simple DIY Steps To Turn Your AR-15 From Ordinary to Complete Bad AssYDownload the image right ent/uploads/2010/05/Star-FivePointStencil.pngSTEP #4: PreparationThere are a couple key pieces to preparation before getting started.The first is to soak your parts in a water/degreaser mixture for at least one hour. Thiswill remove any of the grease left on your firearm.For my mixture, I used 1 part Simple Green and 1 part warm water:PRO TIP: The longer you can soak your parts, the better. You DO NOT want oil orgrease on your weapon.After you soak your parts, make sure they’re completely dry. Now you’re ready to beginpainting.The first thing about your painting area is that you’ll want to make sure you have aspace that’s well ventilated and that won’t receive a lot of debris floating through the air.Next, make sure the space you’re painting in has temperatures running between 60-90degrees. You won’t want to paint your AR in the freezing cold or the scorching hot.Spray paint needs the proper temperature to bond. If you can’t find the proper temp, skipthat day and choose another.
7 Simple DIY Steps To Turn Your AR-15 From Ordinary to Complete Bad AssYFinally, make sure you have a clean surface to sit all your parts.Here’s how my prep space looked on painting day And here’s a close up of the tape job on my stock:PRO TIP: If you’re taping out your stock, remember to tape out the small ovalopenings. See picture above for all the green tape areas.
7 Simple DIY Steps To Turn Your AR-15 From Ordinary to Complete Bad AssYAfter your space is prepared, it’s time for painting.STEP #5: ActionThe first thing you’ll want to do is to apply your primer.Use short, pulsed sprays of the spray paint to fully cover the area. DO NOT hold downthe spray nozzle and drench the parts. Drenched parts will cause dripping.Instead, the short pulses you use will cover the parts nicely with even coats.Once your primer is applied, wait 30 minutes (or until fully dry) then flip your partsover (if applicable) and apply primer to the opposite side.DO NOT touch your parts before they’re dry. Touching your parts prematurely willcause smudging and, worse, fingerprints.DO NOT rush the paint job. It’s better to stay on the safe side here, allowing more thanenough time to dry.After you have the first coat on all parts (and all sides of all parts) then repeat theprocess for a second coat of primer.Again, you wait.Here’s how my AR parts looked after two coats of primer.
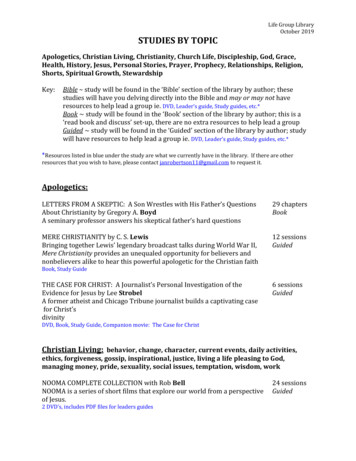
7 Simple DIY Steps To Turn Your AR-15 From Ordinary to Complete Bad AssYOnce your primer is fully dry, it’s time to repeat the whole process but this time withyour actual paint.Remember to apply two even coats pulsing the spray paint can back and forth.In total, you’ll want to apply three coats of your finished paint.PRO TIP: If you’re looking to camo out your AR, gather leaves and branches fromaround your neighborhood.Lay them on your AR and spray accordingly, like this:
7 Simple DIY Steps To Turn Your AR-15 From Ordinary to Complete Bad AssYAnd this:Using natural leaf formations will give you a nice, nature camo look.For more info on camo-ing out your AR, see here, from the paint manufacter gtips.pdfThey even have camo stencils that you can download, too if you live in the city andcan’t find any natural leaves around your area. See here for ils.pdfPRO TIP: When/if painting your magazine, set the magazine upside down in the centerof a masking tape ring. Doing this will allow you a hands free way to paint ALL SIDESof your magazine without having to flip it over!Here’s a picture of how my magazine looked when being painted:
7 Simple DIY Steps To Turn Your AR-15 From Ordinary to Complete Bad AssYSTEP #6: DryingThis is the easiest step of all You simply wait. Be patient.After everything’s complete, allow all your parts to dry for a full 24 hours in a dry,warm room. The key to that sentence is the word – DRY.Having any moisture present in your drying area won’t encourage the bonding of thepaint to the metal/plastic that you’ll need for the cleanest lines.PRO TIP: DO NOT put the parts back together before you 24 hour drying period as itmay cause bleeding from the painted parts to the non-painted parts.STEP #7: ReconstructionNow comes the last part You simply reverse your deconstruction to put your AR back together.
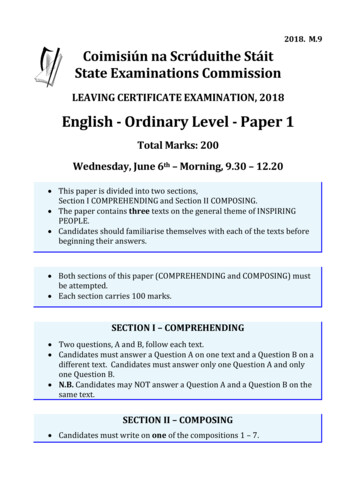
7 Simple DIY Steps To Turn Your AR-15 From Ordinary to Complete Bad AssYRemember to use ALL your screws.Check your AR for any missing screws before you head to the range to showoff yournew look. Here’s how my final, painted AR looks BEFORE:AFTER:
7 Simple DIY Steps To Turn Your AR-15 From Ordinary to Complete Bad AssYI hope you’ve enjoyed this special report.Sincerely,Ehrich WeissPartner, UGARP.S. For an extra custom look, you can stencil out initials on your magazine, along withany other design. Here’s a close-up of my magazine with the initials “LDC.”They’re not my initials.Instead, the initials are in honor of my father-in-law, who served in Vietnam.After being one of just a few of his platoon to make it back safely, he died at the youngage of 58 from cancer brought on by exposure to Agent Orange in the field of battle.God bless our troops – both past and present. And if you’re one of them, thank you forserving our great nation.
7 Simple DIY Steps To Turn Your AR-15 From Ordinary to Complete Bad AssYNotes:ALL RIGHTS RESERVED. No part of this report may be reproduced or transmitted in anyform whatsoever, electronic, or mechanical, including photocopying, recording, or by anyinformational storage or retrieval system without express written, dated and signedpermission from the author.DISCLAIMER AND/OR LEGAL NOTICES:The information presented herein represents the view of the author as of thedate of publication. Because of the rate with which conditions change, theauthor reserves the right to alter and update his opinion based on the newconditions. The report is for informational purposes only. While every attempthas been made to verify the information provided in this report, neither theauthor nor his affiliates/partners assume any responsibility for errors,inaccuracies or omissions. Any slights of people or organizations areunintentional. If advice concerning legal or related matters is needed, theservices of a fully qualified professional should be sought. This report is notintended for use as a source of legal advice. You should be aware of any lawswhich govern the topics discussed herein in your city, country and state. Anyreference to any person or business whether living or dead is purelycoincidental. UGAR LLC 2014 and Beyond
7 Simple DIY Steps To Turn Your AR-15 From Ordinary to Complete Bad Ass Y And best of all, you can do this WITHOUT spending 100s (even 1000s!) taking your gun to a custom paint shop WITHOUT a blast chamber WITHOUT any special painting knowledge And WITHOUT worrying about you rifle eve