Transcription
User’s GuideThe ESA/ESO/NASA Photoshop FITS Liberatorv.2.3
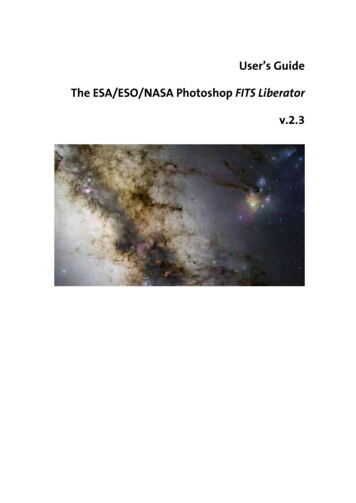
ColophonThis User’s Guide was written by Robert Hurt, Lars Lindberg Christensen, Kaspar K.Nielsen and Teis JohansenThe team behind the ESA/ESO/NASA Photoshop FITS Liberator:Project Lead:Lars Lindberg Christensen (lars@eso.org)Development Lead:Lars Holm NielsenCore Functionality:Kaspar K. NielsenEngine and GUI:Teis JohansenScientific, technical support:Robert HurtTesting:Robert Hurt, Davide de MartinAcknowledgementsFITS is an abbreviation for Flexible Image Transport System. FITS has been a standardsince 1982 and is recognised by the International Astronomical Union.The ESA/ESO/NASA Photoshop FITS Liberator uses NASA’s CFITSIO library, TinyXML,Boost C Libraries, Object Access Library and Intel Threading Building Blocks.Adobe and Photoshop are either registered trademarks or trademarks of AdobeSystems Incorporated in the United States and/or other countries.We kindly ask users to acknowledge the use of this plug-in in publicly accessibleproducts (web, articles, books etc.) with the following statement: This image wascreated with the help of the ESA/ESO/NASA Photoshop FITS Liberator.Cover:This is a 34 by 20-degree wide image of the area near the galactic centre. The image shows the regionspanning the sky from the constellation of Sagittarius (the Archer) to Scorpius (the Scorpion). The verycolourful Rho Ophiuchi and Antares region features prominently to the right, as well as much darker areas,such as the Pipe and Snake Nebulae. The image was obtained by observing with a 10-cm TakahashiFSQ106Ed f/3.6 telescope and a SBIG STL CCD camera, using a NJP160 mount. Images were collected throughthree different filters (B, V and R), “liberated” with the FITS Liberator and then stitched together. This mosaicwas assembled from 52 different sky fields made from about 1200 individual images totalling 200 hoursexposure time, with the final image having a size of 24 403 x 13 973 pixels.Credit: ESO/S. GuisardThis image was created with the help of the ESA/ESO/NASA Photoshop FITS Liberator.
The ESA/ESO/NASA Photoshop FITS Liberator User’s Guide3Table of Contents12Introduction to the FITS Liberator .4Installing the FITS Liberator .72.1FITS Liberator v.2.3 System Requirements .82.2Windows Installation .82.2.1 Installing with the Setup Program .82.2.2 Manual installation under Windows .82.3Mac OS X Installation .92.3.1 Manual installation under Mac OS X .92.4Uninstall information . 103FITS Liberator Basics . 113.1The FITS Liberator Interface . 123.2The FITS Liberator Workflow . 133.3Handling High Dynamic Range Images . 133.3.1 A Quick Example of Stretch Functions . 143.3.2 More about Stretch Functions . 143.3.3 Scaling Images for Better Stretches . 153.4Entering Metadata . 163.5Other Utilities . 183.5.1 FITS Concatenator Script . 183.5.2 Colour composite Action . 183.5.3 Metadata Panels . 184Cookbook Examples . 214.1Step-by-step Image Import . 224.2Making a Colour Composite Image . 225Reference Guide . 245.1Tabs . 275.2Processing Tab: Tools . 275.3Processing Tab: Preview Window. 285.4Processing Tab: Histogram Window. 285.5Processing Tab: Image Data . 285.6Processing Tab: Image Statistics . 295.7Processing Tab: Scaling and Stretch (Advanced) . 295.8Processing Tab: Channels . 315.9Processing Tab: Undefined Values . 325.10 Processing Tab: Other Settings . 325.11 Preferences Dialog. 33A. More about Metadata . 35B. Behind the scenes . 38
The ESA/ESO/NASA Photoshop FITS Liberator User’s Guide41 Introduction to the FITS LiberatorThe Wide Field Camera 3 (WFC3), a new camera aboard the NASA/ESA Hubble Space Telescope, snapped thisimage of the planetary nebula, catalogued as NGC 6302, but more popularly called the Bug Nebula or theButterfly Nebula.Credit: NASA, ESA and the Hubble SM4 ERO Team
The ESA/ESO/NASA Photoshop FITS Liberator User’s Guide5The release of version 2 of the popular ESA/ESO/NASA Photoshop FITS Liberatorimage processing software has meant that it is even easier and faster to createcolour images using raw observations from a range of telescopes, including theNASA/ESA Hubble Space Telescope, NASA’s Spitzer Space Telescope, ESO’s Very LargeTelescope and ESA’s XMM-Newton Telescope.Version 1 of the ESA/ESO/NASA Photoshop FITS Liberator was completed in July 2004by imaging scientists at the European Space Agency, the European SouthernObservatory and NASA. FITS stands for Flexible Image Transport System. This single fileformat archives nearly all images of stars, nebulae and galaxies produced by majortelescopes around the world. Before July 2004 this file format was primarily accessibleto scientists working with highly specialised image processing tools.More than 60,000 laypeople, educators and amateur astronomers have started usingthe Liberator since the release of v.1 in July 2004. The FITS Liberator has also becomethe industry standard for professional imaging scientists at the European SpaceAgency, the European Southern Observatory and NASA.Stunning images such as the iconic Hubble image Pillars of Creation (Figure 1) can becreated in a matter of minutes using version 2 of the FITS Liberator. Versions 2.0, 2.1and 2.2 had several notable improvements over v.1.0:o FITS images with up to 4 billion greyscale levels can be processed (32-bitsupport).o FITS images with up to 500 million pixels or more can be processed (100 timeslarger than standard images from a digital camera).o An improved user interface and a re-designed order of operations simplify theoverall process – for example, the plug-in now remembers previous settings.o New options for advanced Scaling and Stretching to fine tune images foroptimal results.o A whole section dedicated to inputting metadata, i.e. information about theimage and what it shows. Metadata will be an important tool for future effortsto make archives of ‘pretty pictures’ more accessible.o User access to a text version of the original FITS header. Universal Binary forMac allows native CS3 operation on Intel-based systems.o Flip image checkbox allows image orientation to be selected on import.o Root functions (x1/2, x1/3, x1/4, x1/5) now operate antisymmetrically about x 0.o Version 1.1 of the Astronomy Visualization Metadata (AVM) standard is nowfully supported. For more information see http://www.virtualastronomy.orgo The import of coordinate metadata from the FITS header has been improved.Version 2.3 of the FITS Liberator include the following new features:o Full support for Photoshop CS4 (on both Mac and Windows).o Significant performance (speed) enhancement through the usage of multipleCPUs and CPU cores as well as an improved memory management strategy(helpful especially for large images).o Support for planetary images through the PDS image format.o Metadata editing support for Photoshop CS4.o Options has been added including the histogram markers stretched mean,stretched median, peak level and background level.o It is now possible to change the default initial guess between three differentmodes (a specified percentage of the histogram for the black and white levels,the mean /- the standard deviation or the median /- the standard deviation).o The World Coordinate System (WCS) coordinates are now given when the usersweeps the image pixels with the mouse pointer.
The ESA/ESO/NASA Photoshop FITS Liberator User’s GuideFigure 1 Version 2 of the FITS Liberator makes it even easier to create stunning images. The iconic Hubbleimage Pillars of Creation, seen here, can be created in a matter of minutes. The three-colour dataset used tocreate this image can be downloaded from:http://www.spacetelescope.org/projects/fits liberator/eagledata.html.The advantages of using FITS Liberator over professional image processing tools are indicated in the righthand image:1. Added detail in the shadows.2. Increased gamut (colour space, more nuances).3. Slightly better noise characteristics.4. Easier access to advanced cosmetic cleaning tools as demonstrated by the removal of ghosts.6
The ESA/ESO/NASA Photoshop FITS Liberator User’s Guide2 Installing the FITS LiberatorFigure 2 Image of part of a stellar remnant whose explosion was recorded in 185 AD. By studying thisremnant in detail, a team of astronomers was able to solve the mystery of the Milky Way’s super-efficientparticle accelerators. The team shows that the shock wave visible in this area is very efficient at acceleratingparticles and the energy used in this process matches the number of cosmic rays observed on Earth. North istoward the top right and east to the top left. The image is about 6 arc minutes across.Credit: ESO/E. Helder & NASA/Chandra7
The ESA/ESO/NASA Photoshop FITS Liberator User’s Guide2.18FITS Liberator v.2.3 System RequirementsMinimum requirements:o Windows PC (XP, Vista or Windows 7) or Mac (OS X 10.4 );o Screen resolution of 1024 x 768 pixels or better;o Photoshop 7.0 (or later) or Photoshop Elements 2.0 (or later);o Mac: Photoshop CS 3 or CS 4.Limitations by Photoshop version, Photoshop Elements and CS, known issues:o Photoshop CS2, CS3 (32-bit colour depth);o Photoshop CS (16-bit);o Photoshop Elements 3 to Elements 6 (16-bit);o Photoshop 7.0 (only 15-bit colour, and only partial functionality for more than8-bit colour);o Photoshop Elements 2 (only 8-bit colour) (Elements 1.0 NOT supported);o Mac: Only Photoshop CS3 and CS4 are supported.Other limitations:o As the loading process is very I/O intensive, the performance may be decreasedsignificantly when loading FITS files from a network drive. In this case the plugin will show a notification. It is recommended, if possible, to copy files to thelocal hard disk drive before opening them with the FITS Liberator.2.2Windows InstallationThe FITS Liberator can be installed on Windows either by using a setup program ormanually. In both cases, a local administrator must install the plug-in. By default, allusers on Windows XP machines are local administrators.2.2.1 Installing with the Setup ProgramThe recommended way of installing the FITS Liberator on Windows is to use the setupprogram. This will install all the necessary files and optionally register FITS files withPhotoshop.2.2.2 Manual installation under WindowsTo install manually, download the manual installation package and extract the files toa directory. Next, move the files into the correct locations in the file system. Note thatif you are using a version other than CS3 or a localised version of Photoshop the foldernames will differ.FileLocation and exampleFitsLiberator.8bi{Program Files}\{Photoshop}\Plug-Ins\File Formatse.g.:C:\Program Files\Adobe\Adobe Photoshop CS3\Plug-Ins\File Formatsand{Program Files}\{Bridge}\Plug-Inse.g.:C:\Program Files\Adobe\Adobe Bridge CS3\Plug-InsFITS Concatenator.jsx,xmlsax.inc,xmlw3cdom.inc{Program Files}\{Photoshop}\Presets\Scriptse.g.:C:\Program Files\Adobe\Adobe Photoshop CS3\Presets\ScriptsColourComposite.atn{Program Files}\{Photoshop}\Presets\Photoshop Actionse.g.:C:\Program Files\Adobe\Adobe Photoshop CS3\Presets\PhotoshopActionsUserGuide.pdf{Program Files}\Photoshop FITS Liberator
The ESA/ESO/NASA Photoshop FITS Liberator User’s Guide9e.g.:C:\Program Files\Photoshop FITS sher.txt,AVM-6-FITS Liberator.txt{Program Files}\Common Files\Adobe\XMP\Custom File Info Panelse.g.:C:\Program Files\Common Files\Adobe\XMP\Custom File Info nomyVisualization.swfloc/AstronomyVisualization de DE.datAstronomyVisualization en US.datAstronomyVisualization fr FR.datAstronomyVisualization jp JP.dat{Program Files}\Common Files\Adobe\XMP\Custom File InfoPanels\2.0\panelse.g.:C:\Program Files\Common Files\Adobe\XMP\Custom File Info Panels\2.0\panelsImportant: You should create a file named AstronomyVisualization.cfg in {System}\Macromed\Flash\FlashPlayerTrust. For 32-bit Windows {System} is usuallyC:\Windows\System32 whereas for 64-bit Windows {System} is usuallyC:\Windows\SysWOW64. The file must contain the path to location of the CS4 XMPpanels (e.g.: C:\Program Files\Common Files\Adobe\XMP\Custom File Info Panels\2.0\panels\AstronomyVisualization).If there is an additional plug-ins folder, the FitsLiberator.8bi file can be placed in thatfolder instead.2.3Mac OS X InstallationInstalling FITS Liberator on a Mac consists of just a few steps:1. Open the disk image.2. Double-click on the FITS Liberator installer (FITS Liberator.mpkg) and follow thesteps in the installer. Note: Make sure you select the correct destination.3. Double-click the Extras.mpkg file to install the File Info panels and FITSConcatenator script. You may have to select your preferred Photoshopinstallation folder depending on the version you are running.4. Eject and discard the disk image.2.3.1 Manual installation under Mac OS XFileLocation and examplelibtbb.dyliblibtbbmalloc.dylib/usr/libFITS /File Formatse.g.:/Applications/Adobe Photoshop CS4/Plug-Ins/File FormatsFITS /Adobe/Adobe Photoshop s/{Photoshop}/Presets/Photoshop Actionse.g.:/Applications/Adobe/Adobe PhotoshopCS4/Presets/Photoshop Actions
The ESA/ESO/NASA Photoshop FITS Liberator User’s .txt,AVM-6-FITS Liberator.txt/Library/Application Support/Adobe/XMP/Custom File n de DE.datAstronomyVisualization en US.datAstronomyVisualization fr FR.datAstronomyVisualization jp JP.dat/Library/Application Support/Adobe/XMP/Custom File ibrary/Application Support/Macromedia/FlashPlayerTrust2.410Uninstall informationOn Windows go to Control Panels - Add or Remove Programs - Remove PhotoshopFITS Liberator 2.3. A manual de-installation can be done by removing the files in the listunder 2.2.2 above.On Mac remove the files in the manual installation list above.
The ESA/ESO/NASA Photoshop FITS Liberator User’s Guide113 FITS Liberator BasicsFigure 3 This image is a blend of the Galaxy Evolution Explorer's M33 image and another taken by NASA'sSpitzer Space Telescope. M33, one of our closest galactic neighbors, is about 2.9 million light-years away inthe constellation Triangulum, part of what's known as our Local Group of galaxies.Credit: NASA/JPL-Caltech
The ESA/ESO/NASA Photoshop FITS Liberator User’s Guide3.112The FITS Liberator InterfaceThe FITS Liberator acts as an import filter for Photoshop, presenting the user with aninteractive interface for adjusting the import settings. It can be thought of as a“Camera RAW” plug-in for astronomical data as the general philosophy is the same:raw data from digital detectors, in cameras or telescopes, need some special processingbefore they can be used in Photoshop.The FITS Liberator has four sections accessed by the four tabs along the top of itswindow. The Processing tab contains all of the image import settings. The Metadatatab allows users to enter descriptive information that will be embedded into theimage. The FITS Header tab allows users to view the contents of the header of theimage. The Help Guide provides a short introduction and usage instructions.Figure 4 The Liberator’s Graphical User Interface. A more detailed overview can be seen in Figure 11. Credit:ESA, ESO & NASA.The Processing tab in the Liberator interface (Figure 4) holds all the settings the userneeds to adjust for image import. The interface is laid out in seven main areas:Preview Window (1): This shows what the image will look like given the currentimport settings. It is possible to zoom and pan to focus on specific areas of interest in alarge image.Histogram Window (2): This shows the displayed brightness distribution of pixels inthe image. This can be helpful in identifying Background and Peak levels. Thehistogram updates as the user changes the Stretch functions. Black and White levelscan be set by sliders under the window or from the text entry boxes below. It ispossible to zoom and pan the histogram to expand areas of interest or to moreprecisely set black and white levels.
The ESA/ESO/NASA Photoshop FITS Liberator User’s Guide13Tools (3): These tools allow the user to manipulate the Preview and Histogramwindows interactively. The eyedropper tools set levels by sampling the image.Image Statistics (4): Various numerical statistics about the whole image are displayedin these boxes. The upper area gives the values underneath the cursor in the previewwindow.Scaling and Stretch (5): These settings allow the user to adjust the image by applyinga variety of mathematical functions to the FITS data before it is displayed. This isnecessary to bring out faint details in images with a high dynamic range.Image Import Settings (6): Here the user selects the desired format of the importedimage. This includes the bit-depth (number of bits of greyscale information in eachpixel) and transparency settings for pixels tagged as “blank” in the FITS data.Preference Settings (7): The user may set these toggles to customise various aspectsof the interface including clipping warnings and numeric display settings. It is alsopossible to adjust whether an image is flipped for the import and if the import settingsshould be “frozen” for subsequent images.NOTE: The FITS Liberator has a number of editable text fields in the main panel andpreference windows. Note that for new values to be accepted into the field the usermust either hit the TAB or ENTER keys (in the preferences window, use TAB; ENTER willaccept changes and close the window). Entering a number into a field and simplyclicking “OK” will not retain the new value.3.2The FITS Liberator WorkflowThe basic sequence of steps for importing an image is (numbers refer to Fig. 4):1. Examine the image as rendered in the Preview window (1).2. Adjust the Black and White level sliders (under the Histogram (2)) to show thefull range of the image.3. If the image is too dark, click Auto Scaling and apply a Stretch function (5) toexpand the dynamic range. Note that increasing the Scaled peak Levelafterwards will increase the Stretch level (for Stretch functions such as ArcSinhand Log)4. If desired, go to the Metadata tab and enter contextual information about theimage.5. Click OK to import when satisfied with the image preview and metadata entry.A complete overview of all the Liberator controls can be found in Chapter 5.3.3Handling High Dynamic Range ImagesOften astronomical images have a very high dynamic range, or many greyscale levels.This means that the brightest areas of interest — for instance the core of a galaxy —may be many thousands (or even millions) of times brighter than the fainteststructures in the image — for instance a faint nebula at the edge of the image.However, on a computer screen, one only can see 256 levels of brightness (8-bitgreyscale). If the original high dynamic range image is imported directly intoPhotoshop using simple linear scaling, either the detail in the fainter structures is lostin the black background, or the brightest objects over-saturate (or burn in).
The ESA/ESO/NASA Photoshop FITS Liberator User’s Guide14Photoshop can partially compensate for this by applying Levels or Curvestransformations after the FITS image has been imported. However, an image that hasbeen reduced to 8 bits can only be adjusted a little bit before it begins to “posterize”,showing discrete steps in brightness that obscure low-level features. Even extremeCurve adjustments cannot bring out the faintest detail in some of these images. Theanswer is to apply Scaling and Stretch (5) before importing, as described below.Figure 5 Astronomical images contain many more greyscale levels than can be viewed on a computermonitor or printed. In the image to the left a “normal” or linear representation of the image is shown. To theright the effect of a non-linear Stretch, a Logarithmic Stretch, is shown. By using a non-linear Stretch it ispossible to enhance some greyscale levels in the image more than others and so to make faint details visiblewithout saturating the brighter parts of the image.3.3.1 A Quick Example of Stretch FunctionsWhile there are a lot of potentially confusing elements in the Scaling and Stretch (5)section, the process can actually be quite quick and easy. To begin, select a FITS file thathas a lot of dynamic range (galaxies are often good for this) and open it in the FITSLiberator. Now try the following:ooooooUse the sliders in the Histogram (2) to adjust the levels to show the full range ofthe image. Enabling the White and Black clipping checkboxes on the right (7)can help to make sure that nothing of interest is lost.Click the Auto Scaling button (5). The histogram settings have now been copiedover to the Background and Peak levels. The Scaled peak level has been set to adefault of 10.Choose x (1/2) from the Stretch functions pop-up. Notice how much brighterthe faint features have become.Try out the other Root functions: x (1/3), x (1/4), x (1/5). Notice how eachsuccessive one brings the faint features up even more — probably too much!Now choose ArcSinh(x) from the Stretch functions pop-up. The image will get abit darker.Increase the Scaled peak level to 100, then 1000, and finally 10,000. Notice thatagain the faint features are brought up more at each step.These basic steps cover most of the practical information one needs to know aboutusing Stretch functions and adjusting them to the needs of a specific image. Thedetails, however, must be covered as well.3.3.2 More about Stretch FunctionsThe FITS Liberator can easily handle high dynamic range images by allowing the user toapply a Stretch function to the data before it is rendered as an image. The settings inthe Scaling and Stretch section (5) offer all the flexibility needed to render all thedetails in any image quickly.
The ESA/ESO/NASA Photoshop FITS Liberator User’s Guide15The user has a choice of a variety of mathematical functions in the Stretch functionpop-up menu. The inverse hyperbolic sine (ArcSinh) and Root Functions (x1/2 [squareroot], x1/3, x1/4, etc.) are the most commonly used, but others including the logarithm(Log) and compound functions are available as well. The chosen function will beapplied to the FITS data before it is converted to greyscale. In some ways this mimicsthe perceptual ability of the human eye, which can accommodate to perceivedramatically different levels of brightness simultaneously.Note that ArcSinh is generally preferred over Log. The two have very similar effects onthe image, but ArcSinh is well behaved and symmetric around zero. Log, however,“blows up” at zero and can be harder to use effectively.Each Stretch function affects the rendering of a high dynamic range differently. Theuser may find that different functions are preferred for different images. Since theeffects are difficult to predict, it is best to experiment with different functions onseveral images and to observe the results.The Linear Stretch function applies no transformation at all to the dynamic range ofthe image.3.3.3 Scaling Images for Better StretchesThe Stretch functions work best when an image is properly scaled. All of them benefitwhen the “black” part of the image is numerically equal to zero, and some functionsproduce different effects if the overall scaling of the image is changed. The threenumeric settings in the Scaling and Stretch (5) section allow the user to modify thevalues of the source FITS data as needed.oooBackground level: numeric value of the noise level in the original image. Thisnumber will be subtracted from the data before the stretch function is applied.Peak level: numeric value of the brightest sources of interest.Scaled peak level: target value for the brightest sources before applying theStretch function. This affects the dynamic range of the ArcSinh and Logfunctions.Setting the background level is critical for all of the Stretch functions. While some FITSimages may already have been processed so their Background levels equal zero, otherscommonly have offsets. If not removed, these offsets can make it impossible to recoverfaint details. The FITS Liberator will subtract the value of the Background level from thedata before applying the Stretch function.For Root functions, the Background level is the only setting that affects the results.ArcSinh and the related Log function, however, depend on the overall scaling of thedata as well. These two families of Stretch functions, Root and ArcSinh, compress thedynamic range in different ways. To increase the dynamic range compression for thetwo cases:ooRoots: Choose higher order Root Stretch functions from the pop-up menu.ArcSinh/Log: Increase the value of Scaled peak level.To set the image scaling for the ArcSinh function, the Peak level should be set to thenumeric value of the brightest areas of interest in the image. The Scaled peak level canbe adjusted to different values to fine tune the overall appearance. In general, uselarger Scaled peak values to bring out fainter details.
The ESA/ESO/NASA Photoshop FITS Liberator User’s Guide16To scale an image quickly, set the Black and White level sliders in the Histogram (2) tothe desired levels and click Auto Scaling in the Scaling and Stretch (5) section to copythose settings over to the Background and Peak levels. The Scaled peak level defaults to10, which has a very mild stretch effect, but the default value can be changed in theuser preferences. Increasing this number to higher values (100, 1000, etc.) will yieldstronger effects. The image below (Figure 6) demonstrates the effect of differentStretch functions and different values of the Scaled peak level.Figure 6 The range of available FITS Liberator Stretch functions are shown here. The top two rows show allthe Stretch functions, in approximate order of their effect. Image Scaling is constant for all of these, with theWhite level of the galaxy nucleus set to 10. The bottom row shows the effect of changing the Peak Scalingwhile using Log(x), ( functionally equivalent to ArcSinh(x) in this example). Note that this single functionallows a faint structure to be enhanced smoothly. The Root functions are not affected by Scaling, but thecompound functions, which use Log or ArcSinh terms, do depend on it.3.4Entering Metadata
The ESA/ESO/NASA Photoshop FITS Liberator User’s Guide 6 Figure 1 Version 2 of the FITS Liberator makes it even easier to create stunning images. The iconic Hubble image Pillars of Creation, seen here, can be create


