Transcription
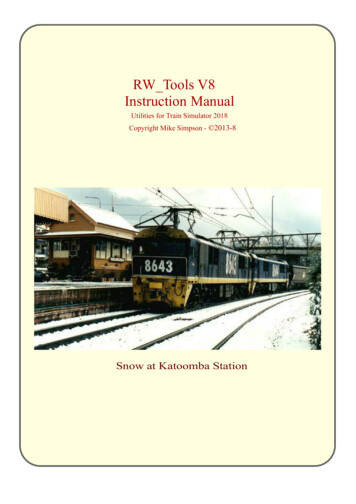
RW Tools V8Instruction ManualUtilities for Train Simulator 2018Copyright Mike Simpson - 2013-8Snow at Katoomba Station
RW Tools - Introduction.RW Tools is a suite of utilities which allow users of TS-2018 to edit many of the simulator's files in a mannerwhich is not possible using the utilities supplied with that program.This program was originally written to provide file editing and re-skinning abilities to Rail Simulator beforethe official Development Tools were released in November 2007. Unfortunately, there appear to be someglaring omissions in the official tools (Still no easy means of reading .bin files etc., so I decided to keep onadding bits to the Editor. - Now that Rail Works has been replaced with TS-2018, the saga continues )As few details of file formats have been released, this program has been developed from experience gainedwith the Microsoft Train Simulator utilities (Route Riter) which I wrote. Users should be extremely carefulwhen using this programs to edit their files and you should have made backups of all of your Assets andContent folders before you even start. The editor does however make backups of all edited files with '.bak',.bak1 etc suffixes.This program is entirely unofficial and has nothing whatsoever to do with DTG. However they did give meaccess to the TS-2018 Beta program and most things I have tested in this version still work OK. Noresponsibility is given for any errors which occur if you use this program, you do so entirely at your own risk.If you don’t agree with this, then please uninstall RW Tools from your PC.Credits:1. The texture file viewer in this program was made possible by the use of Martin Wright's mwgfx.dllpackage, without which it would not have existed. MSTS users will know Martin as the author ofTGATools2a which is included with my Route Riter program and as a major force in utilities for FlightSimulator.2. Many of the ideas for adding suffixes to the names of rolling-stock items to enable changes to be made toexisting wagons/locos, such as providing versions of locos with no drivers, adding headlights to steam locosetc and for providing a Scenario Packager which will automatically create subsets of Locos and Wagons foruse in a scenario from existing rolling stock came from Russell Westwood in South Africa. Russell has alsoextensively tested many of the features.3. Many thanks to Dave Brindley for permission to include his UK headlamps & taillamp models for use inadding lights to UK Steam era trains. And to Stefan Schmidt for the German taillamps.4. Mike Hammett has allowed me to produce thumbnail versions of all the pictures of Assets in his fine‘Railworks Pictorial Asset Library’ which is available in full from uktrainsim.com - These form the backboneof the Thumbnails in the asset viewer in this version of the program. Many thanks to Mike.Note: RW Tools is now freeware , a license is no longer required, although donations will still beaccepted if users are so inclined.Note2: Although most options in RW Tools do make backups of files which are changed. I highlyrecommend that anyone using this program makes a FULL backup of the TS-2018 folder on a USBexternal drive or spare hard-drive to avoid angst if things go wrong. YOU HAVE BEEN WARNED.Please advise me of any bugs, problems, suggestions etc. I will try to update the program as often as possibleon my site at www.rstools.info you can also see my forum athttp://forums.uktrainsim.com/viewforum.php?f 315Mike Simpson - 29 Jul 2018 - virtualtrains@tpg.com.au
Running the program - First timeBefore you can use this program, you must go to the Options Menu and set up several ‘Paths’ so that theprogram knows where to find the files it is to work on.TS-2018 Path - Most importantly you must set up the path to your TS-2018 files. Usually by default this willbe c:\Program Files\steam\steamapps\common\railworks but can of course be anywhere. Once you have setthis path, the files Serz.exe, stlport vc10.5.2.dll and zlibwapi.dll will be automatically copied from TS-2018into the RW Tools folder. (If you get serz.exe error messages, manually copying these files should fix it).Viewer Path - Although RW Tools now includes a built in texture viewer, you may also wish to set up aviewer to look at .dds files. Irfanview with a .dds plugin is a suitable one.Texture Editor Path - To re-skin models, you must set up the path to a paint program suitable for Editing.DDS files (Paint Shop Pro and Adobe Photoshop are suitable if you download the .dds plug-in fromNvidia.com. Paint.Net should also work).Make all RW files read/write- Because on some systems the filesare installed as Read Only and as such cannot be edited by theuser. If you receive an Error 75 while using RW Tools, this may bean indication that there are some Read Only files which RW Toolsis trying to write to or to back up. (But see the comments below reWindows 7/8 requiring Administrators rights)PDF Reader Path - As this Help File is in .PDF format, youshould also set a path to your Acrobat or similar PDF reader fromthis menu.Clear the Screen and Clear Temp Files . Clear the Screen justremoves any text from the editor screen. While Clear Temp Filescleans out the RW Tools\TempFiles folder of any temporaryfiles the program has placed there while processing certainoptions (this option is usually called by the programautomatically whenever the folder is accessed, but might be neededif you exit the program in the middle of a process.)Select Language - If you wish to use a foreign language versionof RW Tools select it here.Don’t Ask on Closing Down By default RW Tools asks if youreally do want to close the program when you click on Exit or onthe Windows close button. If this annoys you, select this option andRW Tools will close immediately.View all Paths Displays all paths chosen above.Start with Editor maximised - by default the program starts withthe editor screen the same size as it was when you closed down, butsome users like to keep it maximised, you can do so here.Warn if Edit not saved - If you open/alter a document in theeditor, this option will warn you if you have not saved it.PreLoad Folder - If you wish to make your own Quick DriveConsists, then you need a PreLoad folder to keep them in, thisOption points to where your PreLoad folder is.
Vista & Windows 7 /8.1/10 UsersRW Tools can change files in the Program Files or Program Files (x86) folder on your PC, so must beinstalled and run with Administrators rights.1. Right click the installation program and select ‘Run as Administrator’ when first installing theprogram.2. Right click ‘RW Tools.exe’ once installed and select Properties/Compatability and tick the box to‘Always run program as administrator’ then it will always run as administrator and no further actionis required.Editing .bin FilesMany of the files used by TS-2018 have a .bin suffix. These files are compressed, but can be modified toeditable .xml files by use of the file SERZ.exe which is included with TS-2018. RW Tools makes use of thisfile to modify selected .bin files to .xml without the user needing to open a CLI window and enter difficulttext stringsTo open a .bin/.GeoPcDx or .XSec file, go to theFile Menu and click on 'Open TS-2018 File' When you select the file, it is converted by theserz.exe utility to an .xml file and displayed in theEditor. The text can then be edited, and you caneither save the .xml file by clicking the Save Asbutton, or save it back to its original TS-2018location by clicking the 'Save TS-2018 File' menuoption. When you save as a TS-2018 file, the originalTS-2018 file is backed up by adding .bak or .bak1 etcto thefilename so that a series of backup files (up to amaximum of 50) are available.The .xml text may be Hi lighted by clicking on theHighlightXML button. (However on a long file thismay take a long time).Open 2nd Window - This new option allows you to open a 2nd window in the editor below the existing one,thus allowing you to view 2 files at once for comparison or cut/paste purposes. When you select this optionthe menu changes to ‘Close 2nd Window’ and an option to ‘Open 2nd .bin’ file appears.Open 2nd .bin file - Allows you to open a 2nd .bin (or .geopcdx) file in the bottom window and copy/pastetext from the bottom to the top file (you can’t edit the bottom file) - If the 2 files are similar (e.g. differentversions of the same file), clicking on a line in the top file will position the bottom file to the same line.Editing .GeoPcDx FilesThese are the equivalent of MSTS shape files, and may be opened and viewed in the editor with this option.The files may then be saved back again as with .bin files above. Once again, backups are produced.Note: In earlier versions, some .GeoPcDx files have proved to be impossible to re-save in their .GeoPcDx formatbecause Serz.exe gave an error while trying to convert the .xml file to its binary format. - These included mostlocomotive files. However in TS-2018 the new version of Serz.exe provided appears to open most .GeoPcDxfiles and can also resave them, so this limitation is no longer apparent.BackupsI have removed the Backup options from this program as better results are gained by downloading theMicrosoft program SyncToy 2.1 from the Microsoft site. Or using other commercial backup programs
RW Tools and .ap FilesSince TS2014, RSC have started packing many Routes and Asset packs in a type of .zip file with .ap suffix.Each of these packed folders contains all the files a route or locomotive etc needs to run in TS-2018.Unfortunately, they have rendered many of the original options in RW Tools unusable. With routes/assets sopackaged, it is no longer possible to check routes for missing items, edit locomotive .bin files, re-skin rollingstock, or swap rolling stock in scenarios.Fortunately, these .ap files can be unpacked using the command line version of 7zip packaged withRW Tools, once the .ap files are unpacked, the contents can be used as before. Please note that doing this willDOUBLE the size of your assets folder as the .ap file must remain so that Steam can carry out its upgrades,and if there are Steam upgrades, then the new .ap file will have to be unpacked to get hold of any new contentsbut take care if you have modified your files as any new files will be overwritten during the unpack process,but see below.Find all .ap filesAs the name suggests, this option searches your Assets folder for any/all .ap files therein. This may take a littletime as there are a lot of files to check through. Once the files are found, a list like the following appears, yourlist will be somewhat different as this list includes some home-made files to test the system.As can be seen above, the list contains packages of both Assets(rolling stock etc) and Content(routes etc).New files will display in Red.If you wish to see what is in a particular pack, click on the .ap file to select it and click the ‘Unpack Selected.ap files’ button. This will display ALL of the files contained within any particular .ap file. If you just want toaccess 1 particular file within the package, you can go to the Extract Files/Extract Selected menu and this willextract the chosen items.Alternatively you may wish to extract all the files, this can be done using the option ‘Extract All’ which willplace the extracted files into a folder of your choice, or ‘Extract all to same folder as .ap’ which will establishthe complete folder tree as you would have seen under TS2013 and place all of the files so that they are nowvisible from RW Tools as in the past.
Unpack with 7zipAs a faster alternative to the above, you may select as many .ap files as you wish in the list of .ap files andclick on ‘Unpack with 7zip’ this then gives you a list of alternative unpack methods you can use as can beseen below.1. Unpack .ap files to a new folder - this places thefolder tree in a folder away from your Assets folderand may be useful if you don’t wish to overwriteModified files, you could unpack to a spare folderand check for changed files.2. Unpack .ap files to same folder as the .ap (firsttime unpack) - Use this if your folder only containsthe .ap file as it fails if there are existing files in theFolder tree.3. Unpack .ap overwriting all destination files if theyexist - Use this if you have no modified files in theexternal folder tree - it will unpack all files includingupdated ones and update your whole folder tree.4. Unpack .ap skipping any files which already exist - This will only unpack new files in the .ap - and willNOT unpack new versions of files you already have.5. Unpack .ap appending number to any NEW file which already exists - Probably not much use as it adds anumeric suffix, e.g. Scotsman 1.bin to the new version if Scotsman.bin already exists - OK if it was a smallarchive, but if you have thousands of files in the tree, a lot of work 6. Unpack .ap renaming existing files by adding a number - This unpacks all of the new files and keeps the oldones but renames them by adding a numeric suffix as in 5 above.
Editing .xml/.cost etc filesThe .xml/.cost/.tgt files are all uncompressed text files (in .xml format), these canbe Opened/Saved by using the appropriate menus. The .cost and .tgt files should not be changed as they areproduced automatically and for all practical purposes may be deleted as they are not used in the game and justtake up disk space.Using the XML ViewerAs there are several differences in the way which TS-2018 and its tools parse .xml files compared with theway Microsoft handles these, I have changed RW Tools so rather than having an XML editor, it only has anXML viewer with which you can inspect the files in a tree view, but not change them. The original .xmleditor did not save .xml files correctly if they contained accented letters and certain other features. I have notfound a way around this yet, so if you wish to edit the files, you must use the normal RW Tools editor.However, it can be useful to view the XML files in TreeView mode, so the XML viewer is included forexperienced users. The illustration below shows the contents of a Scenario.bin file in TreeView mode.You can search for Nodes in theTreeView by using the Search boxand clicking the Find option - Thiswill hilight the first item found andask if this is the one you arelooking for, you should then clickYes or Continue.
BackupsThere are options on the file menu which allow you to Backup TS-2018 files in the Assets/Contents/Sourceand root folders of TS-2018. Once you have a backup, you may then use the ‘Incremental Backup’ option tobackup only those files which have changed since the last backup.However, I prefer to use the Microsoft Synctoy v2.1 program available from Microsoft on line withoutcharge. This allows you to set up daily or weekly backups of any folders you wish and when combined withthe Scheduler to do this automatically. This saves you having to remember to do any backups.Route Builders backups - Route builders need to back up the route they are building on a daily or weeklybasis. To accommodate these people, I have put a stand-alone program on my site athttp://www.rstools.info/downloads/Route Backup.zip - this archive contains full instructions and backs upyour route under construction on a daily or weekly basis to for instance a USB drive. Each backup is placedinto a separate dated folder, so you can always revert to an earlier version if you have a catastrophe.Editing Texture FilesTo open a texture file, go to the Files Menu and click the 'Open Texture File' option and select a texture file( .TgPcDx suffix ). The texture file will be converted to an .xml file and appear in the editor as an .xml file DO NOT ATTEMPT TO EDIT THIS FILE MANUALLYRW Tools has a built in image viewer, you can view the image of the .TgPcDx file you have just loadedby clicking the 'Show Image' button.
To edit the Texture, it must now be converted to a .dds format file by going to the Graphics Tools menu andselecting 'Convert .TgPcDx to .dds'The converted texture file will be placed in your RW Tools\TempDDS folder and will have thesame filename as the original texture, but will have a .dds suffix. Once it is converted, youwill receive a message like the following which tells you the type of .dds file it is and the number of MipMaps, you should note these down as they are required when you come to save your edited texturein your Paint program.You can now either view this .dds file, or open it a Paint program for editing by selecting the appropriatemenu option. Alternatively if you need to save memory, the editor can be closed at this time and the textureedited in your Paint program. (If possible, keep RW Tools open while re-skinning the file as the it savesthe details of the texture in a .dat file in the TempDDS folder so that the texture can be re-exported back toTS-2018 at a later date, so it is safer to keep RW Tools open so that the .dat file is not unintentionallyerased).Once you have edited your texture file, you must save it in EXACTLY the same format as the originaltexture file or you will not be able to re-export it back to TS-2018. You must also save it with the samefilename back into the TempDDS folder (when you click Save in your Paint program, you should get arequester as follows):-
Clicking on 'Yes' then 'Save' will bring up a requester similar to the following (Depending upon your paintprogram, this is the Nvidia .dds plug-in for Paint Shop Pro or Adobe Photoshop, other programs havesimilar requesters):-You must select the .dds type in the top box(usually DXT1 or DXT3 ARGB, or may be8.8.8 or A 8.8.8.8), also make surethe Generate MIP maps is selected and thatthe number in the box is the same as younoted above under the Convert Menu. Leavethe other items at their default and clickSave. The .dds file in your TempDDS foldershould now be the modified one. You cancheck it by using your Viewer program.Converting the texture back to TS-2018 formatGo to the Graphics Tools menu and select the 'Convert .dds to TS-2018 format' option and select your new.dds file in the TempFiles folder. You will be told that you are about to replace the original .TgPcDx filewith a modified version and that a backup will be made. Click OK to proceed.Important Note:With TS-2018, some developers have started using a new texture format namedHC IMAGE FORMAT COMPRESSED INTERP ALPHARW Tools can open these files and send them to external paint programs such as Adobe Photoshop andPaint Shop Pro as .dds files, however they can’t be viewed in the RW Tools image viewer.Using the new Serz.exe, textures up to 4096*4096 can now be opened/saved with RW Tools, the earliersize limitations are no longer valid.
TgPcDx/DDS ViewerRW Tools now includes a built in viewer for TS-2018 texture files, just click this option in the Tools menuand it will bring up a simple file viewer. The viewer will display .TgPcDx, .dds, .tga and .png files.Convert RW time to hrs/minsThis option allows you to convert 'Time' entries in the .bin files to Hours and Minutes. Times in the RWfiles are 5 figure groups indicating the number of seconds after midnight. e.g. 53427 is the equivalent of1550 in 24 hour times or 3:50pmNote Re Files:You may set up any of the RW files in Windows Explorer or utilities like Directory-Opus to openautomatically in RW Tools by making this program their default opening tool.Route Building Tools Menu
Checking a RouteSelect a route by clicking on it, then you will see several options you can use on the selected route, e.g. click the'Delete Selected Route' to get rid of all traces of your route. You may of course use this option to see which folderholds a particular route, then click the Exit button to leave the screen without making any alterations.When you run the 'Check Selected Route' option, you will get a report showing missing Assets in your route.After which you can also check for missing Textures etc. On the missing Assets report, there is now an optionbutton to allow you to substitute missing Assets with those you already have, see 'Substitute Missing Items'.From this screen, when you select a route, it will list all the Scenarios associated with it. If you have beenexperimenting with Scenarios which do not work, you may select them here and click the Delete SelectedScenario button to remove them.Checking Scenarios for missing Rolling-StockSelect a Scenario and click the 'List Stock used by selected Scenario' button and after the process runs you will geta screen listing all rolling-stock used by the scenario. When you first view this screen, you may notice manyduplicate wagons etc (it lists each wagon and loco found), click the Remove duplicates to cleanthis up. If you click the Check for Missing Stock button, a list of Missing Stock will appear. Clicking on Reportwill produce this screen in a printable format with Print and Save buttons so that you can save the report.Clone RouteRather than make modifications to existing routes, it is recommended that you make a copy of the original routeand change it. Then if file changes are made to the original route by the Steam download system, your ownmodifications will not be overwritten.To Clone any route, just select it in the top window and click the ‘Clone Route’ button. This brings up a boxasking for the new name of the route, Here I have just made a copy of the Hagen to Siegen route by adding #2 tothe route name. Click OK and a CLI window will open and the files will be copied across. Next time you runTS-2018, you will find your new route listed.Clone Selected ScenarioSame as for Clone Route above, this will clone any selected scenario with a new name. The modified scenariowill not then be affected by ‘Steam’ updates to the original route/scenario but will maintain any changes you havemade to the scenario.
Substitute Missing ItemsOnce you have run the Check Selected Route option, you will get a report screen which now includes a'Substitute Missing Items' button. To do this, click the 'Remove duplicates' button so that you just get a list ofunique missing items. Highlight those you wish to substitute (remembering that if you substitute an Asset, itmust be with something similar, swapping a shed with a factory will cause some problems, especially if nearthe track.)The Substitute for a missing Asset form will be displayed with the top portion filled in for the first itemselected. Click the '.' Button and select the item you wish to substitute for it as under.Click OK and the item will be substituted. Once the data is saved, the above form will appear again for the2nd selected item and so on until all the items have been substituted.Close everything and check your route again, this time it should show no missing Assets.Substituting/Deleting Existing ItemsFirst select the route, then click the Substitute Asset button. Select the item to remove in the top box byclicking the '.' button and select the item to replace it with in the bottom half of the screen. Click OKTo delete all instances of an item, select it in the top half of the box and leave the bottom half blank,Click OK and all will be done. This is especially useful for removing Gantries from electrified routes etc.
Miscellaneous Items on the Select Route Screen.There are now a number of Miscellaneous buttons on this screen which are mainly self explanatory.1. Show Location of all Assets - Produces a list of assets as in the Check Route option, but also displays thetile they are located on.2. Raise or Lower Track - Some 3rd party track has higher/lower profile than standard track, this enablesyou to raise/lower ALL the track in a route by a few cms if you have changed the track.3. Package this Routes Assets - Mainly for route builders to pack all assets to send to beta testers.4. View route details - Displays internal details of a route such as Template used, weather used etc5. Check Scenario Properties - Checks the validity of the ScenarioProperties.xml files for each route.6. List Stock used with wagon numbers - Select a scenario and click this button to produce a list of all stockused in the scenario and the wagon numbers used by each item.7. List Stock used by all scenarios - Gives a list of all stock used by all scenarios in the selected route.8. Print list of all Routes and Scenarios - produces a complete list of every route installed along with all ofits scenarios.9. List ALL rolling stock used by all routes - Lists all rolling stock currently in use.10. View Route Details - Displays items like Route Name, Sky, Weather and Terrain files it uses andLat/Long of the start of the route.Miscellaneous MenuA. Remove terrain textures - will remove all terrain textures in the selected route and replace them with thedefault grass texture. Really only of use to route builders who decide to use a new texture set for their route.B. Make Asset folder also for route builders who wish to build a folder including just those Assets used bytheir route, e.g. for sending to a tester.Reports MenuThe Reports Menu allows you to view the various reports which you may have saved into theRW Tools\Reports folder. These may be in .txt, .csv or Excel format.
Set Up Developer FoldersThe RailSim 3rd Party Developer & Product Setup file advises users to set up a Developers folder in theTS-2018 Source folder. This option will help you to automate this procedure using correct folder names asoutlined in the above document.This option has changed in RW Tools v6 and all you need do is to enter your ‘Provider Name’ - often justyour own name, and your ‘Product Name’ - These are the equivalent of say RSC/BrightonMainLine in theAssets folder.Clicking on Process will set up full folder trees with your selected name in both the Assets and the Sourcefolders of TS-2018.These names should preferably not include any spaces or accented letters.Edit ProvidersThis option allows you to see which providers/products are selected for your route and allows you to addextra Providers, or delete any which are not actually used e.g. A route author might add a lot of providerswhile planning the route, but not actually use any of their assets in the final build. This option incombination with the Check Route list of Assets allows you to remove Providers/Products not actually usedbut listed in the RouteProperties.xml file.Clicking ‘Hide unused’ then Print allows you to print a list of providers used by your route.
Direct Route SetupThe Route Building Tools menu now includes 'Direct Route Setup' this allows you to prepare a newRoute Template without having to use the Blueprint Editor at all.1. Click this menu item.2. Tick the route location (by continent)3. Enter your Provider Name, e.g. Fred Bloggs4. Enter your Product Name e.g. MyRoutes5. Enter Longitude and Latitude of the starting point of the route6. Enter the Route Template Name e.g. your route name followed by ‘ Template’7. Tick the boxes for Era and type of terrain (you can have multiple terrain entries)8. Select your default Spring, Summer, Autumn and Winter skies9. Weather10. TerrainThe ‘ .’ Boxes will take you to the default weather/sky/terrain folders, but you can navigate to others ifyou wish to add non-default environments to your Route Template .11. Click Build Template - Your Route Template will be made automatically and when you run TS-2018 itwill be available in the list of Route Templates when you select to build a New Route
Starting a New Route using RW ToolsBefore you can start building your own routes in TS-2018, you need to set up your own Developerstructure of folders in TS-2018 where your work will be held.The TS-2018 Wiki describes how your work should be set up and recommends a folder structure to holdyour work and which you should abide by. This involves you setting up about 30 folders and sub-folders inthe RailWorks\Source folder and the same in your Assets folder. It is much easier to have RW Tools do thisfor you as it only involves your typing two words and clicking a couple of buttons - see above for details.Starting a New RouteThere are several ways to start off your new route like using an existing template from TS-2018, but these arelimited in their use.The second method is to set up your own Route Blueprint using the Blueprint editor, however for a beginnerthis is daunting to say the least and involves filling in a lot of boxes, the meaning of which can be veryconfusing to those who have not delved into the midst of such esoteric documents.To save users having any such problems, I have now added an option to my Route Building Tools menunamed Direct Route Setup which produces an individualised template for your route and which onlyrequires you to fill in a few boxes all of which are quite clear as to what is required:-Once all of the boxes are completed, click on ‘Build Template’ and the template will be placed in the selectedfolder, e.g. in the above example, Assets\MikeSimpson\OzRoute - You can then run TS-2018 and selectBuild/New Route - this brings up a list of templates on your PC, select the one required, ‘OzRoute Template’in the above example, give your route a name and click ‘Create’ and the basic route will be created for you.At this stage, you can select your new route from the list of routes and click on Edit to start placing yourscenery, tracks etc.
Marker FilesOnce you have your basic route set up, if you are building a real world route, you will need to set up someMarker files to make track laying easy.RW has two types of marker files, Named (which show the name of points on the route such as stations etc),and Series which draw a line across the terrain allowing you to accurately lay track.You can use Google Earth to produce .kml files for either of the above types of markers, or you can use aGPS such as Magellan which can produce waypoint (.wpt) files, or you may already have MSTS .mkr files Which ever you choose, RW Tools can convert them to the .dcsv and .bin files required
PDF Reader Path - As this Help File is in .PDF format, you should also set a path to your Acrobat or similar PDF reader from this menu. Clear the Screen and Clear Temp Files . Clear the Screen just removes any text from the editor screen. While Clear Temp Files
