Transcription
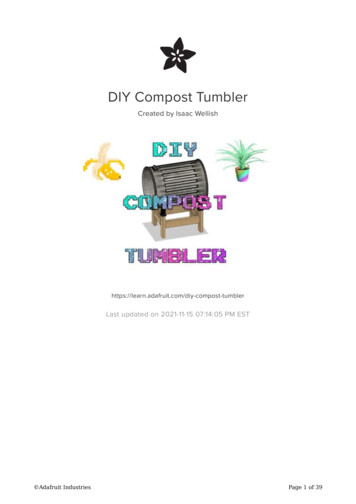
DIY Compost TumblerCreated by Isaac lerLast updated on 2021-11-15 07:14:05 PM EST Adafruit IndustriesPage 1 of 39
Table of ContentsOverview3 Project Parts So a tumbler sounds cool and all, but why do we even want to compost in the first place?35Why Compost?5 What does that mean for planet earth? Lots of wasted food lots of methane bad for Planet Earth WE CAN COMPOST!667What is Composting?7 What Can Go in the Compost Bin? "Aerobic" Composting What to do with Finished Compost?889Turning Compost10 The DIY Solution11Design11 Fusion 360 Overview11Wooden Parts13 Legs Appearance The Leg Connectors1414161618Other Parts18 Caster Wheels Compost Can191920Assembly21 Our gorgeous rendering:27Build27Measuring and Cutting Parts28Connecting the Parts29 The Dowel MethodThe Doweling JigRinse, RepeatUsing Wood GlueWheelsOptimize Adafruit Industries293436373839Page 2 of 39
OverviewIn this tutorial we will be getting down and dirty by chopping up some wood andinstalling some wheels to make a cheap, simple and efficient compost tumbler (https://adafru.it/BG5).For those that compost "aerobically (https://adafru.it/BG6)", a tumbler is a great way to"aerate" your compost without having to physically turn the compost itself.The tumbler works with most compost barrels or trash cans and can easily beintegrated into your current compost set up. If you don't have a can or barrel tocompost in and are looking to find one inexpensively, check with a local car washbusiness to see if they have any extra empty soap barrels you could wash out anduse. Old trash cans work great too.This project will be pretty cheap and quick for those with access to a drill and shopspace. Those with out access can consider looking up a local fab lab (https://adafru.it/BG7) that would have these resources.Project PartsRequired:2 x 8' Piece of 2X4 Wood16 total feet of 2X4 wood of any type. Adafruit IndustriesPage 3 of 39
-Prime-WhitewoodStud-569062/2020912244 x Rigid Caster WheelsSingle direction caster wheels for rotating compost can orbarrel16 x Size 14 x 1" screwsScrews to hold wheels in place16 x 3/8" x 1.5" Dowel PinsDowel pins for connecting pieces of -Pins-840038/202252101?keyword fluted dowel pins 2 inches&semanticToke %3E st%3A%7Bfluted dowel pins 2 inches%7D%3Ast cn%3A%7B0%3A0%7D pin %7Bproduct%7D2 %7B544579%7D 2 %7B544611%7D 2 %7B544609%7D fluted dowel %7Brest%7D dln%3A%7B500919%7DOptional:1 x DrillTo drill holes for dowels1 x Dowel Jig KitJig for connecting pieces of wood. Comes with 3/8" drillbit we'll need1 x 3/8" Drill BitDrill bit needed for dowels. Comes in the above dowel n-Steel-Brad-Point-DrillBit-DW1710/1001346041 x RulerMeasure parts Adafruit IndustriesPage 4 of 39
So a tumbler sounds cool and all, but why do we evenwant to compost in the first place?Why Compost?Once in a while I'll go to a buffet, and overwhelmed with all the plentiful options, I'llget 1 (or 5) too many plates of food. Most of which end up going in the trash.When I found out that 40% of food produced in the U.S. is never eaten, while 1 in 8Americans struggles to put food on the table* (https://adafru.it/BG8), I decided tochange my habits.* National Resources Defense Council Adafruit IndustriesPage 5 of 39
To make matters worse, the "EPA estimates that more food reaches landfills andincinerators than any other single material in our everyday trash, constituting 21.6percent of discarded municipal solid waste." (https://adafru.it/BG9)*Additionally when all that food breaks down in land fills, it does so "anaerobically".This means the decomposing food buried deep in the landfill doesn't get the oxygenit needs to decompose organically and releases methane gas into the atmosphere asa result.What does that mean for planet earth?Methane is a greenhouse gas which is 28 to 36 times more effective than CO 2 attrapping heat in the atmosphere. Landfills, which are the third largest human-relatedmethane producer, account for roughly 14% of these emissions. (https://adafru.it/BR0)*Essentially what we have here is a simple but alarming equation:Lots of wasted food lots of methane bad for PlanetEarth* U.S. Environmental Protection Agency Adafruit IndustriesPage 6 of 39
So what can we do to reduce food waste? I'm glad you asked!WE CAN COMPOST!What is Composting?Composting is collecting food scraps and other organic material and letting itdecompose into nutrient rich soil. This soil can later be used for growing all types ofplants!By collecting food scraps in a compost bin instead of throwing them in the trash, wecan not only reduce the amount of food going to landfills and methane released butwe can also create a more sustainable cycle of food consumption. Adafruit IndustriesPage 7 of 39
What Can Go in the Compost Bin?What you CAN compost: Fruits and veggies Yard trimmings and grass clippings Cotton and wool rags Egg shells and nut shells Leaves and houseplants Shredded newspaper, cardboard, and paper Dryer and vacuum lint Sawdust and wood chips Fireplace ashes Tea bags, coffee grounds and filters Hay and straw Hair and furWhat you CANNOT compost Coal and charcoal ash Fats, grease, lard and oils Meat or fish bones and scraps Dairy products and eggs Pet waste Glazed, color printed magazines Yard trimmings treated with chemical pesticides Diseased or insect-ridden plants Black walnut tree leaves or twigs*Find out more about what can or cannot be composted and why from the EPA (https://adafru.it/BGX)"Aerobic" CompostingThere are many different types of composting but for the purposes of this project wewill discuss "aerobic" composting. Aerobic composting is a method of compostingwhere the compost must be turned or "aerated" every so often to feed the microbesbreaking down the food scraps with oxygen so they can keep doing their job. With out Adafruit IndustriesPage 8 of 39
turning the compost, the microbes can't thrive as well and the food scrapsdecompose "anaerobically" releasing methane just like in landfills.What to do with Finished Compost? You know your compost is finished when it has a crumbly texture and smells likesoil. Once your compost is finished, you can use it in the garden to grow fruits,veggies, spices, and other plants! Compost is sometimes known as "black gold (https://adafru.it/BGW)" for yourgarden because of all the awesome benefits: Increased microbial activity. Attraction of beneficial insects like earth worms. General improvement of soil structure. Lessens need for chemical fertilizers. Your plants will love it :) Adafruit IndustriesPage 9 of 39
Turning CompostAs mentioned earlier, for the compost to break down efficiently and prevent thecreation of methane, compost must be aerated or "turned" from time to time.Unfortunately this is back-breaking work. Furthermore it can be considered to be a bitgross by some, especially when that moldy banana peel from two weeks ago looksyou right in the eye.Fortunately we can use the the power of gravity to do most of our work for us! Thiscan be done with what's called a compost "tumbler".The tumbler is rotated every so often and the compost is aerated efficiently withmuch less energy. Adafruit IndustriesPage 10 of 39
Tumblers however can be pricey.The DIY SolutionIf you're looking to build your very own tumbler for a fraction of the price and athousand times the satisfaction, you're following the right guide!Let's get rolling ; )DesignWe'll be using Fusion 360 to design the tumbler. Fusion 360 is a great tool, even forbeginners, to design any physical project before building it. By designing the tumblerbefore buying wood and other parts I was able to figure out exactly what I needed.Fusion 360 OverviewIf you're new to Fusion 360, here's a great video by Noe Ruiz that gives an overviewof the software.To design the tumbler we will first need to know the dimensions of our compostcontainer. The can I'm using is 27" high X 21.5" diameter. Adafruit IndustriesPage 11 of 39
Adafruit IndustriesPage 12 of 39
Wooden PartsWe'll be using 2X4 lumber as the material for our tumbler. You can find 2X4 at anyhome improvement store. 2X4 just means that when the wood is cut from tree logs,it's cut into pieces that are 2" thick by 4" wide with varying lengths. However, after thewood dries out and is sent to home improvement stores, it actually shrinks to about1.5" X 3.5".Now that we know the size of our container and the dimensions of our material, wecan determine the size of each part for the tumbler.In the design I sketched out initially, I have 4 legs, 4 connectors and 4 wheels. Adafruit IndustriesPage 13 of 39
Now let's design the parts in Fusion 360!LegsOur legs will be 1.5" thick X 3.5" wide X 12" tallI decided the height of the legs to be 12" so that the tumbler would be high enoughoff the ground but not too high so the stability of the tumbler can be kept. Adafruit IndustriesPage 14 of 39
Open up a new design in Fusion360. Make sure you are working ininches If you are in mm, switch toinches, then open up a newdesign to start working ininches. Make sure you're in the "Model"workspace. Click on the "Create" tab Choose the "Box" option Select the top plane to create thebox on. Click where you want the corner ofthe box to be. Move the mouse to the dimensionsof height and width of the leg (3.5"X 12") then click. Next set the thickness of the boxwhich is 1.5". Lastly, rotate the piece 90 degreesto stand upright. To do this, rightclick on the object and select"move/copy". Then click and dragon the rotational interface to rotate. Adafruit IndustriesPage 15 of 39
AppearanceNow we have our legs dimensioned correctly!Let's add some wood texture to the surface to make this more realistic. Adafruit IndustriesPage 16 of 39
Switch to the "Render" workspace Click on the "Appearance" icon Scroll down the list of materials towood, unfinished, then select whatever wood you want to use. Drag the material onto the object. Adafruit IndustriesPage 17 of 39
The Leg ConnectorsTo hold the legs of the compost tumbler in place we will need to create someconnecting pieces that will attach to the legs.Two of the connectors will be 18" long to correspond with the length of the containerand the other two will be 10" long to correspond with the diameter of the container.Now go ahead and create these connectors as new designs following the steps fromabove. Long connector dimensions: 18" X1.5" X 3.5" Short connector dimensions: 10" X1.5" X 3.5" Rotate each connector 90 degrees.Other PartsTo get the designs for the wheels and compost can, rather than designing themourselves, we can pull existing designs from Thingiverse which saves us lots of time! Adafruit IndustriesPage 18 of 39
Caster WheelsThingiverse user "ShuttleSpace" has an awesome design for the rigid caster wheelswe will be using. Find a link to that file here (https://adafru.it/BGb).After downloading and opening up the zip file, go to Fusion 360, click the "upload"button, select the .slt file entitled "MO-WL-002-0001-3-1.stl" from the "files" folder inthe zip you just downloaded.Now you have the 3D file of the wheel in Fusion 360!Let's add a steel finish to the wheels. Adafruit IndustriesPage 19 of 39
Compost CanThingiverse user CBiker has a great trash can design on Thingiverse that closelyresembles the compost can I use. Find a link to that here (https://adafru.it/BGc).Bring the design into Fusion 360 like we did above.Let's add a steel finish to the can as well. Adafruit IndustriesPage 20 of 39
Now that we have all our virtual parts, it's time to assemble the tumbler!AssemblyOpen up a new design in Fusion 360. Adafruit IndustriesPage 21 of 39
Right click on your legs design onthe left side of the screen. Select "Insert into current design". Repeat 3X until you have four legs. Adafruit IndustriesPage 22 of 39
Now let's add the connectors. Insert two of the shorter connectorsinto the design. Insert one of the long connectors,then rotate it 90 degrees in the Xdirection. Repeat for the second longconnector. Adafruit IndustriesPage 23 of 39
Next, choose the "top" view. Drag each component into place. Then choose "front" and adjust thepieces.Now we'll add the wheels and can. Adafruit IndustriesPage 24 of 39
Insert a wheel into the design. Rotate and move the part until itrests on top a leg. Repeat for the other three wheels. It's ok if the wheels don't fitperfectly over the legs, the actualcaster wheels are a bit smaller andwill fit. Insert the can into the design. Move can until it rests on top ofwheels.And that's it! Our virtual design is compete and we have all we need to get building!If you want to a nice rendering of the design: Adafruit IndustriesPage 25 of 39
Go to "Render" workspace Drag whatever last minute texturesyou want on the parts of the design. Zoom and pan until you get theright size and angle you want. Change the environment to "field"in "scene settings" to get a brightereffect with the render. Click the play button at the top ofthe screen. The program will render the imagefor you. The longer you wait thehigher quality the rendering. Once satisfied with the rendering,you can save the image to a folder. Adafruit IndustriesPage 26 of 39
Our gorgeous rendering:Now it's time to get building!BuildTo build the compost tumbler we just designed, we'll be using 2, 8' long 2X4s A table saw (For cutting wood, can be done at a home improvement store if youhave no access, or consider a hand saw and a bit more time) A power drill 16, 3/8" x 1.5" dowel pins Included in the dowel kit Dowel Jig Wood glue 3/8" Drill Bit Drill stopperThe dowel jig will make it much easier for us to drill holes more precisely into thewood at the right length to fit the dowels in. There are more benefits to using thedowel jig which I'll go into when we get to the dowel jig section! Adafruit IndustriesPage 27 of 39
Measuring and Cutting Parts Using a table saw, cut the 2 X 8' pieces of 2X4 in half into 4 X 4' pieces. If you don't have access to a table saw, you can get your wood cut at anylocal home improvement store like Lowe's or Home Depot for pretty cheap. Use a ruler and a pencil to measure out the pieces of wood. On one 8' piece, measure out 4 X 12" pieces which will be our legs for thetumbler. On the second piece measure out 2 X 10" pieces which will be the shortconnectors. On the third piece measure out 2 X 18" pieces which will be the longconnectors. The fourth piece can be used for any mistakes or just to keep as scrap wood. Adafruit IndustriesPage 28 of 39
Use a table saw (or home improvement store or a hand saw) to cut the piecesaccordingly.Connecting the PartsThe Dowel MethodTo connect the parts we are going to use a doweling jig. A doweling jig will help usdrill holes in the wood precisely where we want them so we can place the dowelsinside and connect the different pieces. Adafruit IndustriesPage 29 of 39
The dowel jig first lets us drill theholes. Next we will be able to place thedowels and wood glue. Lastly we connect the two parts andlet them dry. Adafruit IndustriesPage 30 of 39
Now that you have an idea of how we'll be doing this, we'll start by connecting one ofthe legs with one of the short connectors.To properly place the dowel jig, we'll first have to draw some reference points on ourpieces. Adafruit IndustriesPage 31 of 39
First use a ruler to find the midpointof the length of the leg. Then drawa line through that midpointextending onto the connector. Next use the ruler to draw a line onboth sides of the midpoint line youjust drew. Draw the line from the legextending onto the connector. Now draw a line, extending from thecenter, right and left lines you justdrew, down onto the end. Thendraw a line through the center ofthat connector's end. Repeat that process for the leg byextending the three lines onto theend and also drawing a midpointline on the end to get the three"cross hairs". Adafruit IndustriesPage 32 of 39
Adafruit IndustriesPage 33 of 39
The Doweling Jig Grab the doweling jig and makesure it is set to the 3/8" setting. Now clamp it onto the connector,placing the "cross hairs" we drewdirectly in the center of the 3/8"hole. Pull out your power drill and makesure you are using a 3/8" drill bit. Take a dowel pin and draw a line inthe center. Put the drill into the doweling jigand with out drilling yet, use this pinto measure with the drill how far thedrill stopper should be screwedonto the bit. This will prevent thedrill from going too far into thewood. Go ahead and drill into the wooduntil the stopper stops the drill. Now repeat these steps with theleg. Place dowels in holes and fit piecestogether. Adafruit IndustriesPage 34 of 39
Adafruit IndustriesPage 35 of 39
Rinse, RepeatRepeat these steps with each of the connectors and legs until you have the wholestructure fitting together. Adafruit IndustriesPage 36 of 39
Using Wood Glue Next, take apart the tumbler and repiece it back together glueing eachdowel connection one at a time. Feel free to use a hammer to setthe pieces deeper. Let the structure dry overnight. Adafruit IndustriesPage 37 of 39
Wheels Hold a caster wheel on a leg anddraw an outline of each hole. With a 3/8" drill bit, drill 4 holes oneach leg. Screw on each wheel.And voila! That's it! Now you have yourself a handy compost tumbler and you made itall on your own. Adafruit IndustriesPage 38 of 39
*Note, you may have to do some sanding or add some cardboard to some of the legsto make sure the structure is level and steady.OptimizeSo how often should you turn your compost on your new handy tumbler?There are a couple specific instances: When the compost is too dry, you should add food scraps and turn it. When the compost is too wet, you should add some dry carbon material likeleaves, wood chips, or paper and turn it. If the compost isn't heating up, turn it.But how will you know all these specific moisture and temperature levels? I amworking on a compost optimization system with the Circuit Playground Express (https://adafru.it/wpF) as we speak. That will take into account all these readings and let youknow when it's time to turn the compost. Stay tuned! Adafruit IndustriesPage 39 of 39
The DIY Solution If you're looking to build your very own tumbler for a fraction of the price and a thousand times the satisfaction, you're following the right guide! Let's get rolling ; ) Design We'll be using Fusion 360 to design the tumbler. Fusion 360 is a great tool, even for begi
