Transcription
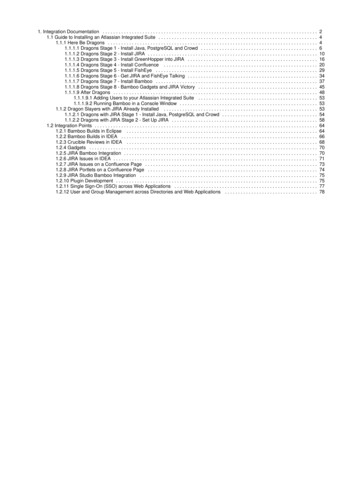
1. Integration Documentation . . . . . . . . . . . . . . . . . . . . . . . . . . . . . . . . . . . . . . . . . . . . . . . . . . . . . . . . . . . . . . . . . . . . . . . . . . . . . . . . .1.1 Guide to Installing an Atlassian Integrated Suite . . . . . . . . . . . . . . . . . . . . . . . . . . . . . . . . . . . . . . . . . . . . . . . . . . . . . . . . . . . .1.1.1 Here Be Dragons . . . . . . . . . . . . . . . . . . . . . . . . . . . . . . . . . . . . . . . . . . . . . . . . . . . . . . . . . . . . . . . . . . . . . . . . . . . . . . .1.1.1.1 Dragons Stage 1 - Install Java, PostgreSQL and Crowd . . . . . . . . . . . . . . . . . . . . . . . . . . . . . . . . . . . . . . . . . . . .1.1.1.2 Dragons Stage 2 - Install JIRA . . . . . . . . . . . . . . . . . . . . . . . . . . . . . . . . . . . . . . . . . . . . . . . . . . . . . . . . . . . . . . . .1.1.1.3 Dragons Stage 3 - Install GreenHopper into JIRA . . . . . . . . . . . . . . . . . . . . . . . . . . . . . . . . . . . . . . . . . . . . . . . . .1.1.1.4 Dragons Stage 4 - Install Confluence . . . . . . . . . . . . . . . . . . . . . . . . . . . . . . . . . . . . . . . . . . . . . . . . . . . . . . . . . .1.1.1.5 Dragons Stage 5 - Install FishEye . . . . . . . . . . . . . . . . . . . . . . . . . . . . . . . . . . . . . . . . . . . . . . . . . . . . . . . . . . . . .1.1.1.6 Dragons Stage 6 - Get JIRA and FishEye Talking . . . . . . . . . . . . . . . . . . . . . . . . . . . . . . . . . . . . . . . . . . . . . . . . .1.1.1.7 Dragons Stage 7 - Install Bamboo . . . . . . . . . . . . . . . . . . . . . . . . . . . . . . . . . . . . . . . . . . . . . . . . . . . . . . . . . . . . .1.1.1.8 Dragons Stage 8 - Bamboo Gadgets and JIRA Victory . . . . . . . . . . . . . . . . . . . . . . . . . . . . . . . . . . . . . . . . . . . . .1.1.1.9 After Dragons . . . . . . . . . . . . . . . . . . . . . . . . . . . . . . . . . . . . . . . . . . . . . . . . . . . . . . . . . . . . . . . . . . . . . . . . . . . . .1.1.1.9.1 Adding Users to your Atlassian Integrated Suite . . . . . . . . . . . . . . . . . . . . . . . . . . . . . . . . . . . . . . . . . . . . .1.1.1.9.2 Running Bamboo in a Console Window . . . . . . . . . . . . . . . . . . . . . . . . . . . . . . . . . . . . . . . . . . . . . . . . . . . .1.1.2 Dragon Slayers with JIRA Already Installed . . . . . . . . . . . . . . . . . . . . . . . . . . . . . . . . . . . . . . . . . . . . . . . . . . . . . . . . . .1.1.2.1 Dragons with JIRA Stage 1 - Install Java, PostgreSQL and Crowd . . . . . . . . . . . . . . . . . . . . . . . . . . . . . . . . . . . .1.1.2.2 Dragons with JIRA Stage 2 - Set Up JIRA . . . . . . . . . . . . . . . . . . . . . . . . . . . . . . . . . . . . . . . . . . . . . . . . . . . . . . .1.2 Integration Points . . . . . . . . . . . . . . . . . . . . . . . . . . . . . . . . . . . . . . . . . . . . . . . . . . . . . . . . . . . . . . . . . . . . . . . . . . . . . . . . . . . .1.2.1 Bamboo Builds in Eclipse . . . . . . . . . . . . . . . . . . . . . . . . . . . . . . . . . . . . . . . . . . . . . . . . . . . . . . . . . . . . . . . . . . . . . . . .1.2.2 Bamboo Builds in IDEA . . . . . . . . . . . . . . . . . . . . . . . . . . . . . . . . . . . . . . . . . . . . . . . . . . . . . . . . . . . . . . . . . . . . . . . . . .1.2.3 Crucible Reviews in IDEA . . . . . . . . . . . . . . . . . . . . . . . . . . . . . . . . . . . . . . . . . . . . . . . . . . . . . . . . . . . . . . . . . . . . . . . .1.2.4 Gadgets . . . . . . . . . . . . . . . . . . . . . . . . . . . . . . . . . . . . . . . . . . . . . . . . . . . . . . . . . . . . . . . . . . . . . . . . . . . . . . . . . . . . . .1.2.5 JIRA Bamboo Integration . . . . . . . . . . . . . . . . . . . . . . . . . . . . . . . . . . . . . . . . . . . . . . . . . . . . . . . . . . . . . . . . . . . . . . . . .1.2.6 JIRA Issues in IDEA . . . . . . . . . . . . . . . . . . . . . . . . . . . . . . . . . . . . . . . . . . . . . . . . . . . . . . . . . . . . . . . . . . . . . . . . . . . . .1.2.7 JIRA Issues on a Confluence Page . . . . . . . . . . . . . . . . . . . . . . . . . . . . . . . . . . . . . . . . . . . . . . . . . . . . . . . . . . . . . . . . .1.2.8 JIRA Portlets on a Confluence Page . . . . . . . . . . . . . . . . . . . . . . . . . . . . . . . . . . . . . . . . . . . . . . . . . . . . . . . . . . . . . . . .1.2.9 JIRA Studio Bamboo Integration . . . . . . . . . . . . . . . . . . . . . . . . . . . . . . . . . . . . . . . . . . . . . . . . . . . . . . . . . . . . . . . . . . .1.2.10 Plugin Development . . . . . . . . . . . . . . . . . . . . . . . . . . . . . . . . . . . . . . . . . . . . . . . . . . . . . . . . . . . . . . . . . . . . . . . . . . . .1.2.11 Single Sign-On (SSO) across Web Applications . . . . . . . . . . . . . . . . . . . . . . . . . . . . . . . . . . . . . . . . . . . . . . . . . . . . . .1.2.12 User and Group Management across Directories and Web Applications . . . . . . . . . . . . . . . . . . . . . . . . . . . . . . . . . . 5757778
Integration DocumentationGuide to Integrating your ApplicationsFollow the Atlassian Dragon Quest to set up and integrate your suite of Atlassian applications.Links and ResourcesWant to know more? Take a look at our Links and Resources, or follow the links in the table of contents on the left.
Atlassian Integration PointsHere are some of the ways your Atlassian applications can work together. Click an item to see more details of the integrationpoint and how you can make it happen.Bamboo Builds in EclipseThe Atlassian Connector for Eclipse displays Bamboo build information in your Eclipse development environment.Bamboo Builds in IDEAThe Atlassian Connector for IntelliJ IDEA displays Bamboo build information in your IntelliJ IDEA development environment.Crucible Reviews in IDEAThe Atlassian Connector for IntelliJ IDEA lets you work with your Crucible code reviews within your IntelliJ IDEA developmentenvironment.GadgetsThe big list of all Atlassian gadgets tells you about all our gadgets, where they come from and where you can put them.JIRA Bamboo IntegrationIntegrate JIRA with Bamboo to link JIRA issues to Bamboo builds. Once you have linked JIRA issues to your builds, you canview the linked issues in your Bamboo build results and build plans. You can also view build information in JIRA via tabs onrelated issues, versions and projects or on portlets.JIRA Issues in IDEAThe Atlassian Connector for IntelliJ IDEA integrates JIRA issues into your IntelliJ IDEA development environment.JIRA Issues on a Confluence PageUse the JIRA Issues macro to display a list of JIRA issues on a Confluence page. The list is shown in tabular format, and isdynamically updated from your JIRA site. People viewing the Confluence page will see only the JIRA issues which they areauthorised to see.JIRA Portlets on a Confluence PageUse the JIRA Portlet macro to display a portlet from your JIRA site on a Confluence page. The information is dynamicallyupdated from your JIRA site. People viewing the Confluence page will see only the JIRA issues which they are authorised tosee.JIRA Studio Bamboo IntegrationElastic Bamboo is integrated with JIRA Studio.Plugin DevelopmentAtlassian is moving towards wider and more intimate integration between the different applications we develop. Providing acommon plugin framework is a key part of this initiative, because the plugin framework will help developers (both Atlassiansand others) to write plugins that work on more than one of the products. It will also allow plugins on each product to have aconsistent look and behaviour from a user's point of view, even when the plugin works on only one application.Single Sign-On (SSO) across Web ApplicationsUsing Crowd for single sign-on (SSO), each person needs only one username and password to access all web applications.You only need to log in once, to Crowd or a Crowd-connected application. When you start another Crowd-connectedapplication, you will be logged in automatically. Similarly, when you log out, you will be logged out of Crowd and the otherapplications at the same time.User and Group Management across Directories and Web ApplicationsUse Crowd to manage users and groups simply and centrally. You can use Crowd's internal user directories or hook up yourexisting LDAP user bases, then link them to your web applications. Crowd provides an Administration Console foradministrators as well as a Self-Service Console, allowing users to view their login permissions and to change their ownpasswords and user profiles.
Guide to Installing an Atlassian Integrated SuiteWe have put together a guide (see below) to integrating a suite of Atlassian applications. The guide consists of detailed step-by-stepinstructions for setting up a specific configuration. There are also links to the installation and configuration guides for each component.Setting up the integrated suite will give you awesome results, but we know that the setup procedure can be long and difficult. So we inviteyou to join the Atlassian Dragon Quest.Starting from scratch? If you do not have any Atlassian applications installed, please start at Here Be Dragons.Got JIRA? If you are already using JIRA, please start at Dragon Slayers with JIRA Already Installed.Here Be DragonsBeware, all ye who enter, for here be dragons! This is the starting point for the Atlassian Dragon Quest.By the time you reach the end of this set of instructions, you will have an awesome Atlassian integrated development suite (details below).There's a good chance that the Atlassian Integration Dragon will scorch the clothes off your back somewhere along the way, so we'll alsosend you a free, limited-edition Atlassian DragonSlayer T-shirt when you have completed all the steps.Got JIRA? If you are already using JIRA, please start at Dragon Slayers with JIRA Already Installed.Getting helpIf you run into problems at any stage of the integration procedure, please go immediately to the Dragon Slayers' Forum.Please don't try to battle on alone. Instead, ask for help immediately. We'll be monitoring the forum 24 hours a day, andyou're sure to meet other battle-weary dragon slayers there too.Rushing into the Dragon's LairDon your armour and alert your serfsIf you like, you can tweet your status.Follow yon brave dragon slayersOn the Atlassian Dragons Twitter stream.Please read the introduction below.Now you're ready to start stage 1. Meet the dragon if you dare!Dragons Stage 1 - Install Java, PostgreSQL and CrowdDragons Stage 2 - Install JIRADragons Stage 3 - Install GreenHopper into JIRADragons Stage 4 - Install ConfluenceDragons Stage 5 - Install FishEyeDragons Stage 6 - Get JIRA and FishEye TalkingDragons Stage 7 - Install BambooDragons Stage 8 - Bamboo Gadgets and JIRA VictoryAfter DragonsWhat's This All About?We have put together these instructions for integrating a suite of Atlassian applications. Setting up the integrated suite will give you awesomeresults, but we know that the setup procedure can be long and difficult.Why would we ask you to undertake this exercise?We're issuing a challenge to our boldest and most skilled customers and evaluators.We'd like to learn from your experiences, so that we can improve the setup and integration procedures.
It's another excuse to give away some T-shirts.The WinsWhen you have completed the final stage, you will have set up these Atlassian applications and features to work with each other:JIRA for bug tracking.GreenHopper for agile project management.Confluence, the enterprise wiki.FishEye to open up your source repository.Bamboo for continuous integration.Crowd for user management and single sign-on.Atlassian Gadgets.If you slay the dragon, you win a free, limited-edition Atlassian DragonSlayer T-shirt too.How Long Will It Take to Slay the Dragon?We estimate that it will take 5 hours to complete all the stages.Getting Kitted OutBefore you start, please note the points below.AssumptionsThis guide is written for a technical audience. You will need to install a database, install the Atlassian applications and adjust theconfiguration files.This guide assumes that you are starting from scratch, with no Atlassian applications installed or with only JIRA installed.If you can start with a clean slate, with no Atlassian applications at all, please do continue with the integration proceduredescribed on this page and its child pages.If you have JIRA but nothing else, please start at Dragon Slayers with JIRA Already Installed.If you already have Confluence, Crowd, FishEye or Bamboo, please consult our Support team.This guide assumes that you will be using a specific database and specific versions of the applications and plugins, as described ineach stage of this guide. If you need to use other drivers or application versions, please consult our Support team.Hardware RequirementsWe recommend the following:2GB RAMNo other applications running — just the operating system, JAVA, PostgreSQL and the Atlassian applications.500MB disk space for application files.Software RequirementsProgram for extracting our downloaded archive files: Please check your unzip/unpack program before extracting any of theAtlassian downloaded zip or archive files. Some unzip/unpack programs cause errors.Linux or Unix users can use any unpack program.Solaris users must use GNU Tar instead of Solaris Tar.Windows users should use a third-party unzip program like 7Zip or Winzip. If you do not have one, please download andinstall one before continuing:7Zip — Recommended. If in doubt, download the '32-bit .exe' versionWinzipOperating System: The instructions are for Windows, UNIX and Linux. We do not offer instructions for Mac OS X as it is not aplatform preferred by our customers. If you have specific questions please seek assistance on the Dragon Slayers' Forum.Application server: By following our instructions, you will set up a standalone version of each Atlassian product, using the defaultTomcat or Jetty server provided with each application.Database: By following our instructions, you will set up a PostgreSQL database server in stage 1 and use the database server in allsubsequent stages.Source repository: For the purposes of this integration exercise, we have provided a read-only Subversion repository that you canconnect to your FishEye and Bamboo installations. We recommend this repository because:We have committed a code change with a JIRA issue key in the commit message. This will allow you to see the JIRA andFishEye integration immediately, without having to do your own commit.The sample repository is small, so that FishEye's initial repository indexing process will be fast.Build tool: For the Bamboo integration stages you will need a build tool, also called a builder. For this integration exercise, weassume that you are using Maven 2. You can use any of the build tools supported by Bamboo, such as Maven 1, Maven 2, Ant,PHPUnit and others. See the Bamboo documentation.If you wish to use Maven 2 and do not yet have it installed, we recommend the Atlassian Plugin SDK. The SDK includes Maven2 and a correctly-configured Maven settings.xml file, as well as a number of shell scripts to speed up and simplify plugindevelopment. It also includes the Java Activation JAR (javax.activation:activation:jar) which you will need for asuccessful Maven build. If you would like to download the Java Activation JAR separately instead, see the FAQ.Java Development Kit: You will need Sun JDK 1.5 or higher. Note that the JRE alone is not enough. Stage 1 of these instructionswill guide you through the installation process.
Other NotesVirus checkers: If you have a virus checker running, there may be a delay in the availability of JAR files after you have placed arequired JAR into a directory, while the virus checker scans the file. This may happen with the PostgreSQL database driver files, forexample. If you receive an error saying that a driver or other such file is not available, wait a few minutes and try again.Passwords: At several points in this integration procedure you will need to enter a password. The password will be used to secureyour data. The password you choose is up to you, but it is important you pick something that is hard to guess. Take a moment nowto think of a password. Here are some guidelines from AusCERT on choosing a good password. This will save you time later.Rush into the dragon's lair.Dragons Stage 1 - Install Java, PostgreSQL and CrowdBeware, all ye who enter, for here be dragons. You are embarking on stage 1 of the Atlassian Dragon Quest.In this stage, you will install Java and a database (PostgreSQL) to hold the data for your Atlassian applications. Then you will set upAtlassian Crowd for centralised user management and single sign-on (SSO).Time estimate: This stage will take approximately 60 minutes.On this page:Step 1. Install JavaStep 2. Install your PostgreSQL Database ServerStep 3. Create your Crowd Database in PostgreSQLStep 4. Install CrowdStep 5. Set Up CrowdVictory!Step 1. Install JavaRequirements: Sun JDK 1.5 or higher. Note that the JRE alone is not enough.If you do not have the right version of the Java Development Kit (JDK) already installed, follow the steps below to get it.1. Download the Sun Java SE Development Kit – Get the latest JDK 6.2. Follow the Sun installation instructions.3. Make sure you have a JAVA HOME environment variable pointing to the root directory of the JDK. Some JDK installersset this automatically.Check by typing one of the following into a command window, depending on your operating system.On Windows: echo %JAVA HOME%On Linux or UNIX: echo JAVA HOMEIf the above command does not show you the path to your JDK, please refer to the Crowd instructions onsetting JAVA HOME.Step 2. Install your PostgreSQL Database ServerRequirements: PostgreSQL version 8.3.x.
1. Download PostgreSQL – Get the latest 8.3.x. For the simplest installation, choose one of the one-click installers.2. Install PostgreSQL. If you chose one of the PostgreSQL one-click installers, this is simple: Run the executable that youdownloaded and follow the prompts. If necessary, you can refer to the PostgreSQL installation instructions.3. Enter a password for the super user ('postgres').4. Accept the default port 5432.5. Accept all the other default settings.6. Download the PostgreSQL JDBC driver from http://jdbc.postgresql.org/download.html and save it locally for later use.Internet Explorer may rename the file extension from '.jar' to '.zip' when you download it. If you are usingInternet Explorer, please rename the file so that it has a '.jar' extension after downloading it.If you have installed JDK 6.x, get JDBC4 Postgresql Driver, Version 8.4-701.If you have JDK 5.x, get JDBC3 Postgresql Driver, Version 8.4-701.Step 3. Create your Crowd Database in PostgreSQLNow you will create a database where the Atlassian Crowd application will store its data, and the user that Crowd will use to connect to thedatabase.We're using pgAdmin III, the administration user interface supplied with PostgreSQL. If you used the one-click installer, pgAdmin III willbe already installed on your computer.1. Start pgAdmin III.2. Add a new login role called 'crowduser':Right-click 'Login Roles' and select 'New Login Role'.Enter the role 'Role name': crowduser.Enter a 'Password' and enter it again to confirm it.Select 'Can create database objects'.Select 'Can create roles'.Click 'OK' to create the user.3. Add a new database called 'crowd':Right-click 'Databases' and select 'New Database'.Enter the database 'Name': crowd.Select the 'Owner': crowduser.Click 'OK' to create the database.Alternatively, If you are on UNIX and do not have pgAdmin III, you can use the command line interface instead. Assuming that you areusing the default installation directory of /opt/PostgreSQL/8.3/bin/, enter the following commands:sudo -s -H -u postgres# Create the Crowd user:/opt/PostgreSQL/8.3/bin/createuser -S -d -r -P -E crowduser# Create the Crowd database:/opt/PostgreSQL/8.3/bin/createdb -O crowduser crowdexitScreenshot 1 (click to enlarge): Crowd database and user in PostgreSQLStep 4. Install CrowdRequirements: Crowd 2.0.3.
For Windows: (click to expand)1.2.3.4.Go to the Atlassian download centre.Download the 'Standalone (ZIP Archive)' file for Crowd 2.0.3.Unpack the zip archive into a directory of your choice, avoiding spaces in the directory name.Tell Crowd where to find its Crowd Home directory:Edit the properties file at {CROWD roperties.Complete the following line and remove the # at the beginning of the line:crowd.home For example:crowd.home c:/data/crowd-home(Note the forward slashes.)5. Add the PostgreSQL JDBC driver JAR to your {CROWD INSTALL}\apache-tomcat\lib directory.6. Start your Crowd server by running start crowd.bat in the directory where you unpacked Crowd.For UNIX or Linux: (click to expand)1.2.3.4.Go to the Atlassian download centre.Click the 'Linux' tab and download the 'Standalone (TAR.GZ Archive)' file for Crowd 2.0.3.Unpack the archive into a directory of your choice, avoiding spaces in the directory name.Tell Crowd where to find its Crowd Home directory:Edit the properties file at {CROWD roperties.Complete the following line and remove the # at the beginning of the line:crowd.home For example:crowd.home /var/crowd-home5. Create the above Crowd Home directory if it does not already exist, because in some cases Crowd may not create itfor you.6. Add the PostgreSQL JDBC driver JAR to your {CROWD INSTALL}/apache-tomcat/lib directory.7. Start your Crowd server by executing start crowd.sh in the directory where you unpacked Crowd.Full details are in the Crowd installation guide.Problems? Please go immediately to the Dragon Slayers' Forum.Victory?Please continue.Step 5. Set Up CrowdNow you can run Crowd's Setup Wizard, then add Charlie of Atlassian and the groups needed for JIRA, Confluence and the otherapplications.
1. To access Crowd, go to your web browser and type this address: http://localhost:8095/crowd.2. The Crowd Setup Wizard will start up, to guide you through the process of setting up your Crowd server and creatingan administration user. Detailed instructions are in the Crowd documentation. Here are the things you need to know forour Dragon Quest:License – If you do not already have a Crowd license, follow the prompts on the Setup Wizard screen to getan evaluation license key.Installation type – Select 'New Installation'.Database configuration – Select 'JDBC Connection' then enter the following information to connect to yourCrowd database (created above):Database: PostgreSQL.Driver Class Name – Leave this at the default value, i.e. org.postgresql.Driver.JDBC URL – Leave this at the default value, i.e. jdbc:postgresql://localhost:5432/crowd.Username: crowduser.Password – The password you specified when creating your Crowd database above.Hibernate Dialect – Leave this at the default value, ment title – Enter a short, descriptive name. If you will only have one Crowd installation, then 'Crowd' isgood enough.Base URL – Enter the full website address at which Crowd is running, not just 'localhost'. For example, if yourcomputer name is 'coopers' then the base URL should be: http://coopers:8095/crowd. Or specify awebsite address, such as http://www.foobar.com:8095/crowdEmail details – Enter the details of your administrator email account. We recommend that you give your ownemail account details here.Internal directory – This is the Crowd directory that will hold your users and groups. Enter the followinginformation, and leave the other fields at the default values:Name: Crowd.Description: Crowd User Directory.Default administrator – This is the Crowd super user. Enter the following information:Email address – Enter the address of your administrator email account. We recommend that you giveyour own email address here.Username – Enter the administrator's login name: charlie.Password – Enter a password for the administrator account and enter it again to confirm it.Enter a first name for your administrator: Charlie.Enter a last name for your administrator: of Atlassian.Integrated applications – Leave both selected, as is the default.3. Log in to Crowd with username charlie.4. Add the group that will hold all your JIRA users:Click 'Groups' in the top navigation bar and then click 'Add Group'.Enter the following information:Group name: jira-usersDescription: JIRA usersDirectory: CrowdActive – Leave this checkbox selected.Click 'Create' to add the group.5. Add the following groups too, all in the same 'Crowd' directory. These groups are needed for JIRA, Confluence andBamboo:jira-developers — JIRA developersjira-administrators — JIRA administratorsconfluence-users — Confluence usersconfluence-administrators — Confluence administratorsbamboo-admin — Bamboo administrators6. Make Charlie of Atlassian an administrator in JIRA, Confluence and Bamboo by adding him to the relevant groups:Click 'Users' in the the top navigation bar and find 'Charlie of Atlassian'.Click the name to view Charlie's user information.Click the 'Groups' tab under 'View User', then click 'Add Groups'.The 'Add Groups' screen will appear. Click 'Search' to see all the groups in the directory.Select the checkbox at top left, next to the 'Name' column, to select all groups.Click 'Add Selected Groups' to add Charlie to the groups.Screenshot 2 (click to enlarge): Adding Charlie to groups in Crowd
Problems? Please go immediately to the Dragon Slayers' Forum.Victory?Please continue.Victory!Charlie of Atlassian can now log into Crowd. If he checks his profile (using the 'My Profile' link at top right of the Crowd screen), he willsee the groups he belongs to.Screenshot 3 (click to enlarge): Charlie's profile showing the groups he belongs toProblems? Please go immediately to the Dragon Slayers' Forum.Victory?Please continue.Don your Belt and Boots, and Move to the Next StageTweet? Tweet.Go to Dragons Stage 2 - Install JIRA.Dragons Stage 2 - Install JIRABeware of fiends and dragons on the gargoyled eaves. You are embarking on stage 2 of the Atlassian Dragon Quest.In this stage, you will install Atlassian JIRA for bug tracking and issue management. You will also hook JIRA up to Crowd, for SSO andcentralised user management.Time estimate: This stage will take approximately 60 minutes.On this page:Step 1. Create your JIRA Database in PostgreSQLStep 2. Install JIRAStep 3. Set Up JIRAStep 4. Hook JIRA up to CrowdStep 5. Set up a Project and Create your JIRA DashboardVictory!Step 1. Create your JIRA Database in PostgreSQLNow you will create a database where the Atlassian JIRA application will store its data, and the user that JIRA will use to connect to thedatabase. We are assuming that you have already created your PostgreSQL database server in Dragons Stage 1.
We are using pgAdmin III, the administration user interface supplied with PostgreSQL. If you used the one-click installer when installingPostgreSQL, pgAdmin III will be already installed on your computer.1. Start pgAdmin III.2. Add a new login role called 'jirauser':Right-click 'Login Roles' and select 'New Login Role'.Enter the role 'Role name': jirauser.Enter a 'Password' and enter it again to confirm it.Select 'Can create database objects'.Select 'Can create roles'.Click 'OK' to create the user.3. Add a new database called 'jira':Right-click 'Databases' and select 'New Database'.Enter the database 'Name': jira.Select the 'Owner': jirauser.Click 'OK' to create the database.Alternatively, If you are on UNIX and do not have pgAdmin III, you can use the command line interface instead. Assuming that you areusing the default installation directory of /opt/PostgreSQL/8.3/bin/, enter the following commands:sudo -s -H -u postgres# Create the JIRA user:/opt/PostgreSQL/8.3/bin/createuser -S -d -r -P -E jirauser# Create the JIRA database:/opt/PostgreSQL/8.3/bin/createdb -O jirauser jiraexitScreenshot 1 (click to enlarge): JIRA database and user in PostgreSQLStep 2. Install JIRARequirements: JIRA 4.1.0.Do not use the 'Windows Installer' for this integration exercise. Please make sure you follow the instructions below to download the'Standalone (ZIP Archive)' file.For Windows: (click to expand)
1. Go to the Atlassian download centre.2. Click the 'Show all' link above the download buttons, to see all the download file types.3. Download the 'Standalone (ZIP Archive)' file for JIRA 4.1.0.4.5.6.7.8.9.Do not use the 'Windows Installer' for this integration exercise, because the workflow for configuring an externaldatabase is simpler when installing from the zip archive.Unpack the zip archive into a directory of your choice, avoiding spaces in the directory name.Run the JIRA Configuration Tool at {JIRA INSTALL}\bin\config.batTell JIRA where to put its JIRA Home directory under the 'JIRA Home' tab. For example:C:/data/jira-homeConfigure the database connection under the 'Database' tab.Database type: PostgreSQL.Hostname — Enter the name or IP address of the server that you installed your PostgreSQLdatabase on, i.e. localhost.Port — Enter the default port that you set up PostgreSQL with, i.e. 5432.Database — This is the name of the database that you created in step 1 above, i.e. jira.Username — This is the user you created in step 1 above, i.e. jirauser.Password — Enter the password you chose in step 1 above.Schema — Accept the default 'public' schema.Click the 'Test Connection' button to test the connection settings. The tool will attempt to connect to the database,and give a message with the results.Accept the default 'Pool Size' setting.Click 'Save' when you have a working connection and click 'Close'.Start your JIRA server by running {JIRA INSTALL}\bin\startup.bat.For UNIX or Linux: (click to expand)1.2.3.4.5.6.7.8.Go to the Atlassian download centre.Click the 'Lin
Apr 08, 2010 · Elastic Bamboo is integrated with JIRA Studio. Plugin Development Atlassian is moving towards wider and more intimate integration between the different applications we develop. Providing a common plugin framework is a key part of this initiative, because the plugin
